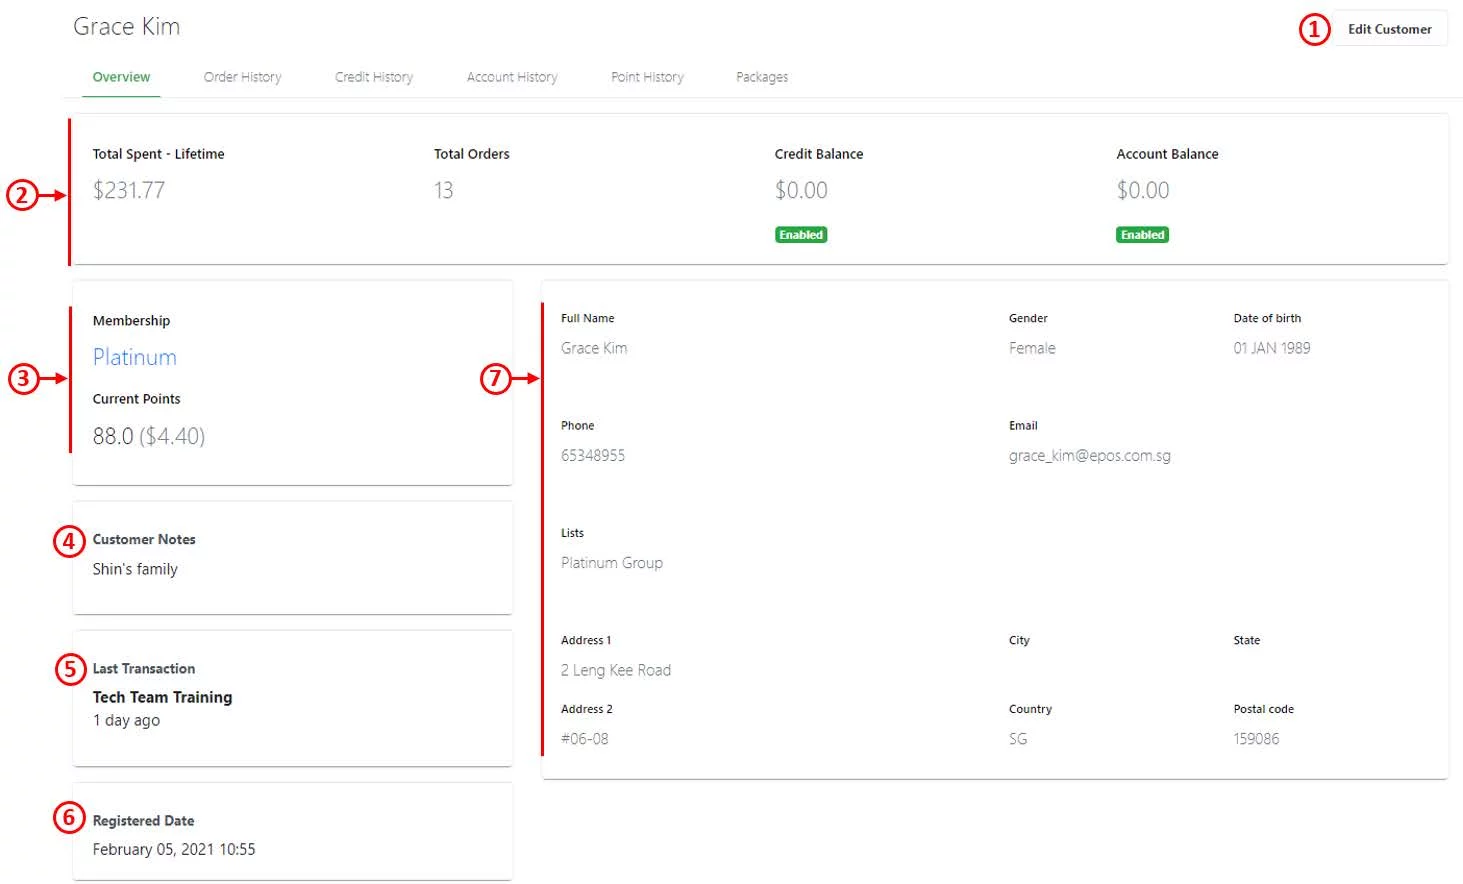
Shows users the last transaction made by the customer.
Location
No. of days ago
6. Registered Date
Date of customer being created in the EPOS database.
7. Customer Personal Particulars
Show users’ customer’s personal particulars.
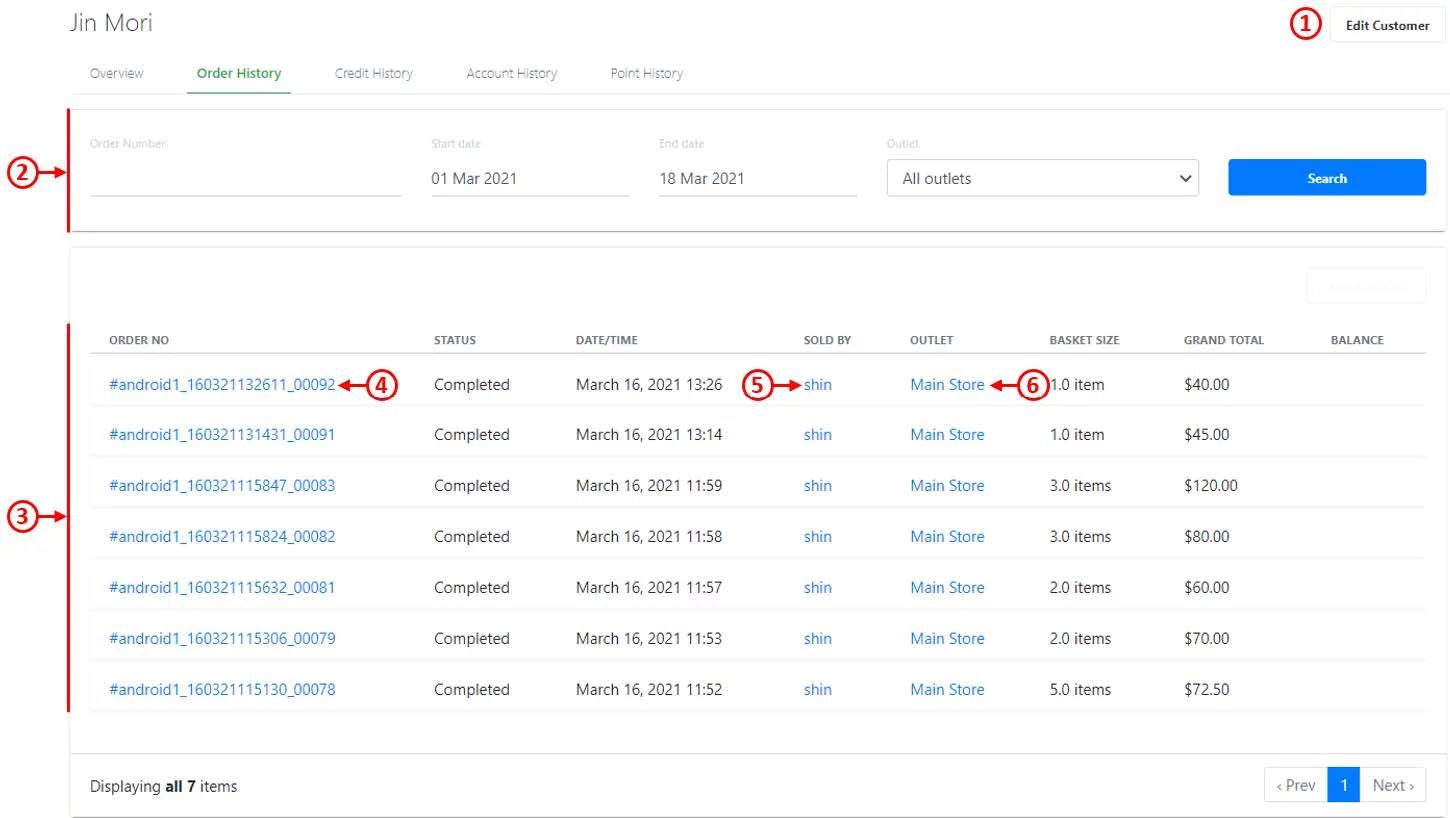
A customer’s order history is a list of all the orders they’ve placed with users’ businesses in the past. It includes the specific items customers purchased, price of each item, along with information about the customer and when they bought the products.
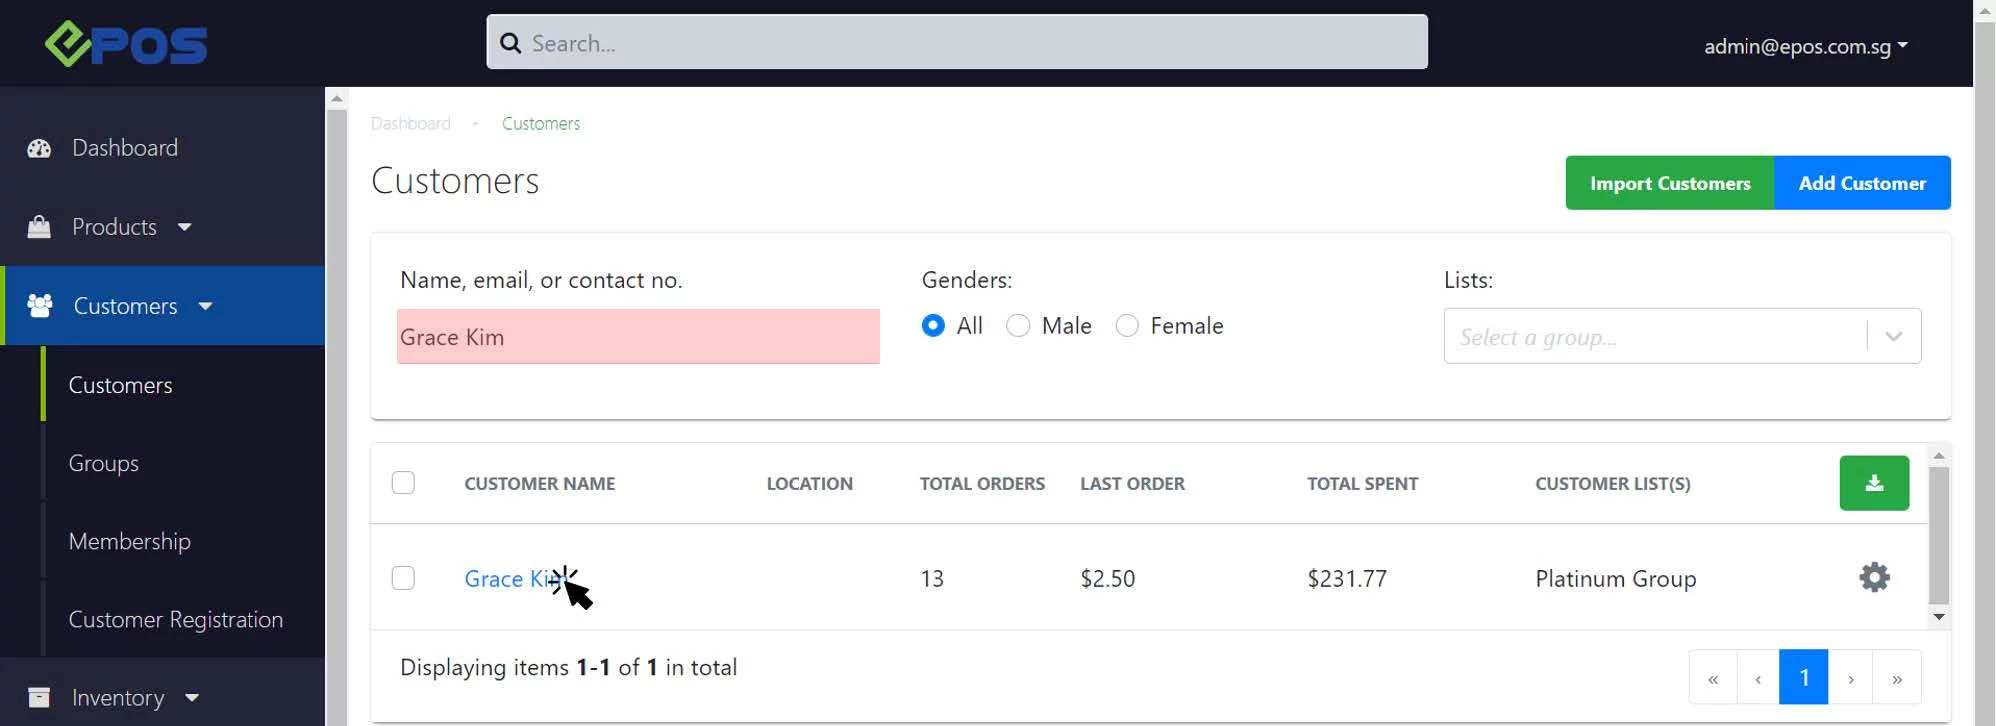
1. Edit Customer
Edit customer details. Displays the edit window similar to Add Customer.
2. Filter and Search
Allows users to search for orders based on order numbers, dates and order status.
3. Order Details
Shows users the entire list of orders made by a particular customer
Order Number
Status of order (Void / On-account / Completed)
Date / Time
Sold By
Outlet
Basket Size (no. of items purchased in the order)
Grand total
Balance to be paid off
4. Order Invoice
Click on the order number to see the order details page.
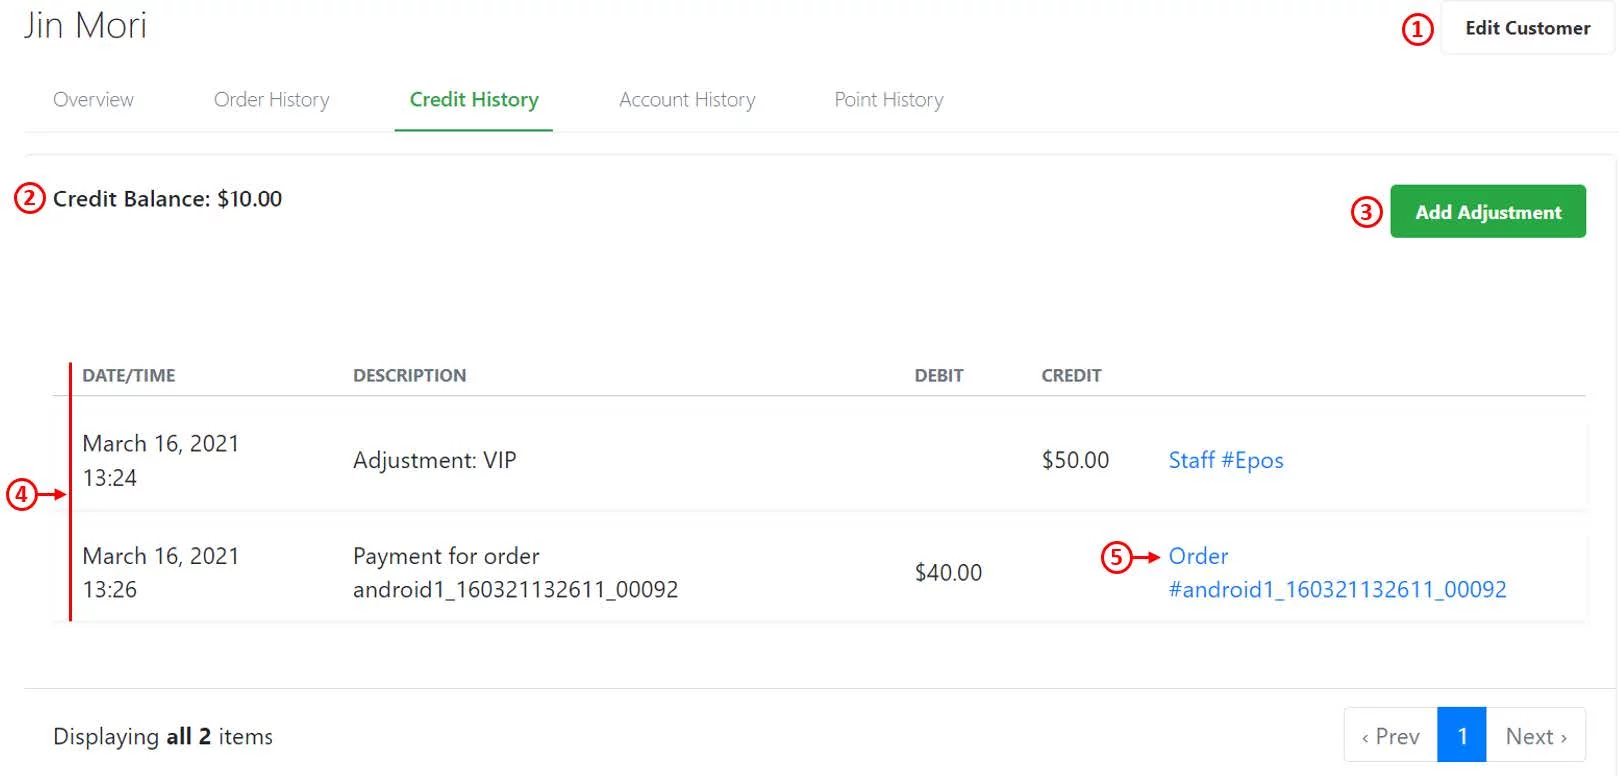
This section provides users the details or history of customer’s credit transactions.
1. Edit Customer
Edit customer details. Displays the edit window similar to Add Customer.
2. Credit Balance
Credit balance in customer’s account.
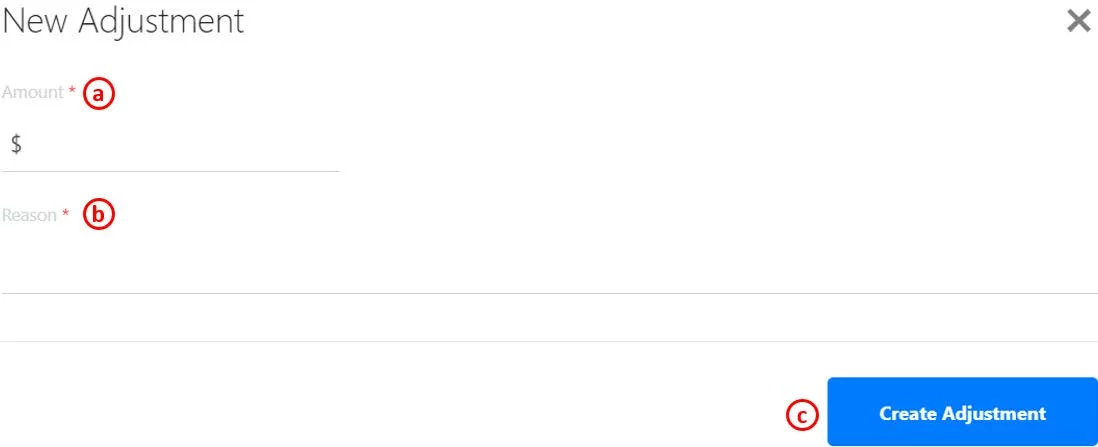
3. Add Adjustment
Allow users to manually adjust customer credit.
a. Enter credit.
b. Enter the reason for adjustment of the credit. 💡 Users may enter a negative value to reduce customers’ credit.
c. Click on CreateAdjustment once done.
4. Credit History
Details Shows user the credit transactions history of the customer
Date and Time
Description of credit transaction
Debit or Credit 💡 “Debit” means deduction of credit; “Credit” means increment of credit.
Order number in which credit is transacted.
5. Order Invoice
Click on the order number to access the detailed order invoice page.
Users may refer to Product Pricingfor more details on configuring product credits.
Users may also refer to Adding a New Customer to toggle on or off for credit transactions.
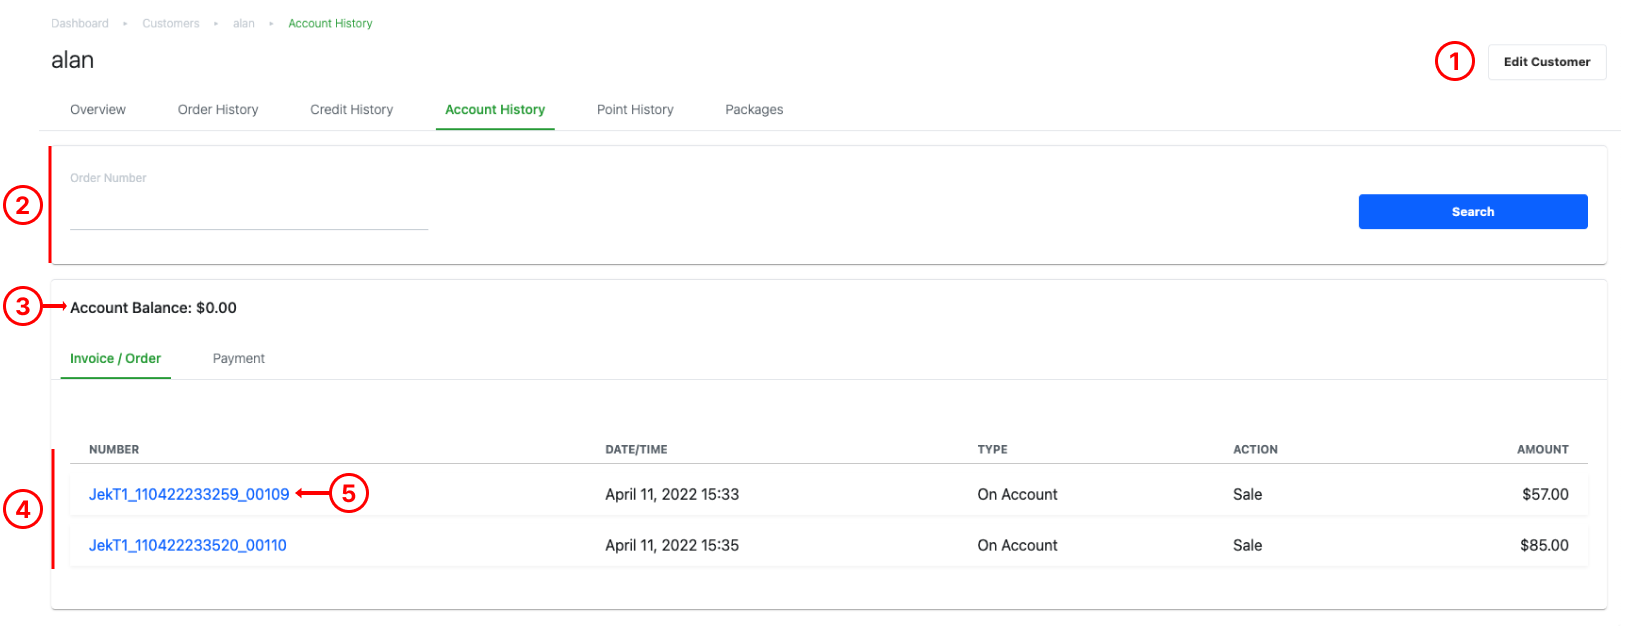
This section provides guidance on the total outstanding payments to be made by customers and details or history of customer’s on-account transactions.
1. Edit Customer
Edit customer details. The edit window will be shown, similar to Add Customer.
2. Account Balance
Total sum of outstanding payment from customer.
3. Account HistoryDetails
Show users the on-account transactions history of the customer.
Order number
Date and time
Payment method
Debit or credit
💡 For every debit transaction, the payment method represents how customers cleared their outstanding payments.
4. Order Invoice
Click on the order number to access the detailed order invoice page.
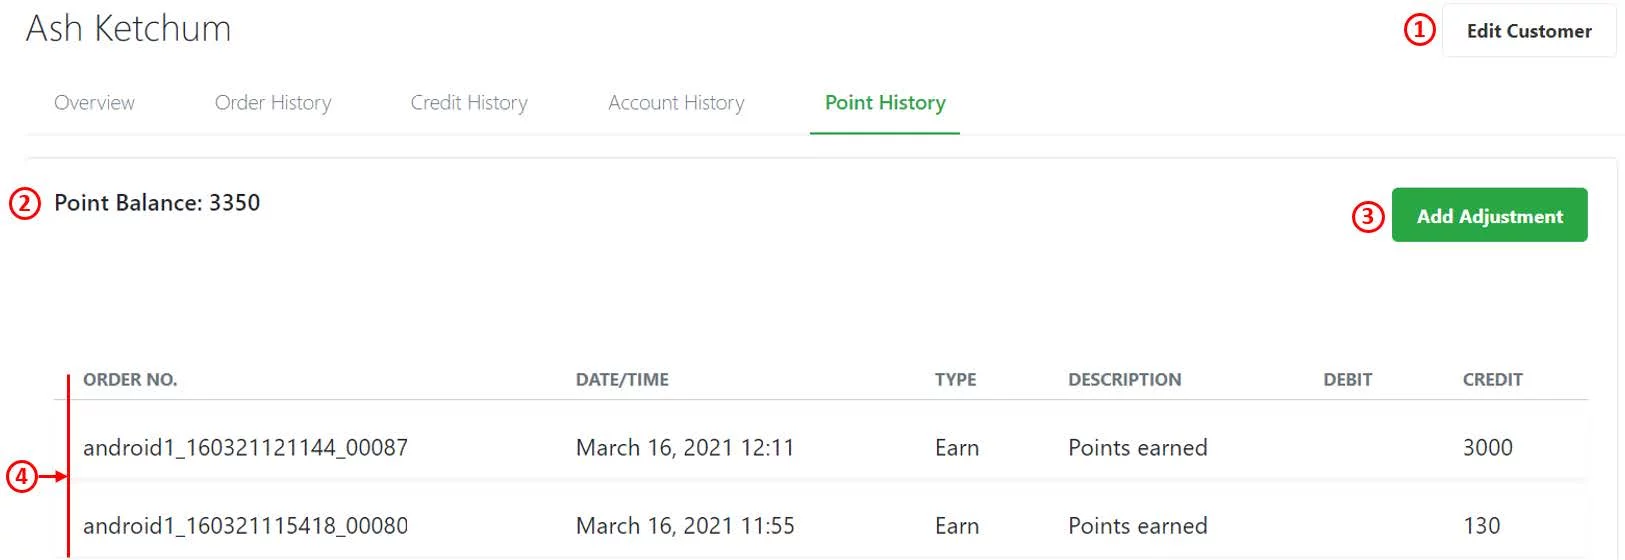
Details on checking customer’s membership points, customer earning and spending membership points will be explained in this section.
For more information on customer membership and membership points, see Memberships.
1. Edit Customer
Edit customer details. The edit window will be shown, similar to Add Customer.
2. Point Balance
Available balance of customer’s membership points.
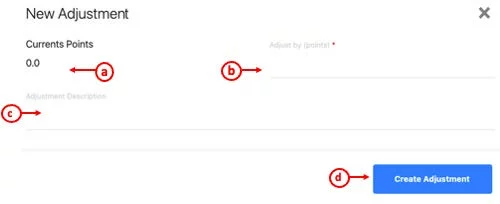
3. Add Adjustment
Allow users to manually adjust customer’s membership point balance.
a. Customer’s current membership points.
b. Enter points adjustment. 💡 Users may enter a negative value to reduce customers’ membership points.
c. Insert Adjustment Description
d. Click on CreateAdjustment once done.
4. Membership Point History Details
Shows user the on-account transactions history of the customer
Order Number
Date and Time
Type: Earn/ Spent/ Refund
Description: Describes Points Type
Debit or Credit
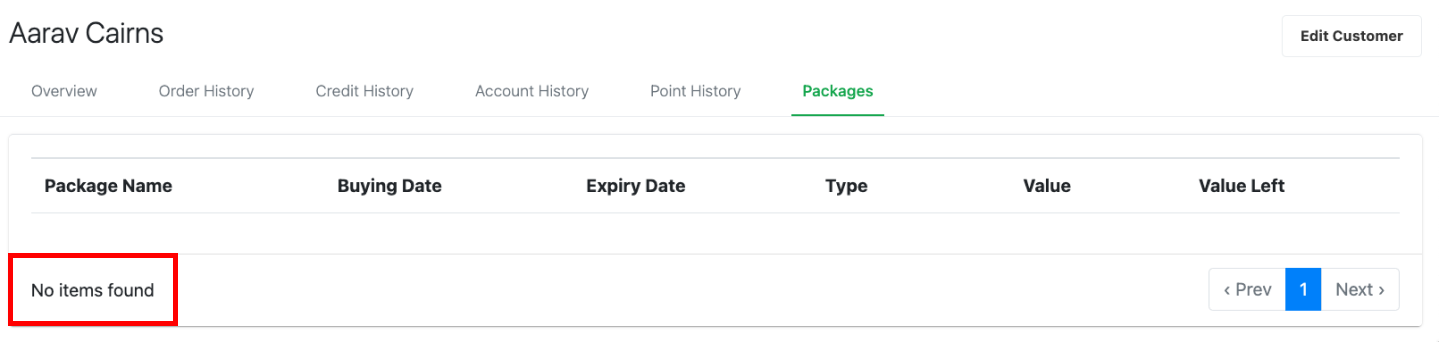
This section guides users on the package(s) purchased by a customer. Users can utilize this feature to check on the status of package(s) and its associated details owned by a customer.
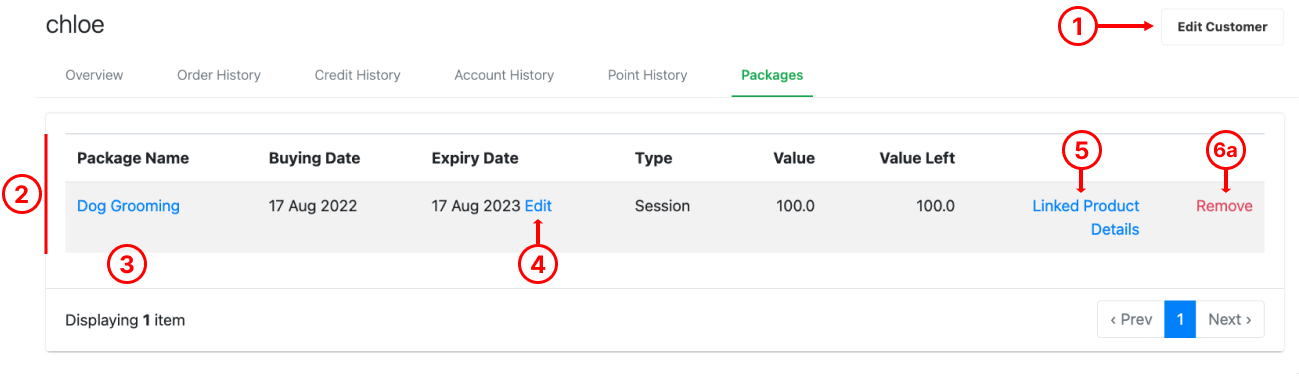
1. Edit Customer
Edit customer details. Displays the edit window similar to Add Customer.
2. Packages Details
Shows users information related to the list of packages purchased by a customer.
Package Name
Purchase Date
Expiry Date
Type of package: session or credit
Value: No of sessions/ amount of credit in the package
Value Left: Remaining session / credit redeemable
3. Package Configuration
Click on the name of the package to access the package configuration page.
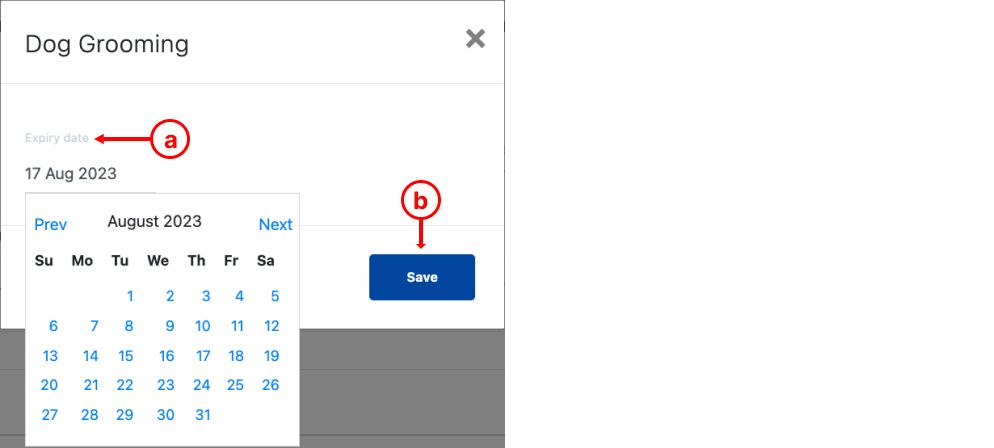
Allow users to update the expiry date of the package purchased by the customer.
a. Select the expiry date.
b. Click on Save once done. 💡 Updating this date will not affect the expiry date of other customers’ packages.
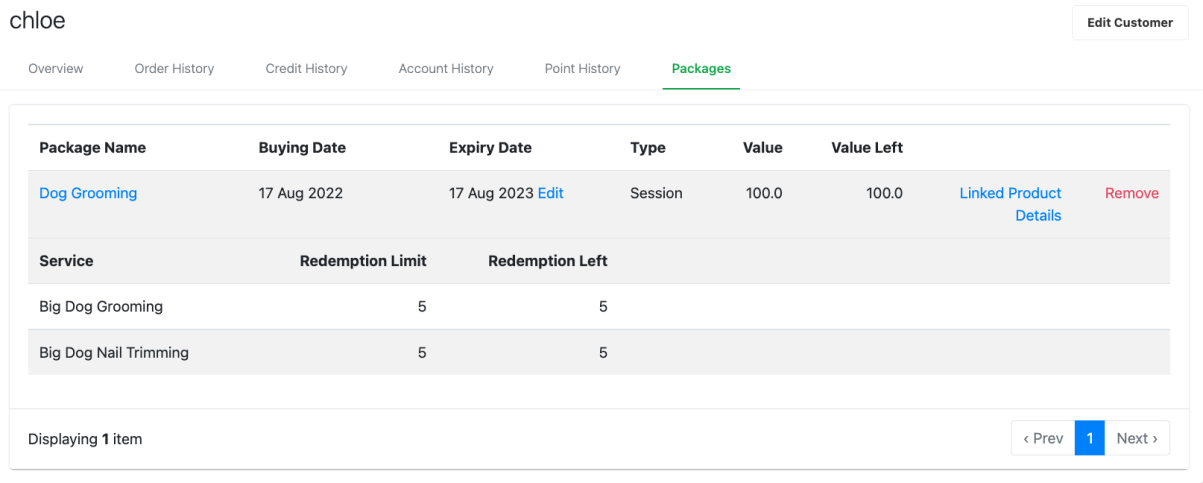
5. Linked Product Details
Click on Linked Product Details to expand the details of linked products in the package.
Users will be able to see the following details:
Linked Product Name
Redemption Limit
Redemption Left
6a. Remove
For packages which are yet to be redeemed, it will be possible for users to remove the package from a particular customer. Click on Remove.
If the package purchase transaction was voided at the FRONTEND POS, the
package will be automatically removed from the customer’s account.
Once the package was redeemed by the customer, the Remove button will no longer be shown, users will only see Transaction History.
6b. Transaction History
Click on Transaction History to expand the list of transactions in which the package was redeemed.
Date and Time
Order Number: click on Order Number to see Order Invoice
Cashier
Outlet
Amount: Session or credit redeemed.
💡 Users may remove a package which had been redeemed, users are required to void all related transaction at FRONTEND POS, the package will be removed from the customer. See below for updated customer’s package
 If the package purchase transaction was voided at the FRONTEND POS, the