Retail Kiosk Order


⬇ Explore the functionalities of the product page by toggling between tabs below.⬇

Users can begin the ordering process by scanning product barcodes using the kiosk’s built-in scanner or a connected hand-held scanner.

1. Add Product to Cart

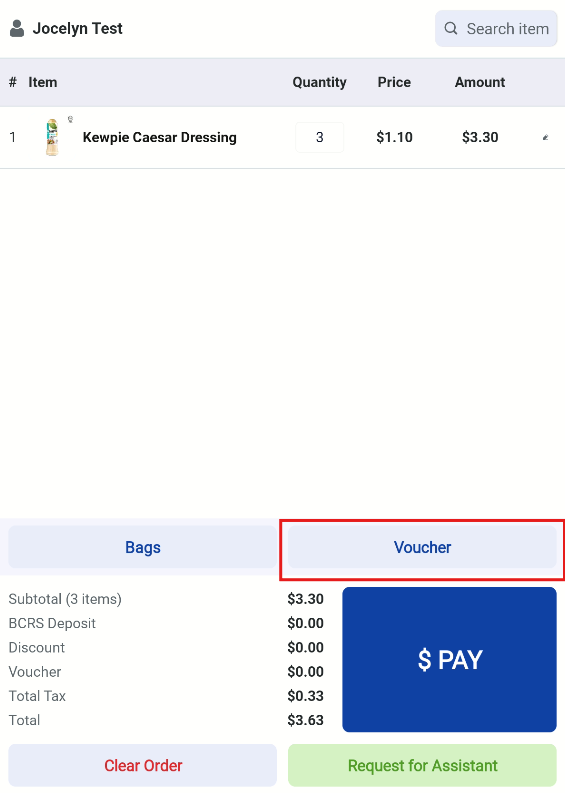
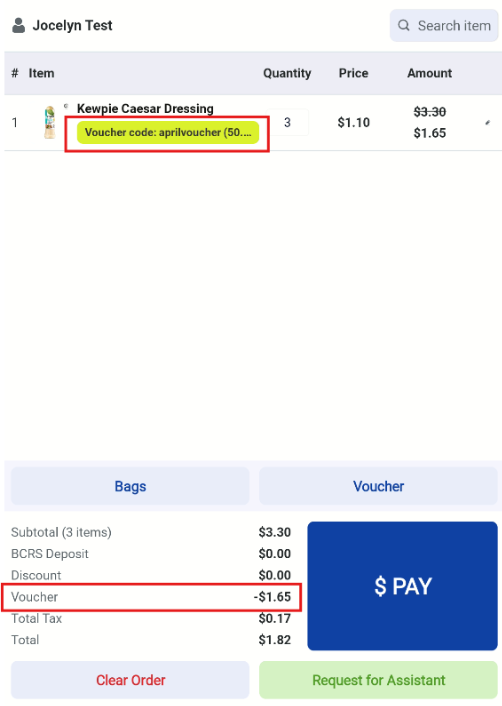
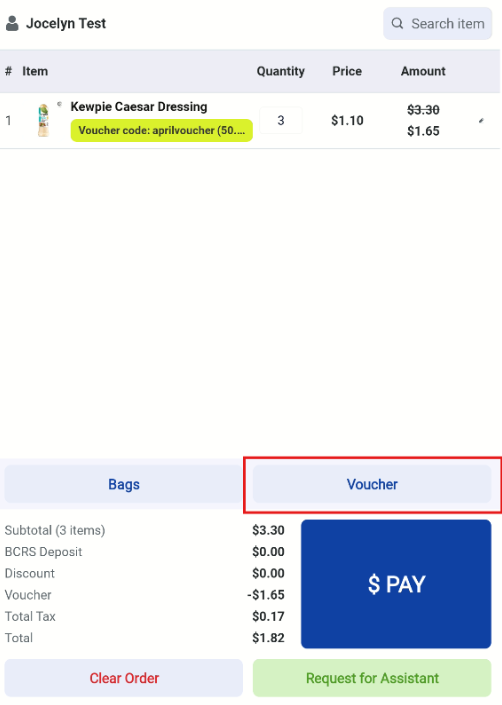
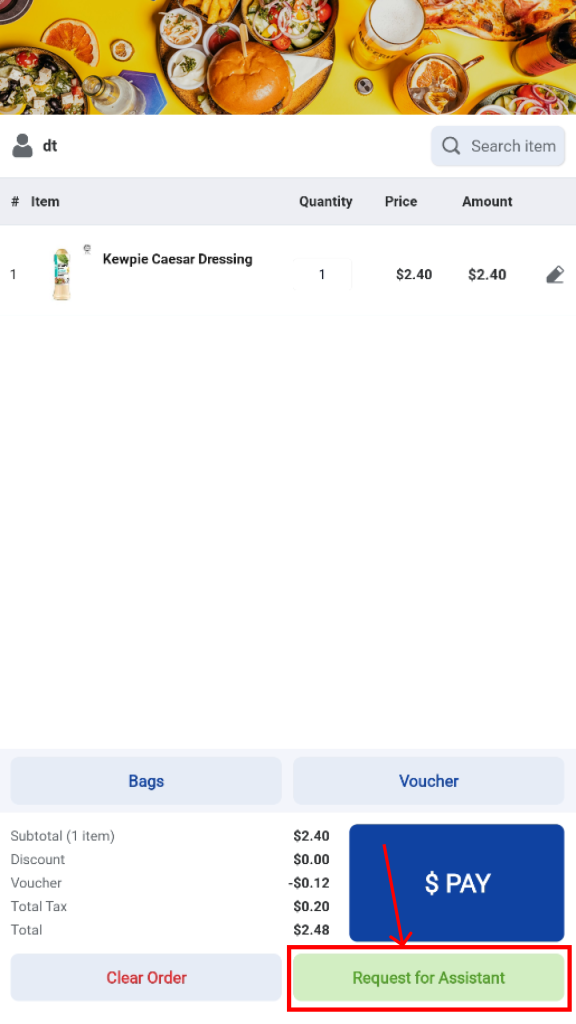
Each successful scan will immediately appear on the kiosk’s Order Summary page.

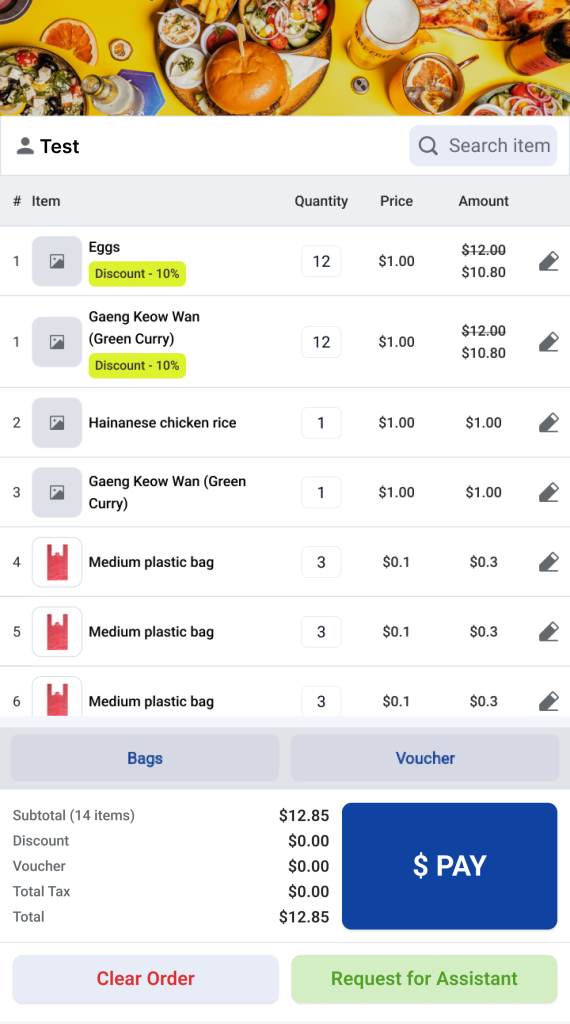
2. Edit Product Quantity & Add Notes
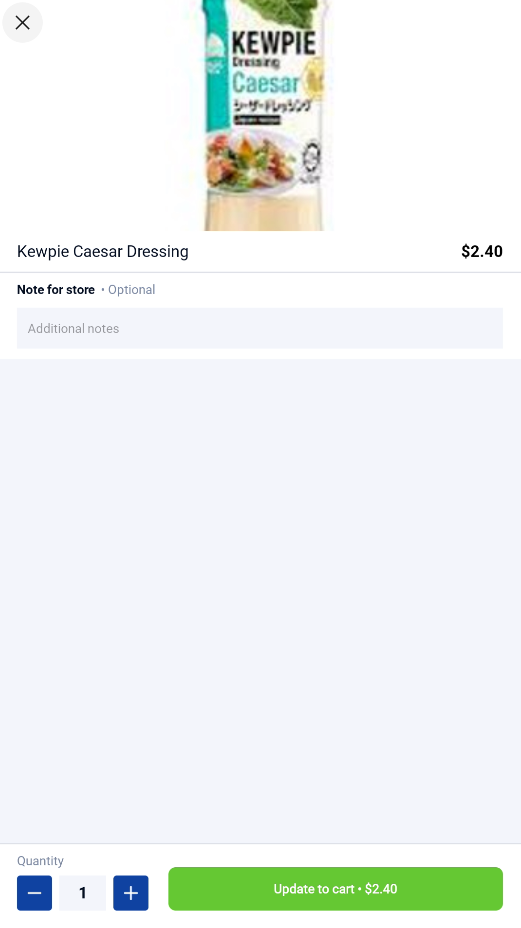
Users can tap the icon beside any product to adjust its quantity. Additional notes (e.g., special requests or instructions) can also be added for each item.

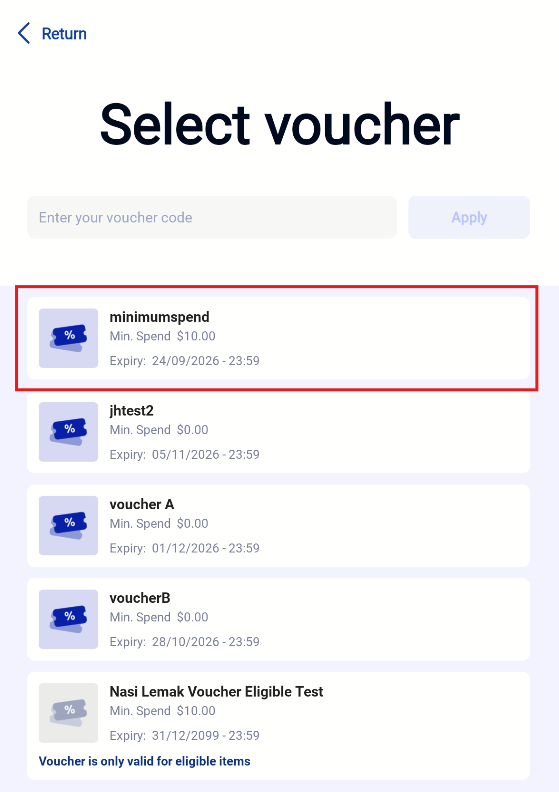
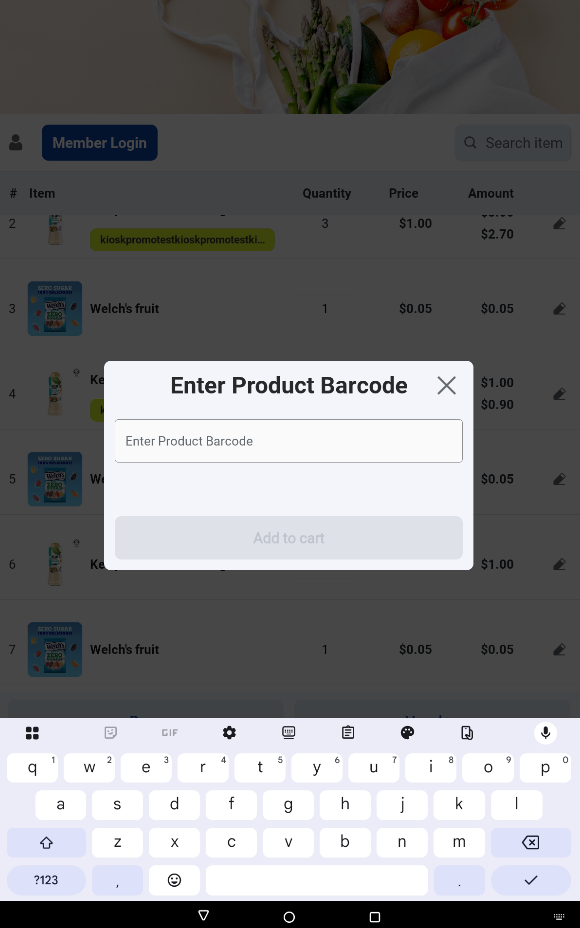
3. Search for Products

Users can also search for products manually by entering the product barcode numbers or scanning a barcode will also automatically bring up the matching product.

4. Clear an Existing Order

Users may choose to clear the current order at any time. Once the order is cleared, the kiosk will return to the Welcome screen. (Note: merchant can configure whether clearing order will trigger staff assistance mode)

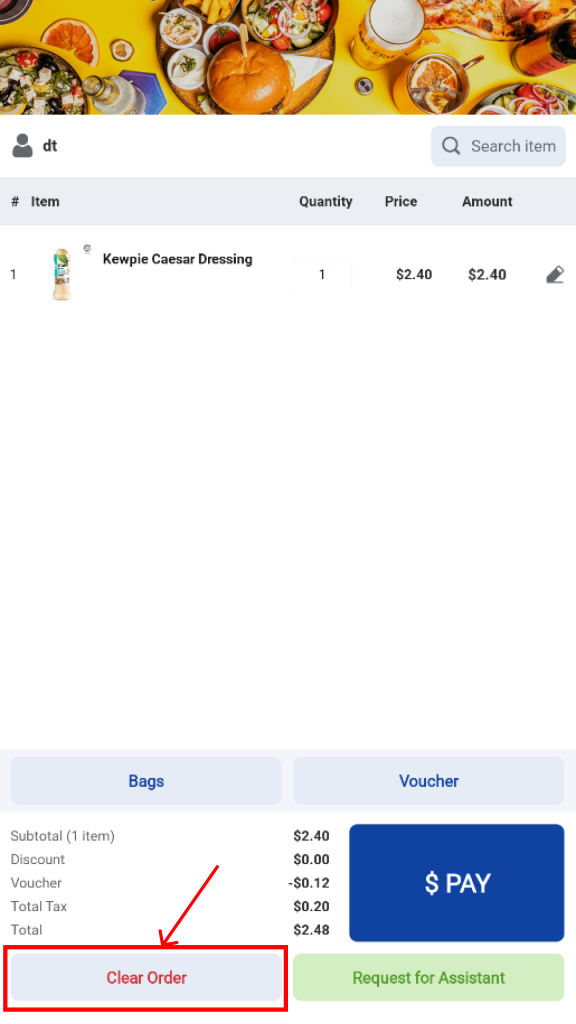
Before clearing the order, a confirmation pop-up will appear to prevent accidental cancellations.

When users taps on the “Bags” button, a popup will appear that allows the user to select the bags they wish to purchase.

Merchants can configure the products to be shown in this popup via the backend popup.  

Once the user goes to the checkout page, the user can click ‘Voucher Code’ to show the vouchers that the customer has. Users can either select the available voucher directly or enter the voucher code to apply.

Apply Voucher via Select Available Voucher

Users can click ‘Voucher’, select the available voucher, and click ‘Apply’ once the voucher code appears in the search field.

Apply Voucher via Type Voucher Code

Users can also type in the voucher code, and click ‘Apply’ once done.


Voucher Code Applied

Once applied, voucher code and the discount amount will be shown in the checkout page. Users can proceed with checkout as per usual process.

No Available Vouchers

If the customer does not have any vouchers, there will not be any available voucher displayed.  However, users can still apply the voucher code in the field. 

Removal or Change of Vouchers

Customers can click ‘Voucher’ again to remove or change voucher usage. Please note that a voucher needs to be removed first in order to select another voucher. Customers can select and apply the voucher again afterwards.


Users can request for assistance by tapping on the “Request for Assistance” button.

A pop-up will then appear, allowing the user to reach out to a staff member. The staff can proceed to identify themselves and enable Staff Assistance Mode.

Once the staff successfully verifies their identity, the kiosk will enter Staff Assistance Mode.


Merchants can follow the Staff Assistance Trigger Configurations in the Configurations Tab.