1) Authenticate WooCommerce Website with EPOS Backend:
Go to Backend > Integrations > WooCommerce > Config
At the Store URL Field, enter WooCommerce store URL and click Connect
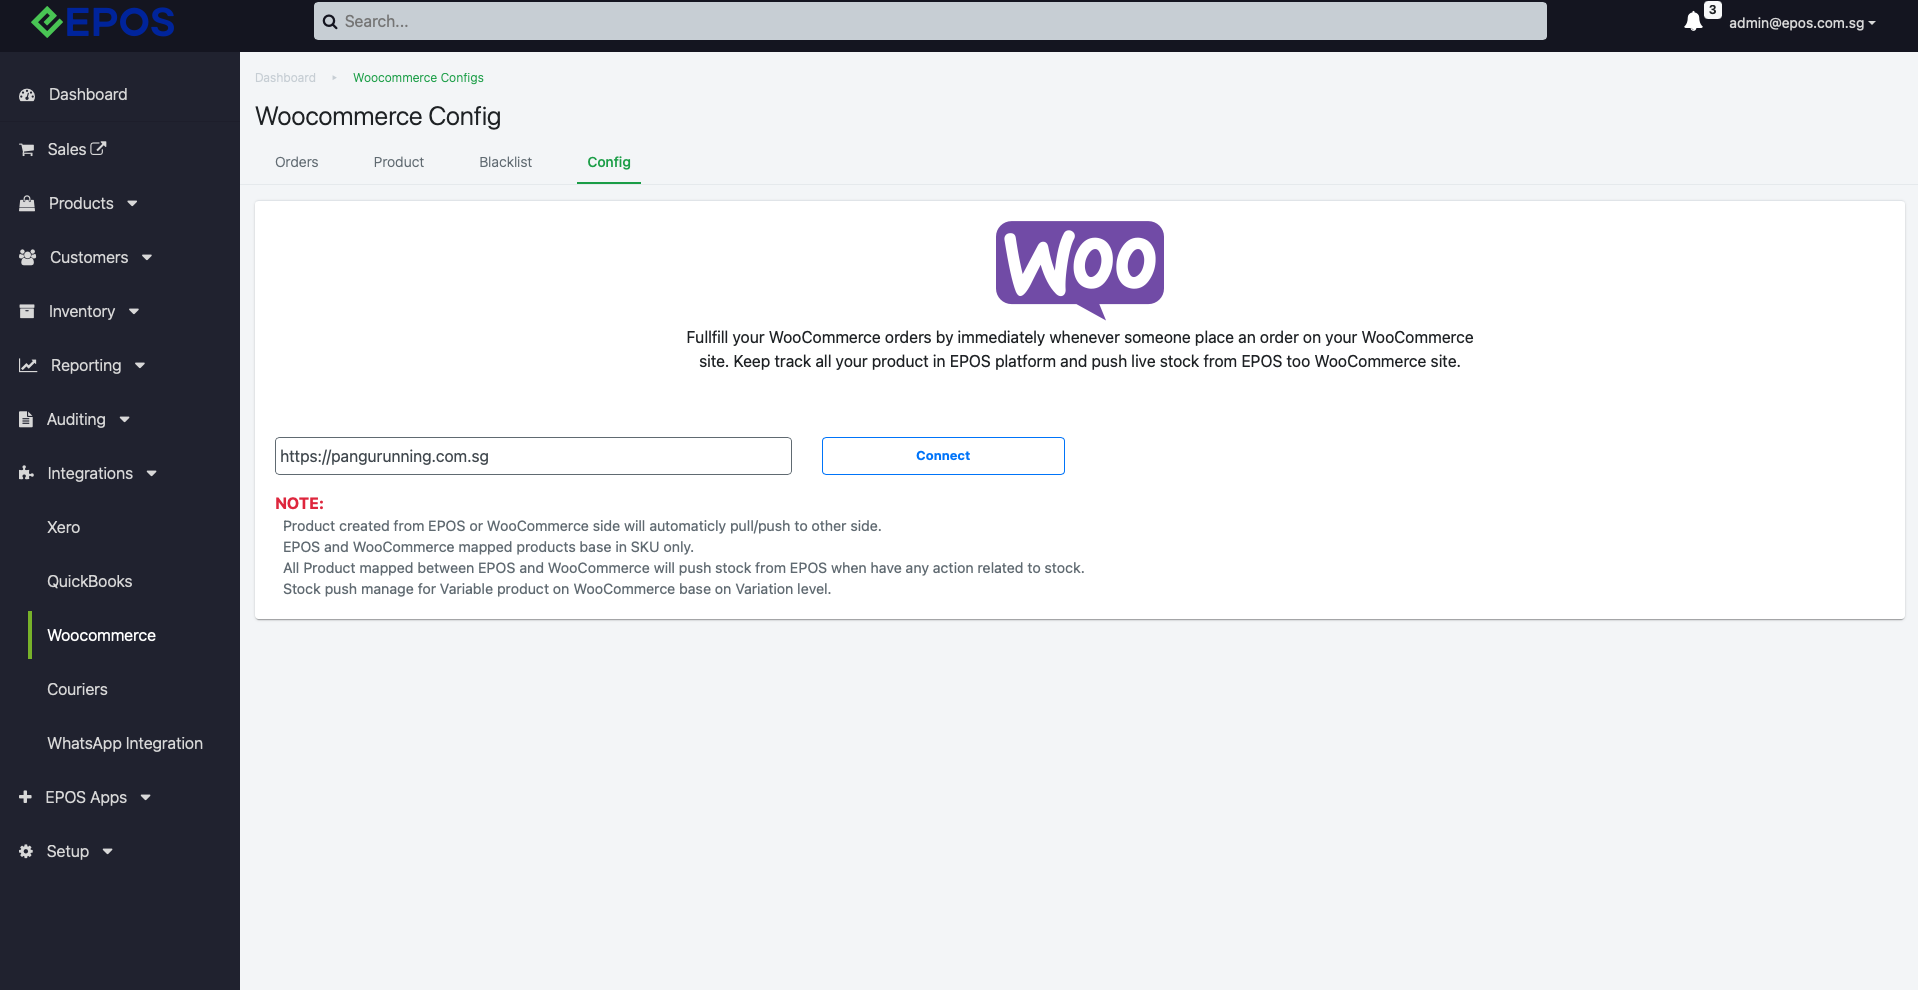
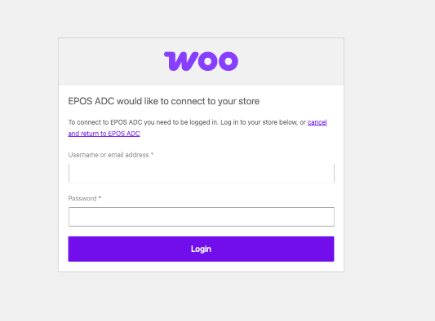
Once click Connect, user will then be directed to the Woocommerce page to proceed with further authentication.
Input your WooCommerce website Username/Email Address and Password.
EPOS Backend will connect successfully to WooCommerce
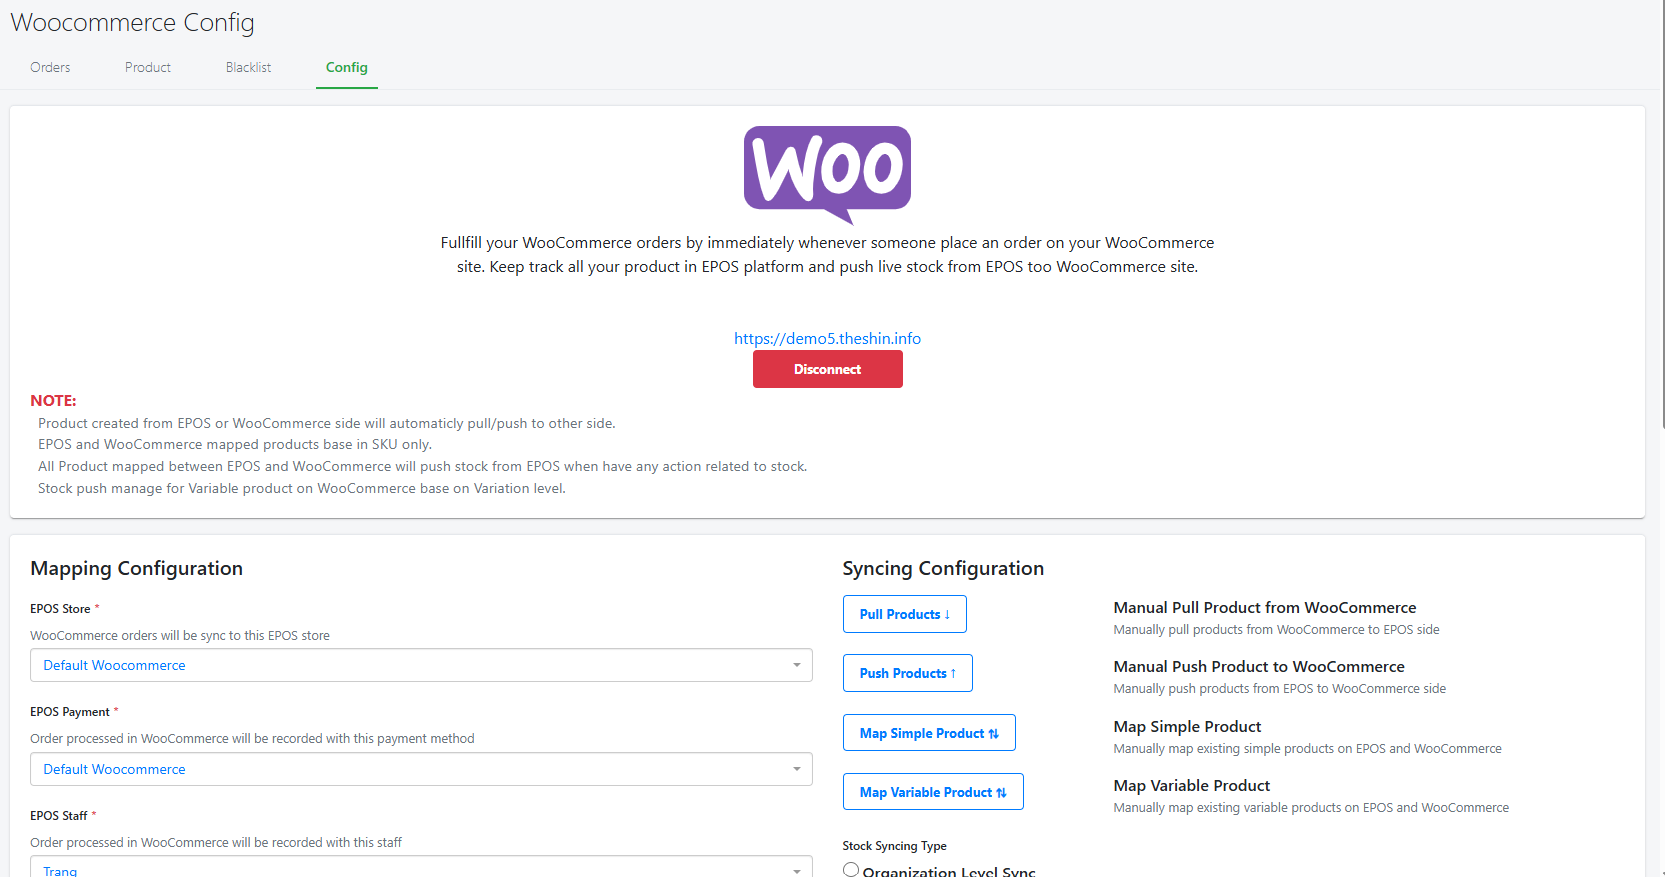
After authentication is complete, users will need to set up syncing preferences so the Backend portal and WooCommerce store is updated with the same information.
User will have to configure for EPOS Store , EPOS Payment, EPOS Staff and Order Sync Status ,
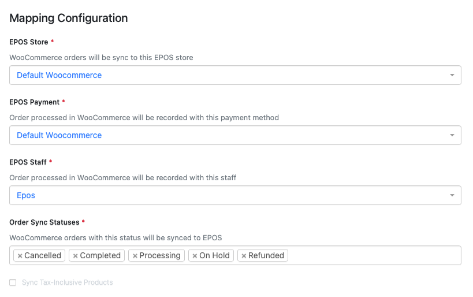
EPOS Store:
By default, Default WooCommerce store will be created and selected.
Woo Orders will then be sync to this EPOS Store.
EPOS Payment:
By default, Default WooCommerce payment will be created and selected.
Order processed in WooCommerce will be recorded with this payment method.
EPOS Staff:
The Default selection will be Epos. Order processed will be recorded with this staff
Order Sync Status:
Select the different types of order status to be sync to Epos.

If user does not select one of the Order Sync Statuses above, the orders will still flow into Epos.
However, the status for these orders will be shown as Failed.
An Error Message will be shown for all failed order: i.e Order status doesn’t match with config’s
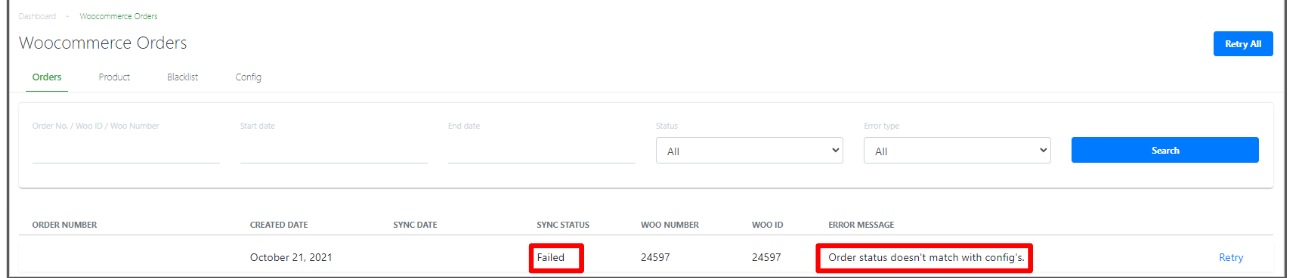
When user adds one of the order Sync Status back, the failed order may either be updated or click RE-Sync for failed order/
- Orders may be auto updated to Finished.
- if Orders are not auto updated, User will have to click Re-Sync for all failed orders.
Tax Inclusive:
Check the box to sync products with tax-inclusive selling price only.
If uncheck, products on WooCommerce will be tax-exclusive and no tax selling price.’
Note: WooCommerce only allows either tax-inclusive or tax-exclusive, so user has to choose one as default.
There are various products configurations to take note .
Note: The products in WooCommerce and EPOS must fist be mapped together before pulling Attributes and Categories

The pulled Attributes and Categories will be shown in WooCommerce Config below it.

There are 3 different ways to set up products to integrate with WooCommerce.
Fo Both Existing and New EPOS & New WooCommerce Users
Products will be created in EPOS and push to WooCommerce from EPOS using Push products button.
Step1: Follow Authentication guide and connect to WooCommerce Account with EPOS
Step 2: Create the products in EPOS side via bulk import or manually
Step 3: Click Push Product Button WooCommerce page to push products to WooCommerce Integration will be ready to use

2. For New EPOS & Existing WooCommerce Users
Products will be setup in WooCommerce and pull to EPOS using Pull products button.
Step 1: Follow Authentication guide and connect to WooCommerce Account with EPOS
Step 2: Ensure all products are setup in WooCommerce and SKU is not empty
Step 3: Click Pull Product Button on WooCommerce page to pull products from WooCommerce. Integration is set-up.

3, For Exisitng EPOS and WooCommerce users
Products will already be mapped in EPOS to WooCommerce
Step 1: Please verify products in WooCommerce is of acceptable format on EPOS
Step 2: Follow Authentication guide and connect to WooCommerce Account with EPOS
Step 3:Click Map Simple Products to map Simple Products
Then click Map Variable products (if any) to map the variable process

Product changes can be done via both EPOS or WooCommerce and changes will automatically be sync on either side.
- Adding a product: If a new product is added in WooCommerce, it will automatically appear in EPOS too. If you add one in EPOS, it’ll show up in Woo.
- Deleting a product: If you delete (trash) a product in WooCommerce, it gets deleted in EPOS as well — and the same happens the other way around,
- Create a new product/product variant
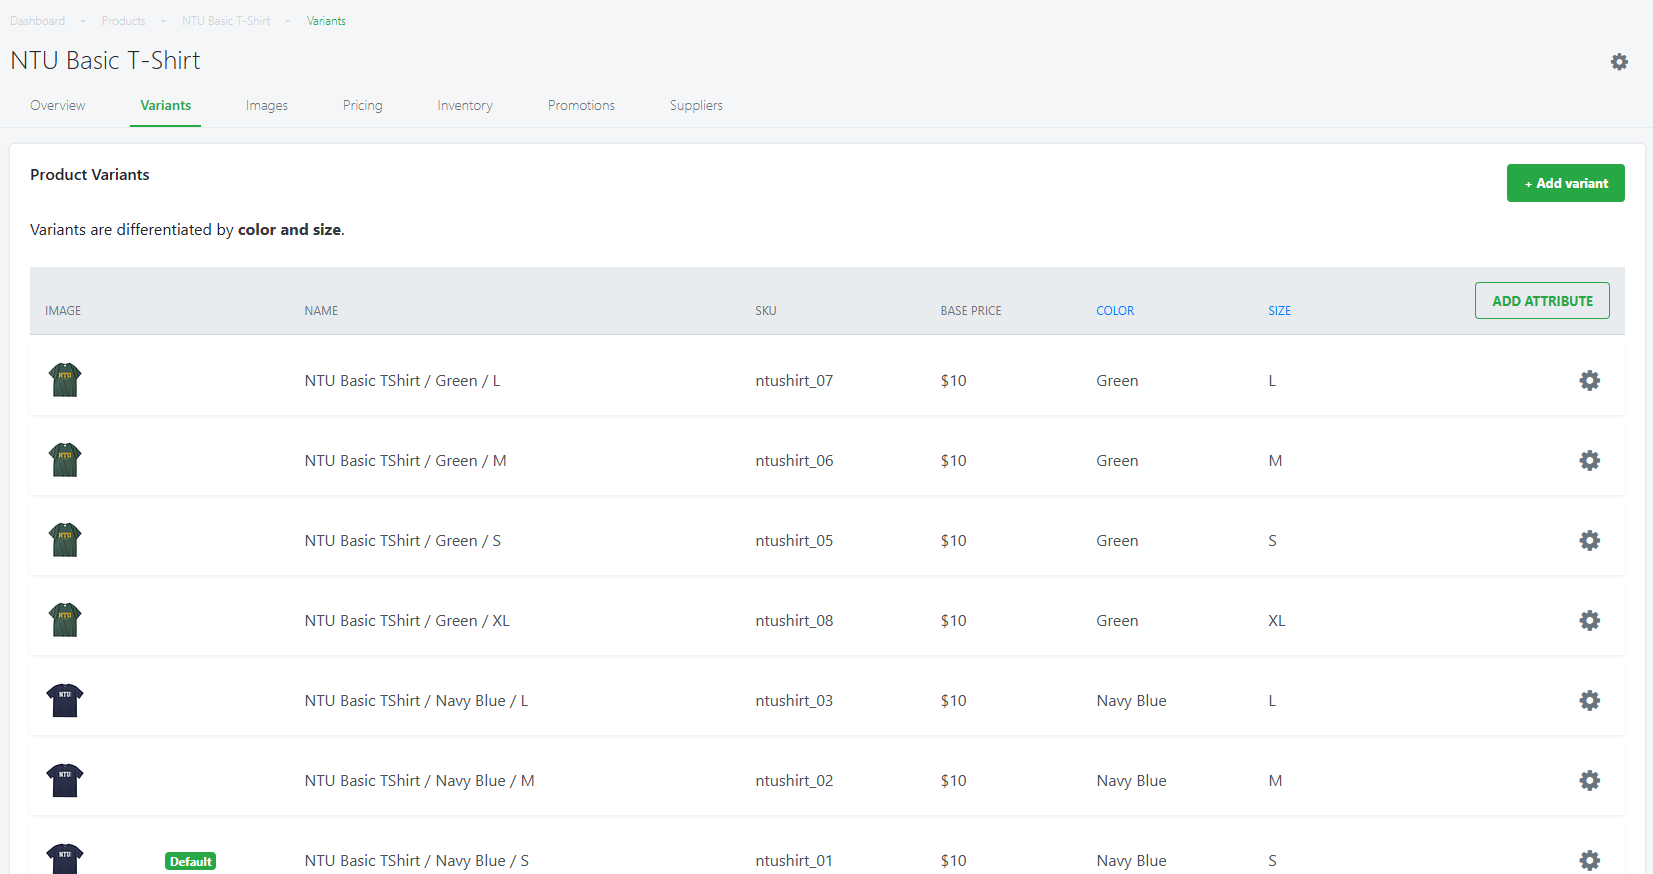
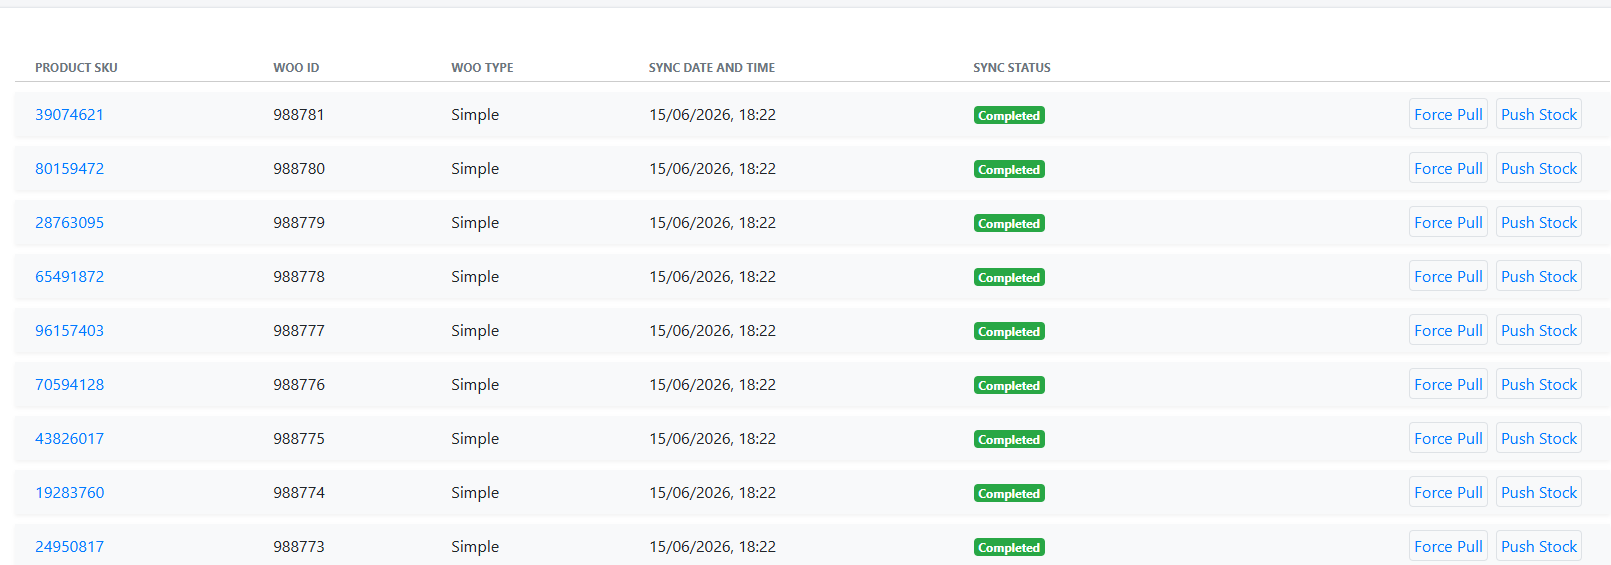
2. Check if products are sync/created on both EPOS and WooCommerce
Go to EPOS Backend > Integrations > WooCommerce > Products
On WooCommerce side,
WooCommerce > Products > All Products > check if product is successfully created.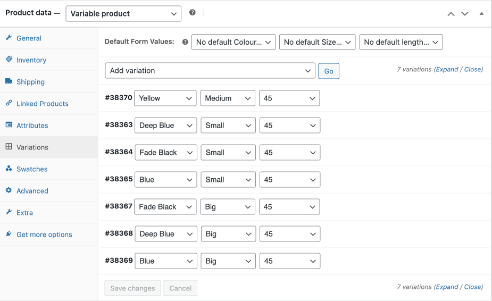
There are 2 types of attributes that users can use when creating products in WooCommerce.
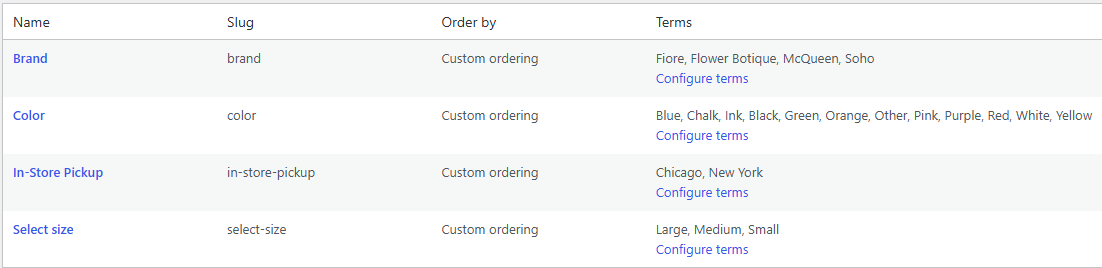
1.Preset Attributes
- Pre-set Attributes – Created before hand that can be used for every subsequent product creation
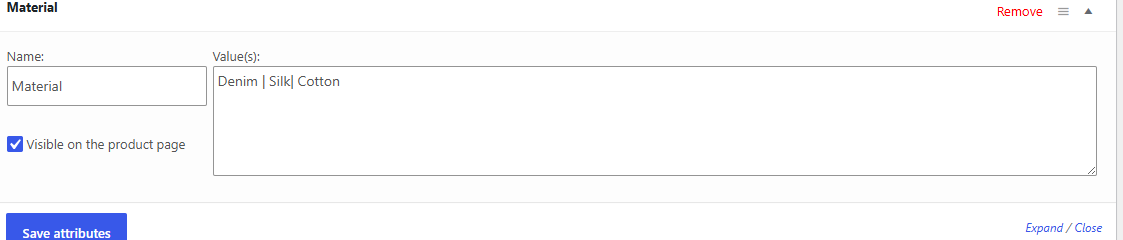
2. Custom Attributes – Only created when creating a product.
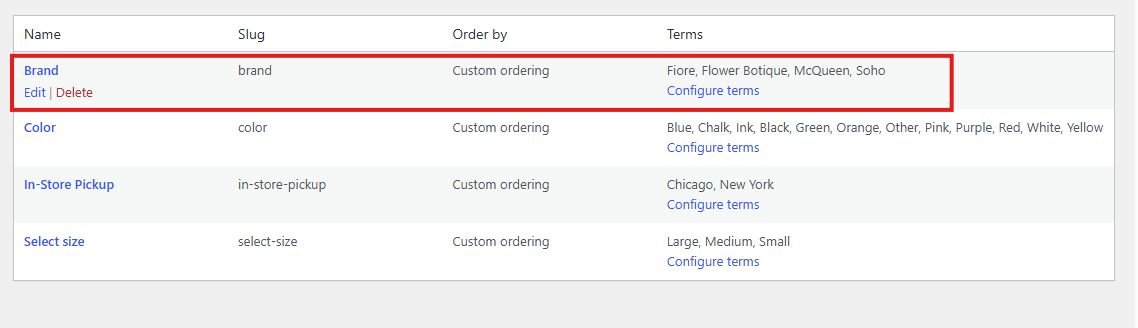
For Configuration of Pre-Set Attributes
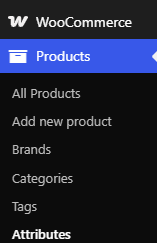
Select Features > Products > Attributes
2.Under “Add New Attribute”, enter:
- Attribute Name (to be shown on the WooCommerce site)
- Slug (for internal reference)
- Once done, click on “Add Attribute”
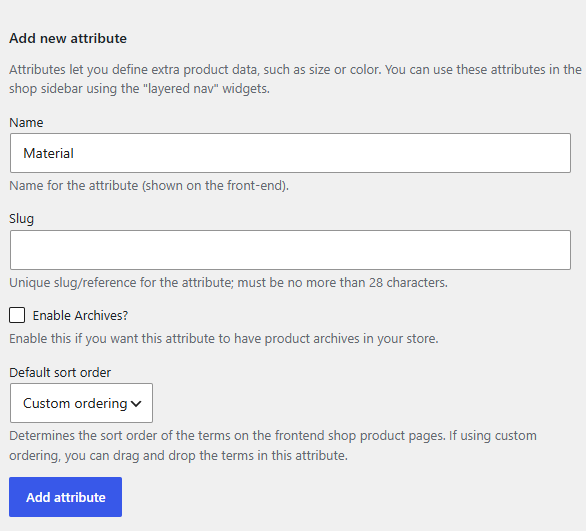
To add new attributes:
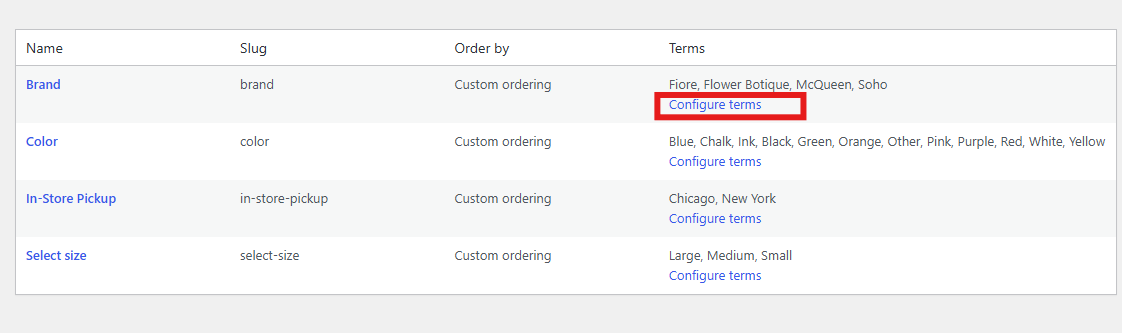
Click on “Configure Terms” in the Attributes list window
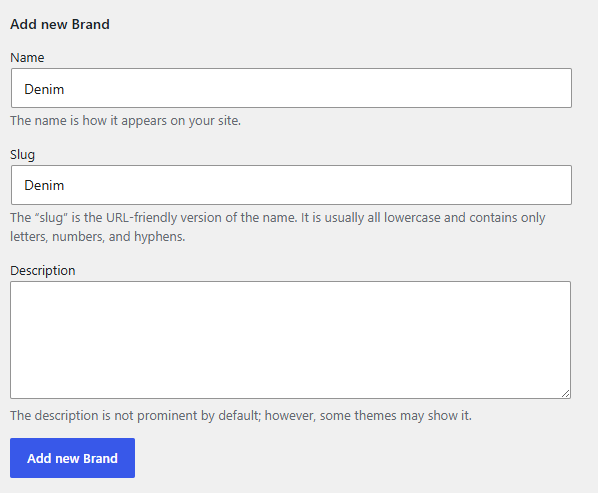
4. Proceed to enter and add new Brand
Custom Attributes:
Note: This set of attributes will not apply to other new product creations in the future
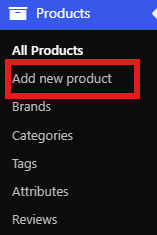
- Select Features > Products > Add New
. At the Product data section,
- Select “Variable Product”
- And Navigate to the “attributes” page
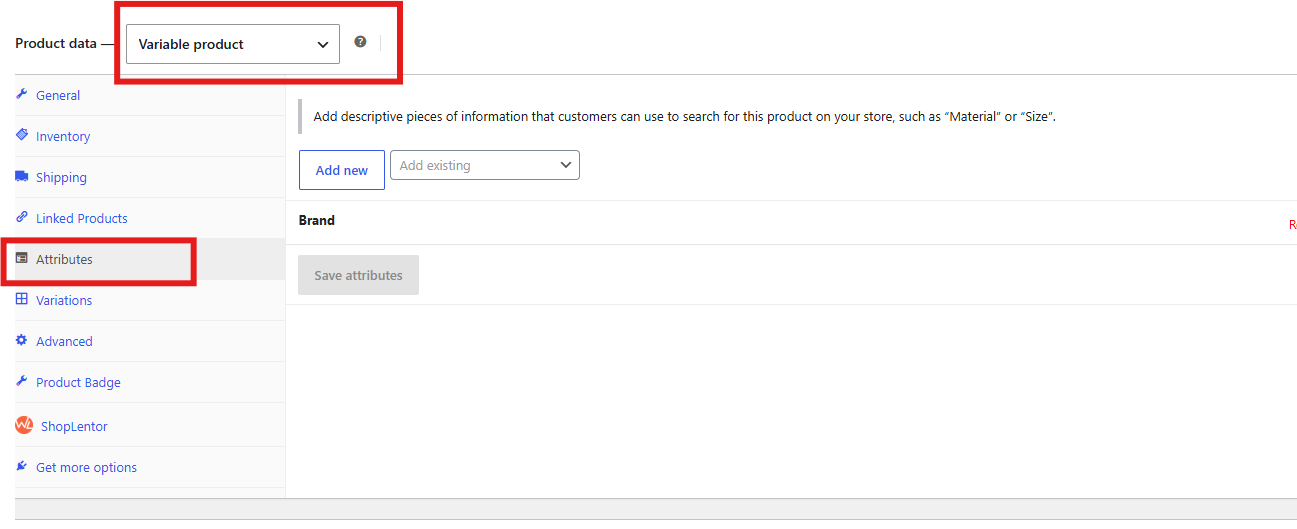
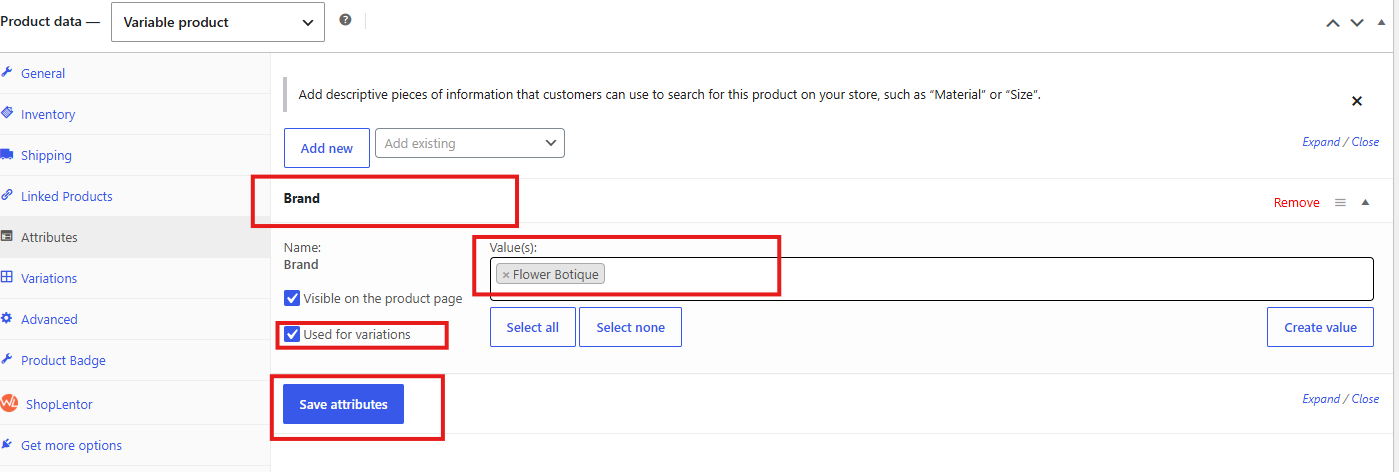
- Add in Attribute name and Add in attributes selection in this format:
- Tick used for Variations
- Save Attributes
Return to the Attributes main window, and users will be able to see the new pre-set attributes created.
On the other hand, EPOS only have one type of attribute creation method which is the Custom Attribute Creation.
This means that users have to create the attribute every time users create a variant product.
- When Variant Products Created in EPOS Syncs over to WooCommerce, Custom Attributes will be created for the product in WooCommerce.
This attributes were made from EPOS sync to WooCommerce
EPOS page:
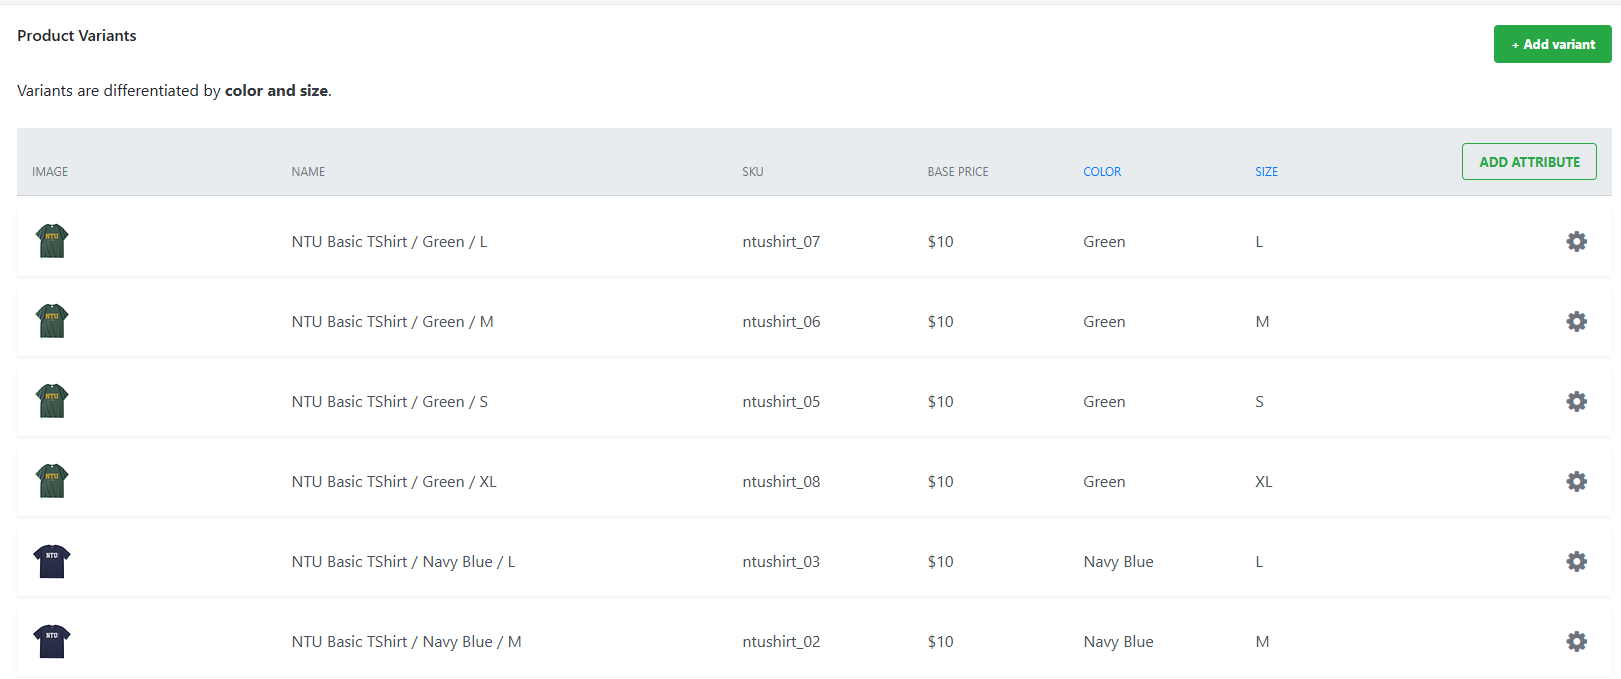
WooCommerce Page
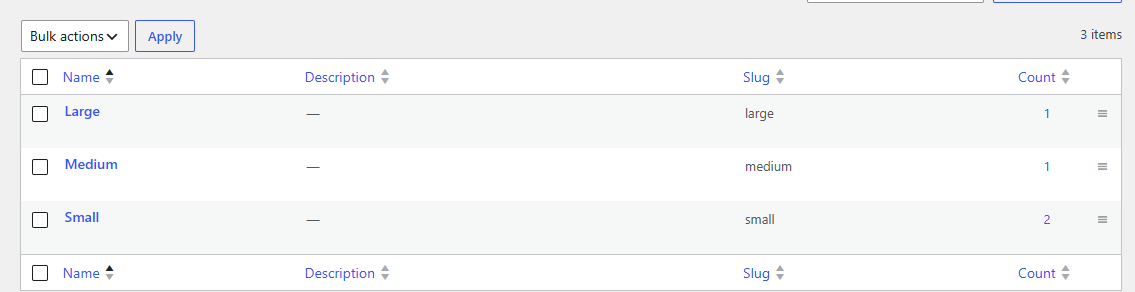
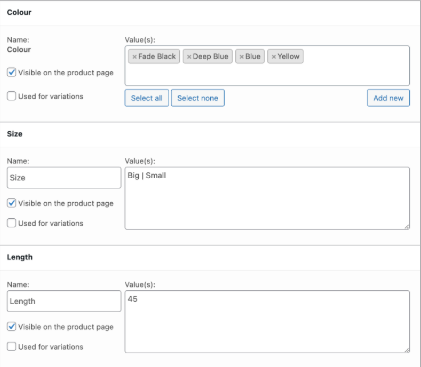
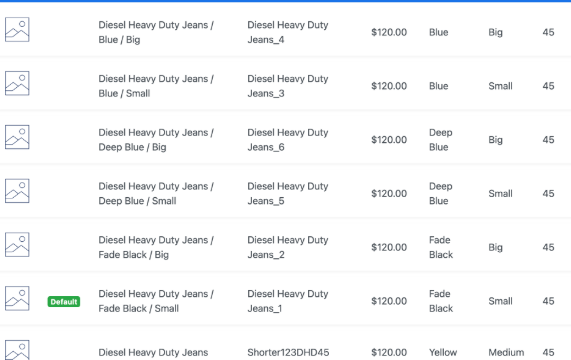
For Attributes made from WooCommerce to EPOS:
WooCommerce page:
EPOS page:
Note:
All types of attributes created in WooCommerce will sync over to EPOS and become Custom Attributes