The “Delivery Detail” feature is now available on the front-end POS system.
This feature enables front-end operation users to add and manage delivery orders directly from the POS. Upon creation of delivery orders on the front end, back-end staff can access and edit the documents accordingly. This allows for a seamless operation process between the front- and back-end staff.
This page guides front-end users of the EPOS system to create and view delivery orders on the POS.
💡 Upon completion of creating a delivery order, delivery details will not be editable on the POS.
Follow through the steps to begin creating delivery orders on the POS.
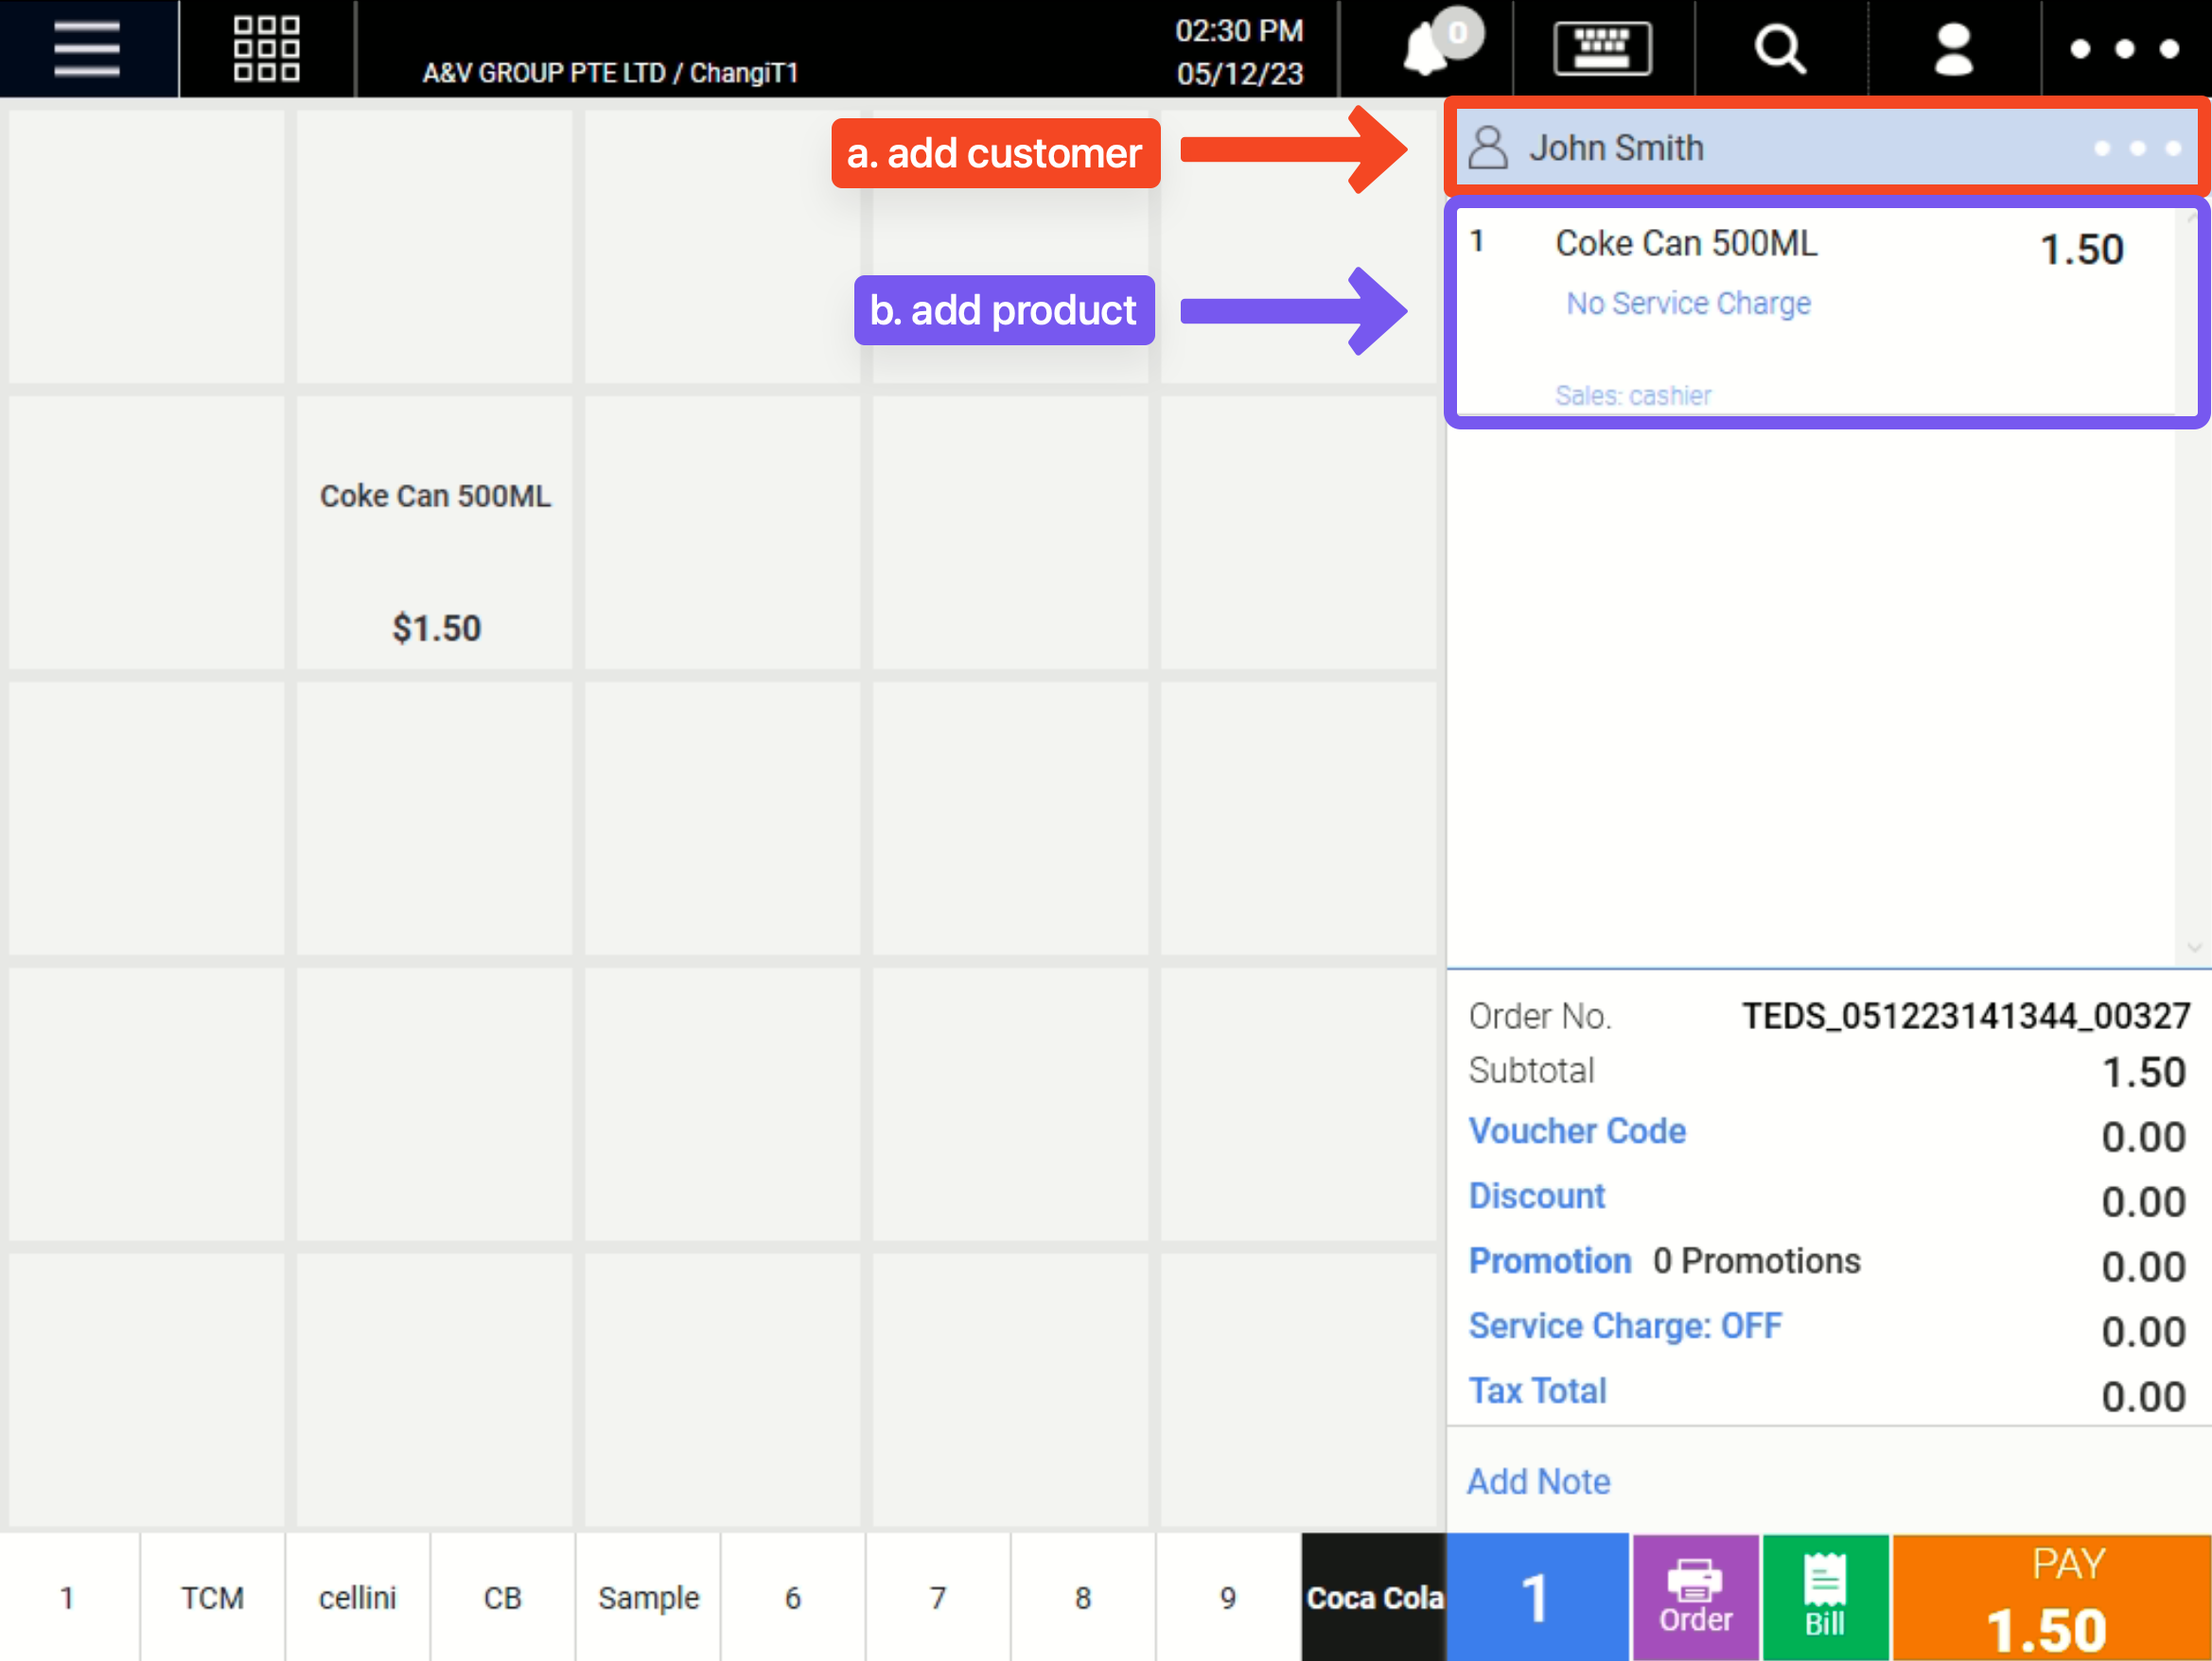
1. Add Customer & Product
To begin creating delivery orders on the POS, users will have to first tag a customer and add at least a product to the order.
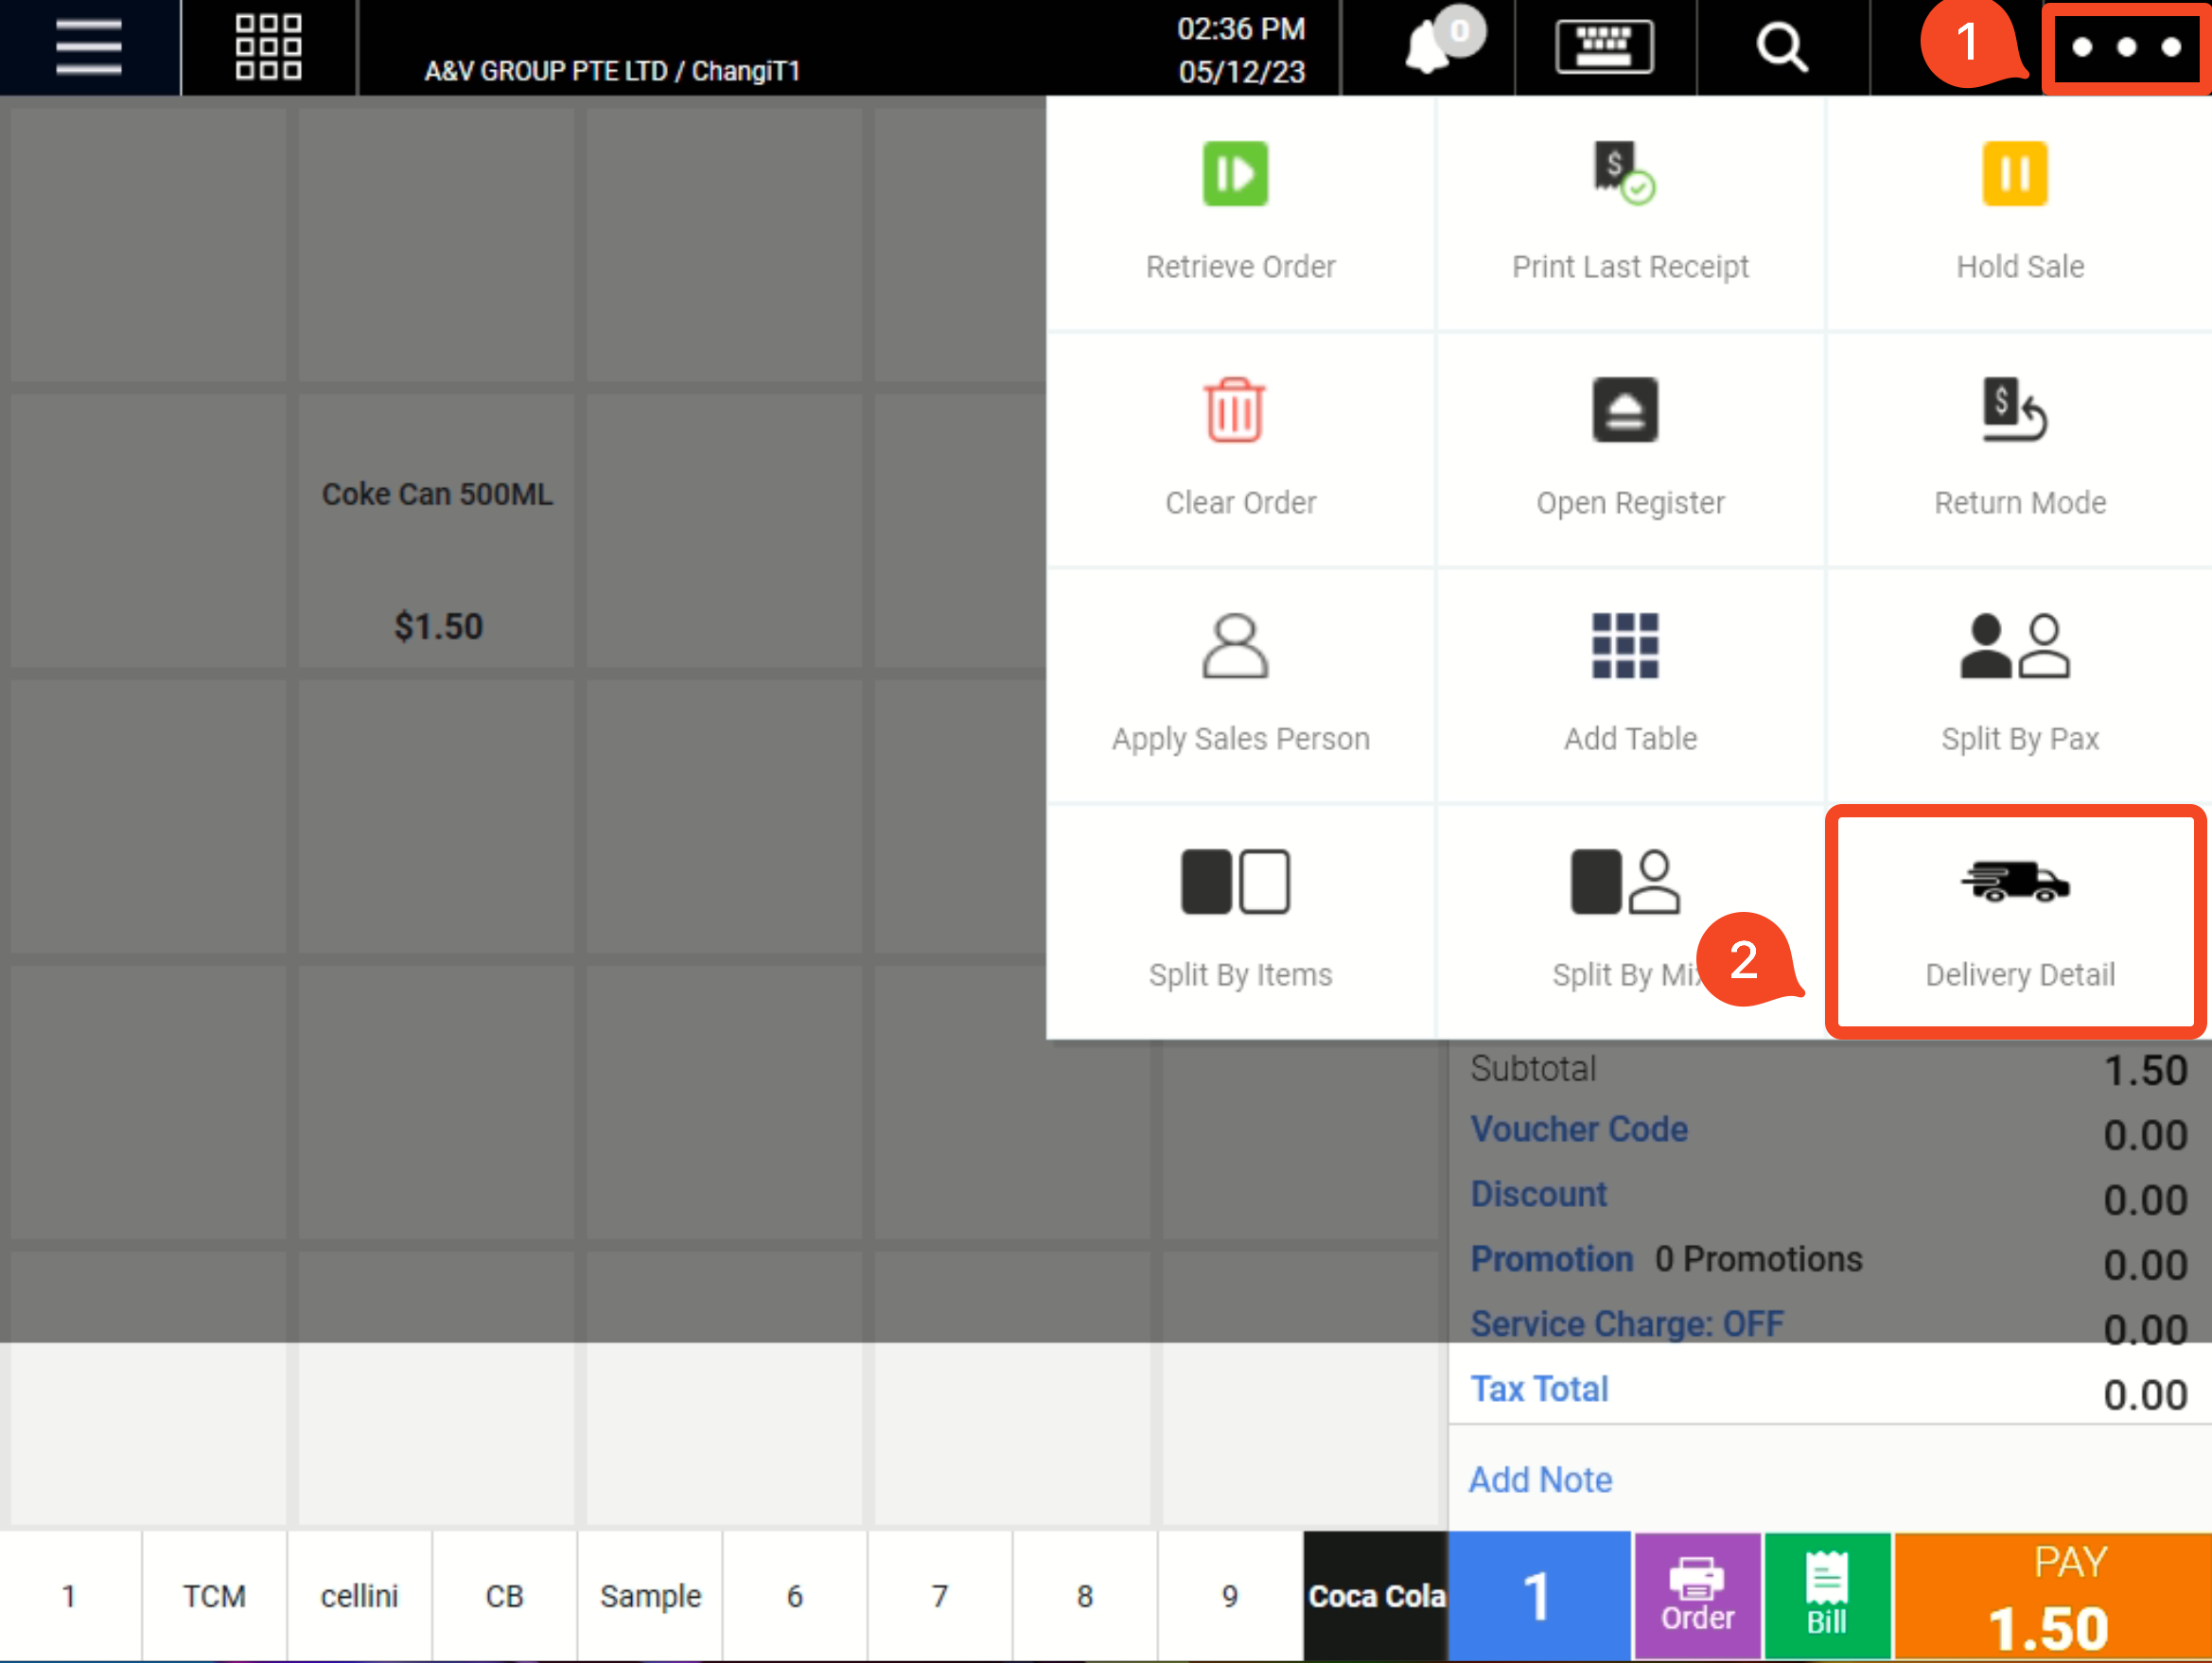
2. Click on the three dots menu button on the top right-hand corner to access the delivery detail page.
3. Fill in the appropriate details
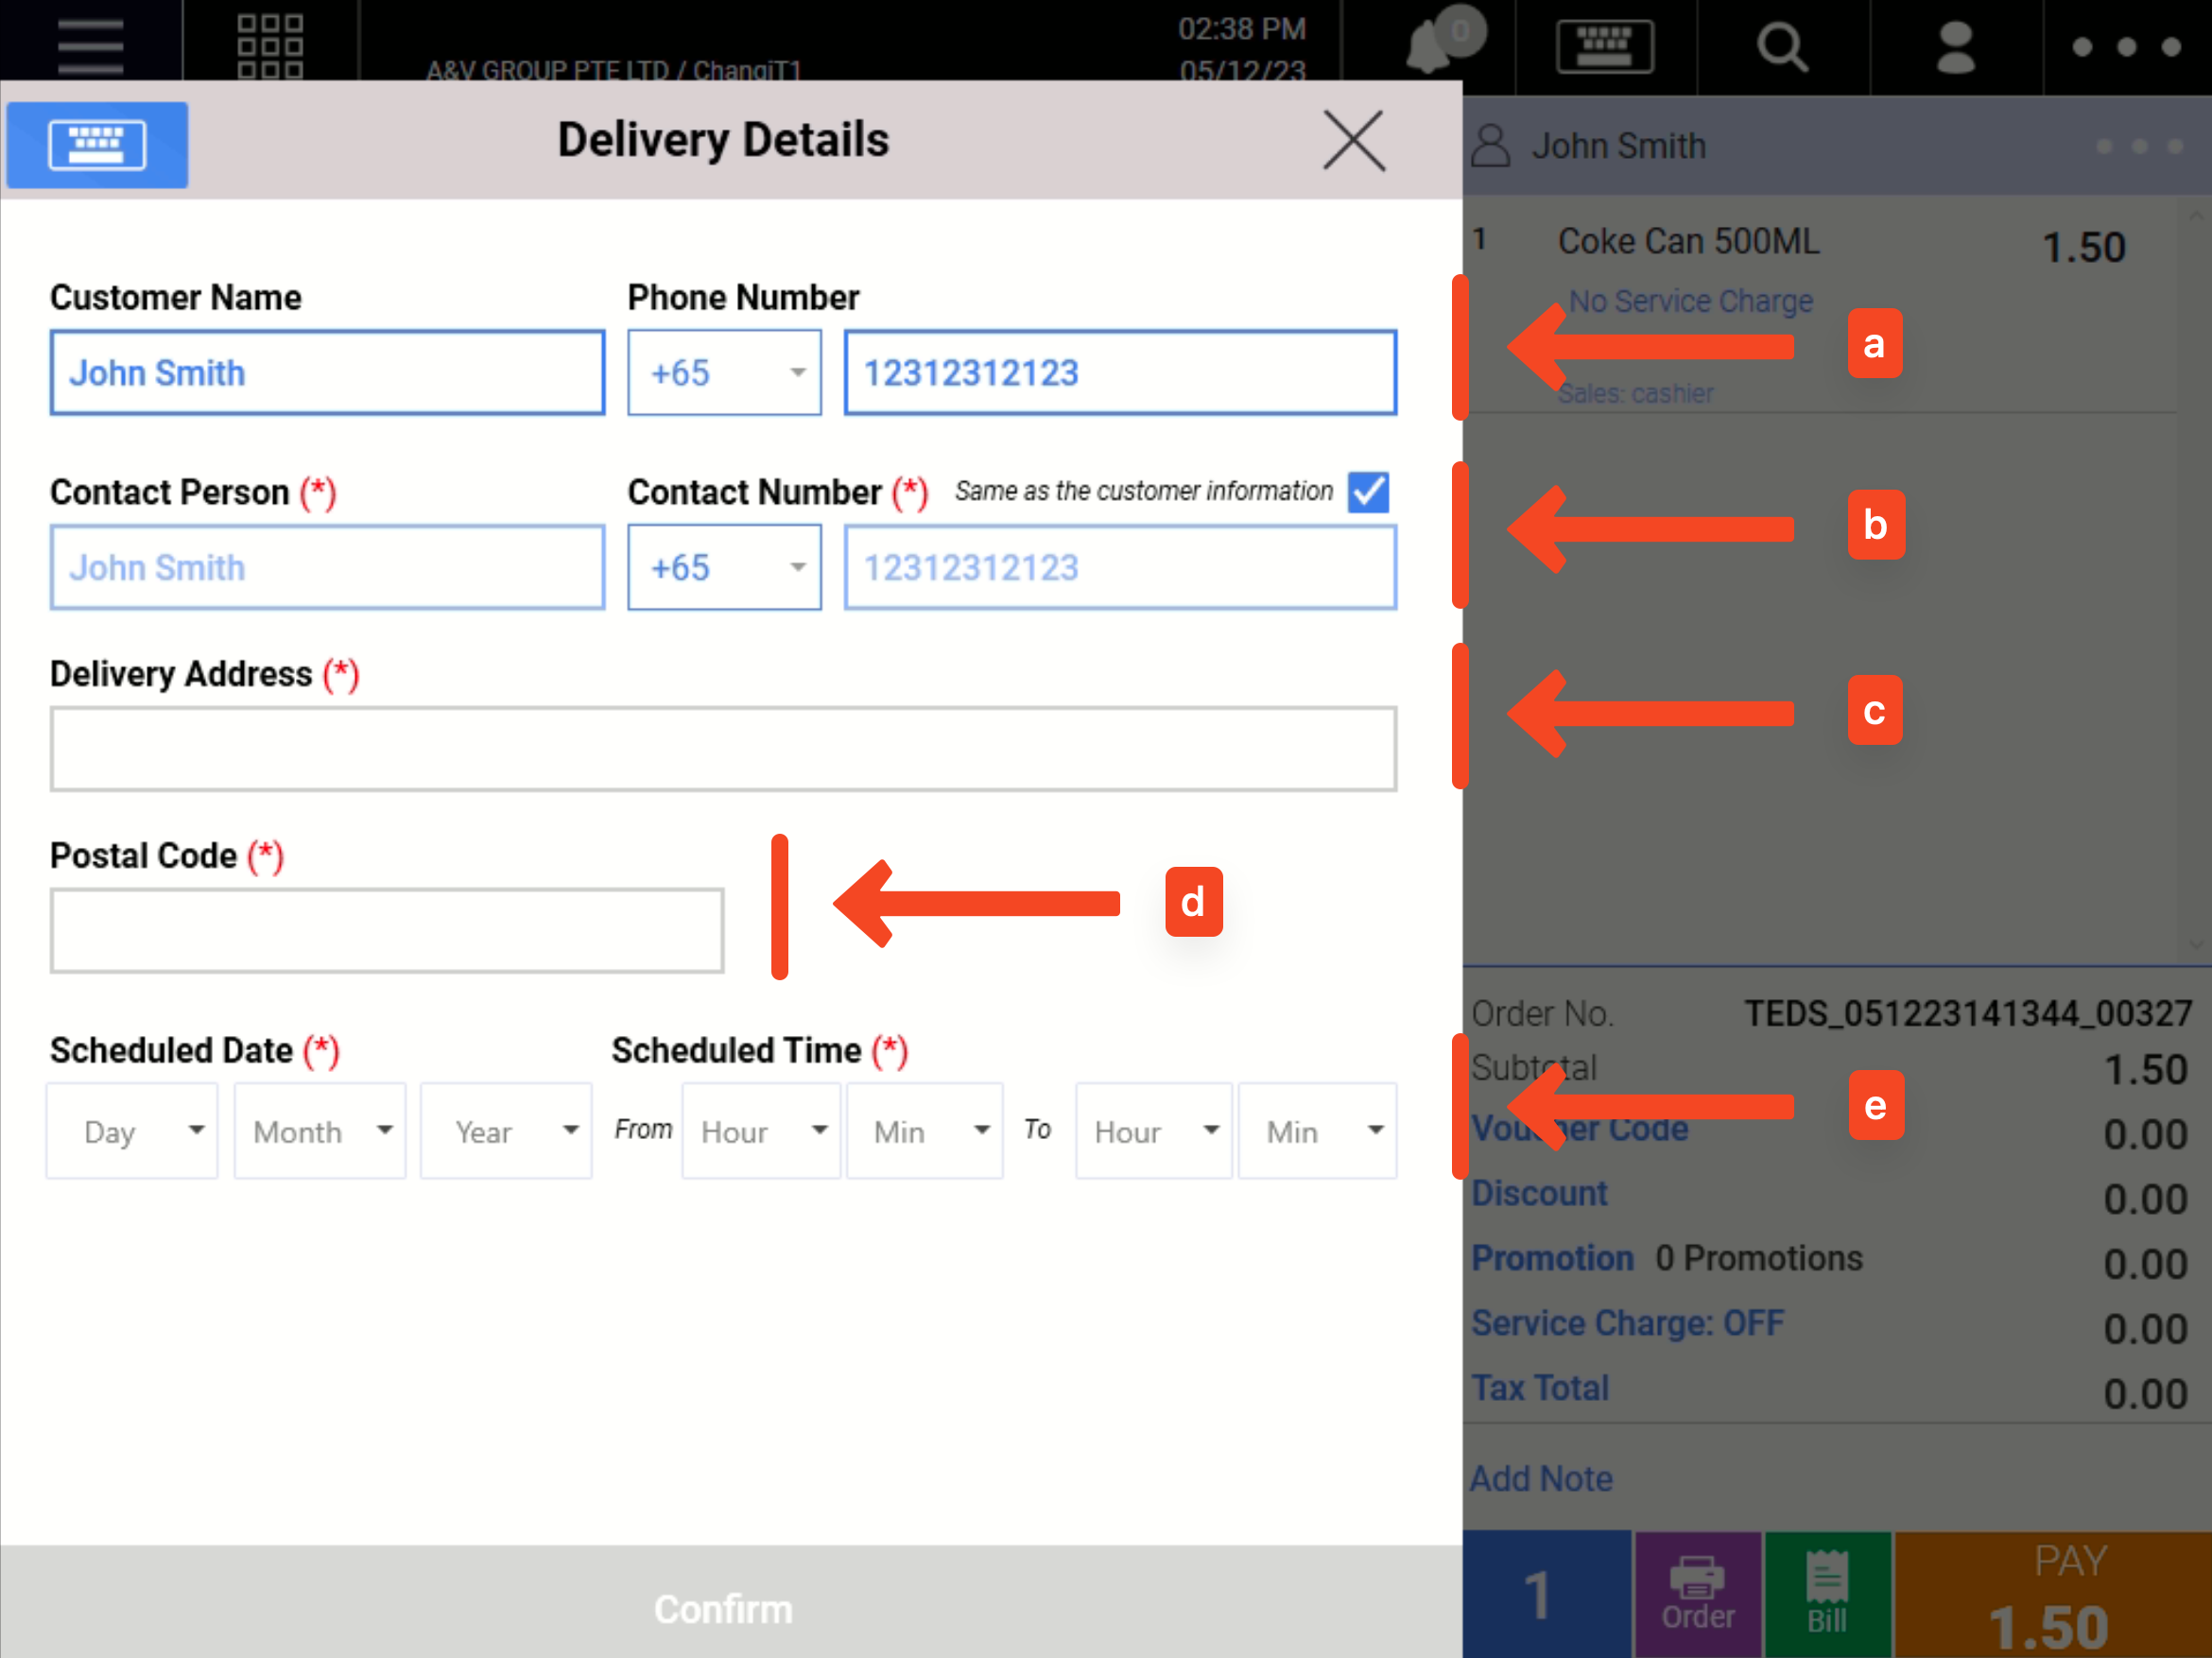
a. Customer Details will automatically be filled in according to the tagged customer’s details. Customer name and phone number fields are still be editable.
b. Contact Person Details by default will automatically be filled in with the customer details. Uncheck “Same as the customer information” to fill in a different contact detail.
c. Delivery Address: Fill in the address for delivery to be sent to.
d. Postal Code
e. Scheduled Date & Time
For delivery orders without a scheduled date, users can input a scheduled date in the far future, e.g. year 2100.
4. Upon Completion, Click on “Confirm”.
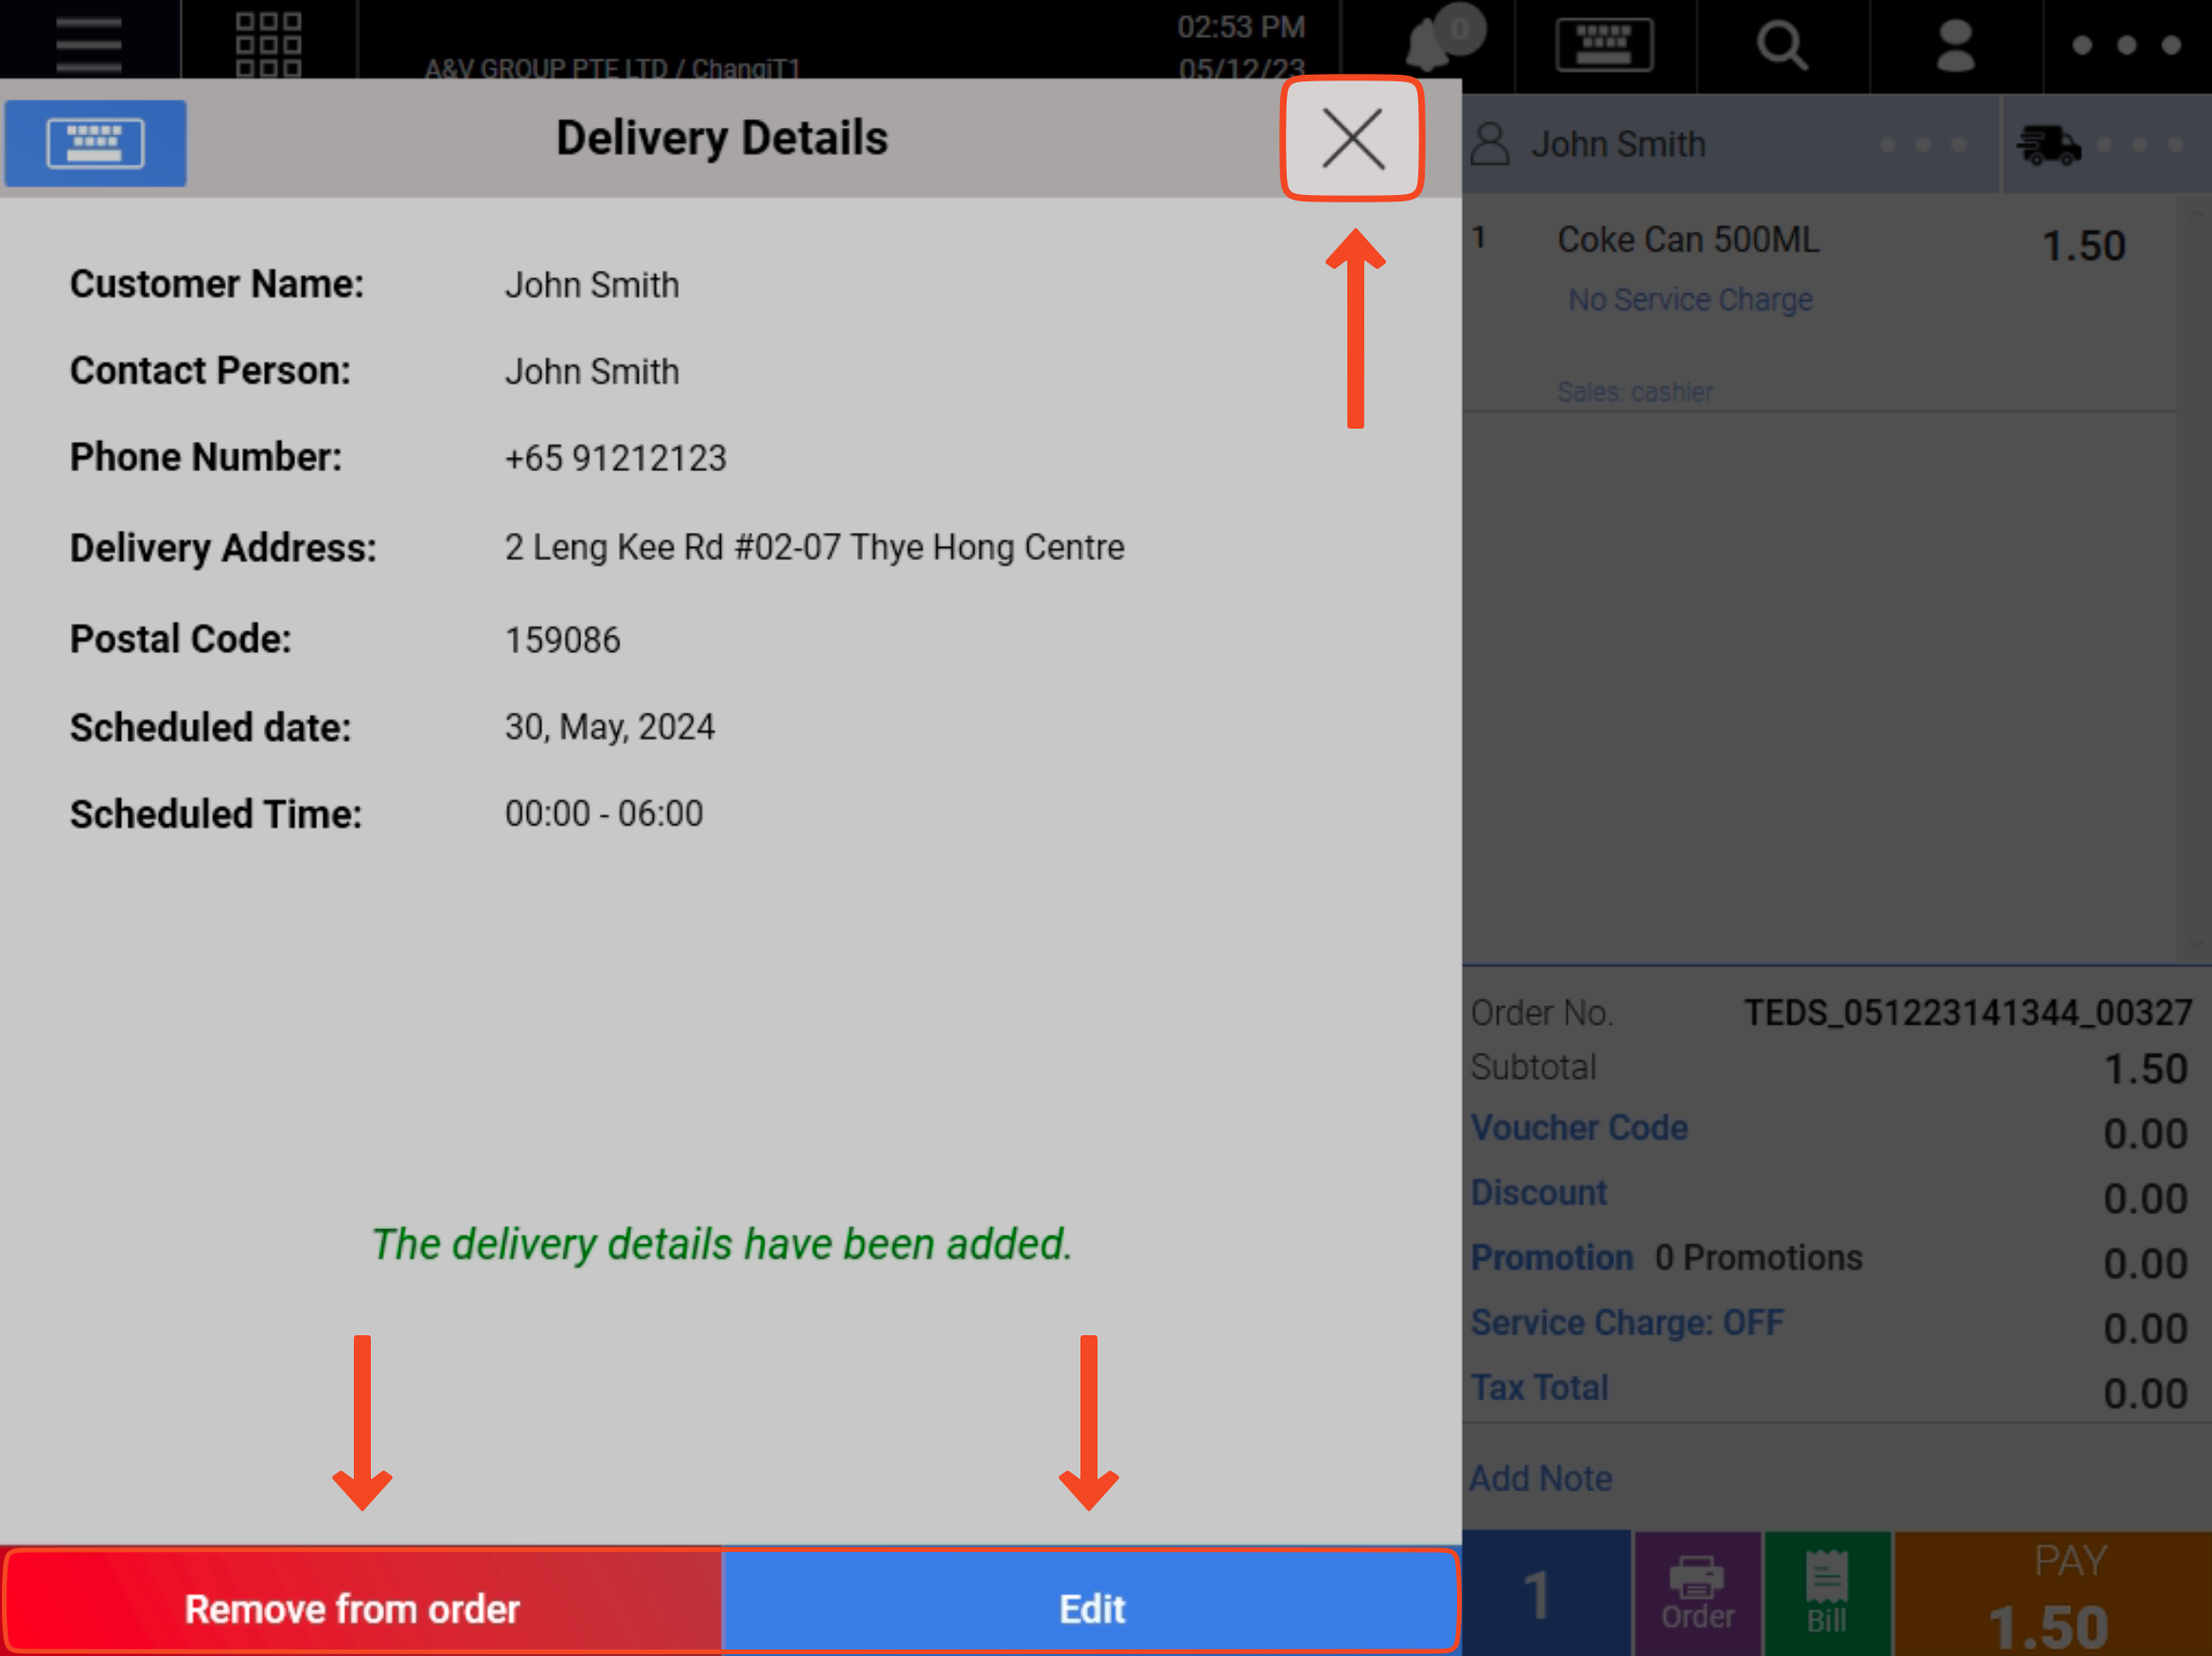
5. Confirm the delivery details.
Click on Remove from order to remove delivery details from this order.
Click on Edit to edit delivery details.
Click on X to return to the sales screen.
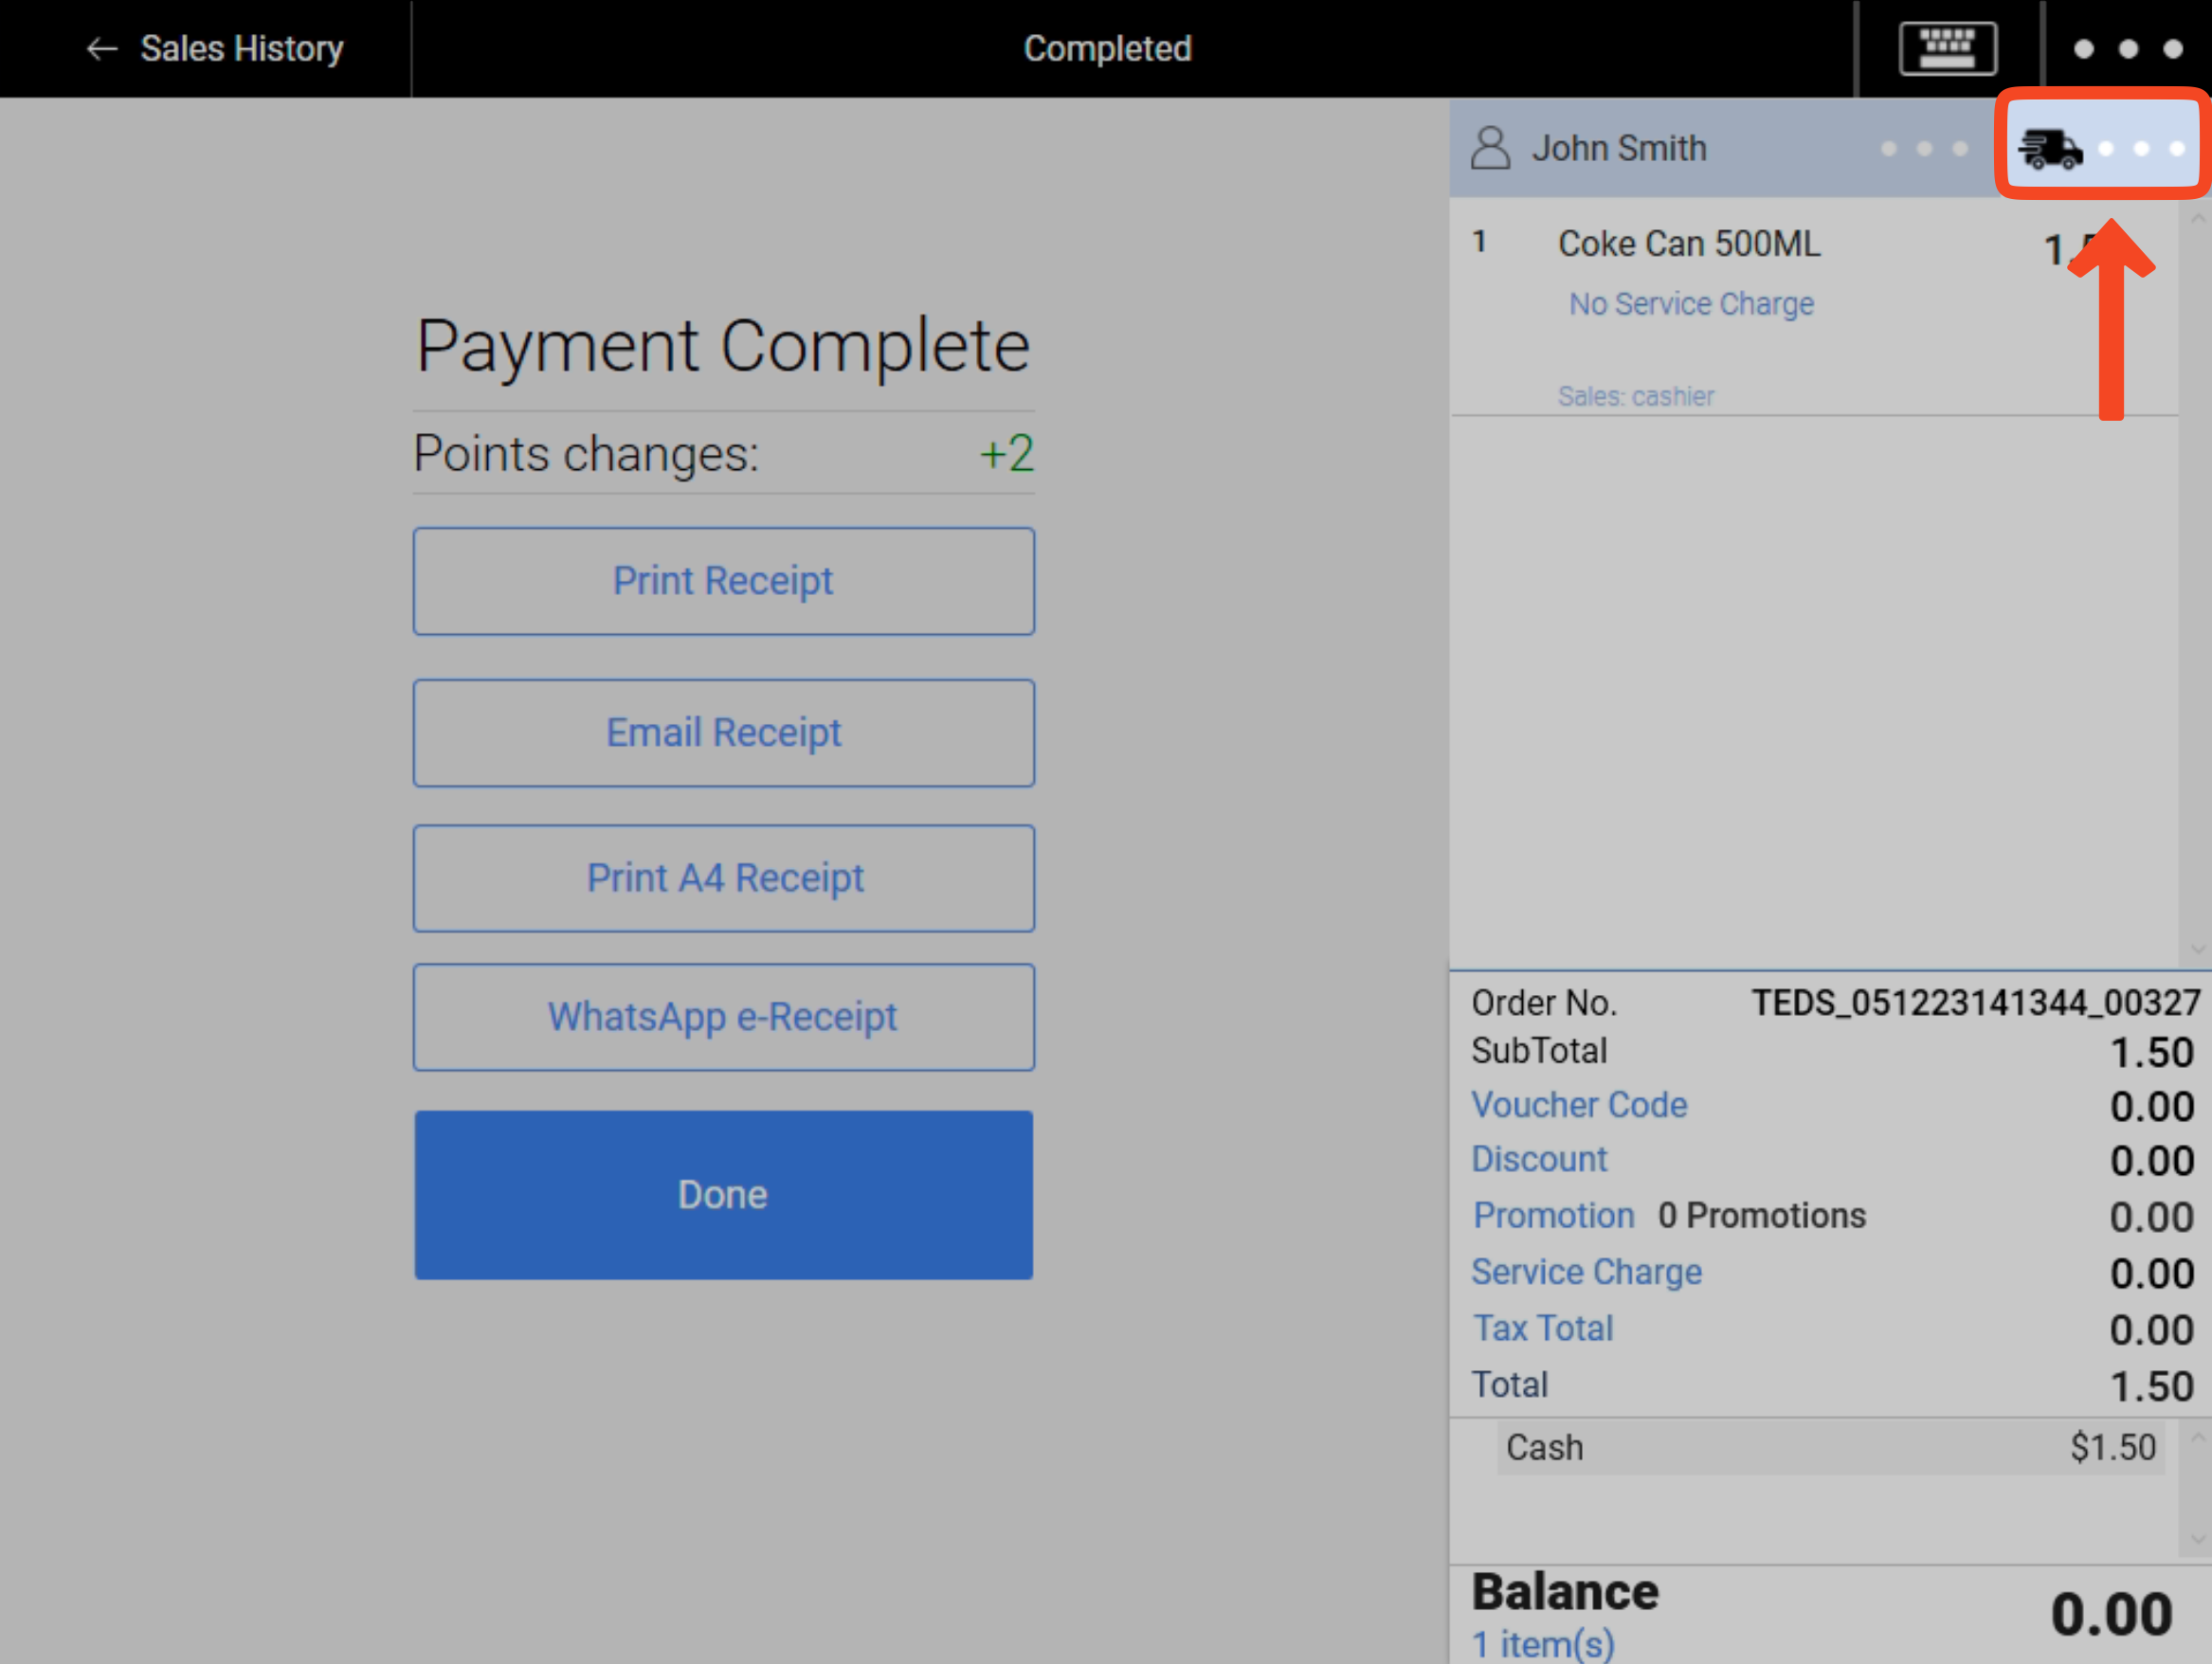
6. On the Sales Screen, users can still access the delivery detail page by clicking on the delivery icon.
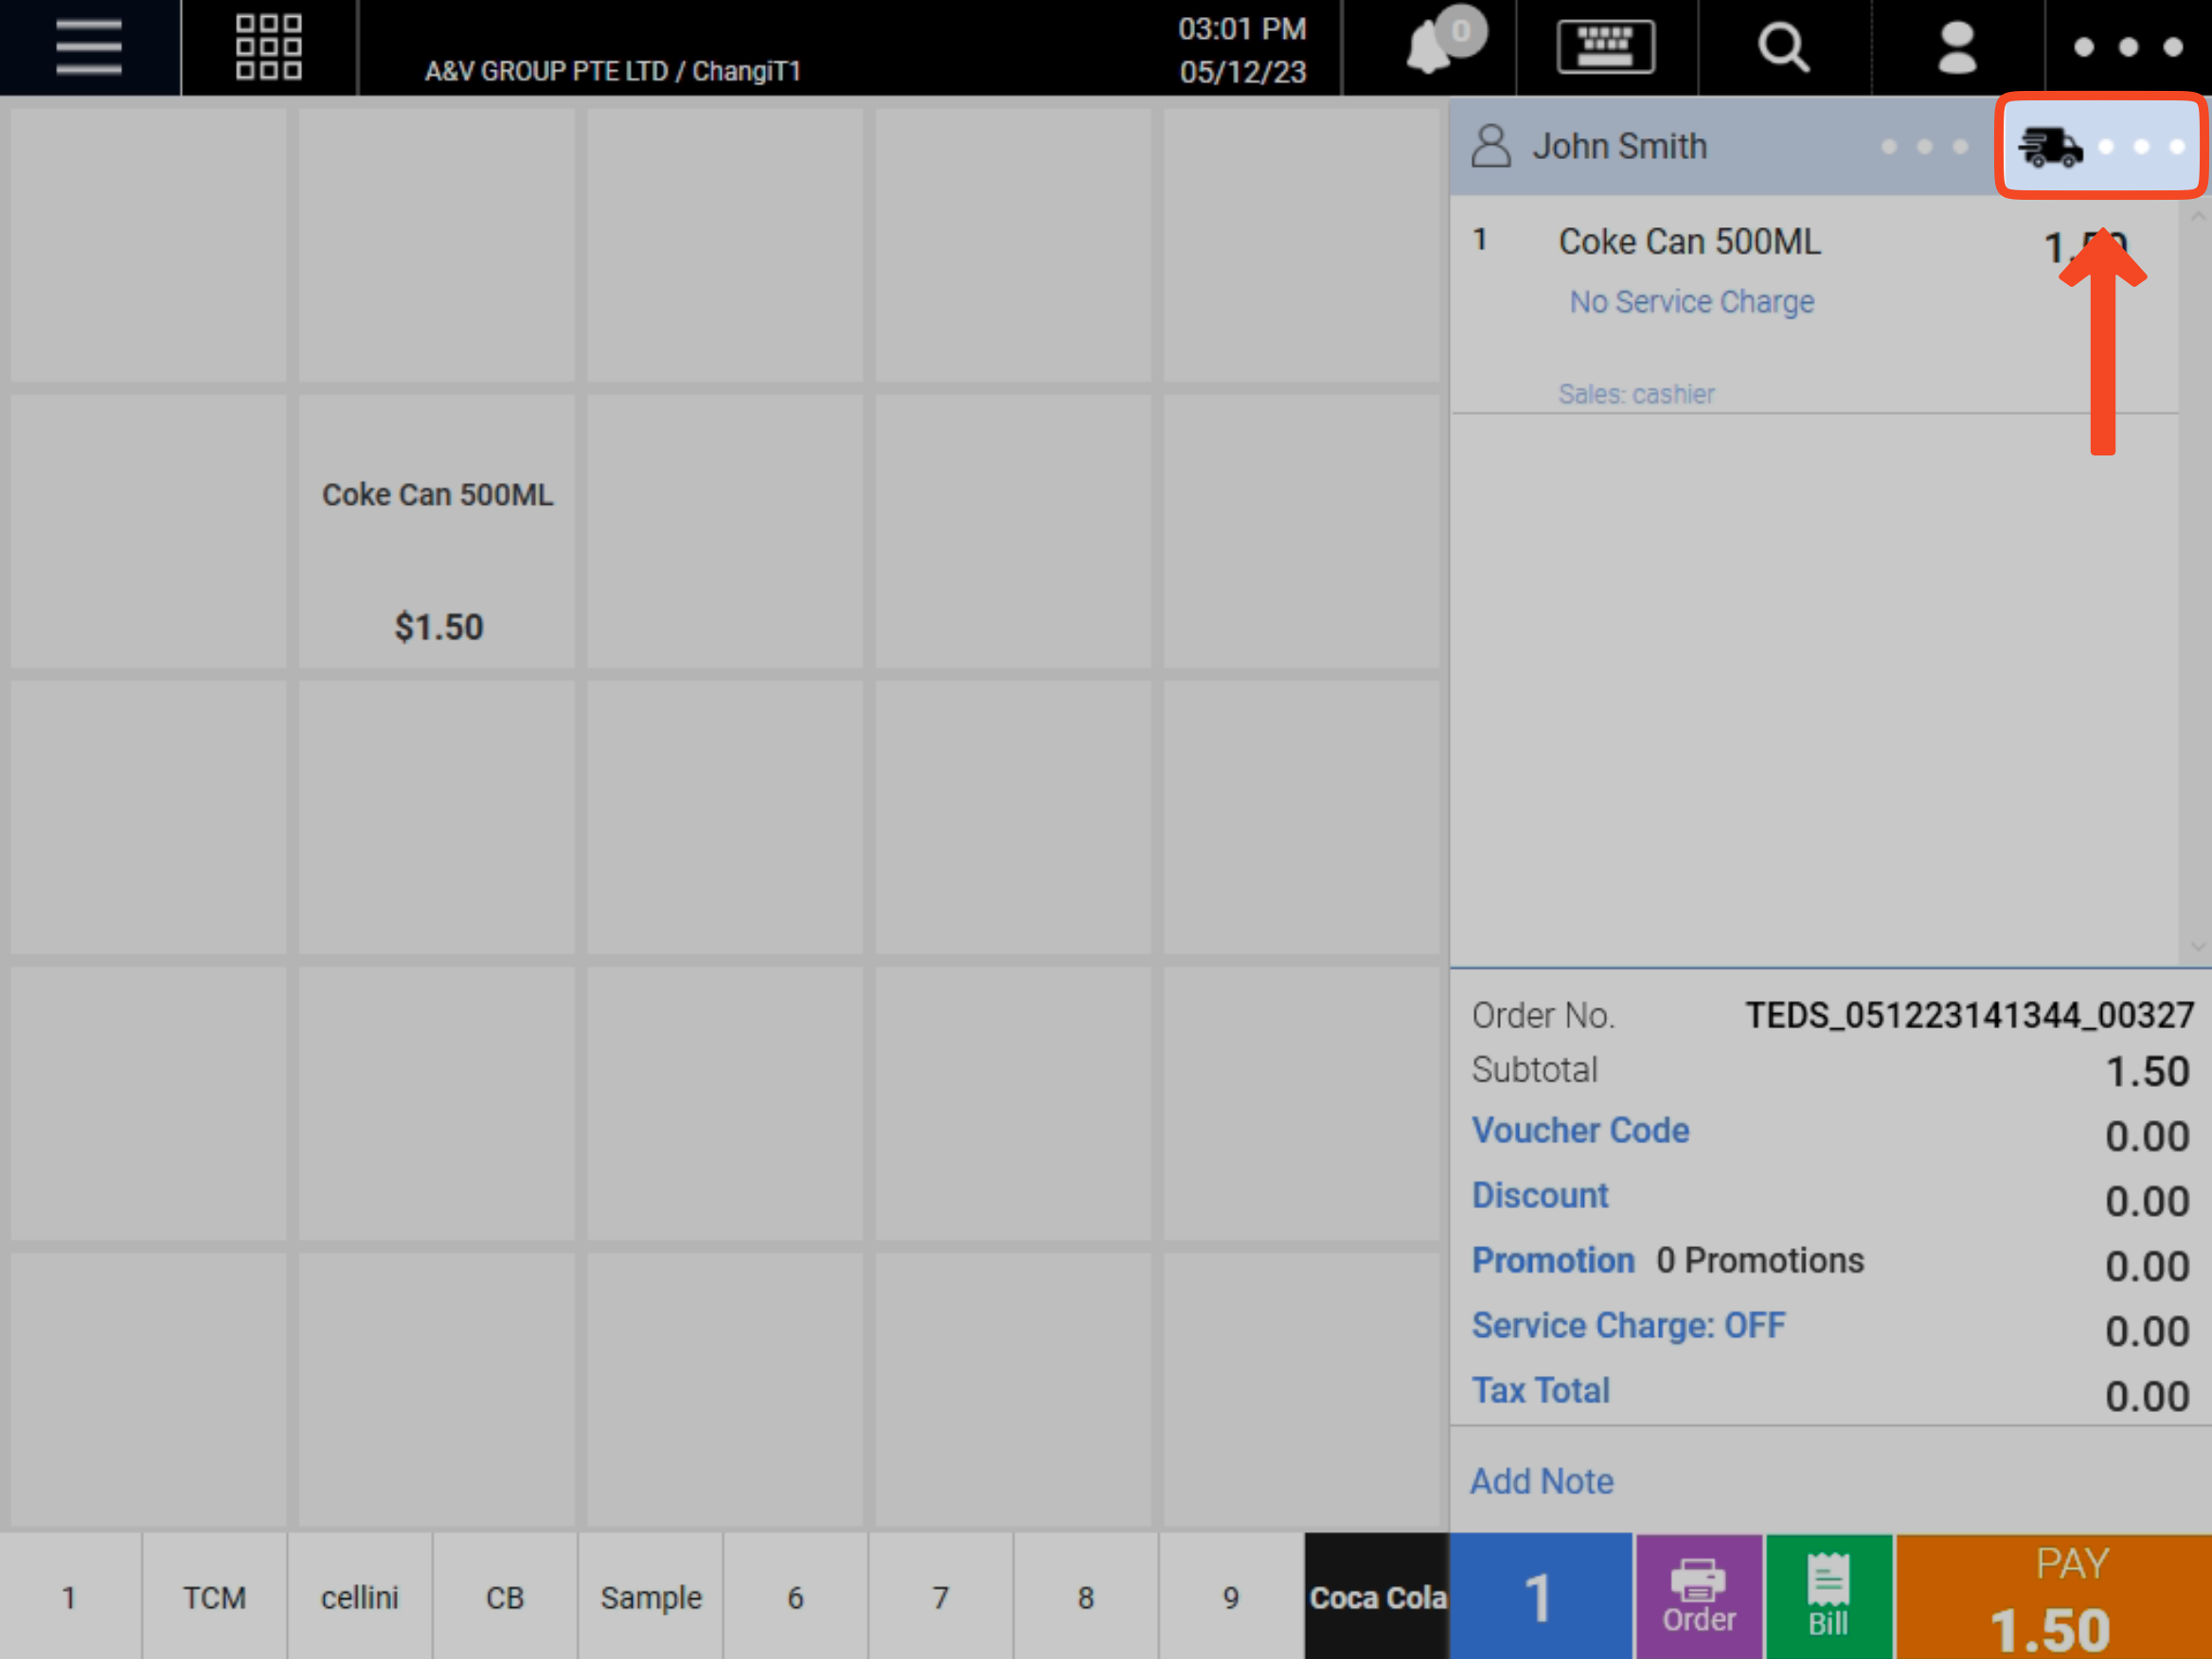
💡 This is the last stage where delivery details are editable. Upon completion of creating a delivery order, delivery details will not be editable on the POS.
7. The payment process for delivery orders remains the same as per normal payment process.
Delivery orders are viewable on the POS through the sales history page and users can proceed to print out the sales receipt to view delivery details.
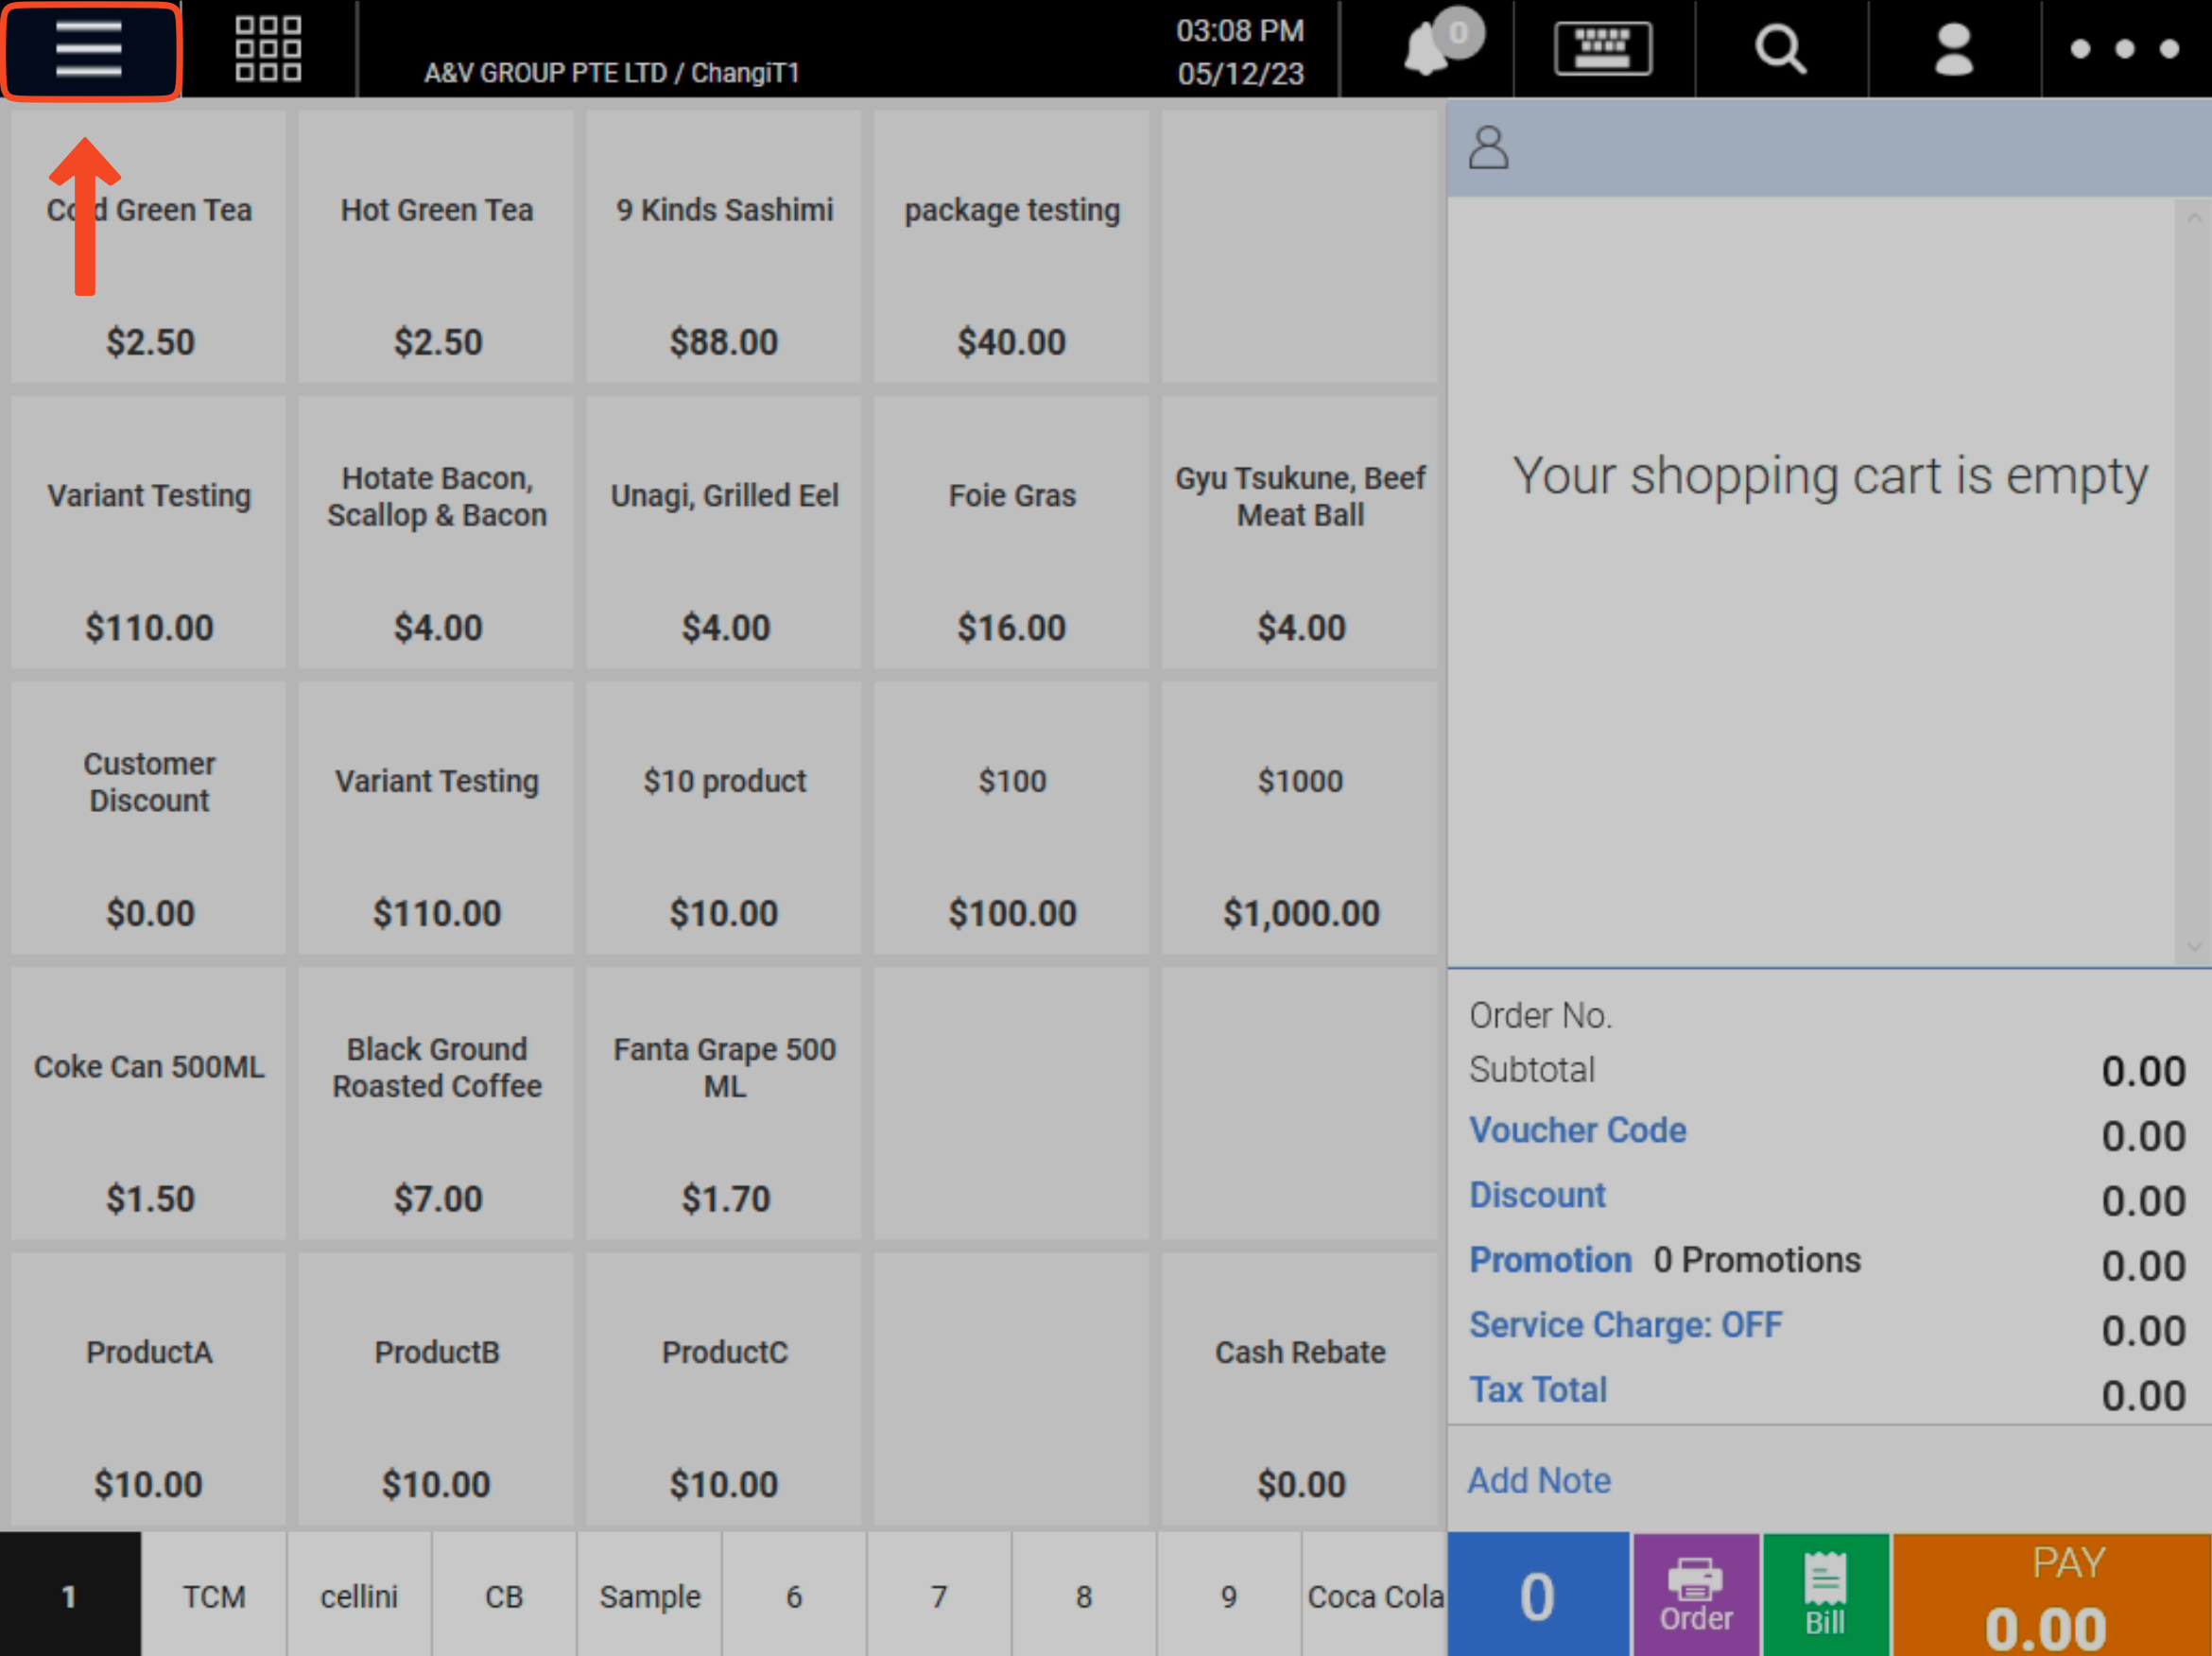
1. Open the 3-line menu page on the top-left hand corner.
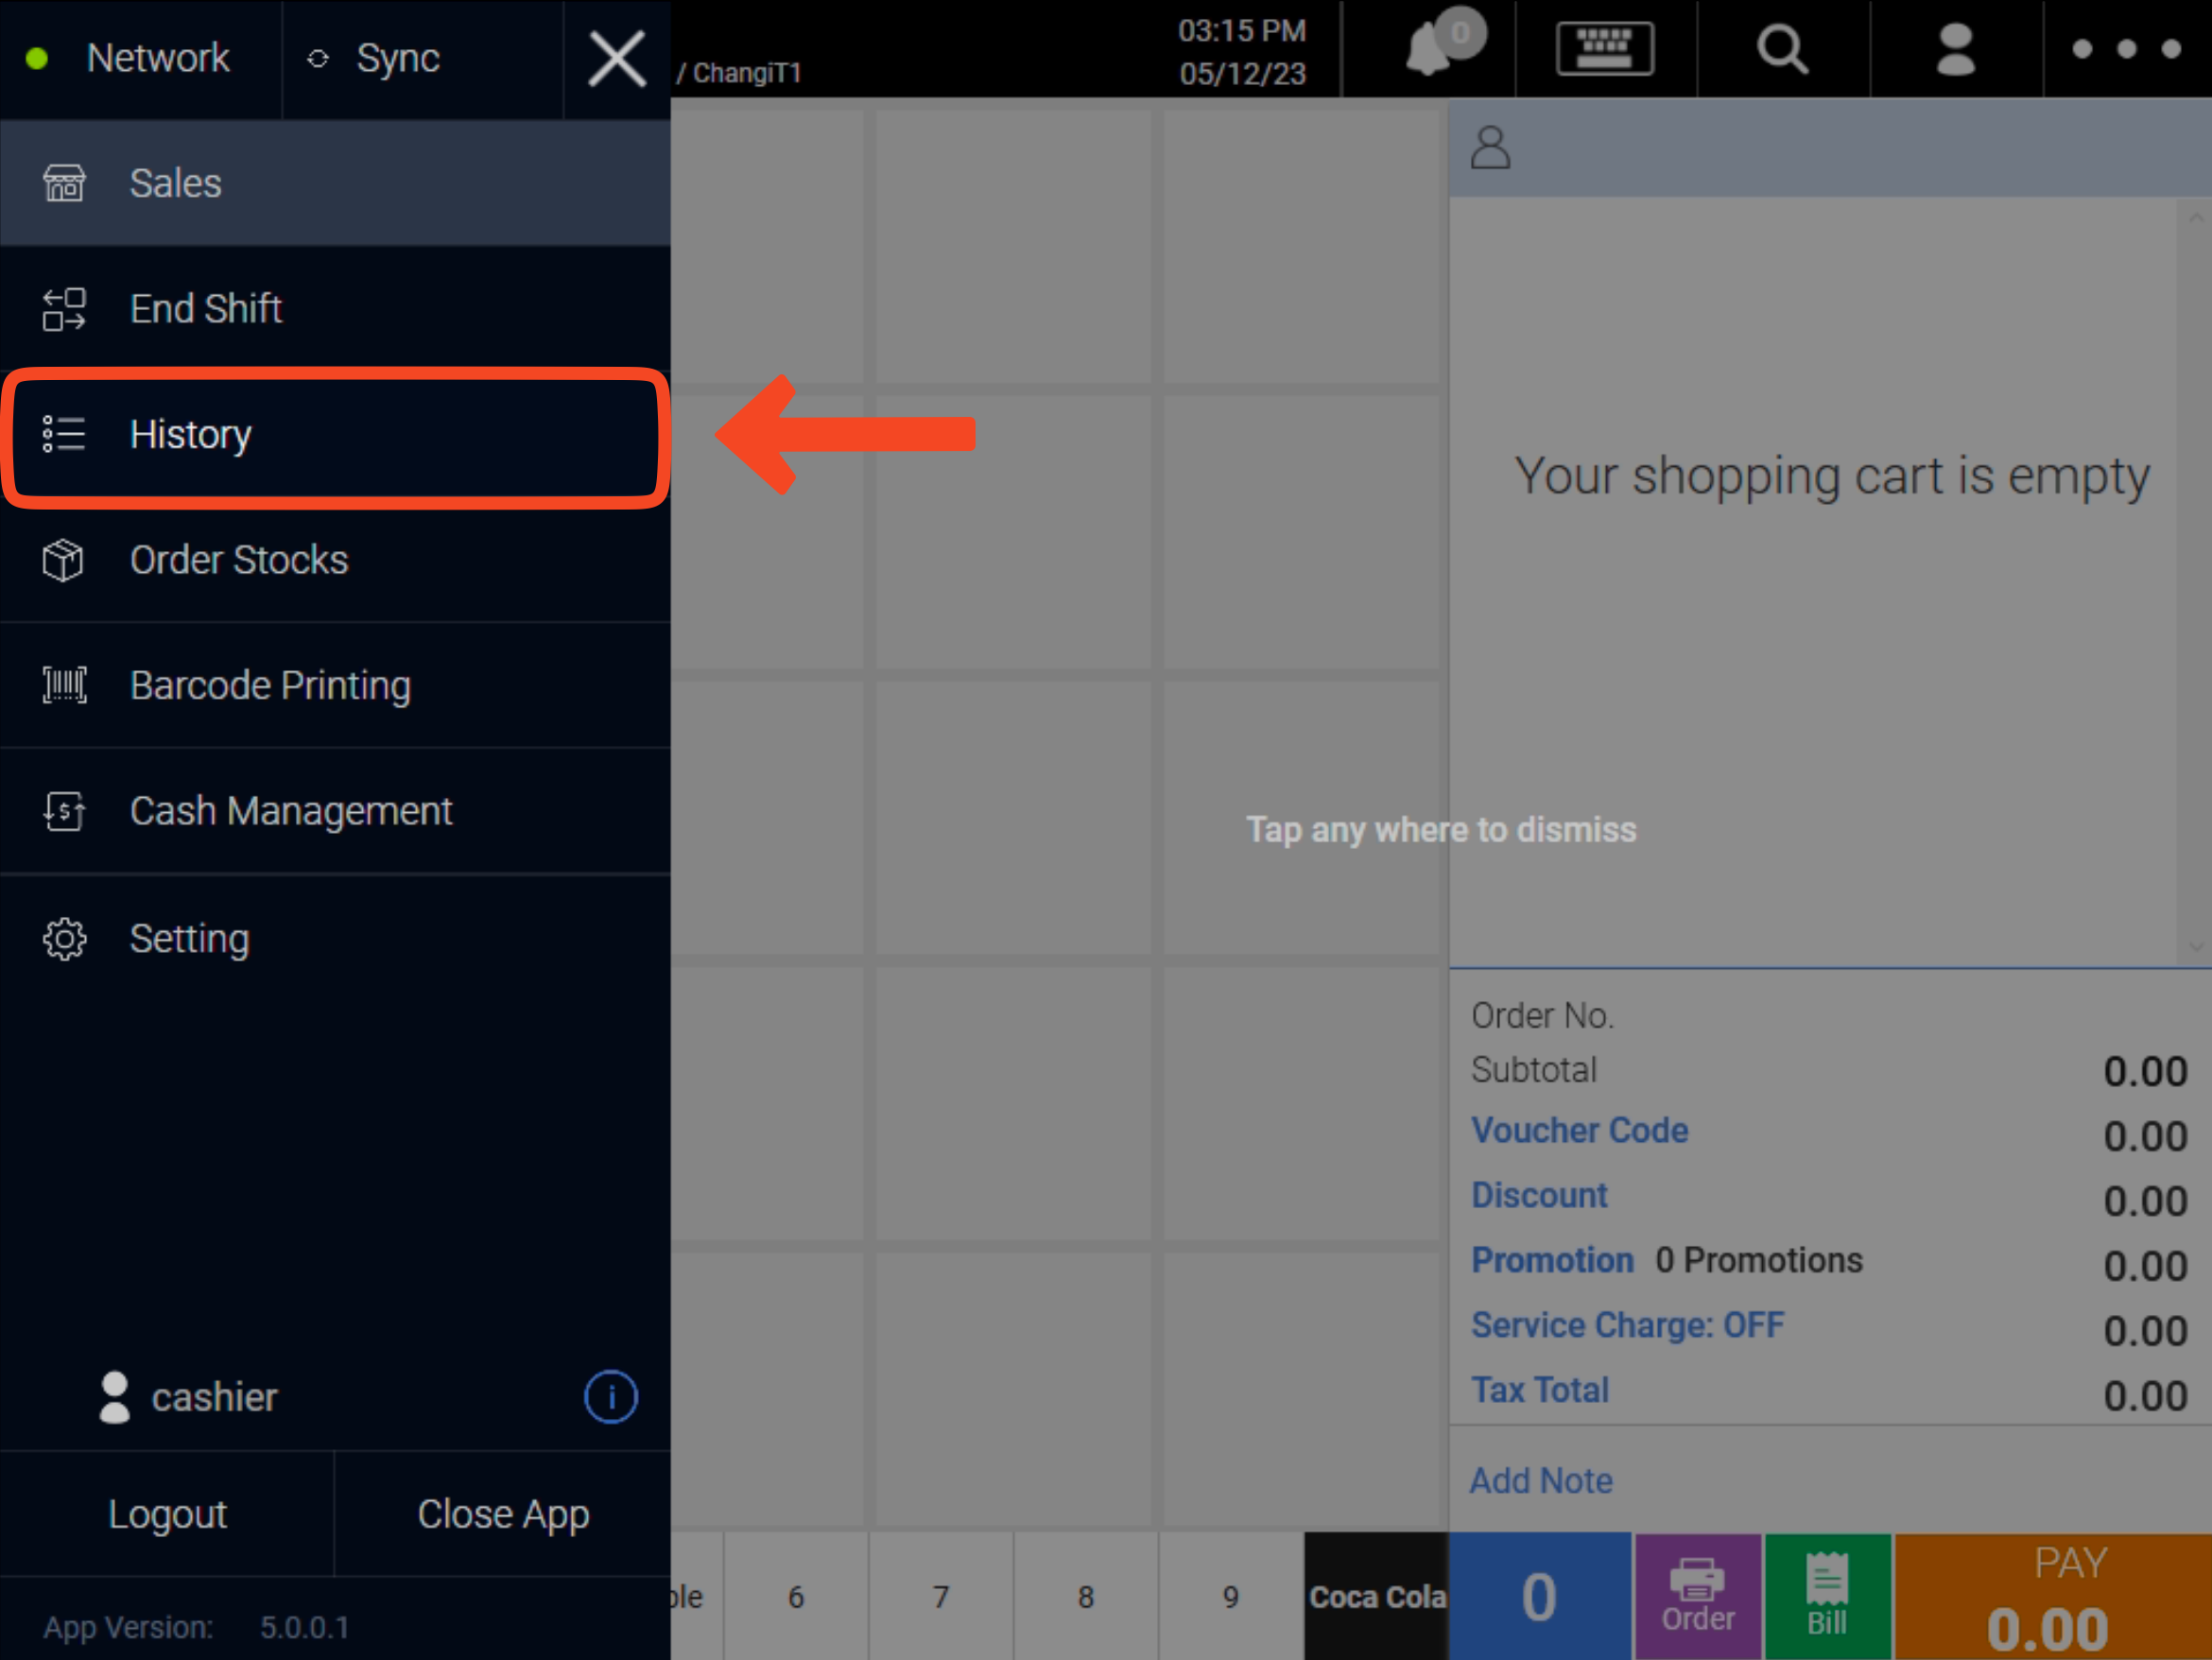
2. Go to History.
3. Select the appropriate transaction or make use of the filters to filter through your list of sales transactions.
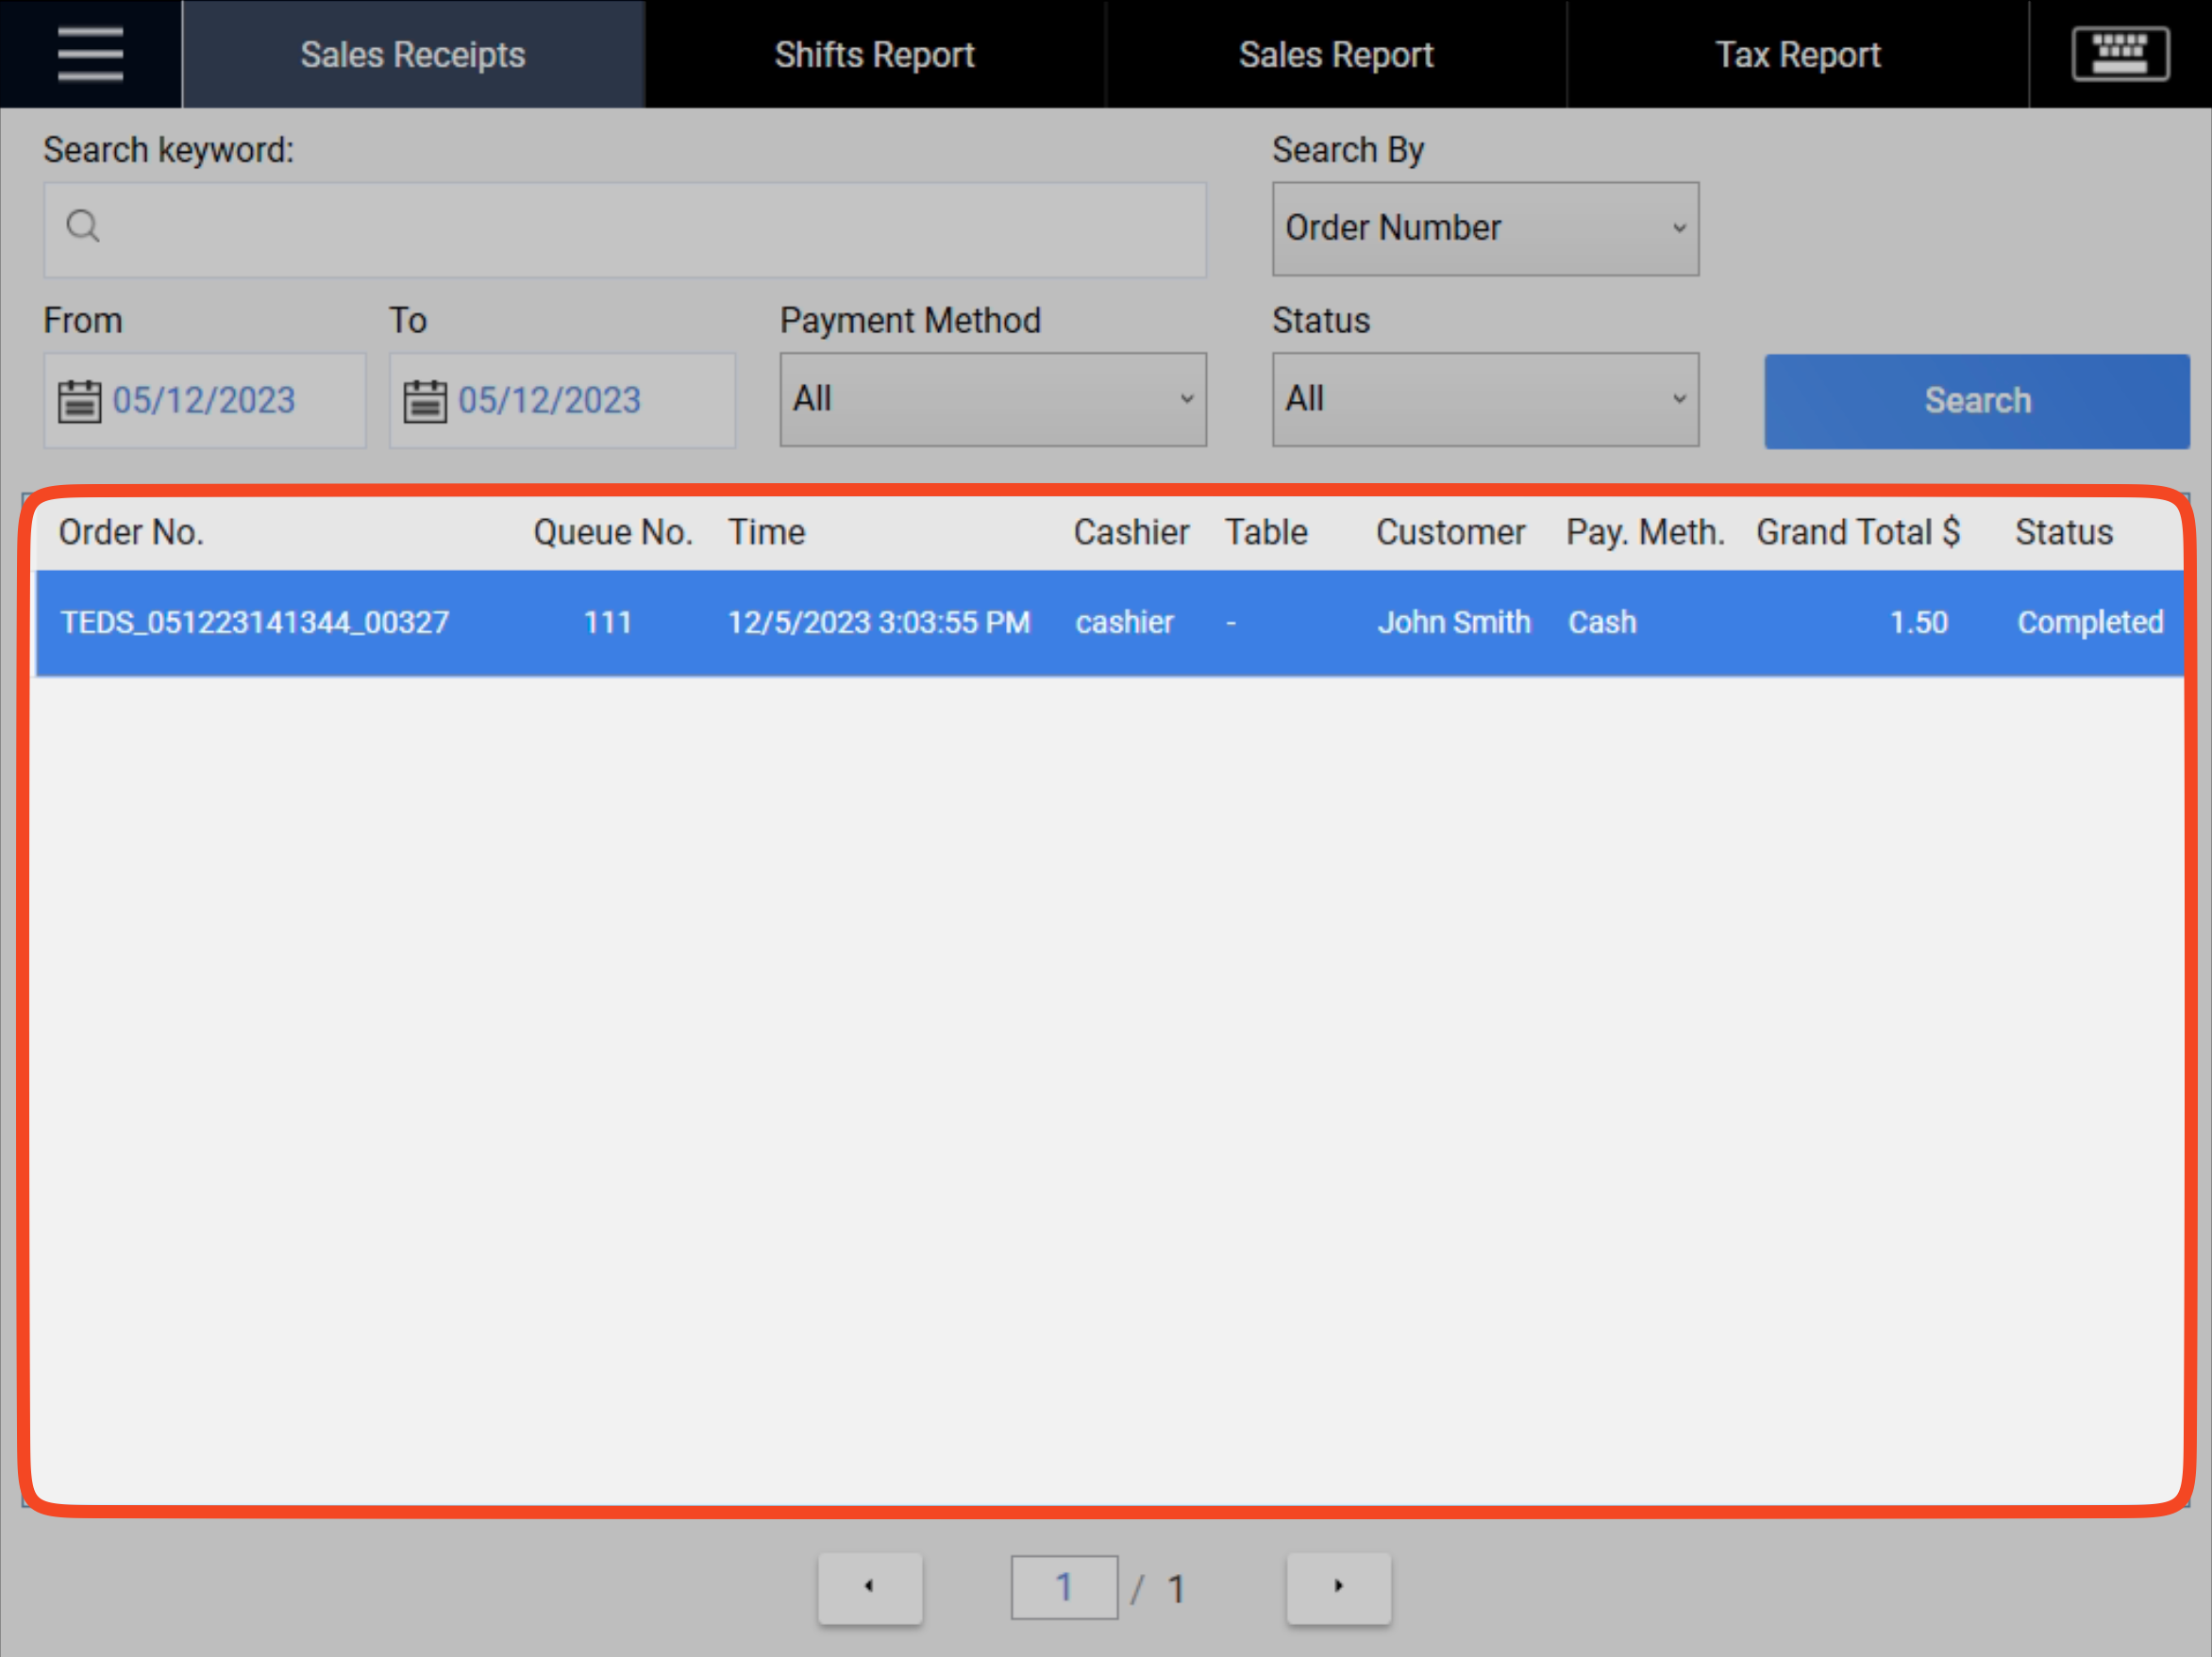
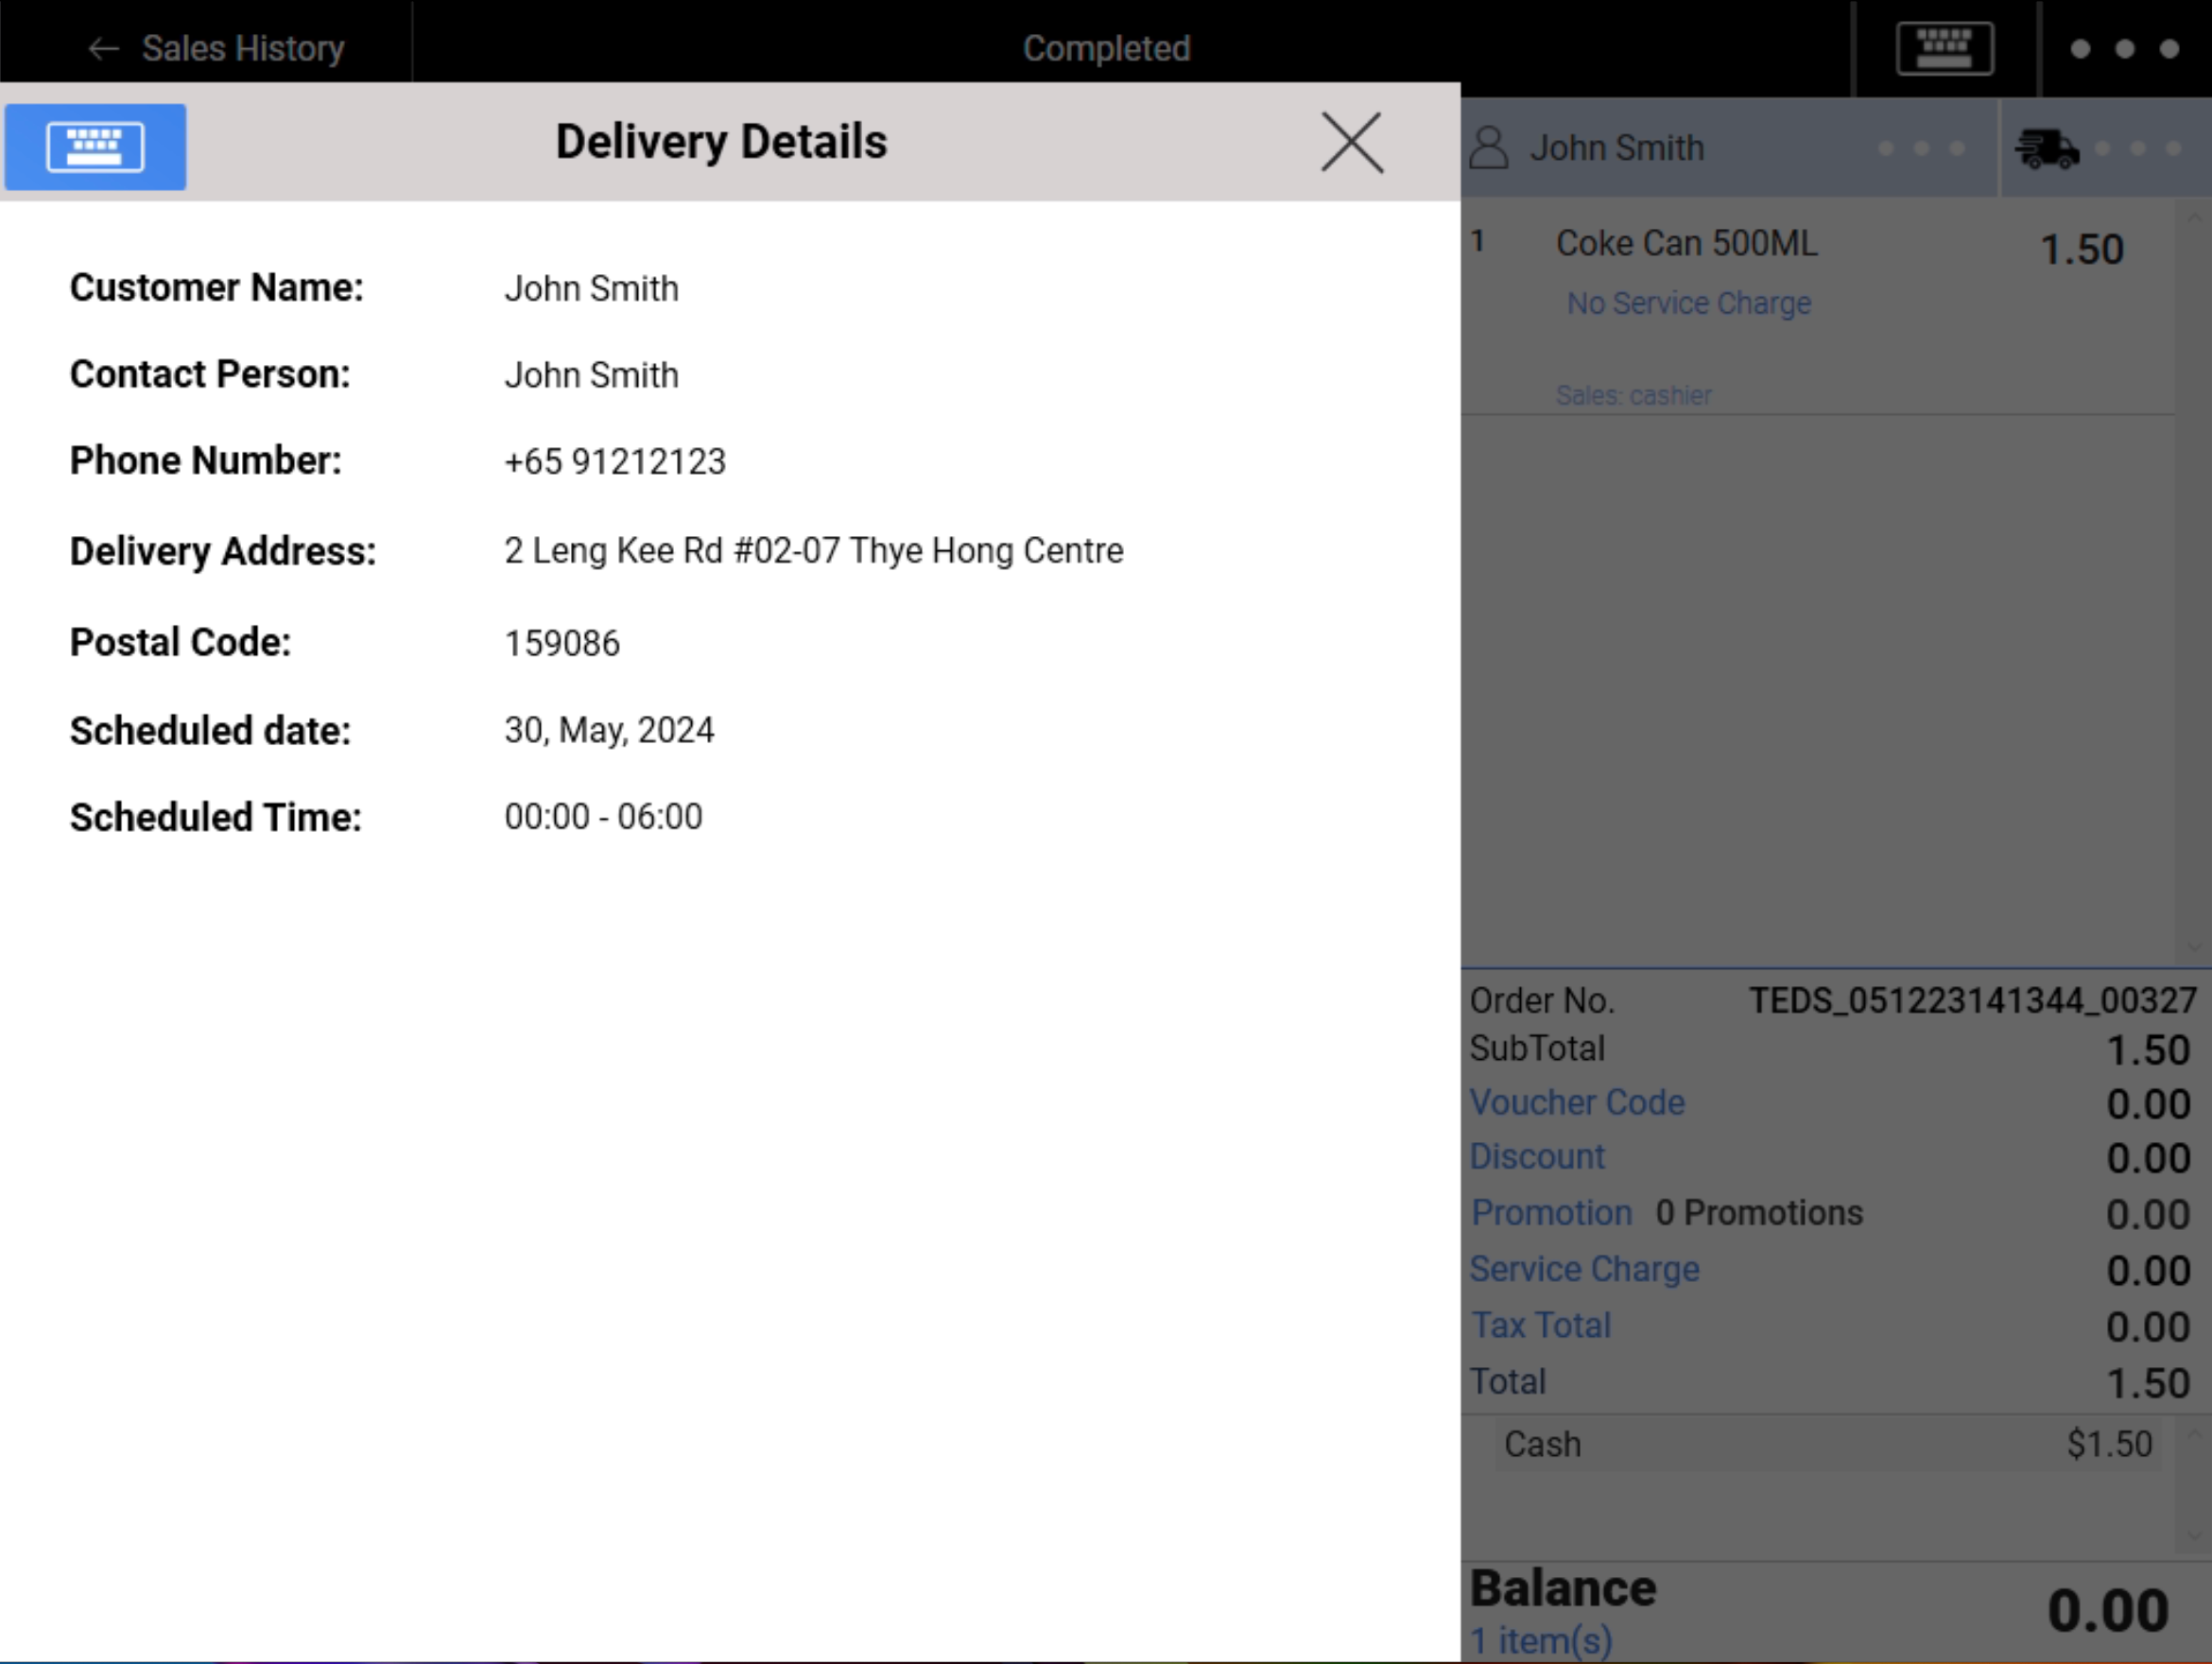
4. Users can access the delivery details of this transaction by clicking on the delivery icon.
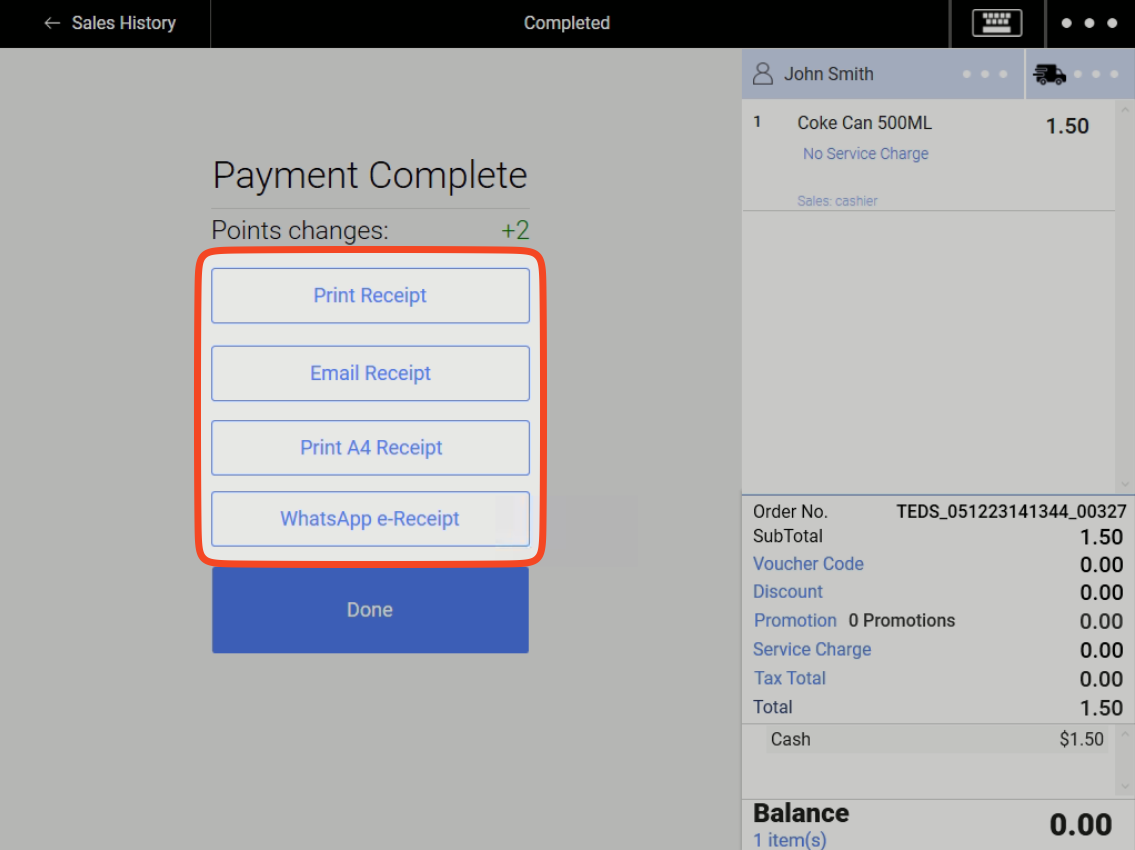
5. Users can access and send delivery details to customers through the receipt printing options on the page as well.
Upon successful creation of delivery orders, backend users can also view the delivery orders on the Back-end Sales Receipt.
There are 2 ways to access sales receipts,
- Through the Invoice Page
- Through Sales Report
💡 Although users can view delivery details on the invoice page, the sales receipt on the back end would reflect more details accurately, hence we would recommend viewing delivery details on the sales receipt.
1. Through Invoice Page
-
- Access Invoice Page
- View Sales Receipts
2. Through Sales Report
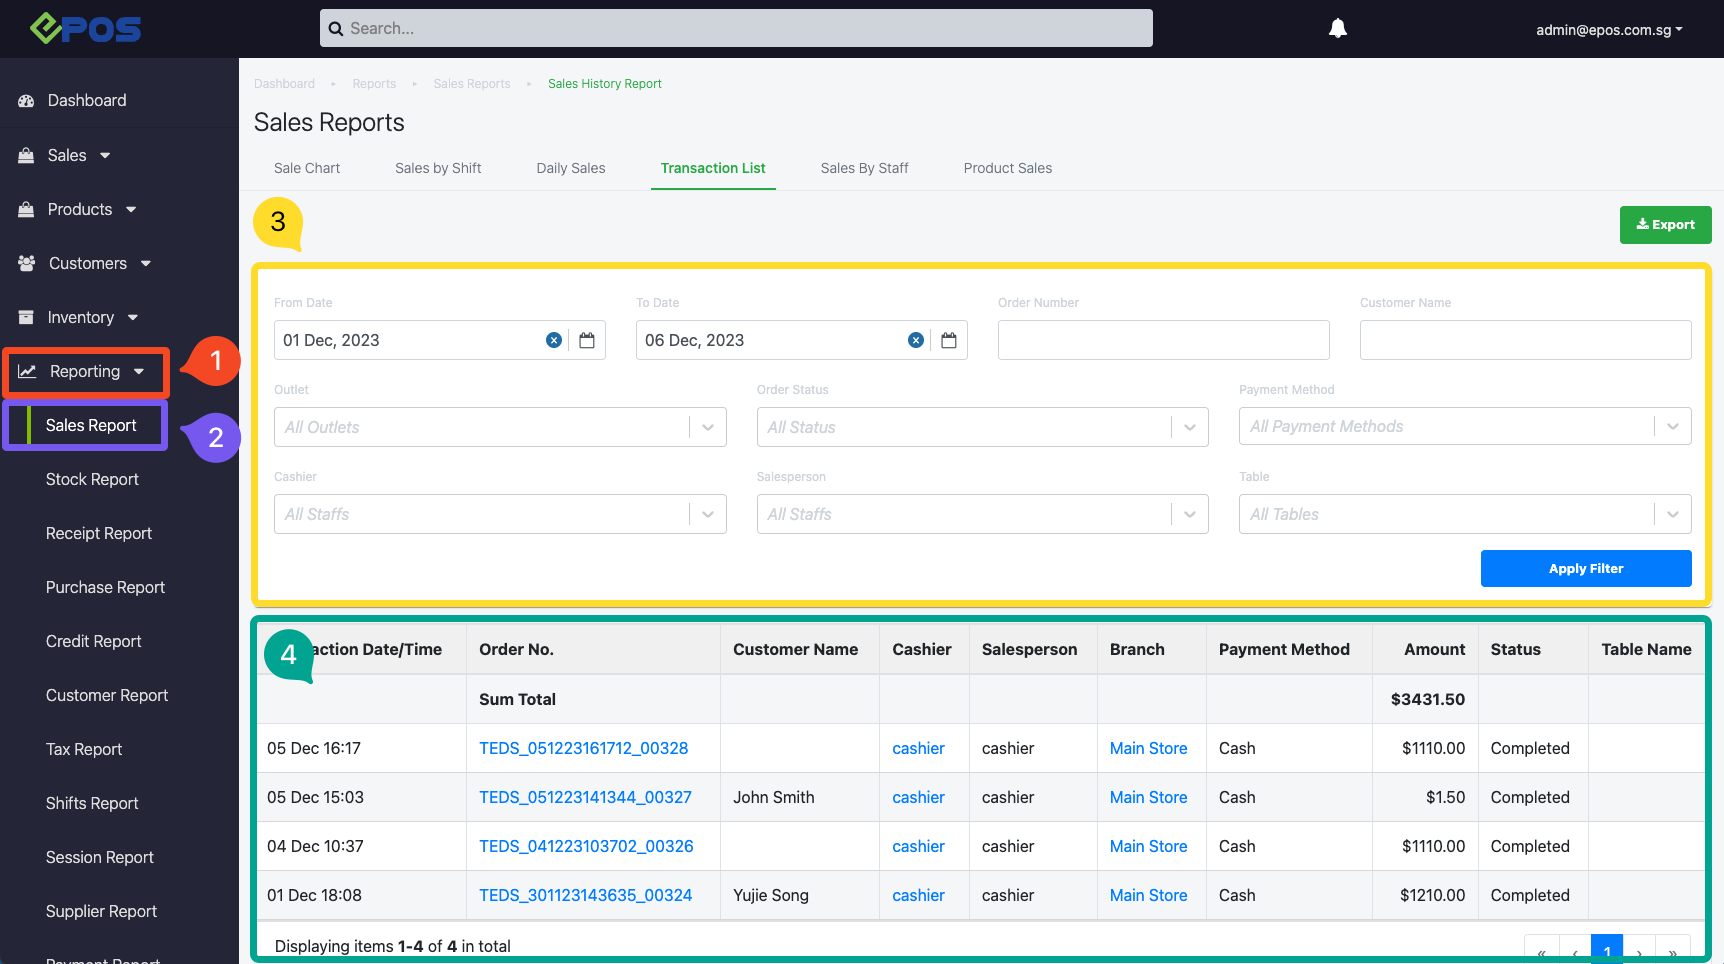
An alternative way to access sales receipts is to navigate from the sales report, following through steps 1 to 4.
-
- Go to Reporting.
- Go to Sales Report.
- Apply relevant filters.
- Click on the transaction Order No. to open up the sales receipt for the delivery order.
- View Sales Receipts
