Hybrid Kiosk POS Mode Interface


⬇ Explore the functionalities of the product page by toggling between tabs below.⬇

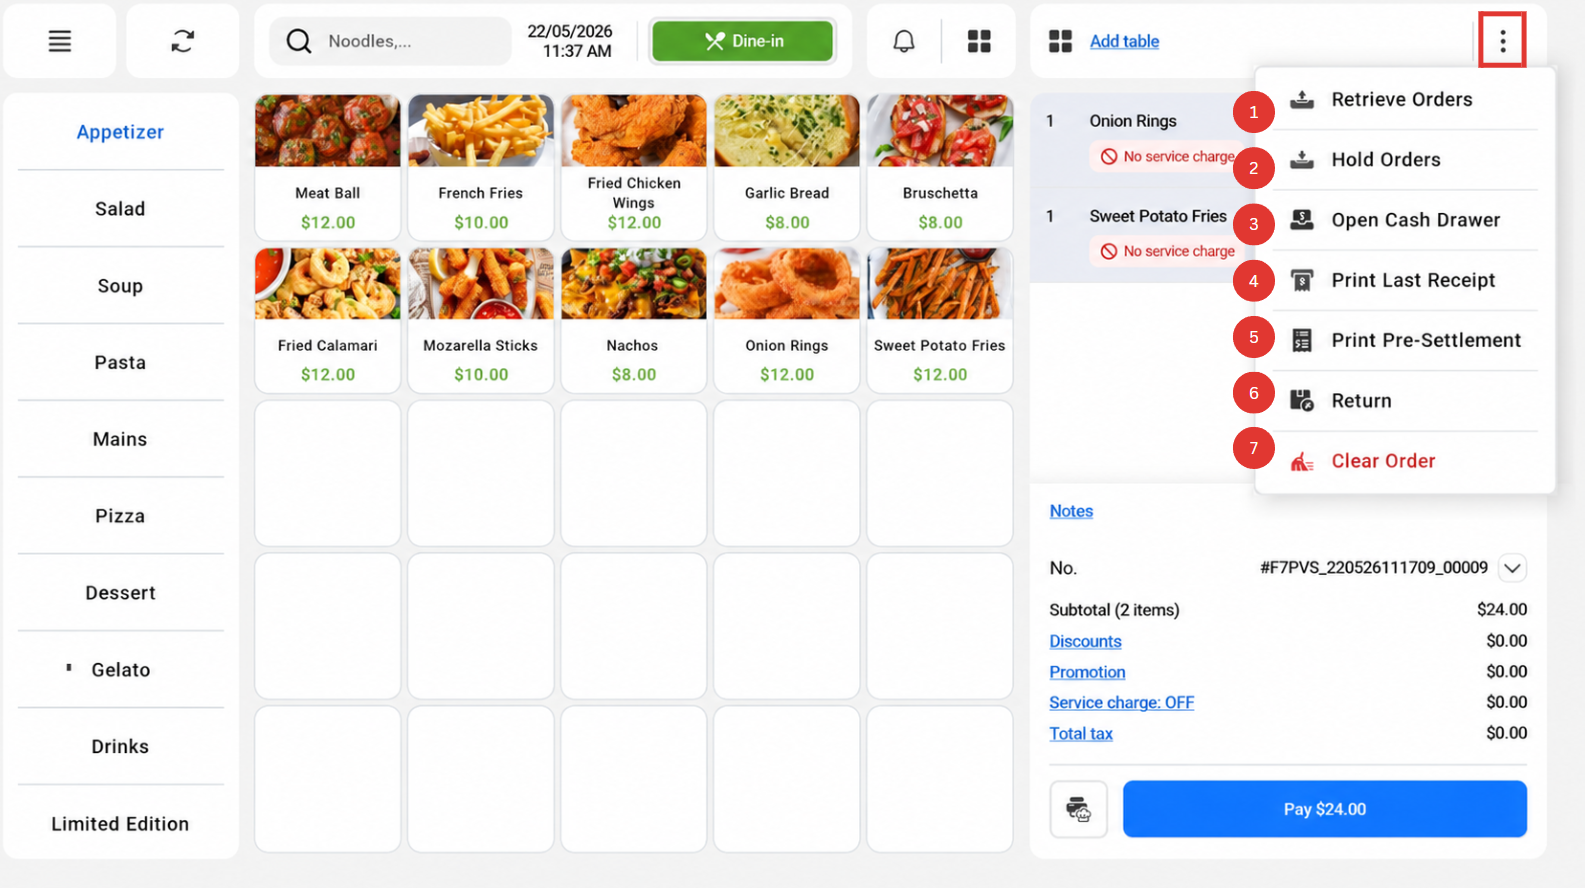
After logging in and starting a shift on EPOS Frontend POS, users will be directed to the main Sales page. The image below shows each function on the main Sales page. 
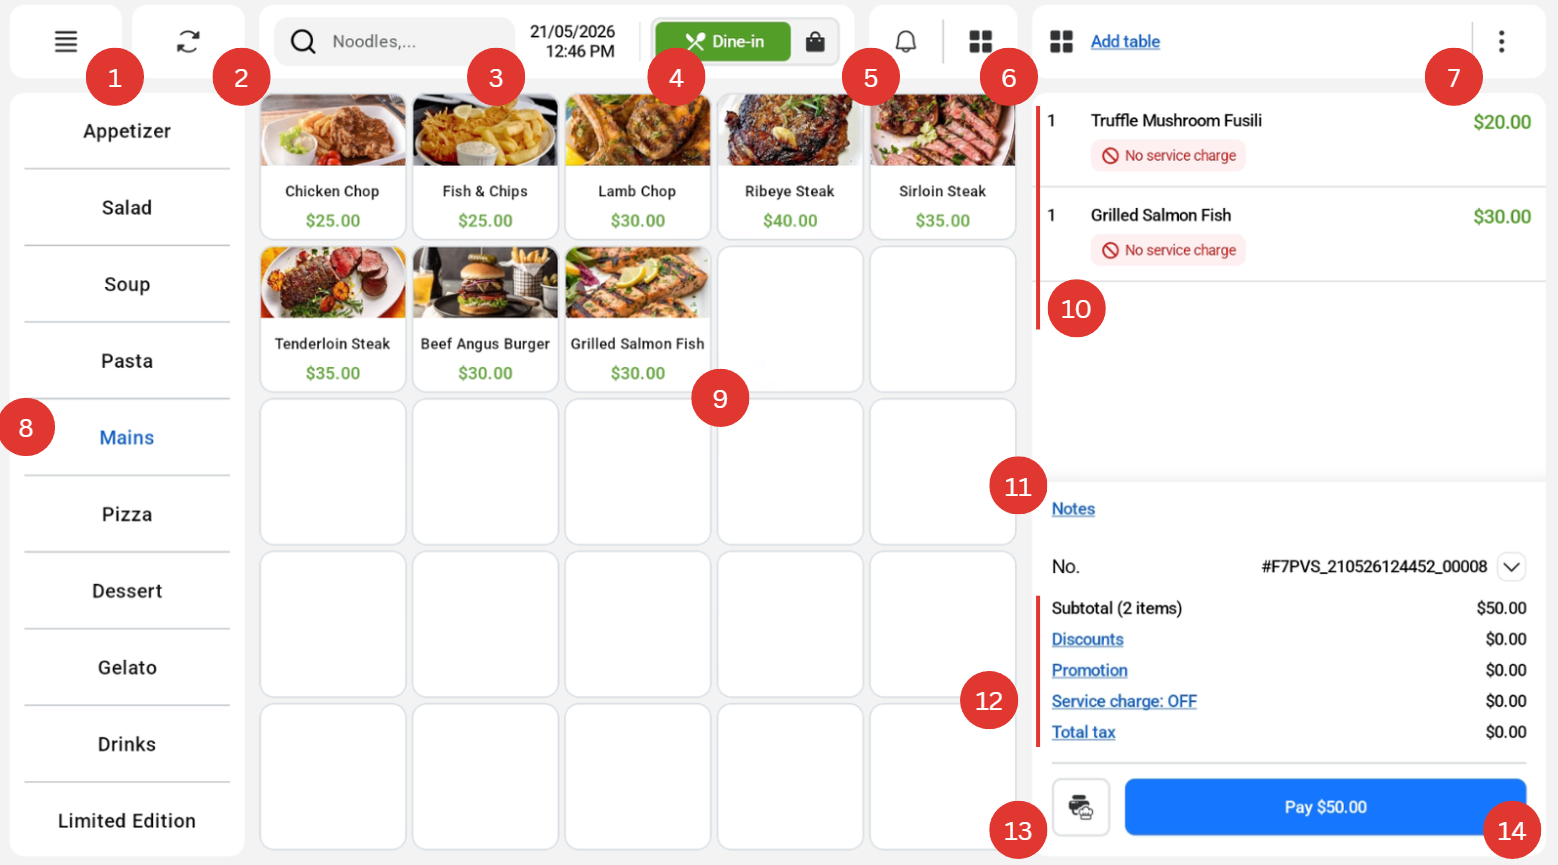
Number

Name

Function

1

POS Sidebar menu

Display menu which allows users to perform EPOS Frontend POS related actions

2

Sync

Allow users to sync any changes made on Backend portal to Frontend POS immediately

3

Search

Allow users to search for existing products and create new product

4

Mode

Allows user to toggle between Dine-in and Takeaway mode

5

Bell Functionality

Allow users to view held orders, delivery orders and their status

6

Table Management

There are 2 table management buttons that allow the user to display table layout and table orders. For the right button, there must be an active order before being able to add table.

7

POS Order menu

Display menu which allows users to perform order related actions

8

Toggle Pages

Allow users to toggle between the different menu categories

9

Add Products

Allow users to add items into the cart

10

Order Information

Display products in order cart, order number, subtotal

11

Notes

Allow users to add notes for their order

12

Order Information

Displays order number, subtotal, discount, promotion, service charge and tax. Users can click into those individually to configure.

13

Send to Kitchen

Allow users to send items to the kitchen printer and KDS manually 

14

Pay

Allow users to check out the current order and proceed to the payment page


Users can click on the hamburger icon on the top left to access the POS Sidebar menu. 

The image below shows each function on the POS Sidebar menu. 

Number

Name 

Function

1. 

Logo

Logo will be displayed as the logo set for receipt

2. 

Sales Screen

Direct users to the Sales Screen

3. 

Shift Management

Allow users to end the current shift

4. 

Reports

Allow users to view transactions performed

5. 

Cash Management

Allow users to perform cash in/cash out functions

6. 

Settings

Direct users to the Settings page

7. 

Backend Portal

Direct users to EPOS Backend Portal

8. 

Toggle Mode

Allow users to toggle between POS and Kiosk mode. However, this cannot be done if there are active orders

9. 

User Account Name

The user’s account name is displayed here. In this case, it is ‘Chi Mini’.

10. 

Logout

Allow users to log out from current session


Users can click on the icon with the 3 vertical dots on the top right to access the POS Order menu.

The image below shows each function on the POS Order menu.

Number

Name

Function

1. 

Retrieve Orders

Allow users to retrieve sales which are set aside

2. 

Hold Order

Allow users to set their sales aside

3.

Open Cash Drawer

Allow users to open the cash drawer manually. This will be recorded at the end shift report and backend shift report.

4. 

Print last Receipt

Allow users to print receipt of the most recent transaction

5. 

Print pre-settlement

Allow user to print pre-settlement receipt

6. 

Return

Allow users to perform order returns

7. 

Clear Order

Allow users to clear all the products in the order cart