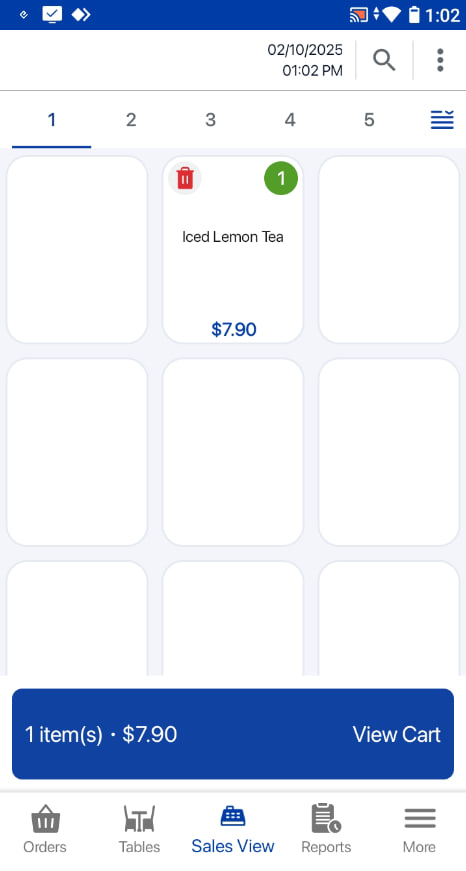
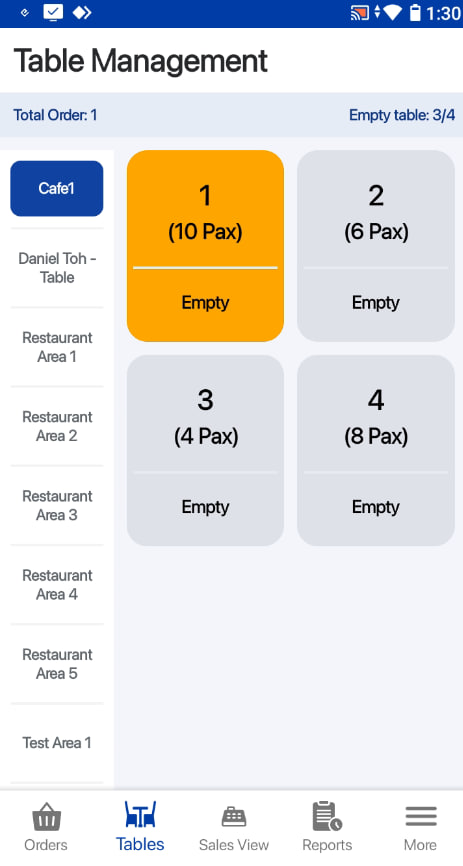
Users can tag tables to orders.
On default table view, users can select an area and table, click on the Take Order button.
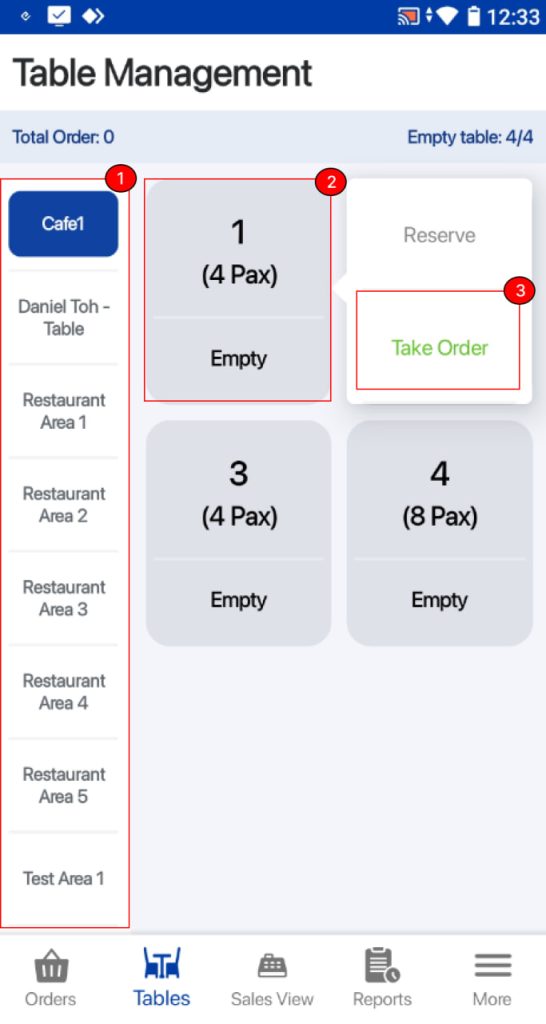

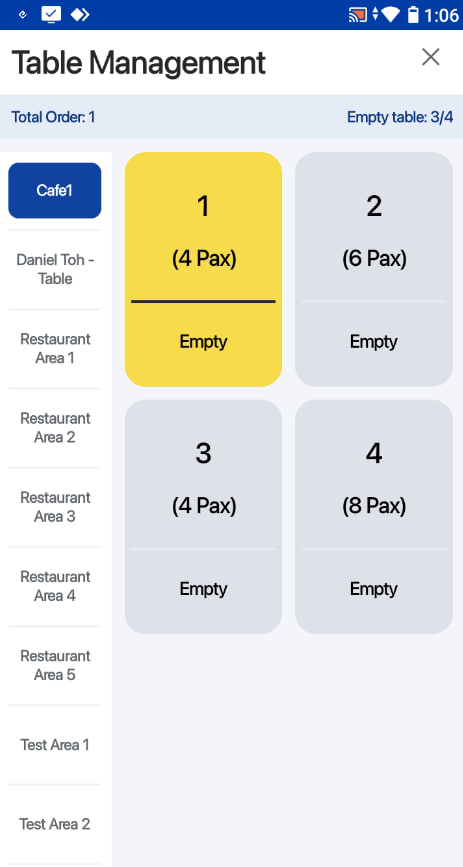
- Access the Bottom Navigation Bar Menu & select “Tables” tab
- Select the Area
- Select any table
- Tap on “Take Order”
- Key in number of pax
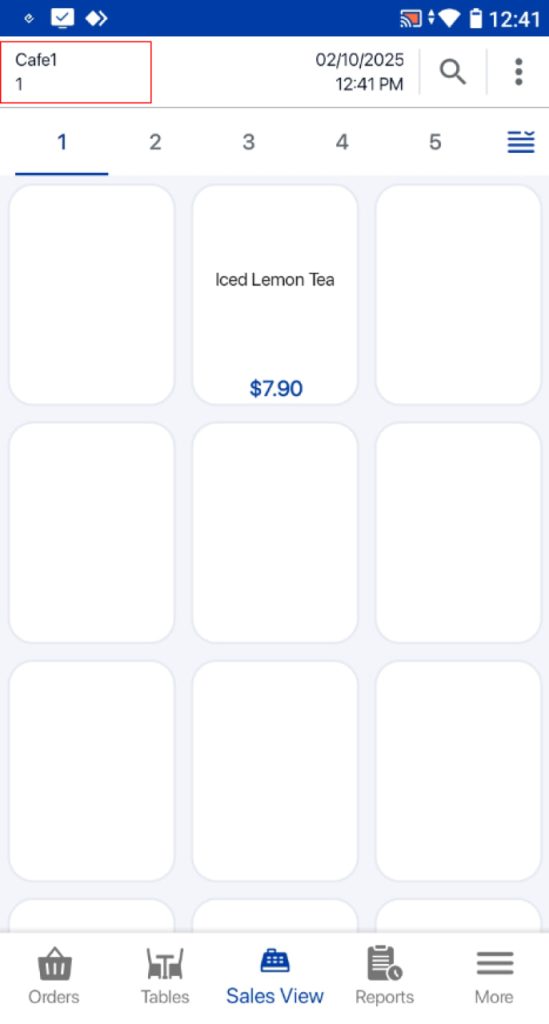
The tagged table will be displayed on the sales screen.
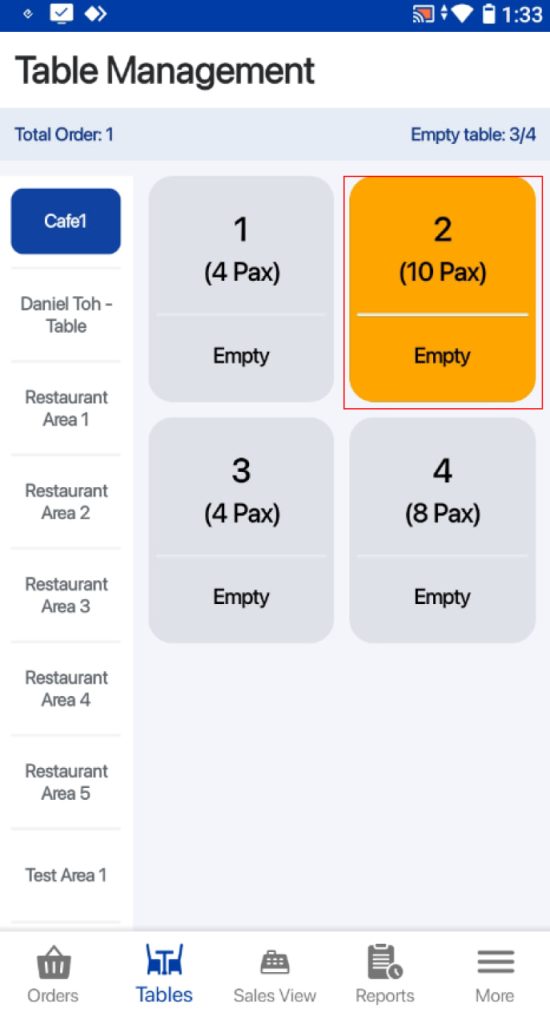
💡 This is a feature configurable on the backend, under table management – Table Colour.
Users can set the duration for tables to turn yellow at the first duration field and orange at the second duration field.
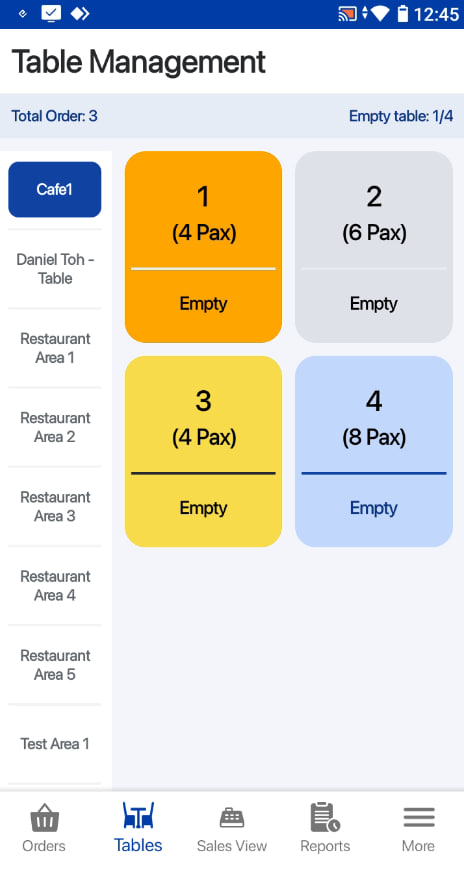
- Light Blue: The timer starts and the table turns light blue when staff click “Take Order”.
- Yellow: The table will turn yellow after the number of minutes specified in the first duration field in the backend.
- Orange: The table will turn orange after the number of minutes specified in the second duration field in the backend.
The timer and color progression will stop once payment is made and the table becomes vacant again.
Users can hold orders made for each table.
- Users can tag a table and enter all of the products into the order cart first.
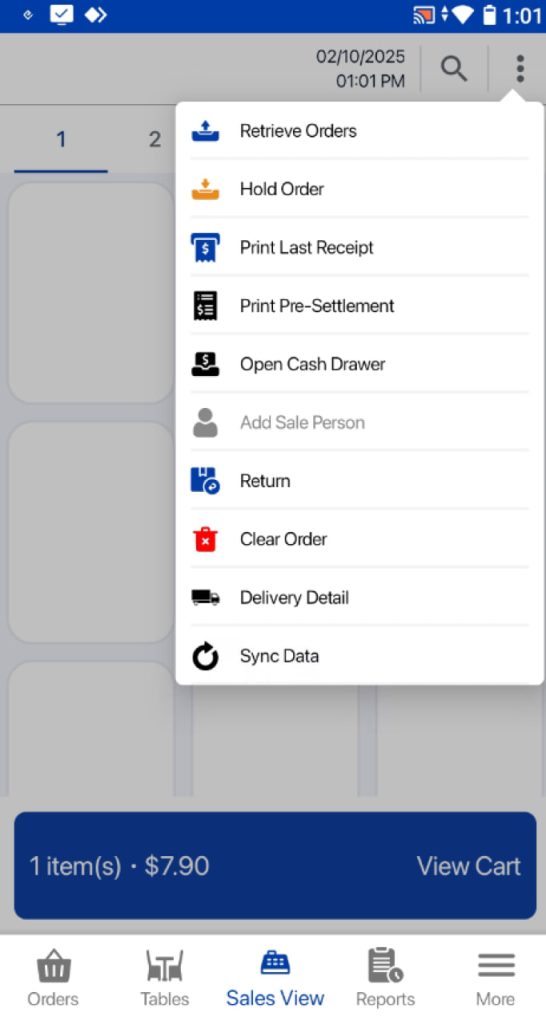
2. After that, users can click on the  icon to access the order menu.
3. Users can navigate to the Hold Order tab and click on it.
4. The order will be displayed in the table management view.
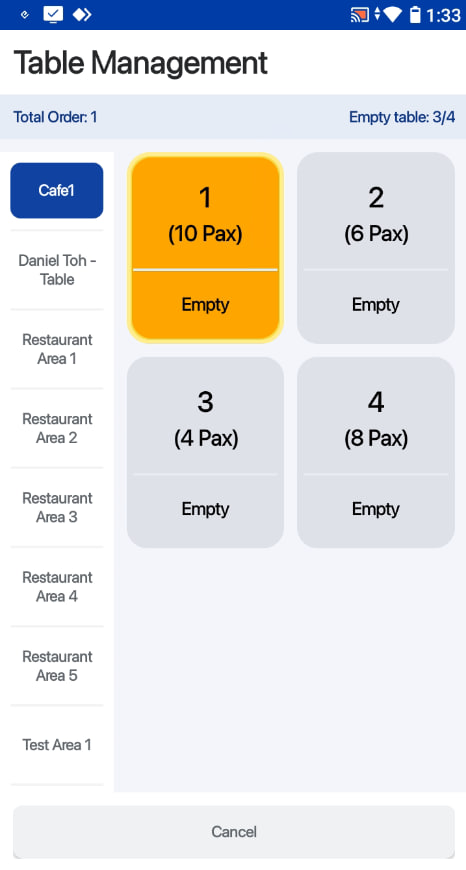
Users can retrieve orders made for each table.
- Users can click on the
 icon in the bottom navigation bar to access the table management.
2. Users can select an area and table which they would like to retrieve the order from.
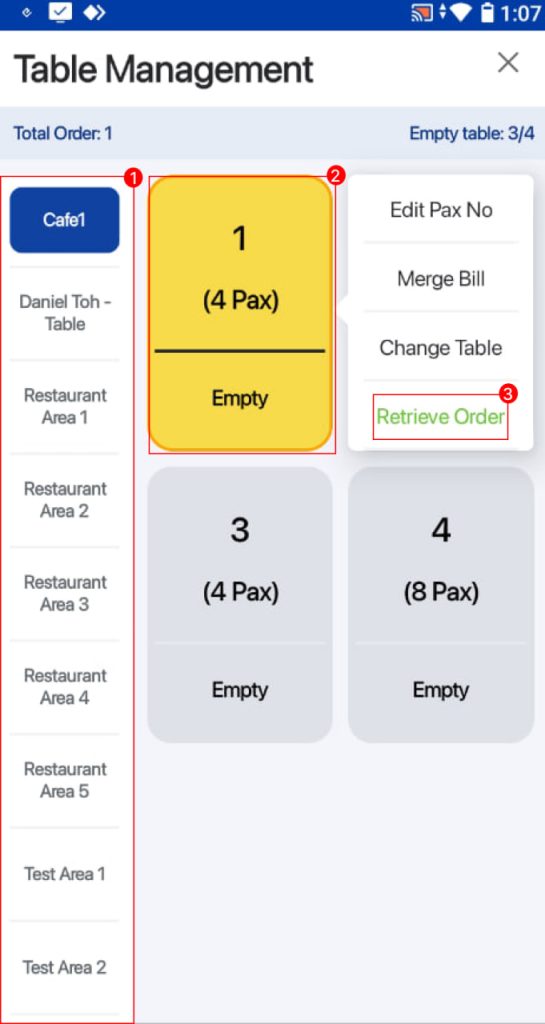
- Select the area
- Select the table
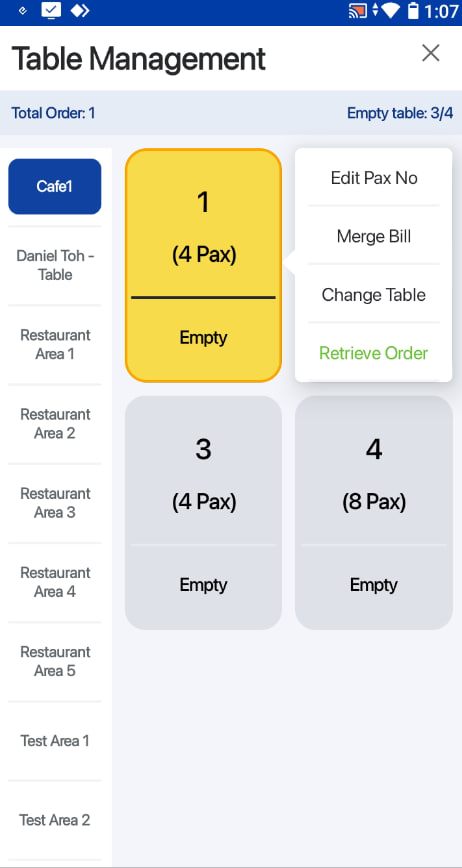
- Click on the Retrieve Order button
The products will be highlighted as item(s) in the Order cart on the sales screen.
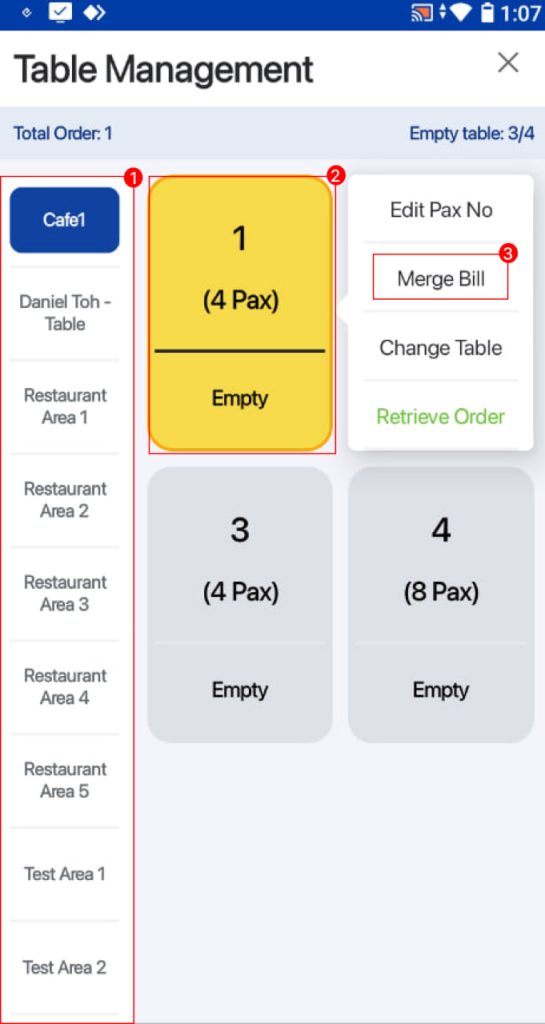
Users can merge bills for orders from different tables.
- Users can click on the icon to access the table management page.
2. Users can select the first table they would like to merge the bill to and click on the Merge Bill button.
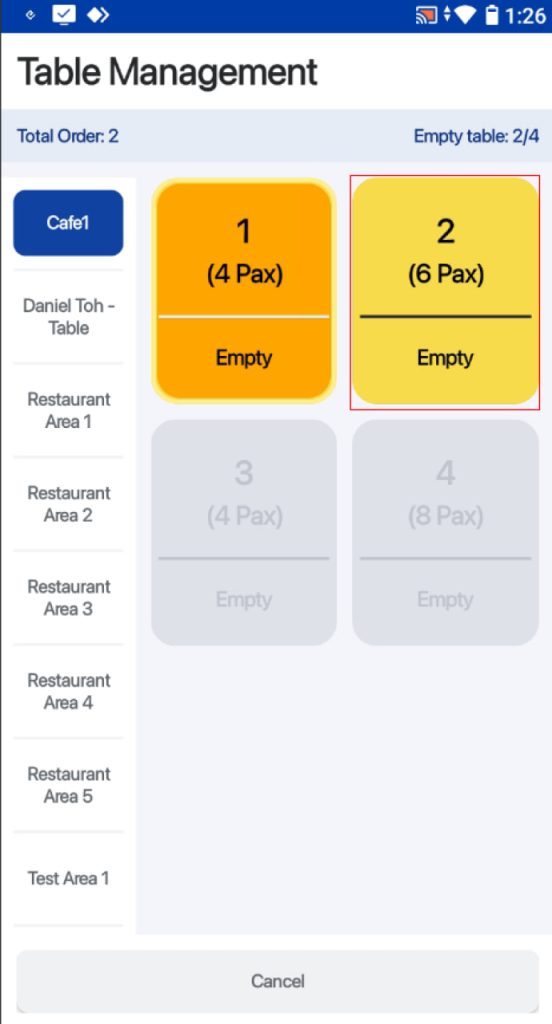
3. After clicking on the Merge Bill button, users can select the other table they would like to merge the bill with.
4. Users can click on orders using the checkboxes under the Order No section after selecting the other table and click on the Confirm button to merge bills for both tables.
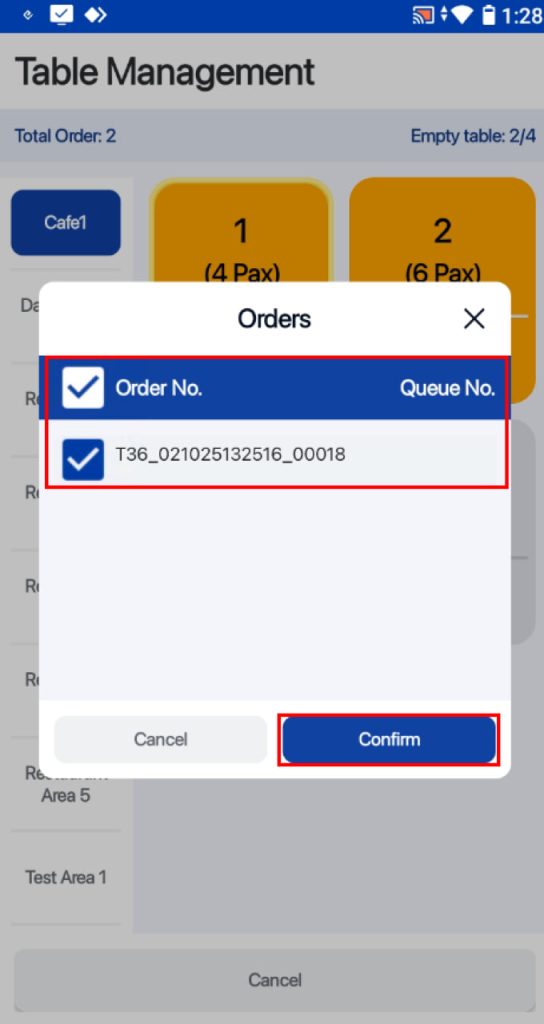
5. Orders will be merged under the first table selected and it will be displayed on the table management page.
Users can change tables for customers.
Users can click on the icon on the bottom navigation bar to access the table management page.
Users can click on their desired table they would like to change the table for and click on the Change Table button.

After clicking on the Change Table button, users can click on the new table they would like to change to.
Orders from the previous table will be changed to the new table.