In the Sales page, users can scan product barcodes to begin a transaction.
The image below shows the functions available on the main Sales screen:
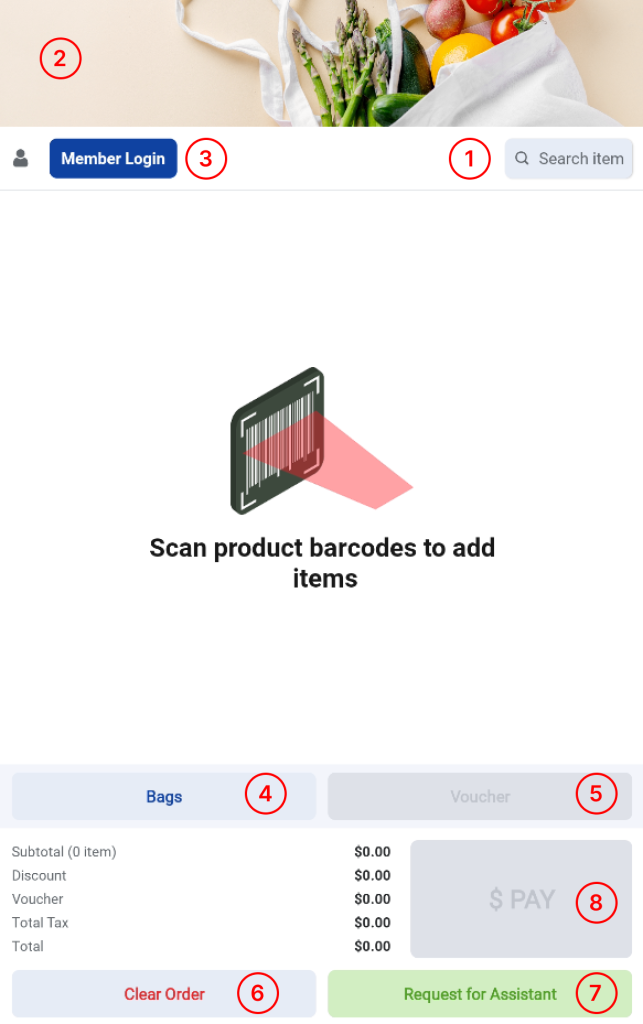
1. Search
Allows users to search for existing products by manually entering the product barcode number or scanning the product barcode.
2. Image Placeholder (Top)
A customizable image that merchants can update for branding, promotions, or visual placeholders.
3. Member Login
Allows users to log in to their membership accounts using their phone number or member barcode.
4. Bags
Displays a pop-up of Quick-Pick products (e.g., plastic or reusable bags) configured by merchants in the Backend Portal.
5. Voucher
Allows users to apply vouchers by scanning or manually entering voucher codes.
6. Clear Order
Clears the current order. Merchants can configure in the Backend Portal whether customers can clear orders themselves or if staff assistance is required.
7. Request for Assistance
Triggers staff assistance mode. Staff must scan their staff barcode to enable this function.
8. Pay
Directs users to the payment method selection page to complete the transaction.