
Follow the steps below on how to print dynamic QR code.
1.Access the table management page
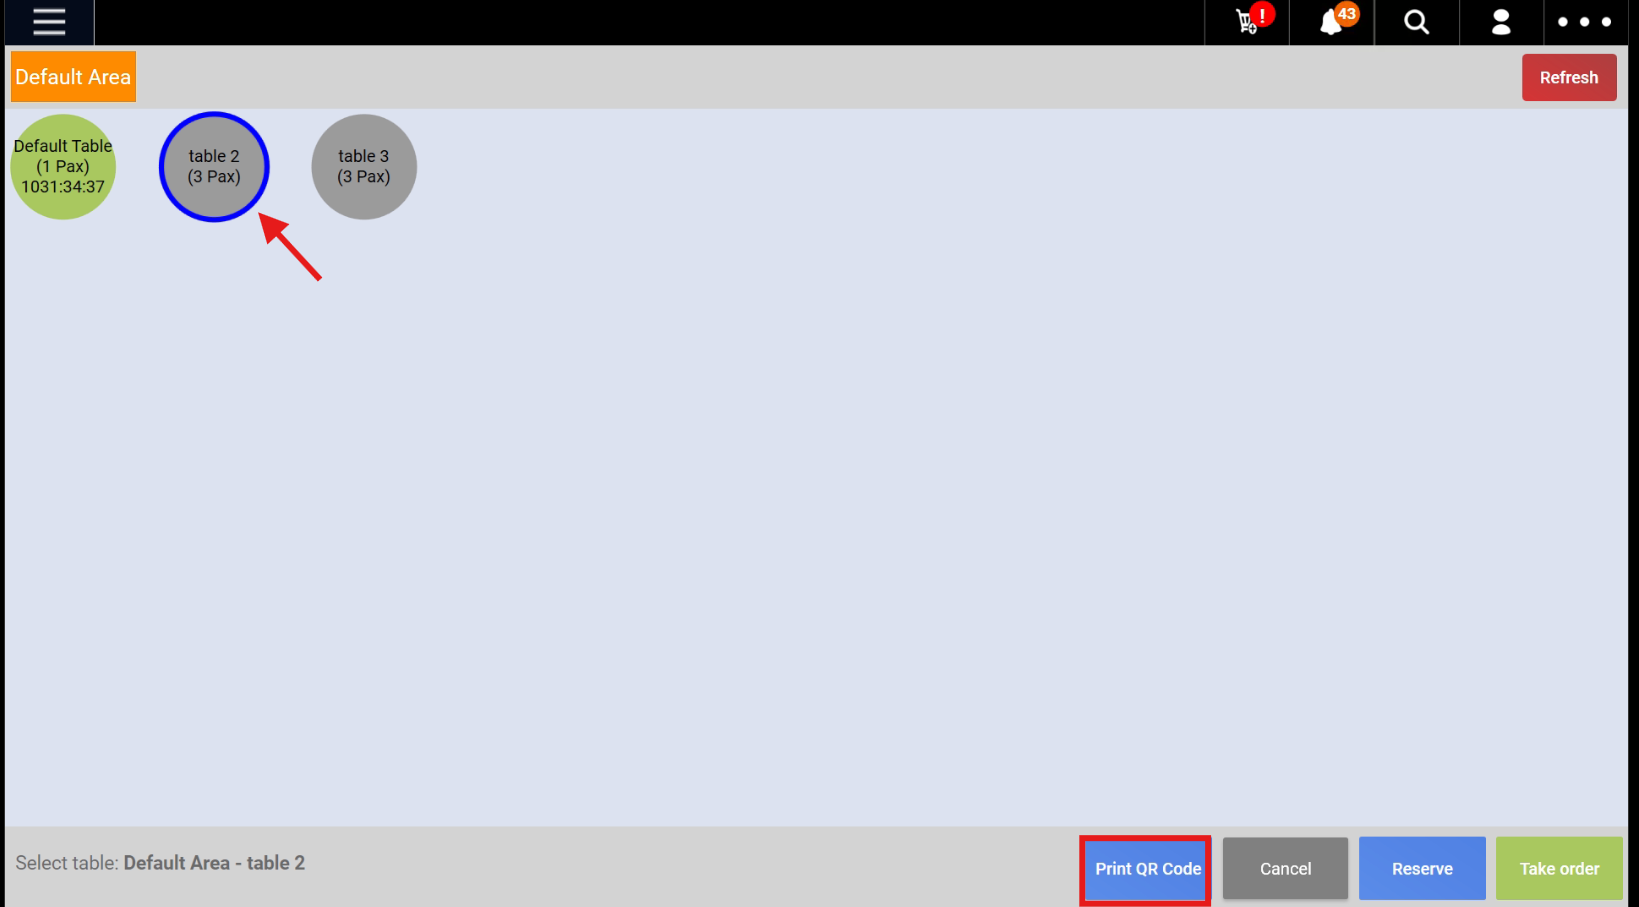
(a) Select the area (selected area will be highlighted in yellow)
(b) Select the table (selected table will be encircled in blue)
(c) Click on Print QR Code (highlighted red box)
2. The QR code will pop out. The area and table name will be indicated at the top. There will be 2 options shown which is “CANCEL” and “PRINT”.
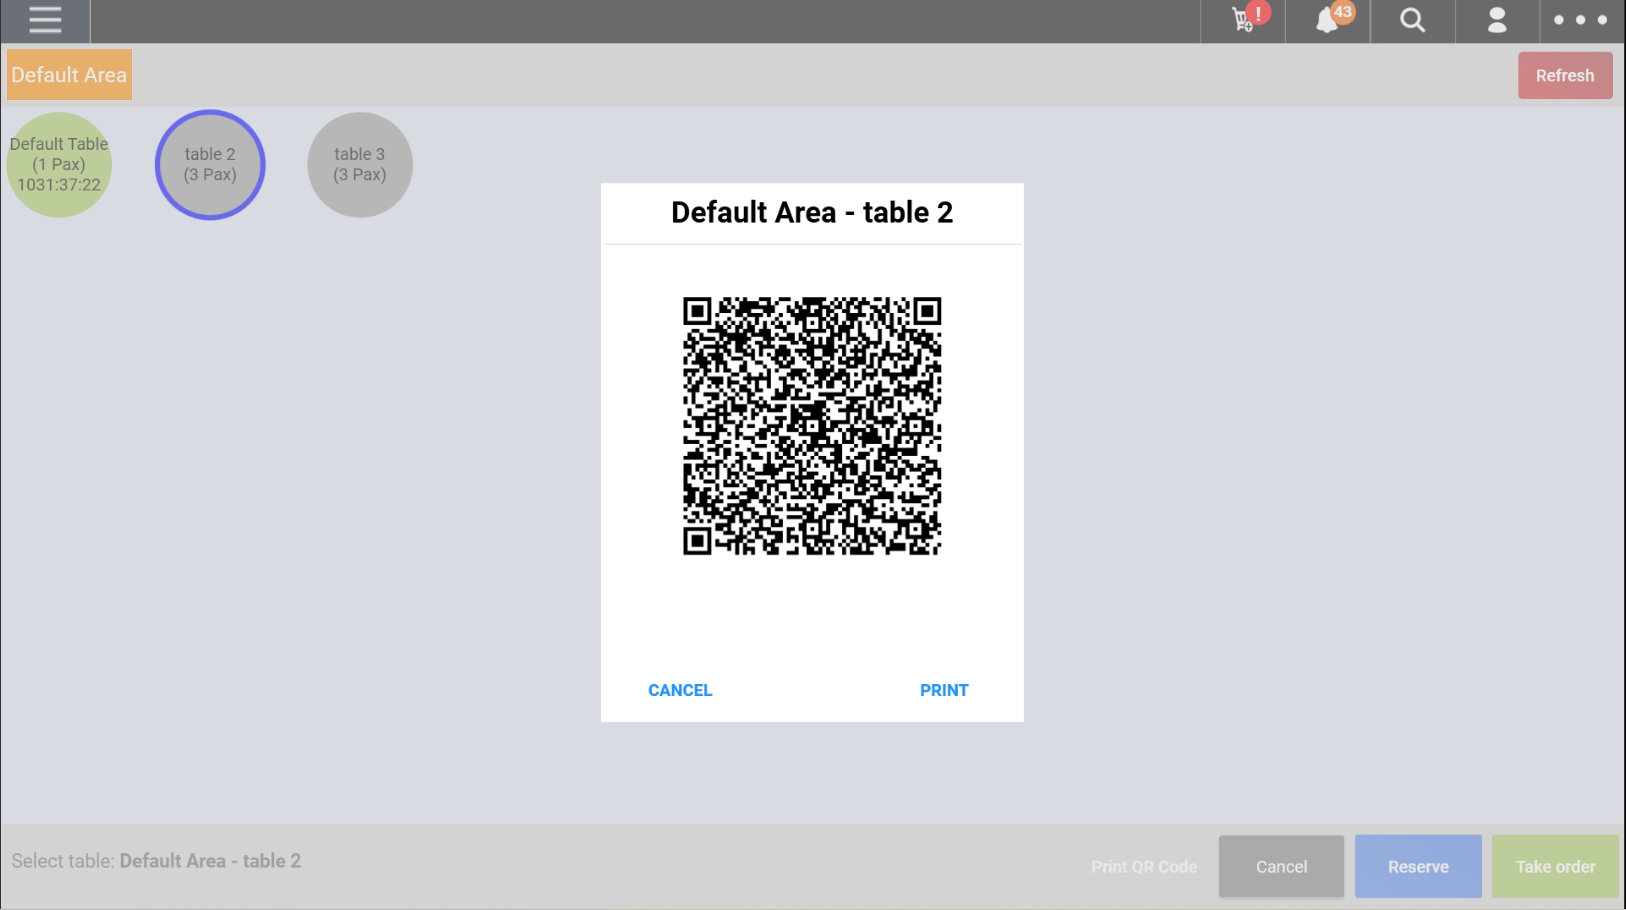
3. To print the QR code, user have to click on “PRINT”. The QR code will be printed out from the receipt printer.

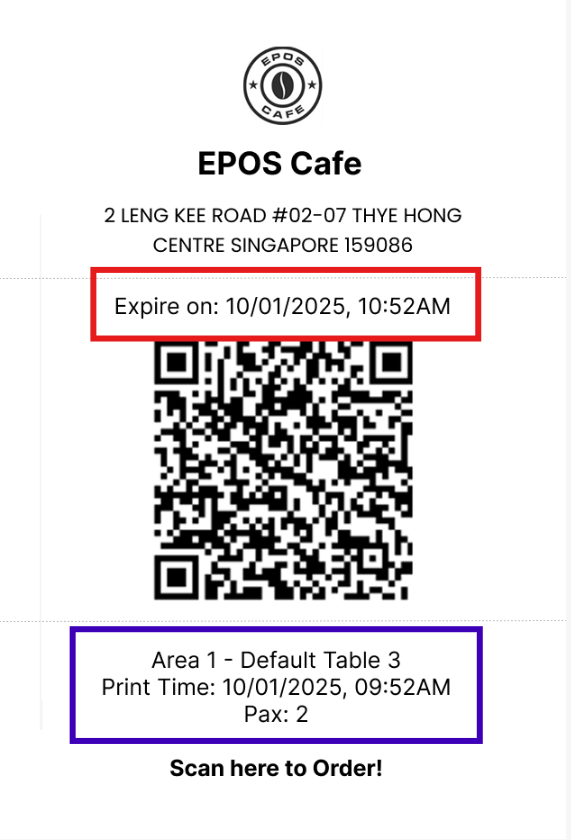
4. This is a sample of how the printed Dynamic QR will look like.
With Shop Logo (note: logo appears if there is a logo added for the receipt)
Without Shop Logo: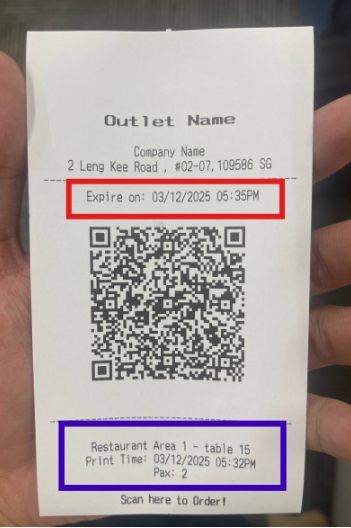
a) From the top it will show name and address
b) It will display the expiry Date and Time (highlighted in red)
c) Below it will display the Area and Table name, followed by the time the QR code was printed from the receipt printer with the number of pax pre-set for that table (highlighted in blue)