
May 2025
This May, several features across our POS, Android POS and Backend have implemented features to enhance the experience of both the users and customers.
What’s New
Not sure which affects you?
These icons indicate which group of users is impacted by each enhancement: Point of Sale (POS) users, Backend users, or Web Ordering App users.
(🖥️ POS — ⚙️ Backend — 📱 Web Ordering App — 🤖 Android POS — 👨🍳 Kitchen Display System (KDS) — 📦 Stock Take Device — 🔊Soundbox)
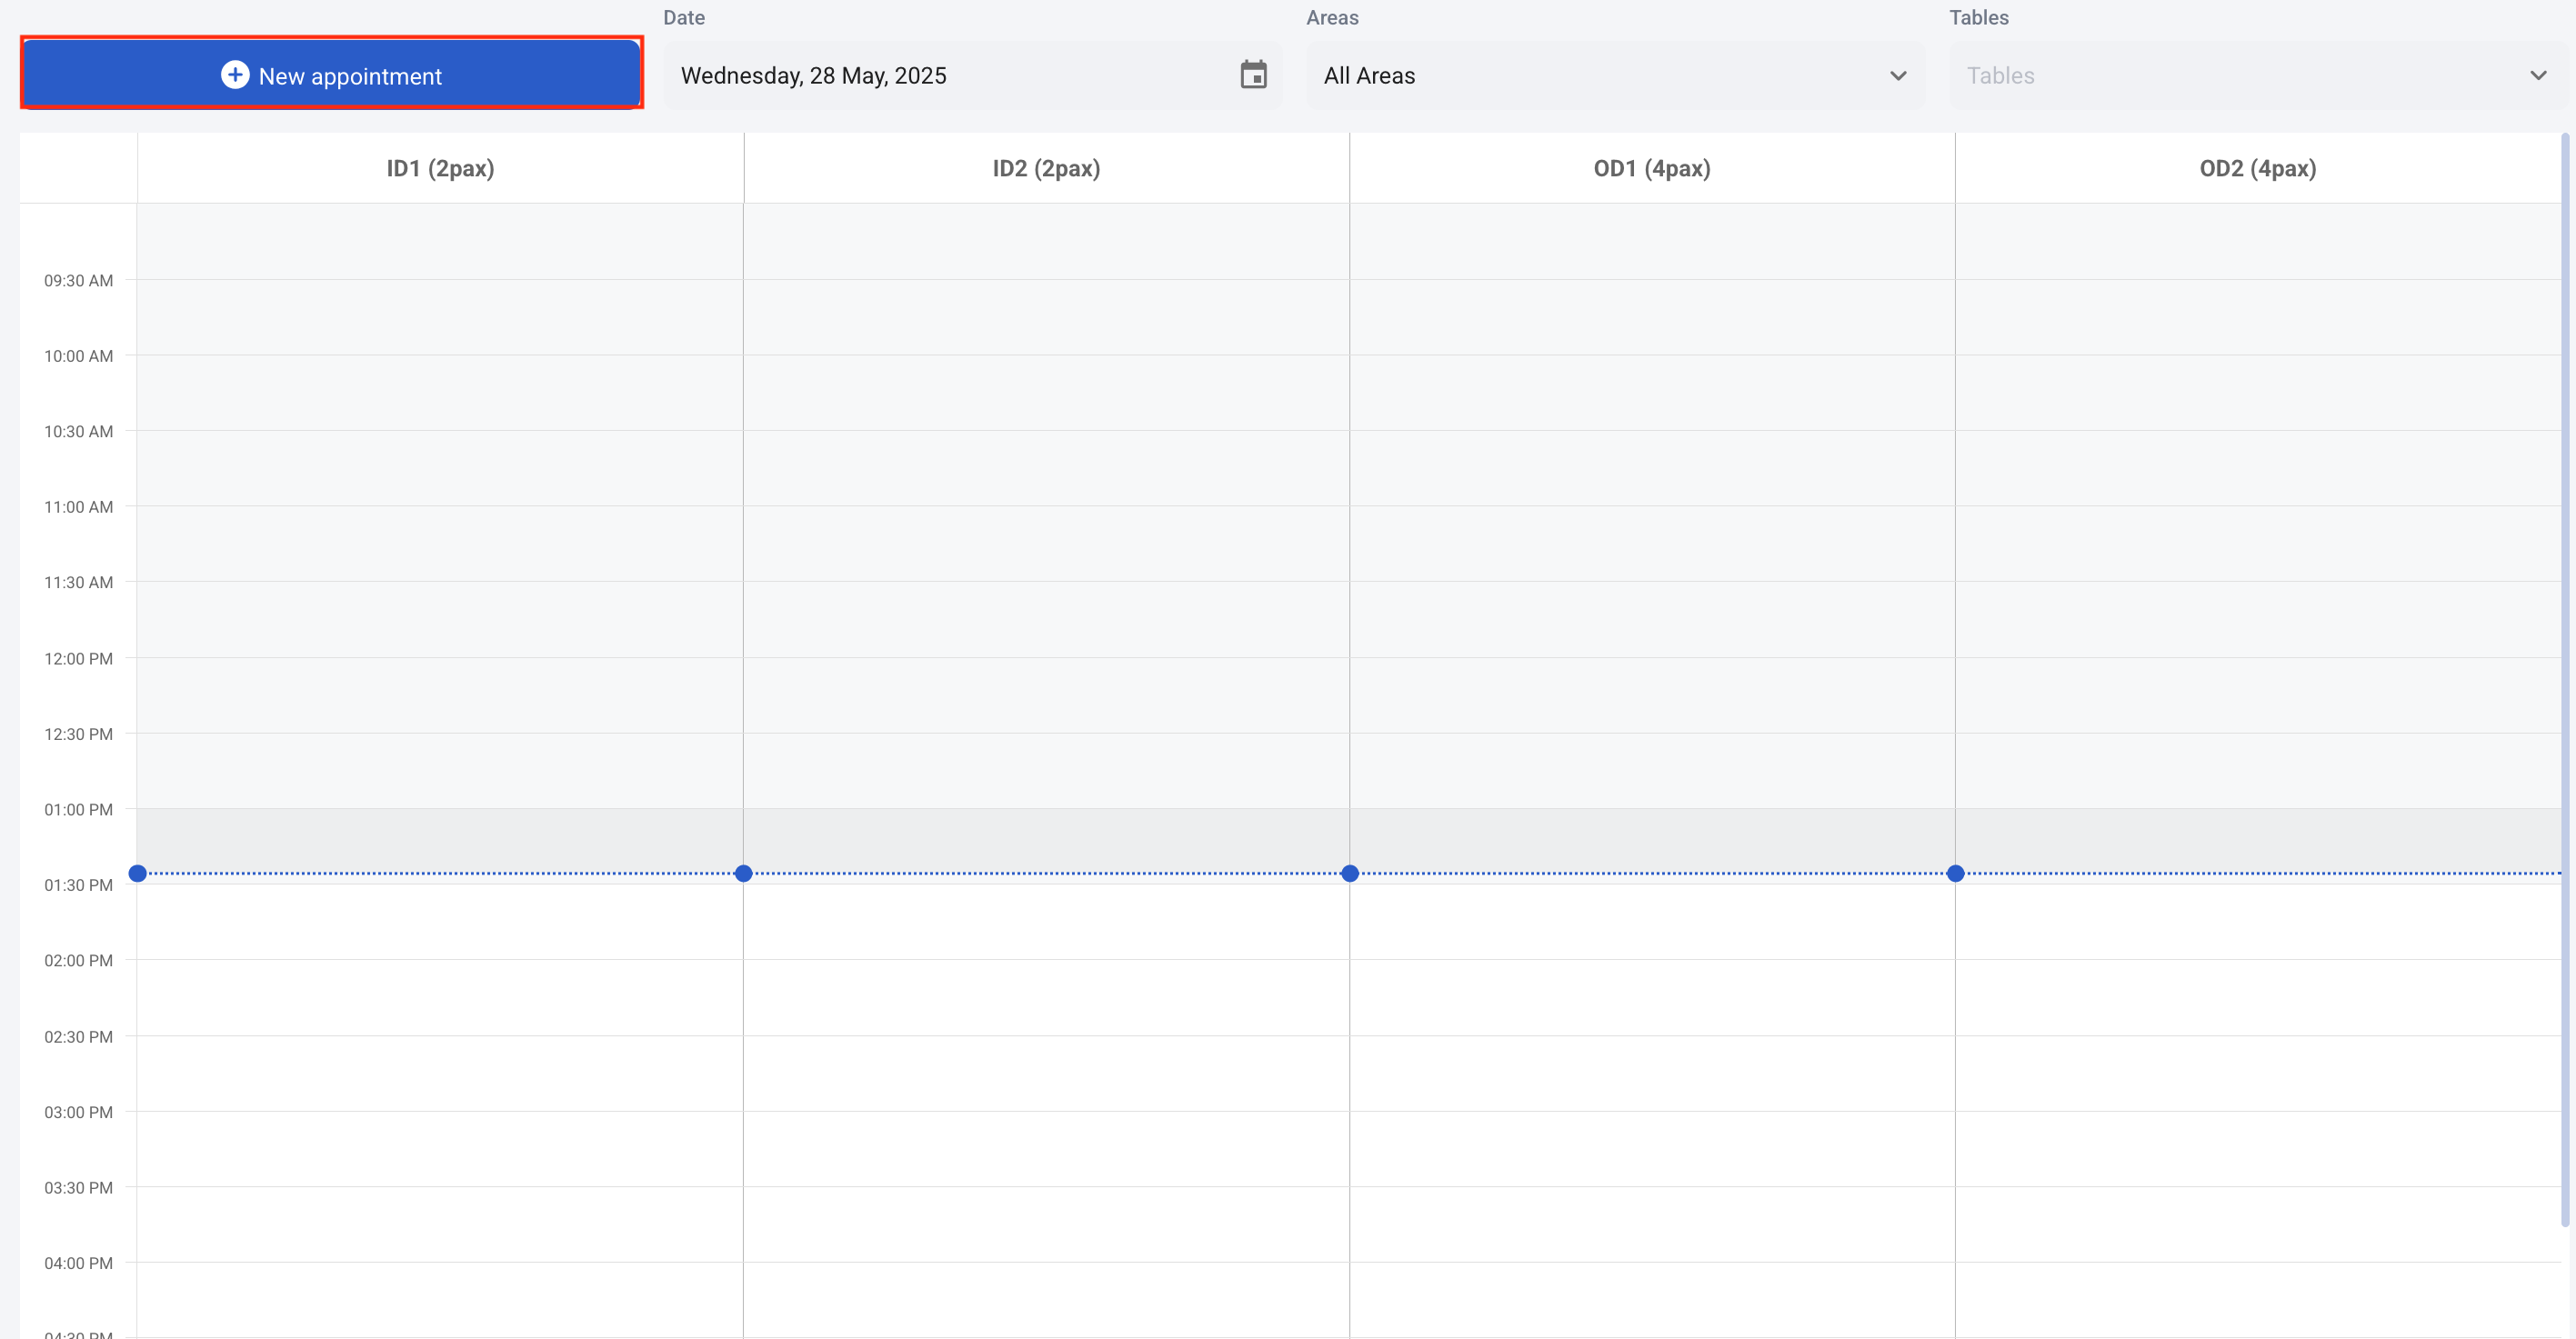
Customer Email Address will now sync to the backend when a new customer is created via the dashboard. For existing customers, all details including email address will auto-populate in the booking form.
1. User navigates to BE> Epos App> Booking Config > Booking Dashboard to add a new appointment
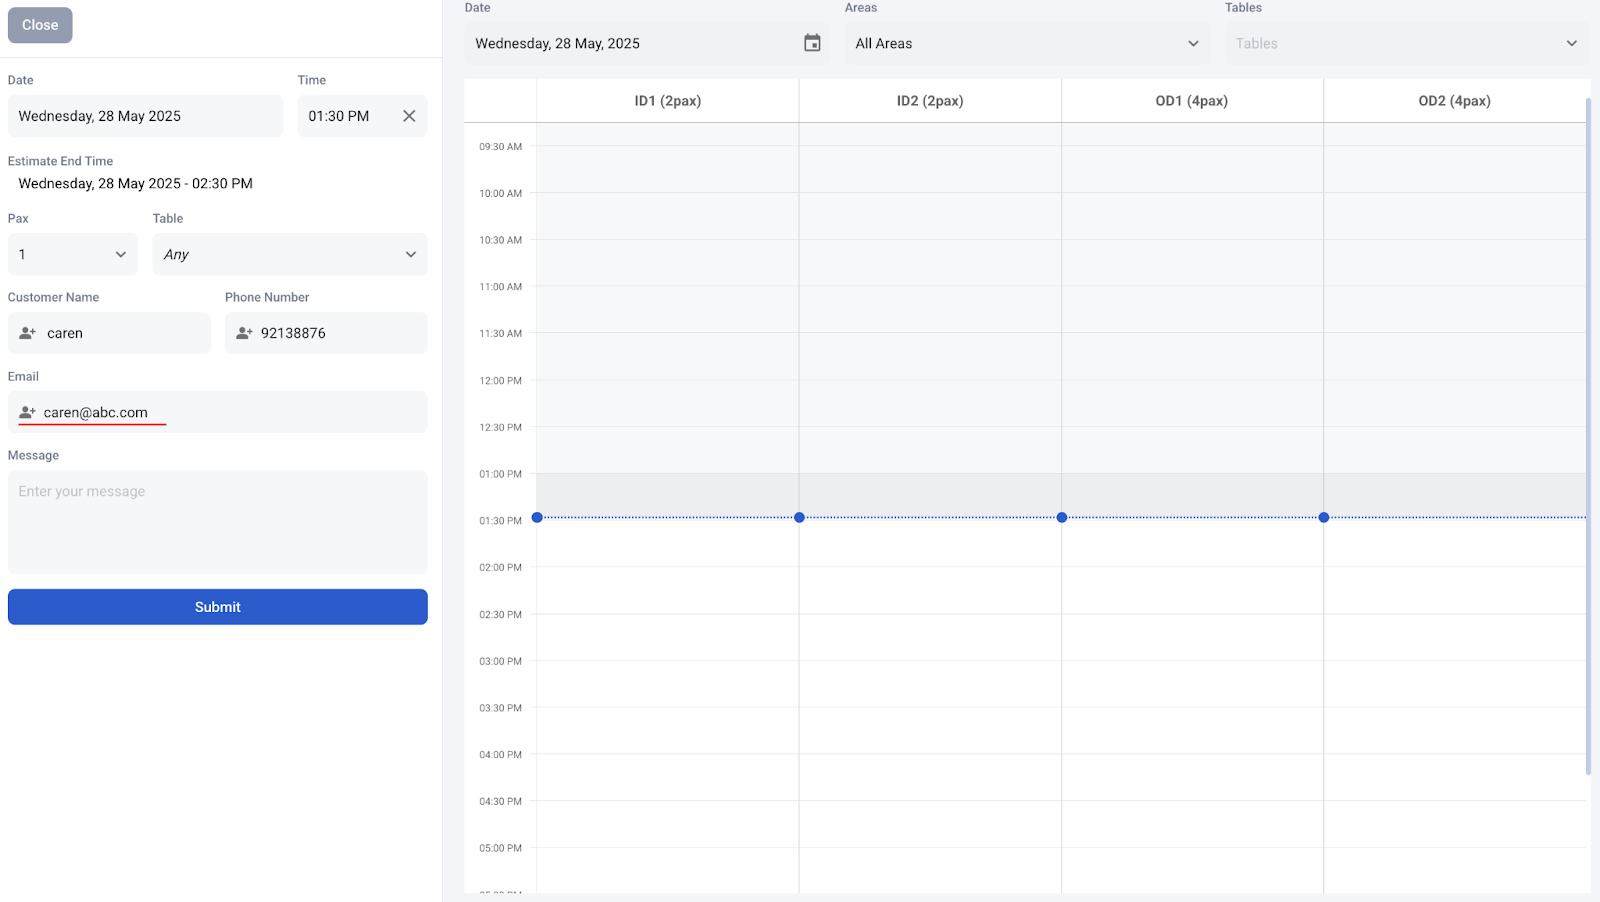
2. When a new appointment is created for a returning customer, all their previously entered details, such as the email address, will be automatically populated.
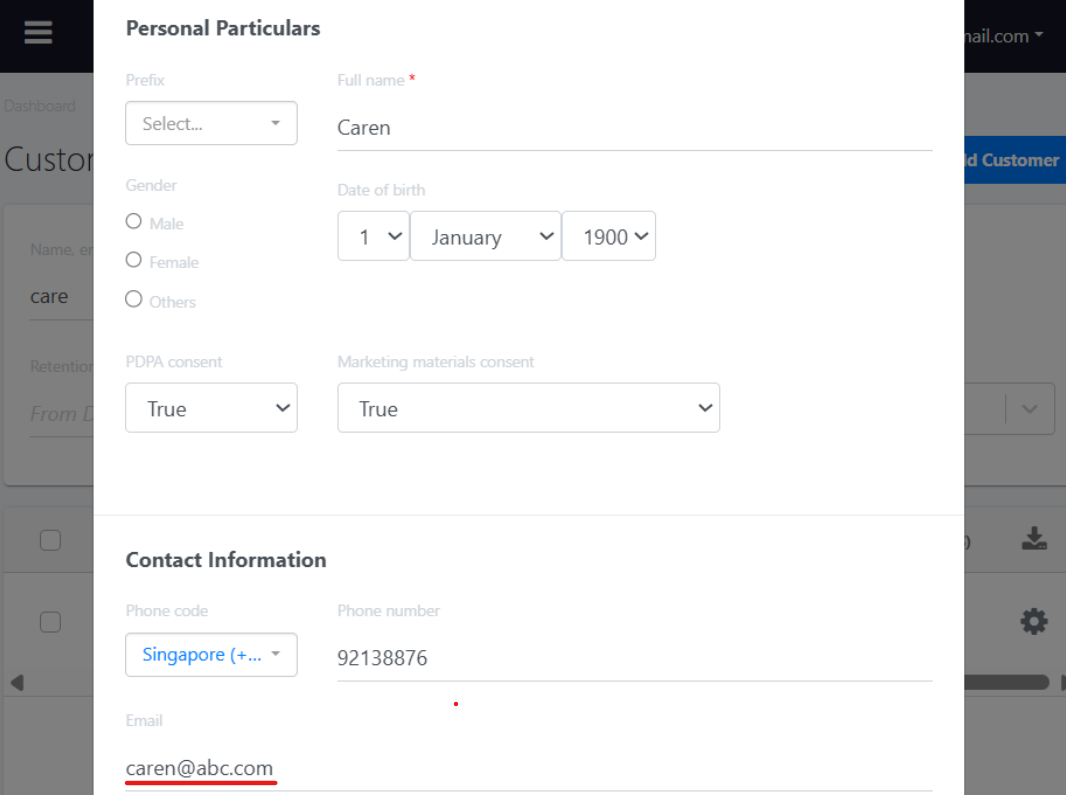
3. User navigates to BE> Customer to search for the customer, and the details are successfully stored.
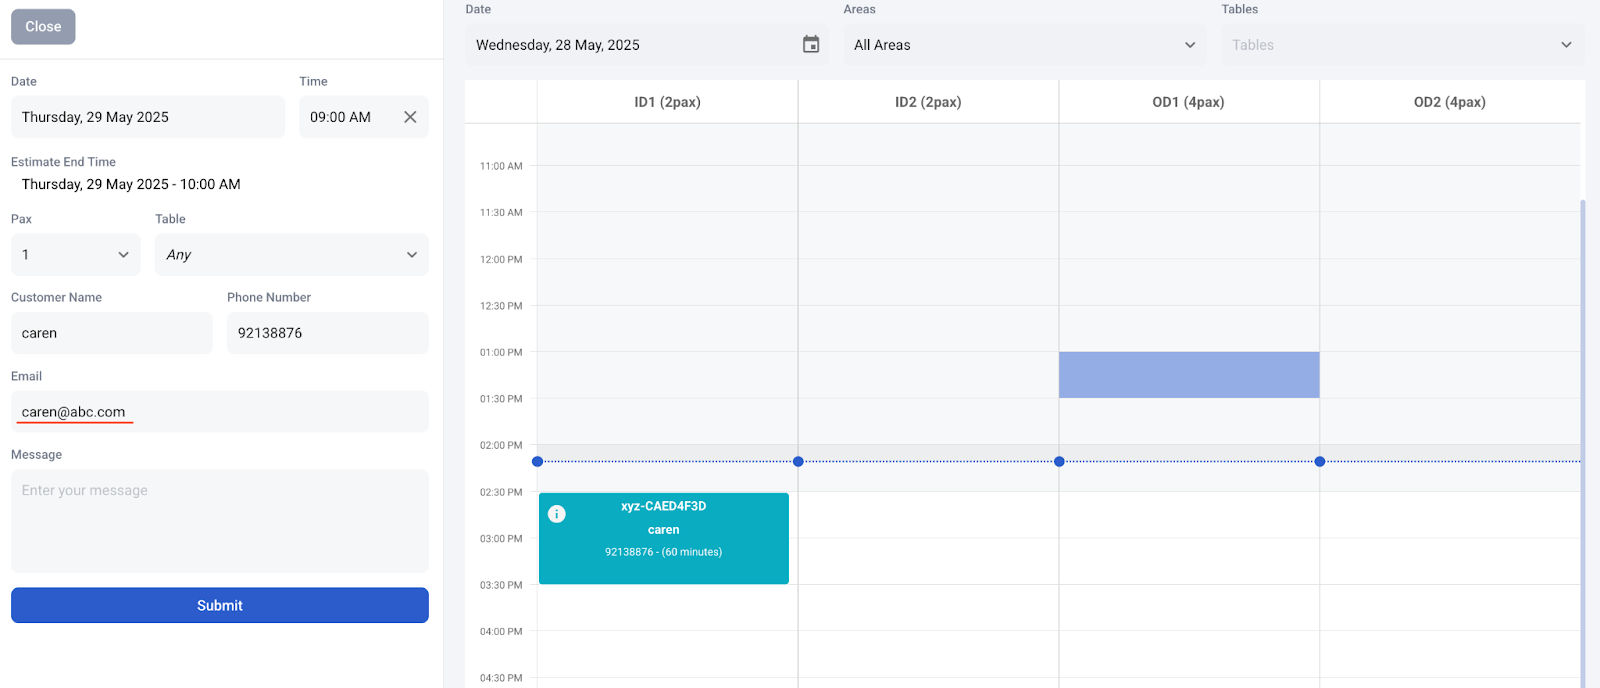
4. When a new appointment is created for a returning customer, all their previously entered details, such as the email address, will be automatically populated.
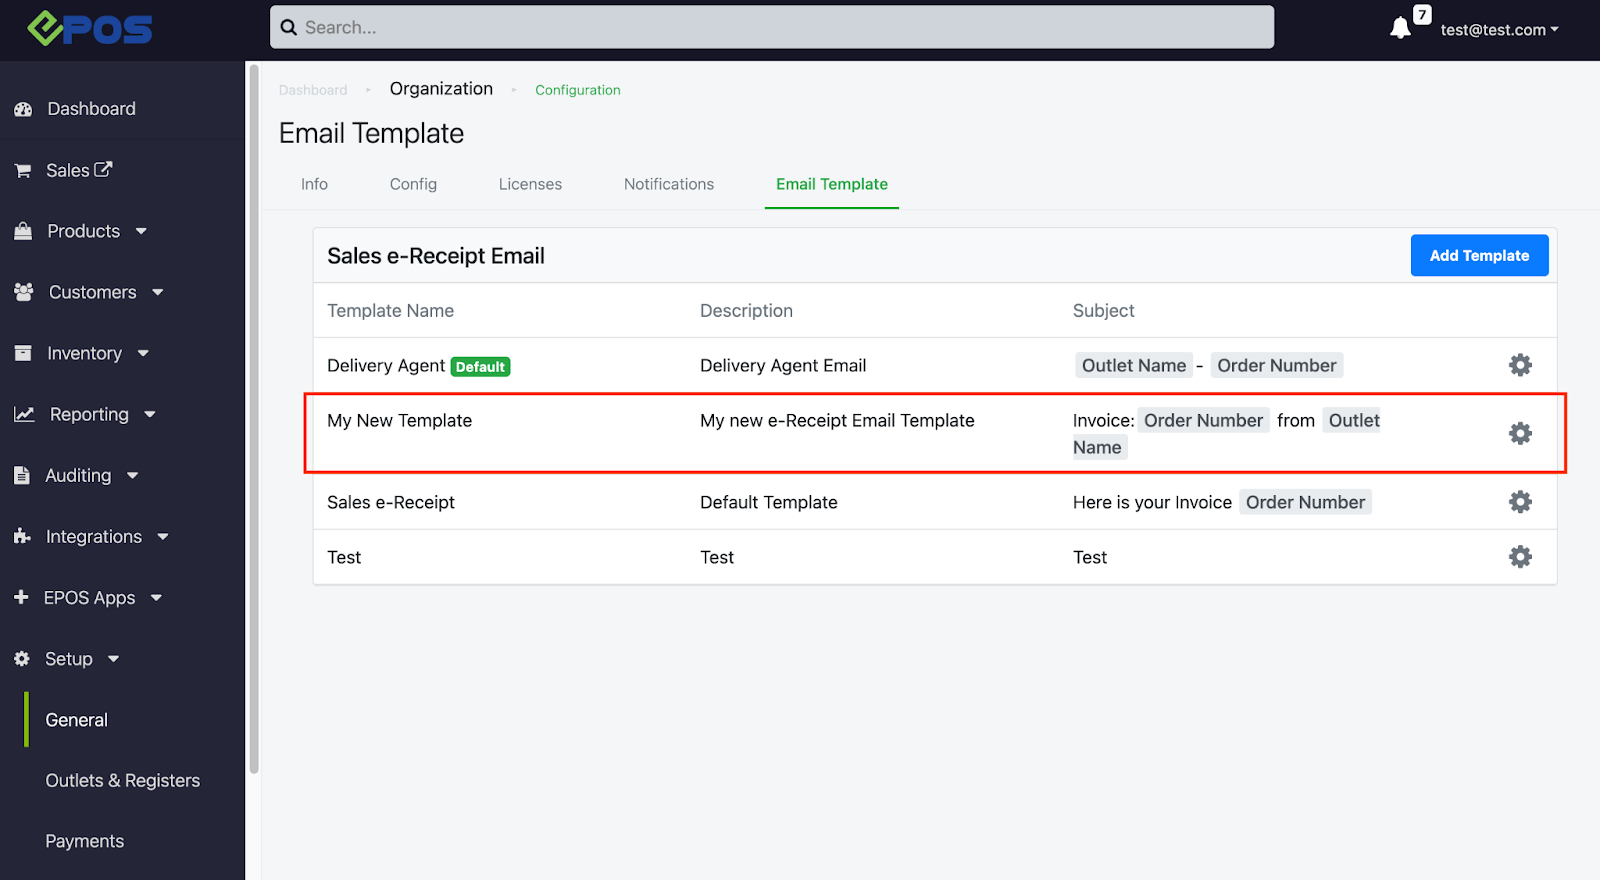
User can now create multiple email templates.
How it works:
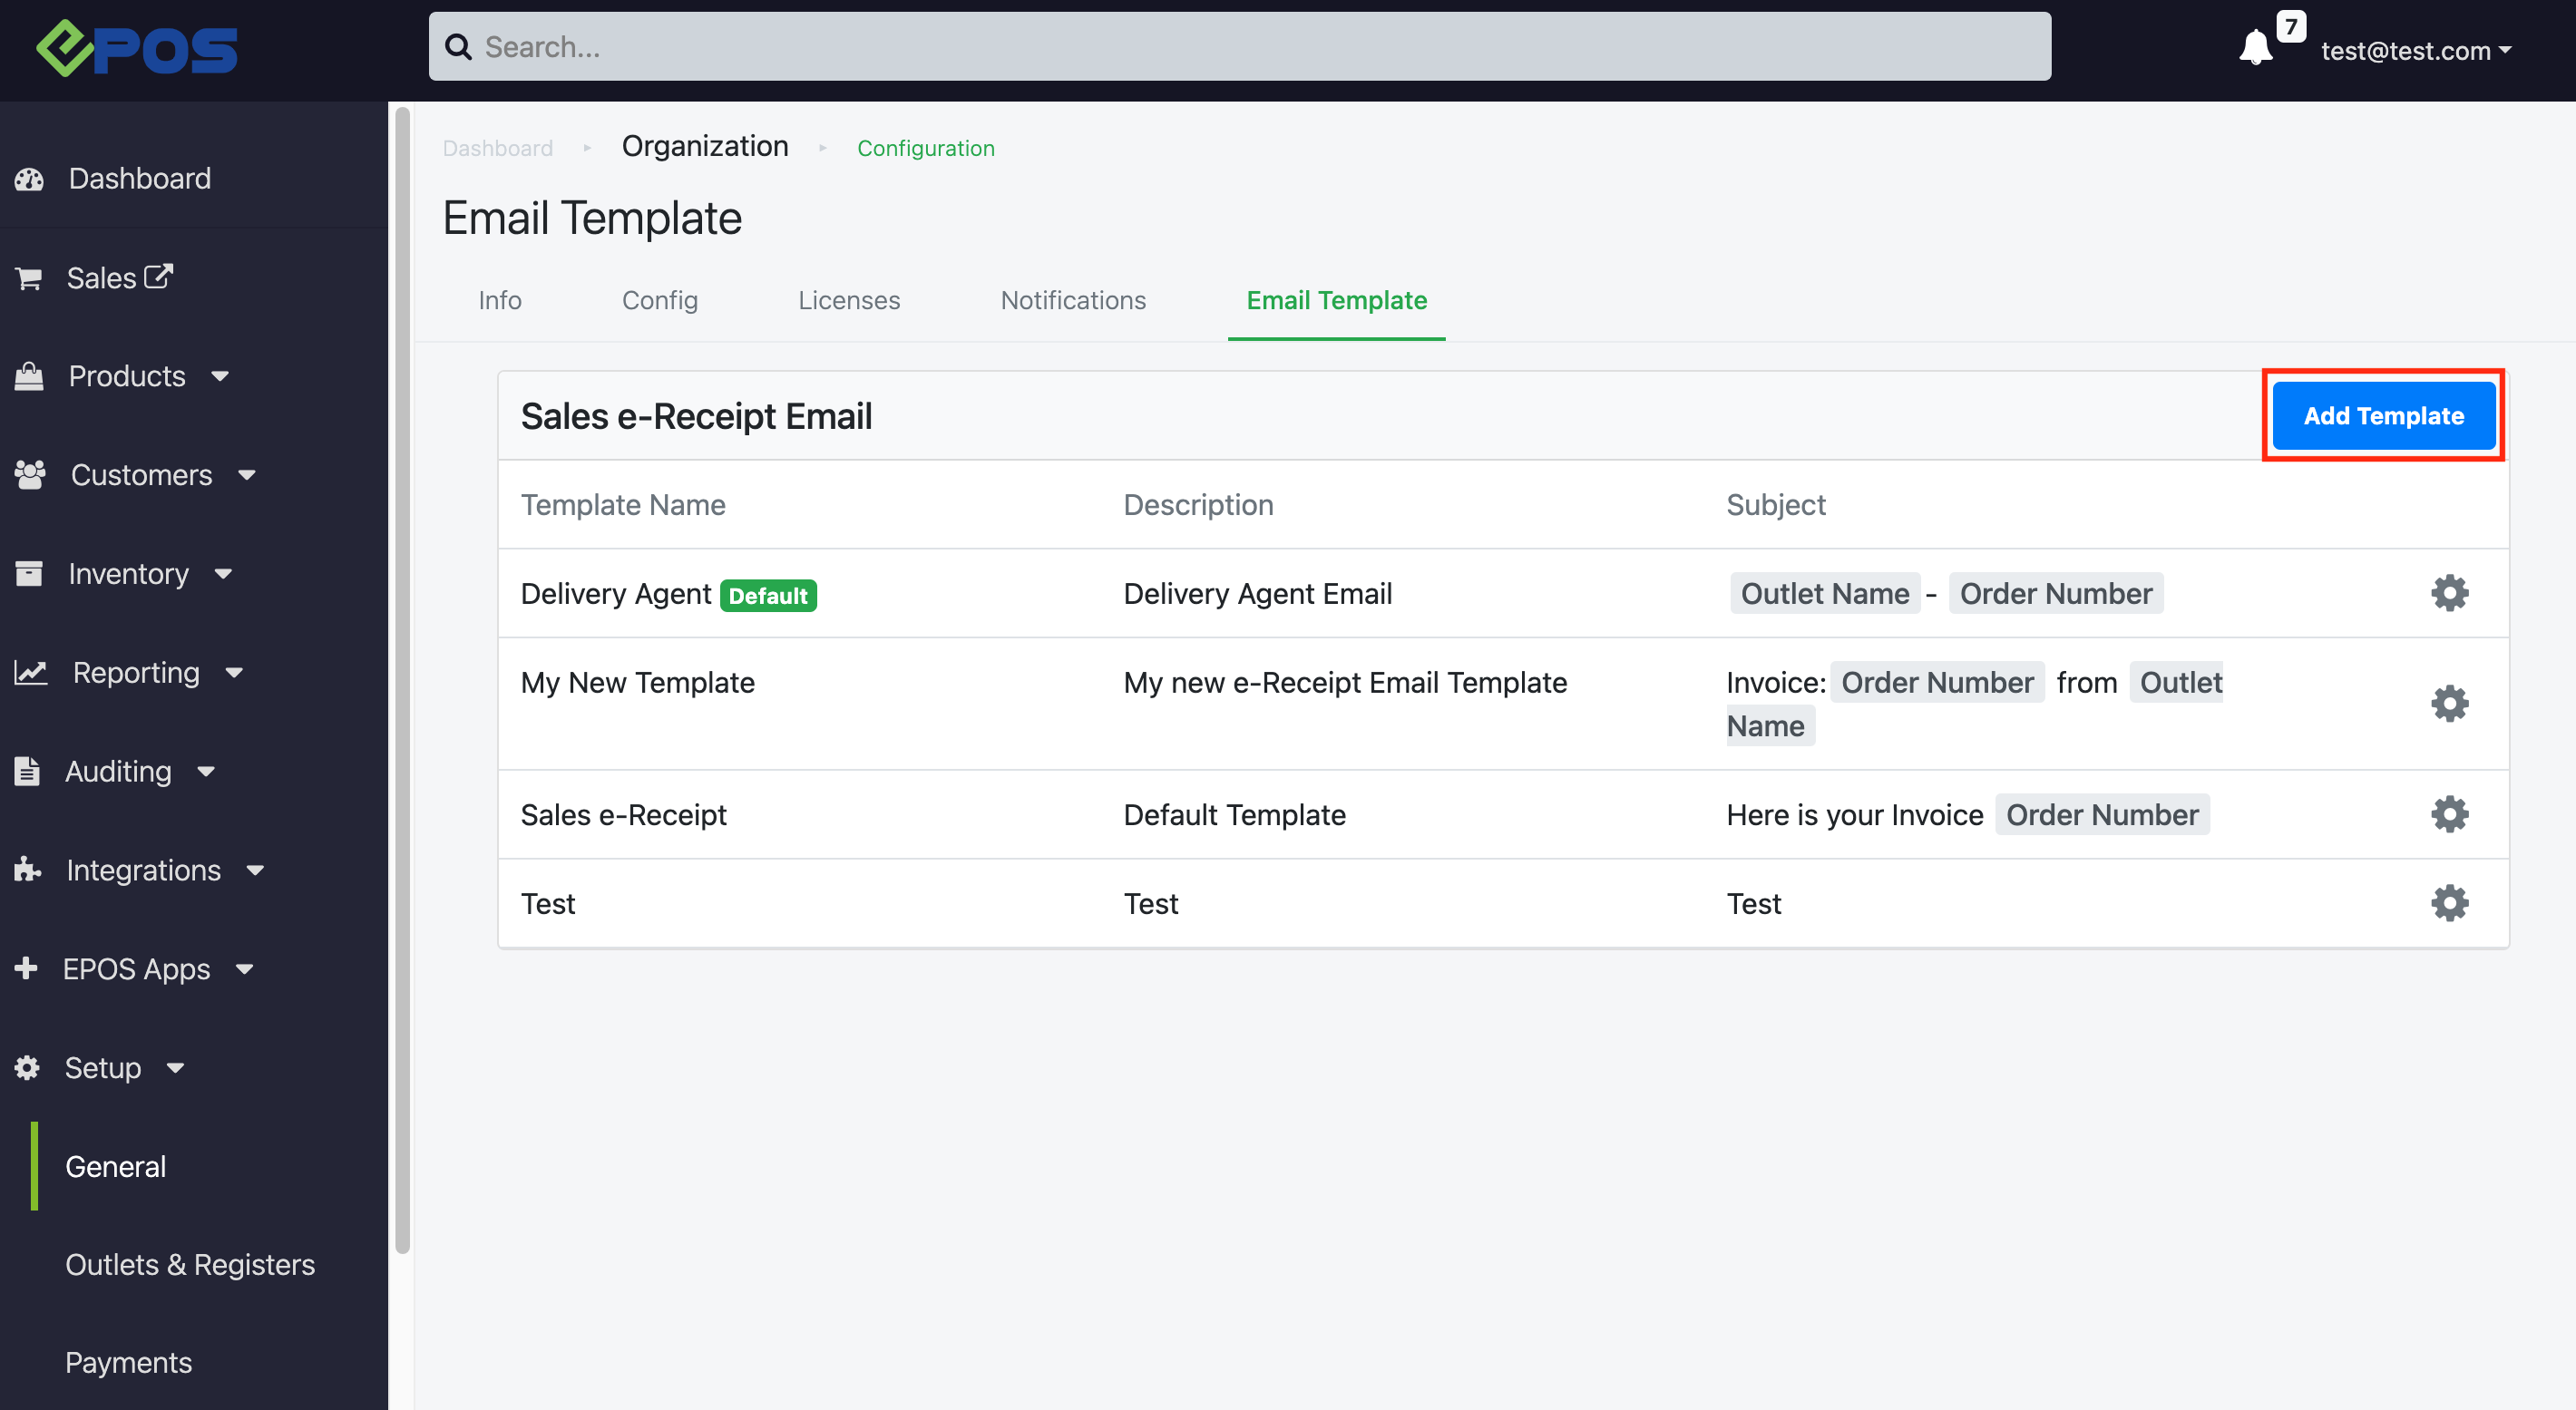
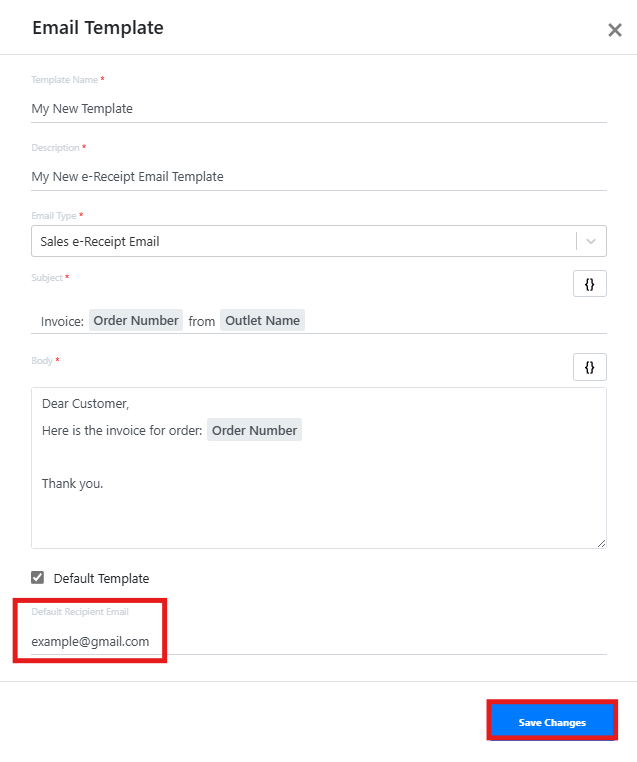
1. Go to Backend > Setup > General > Email Template
2. Click on “Add Template”
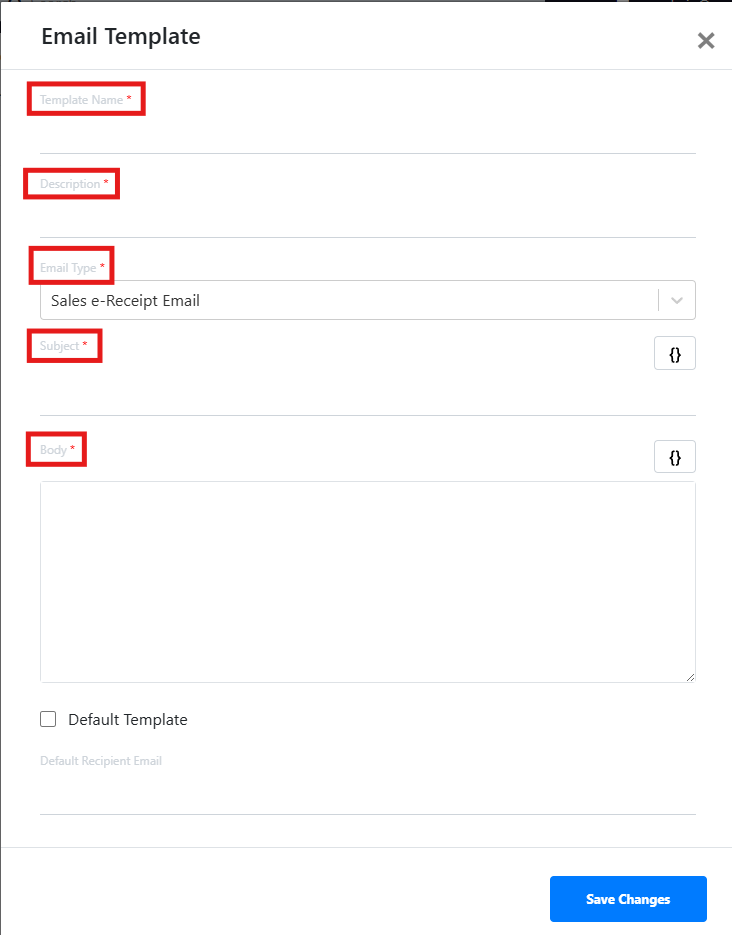
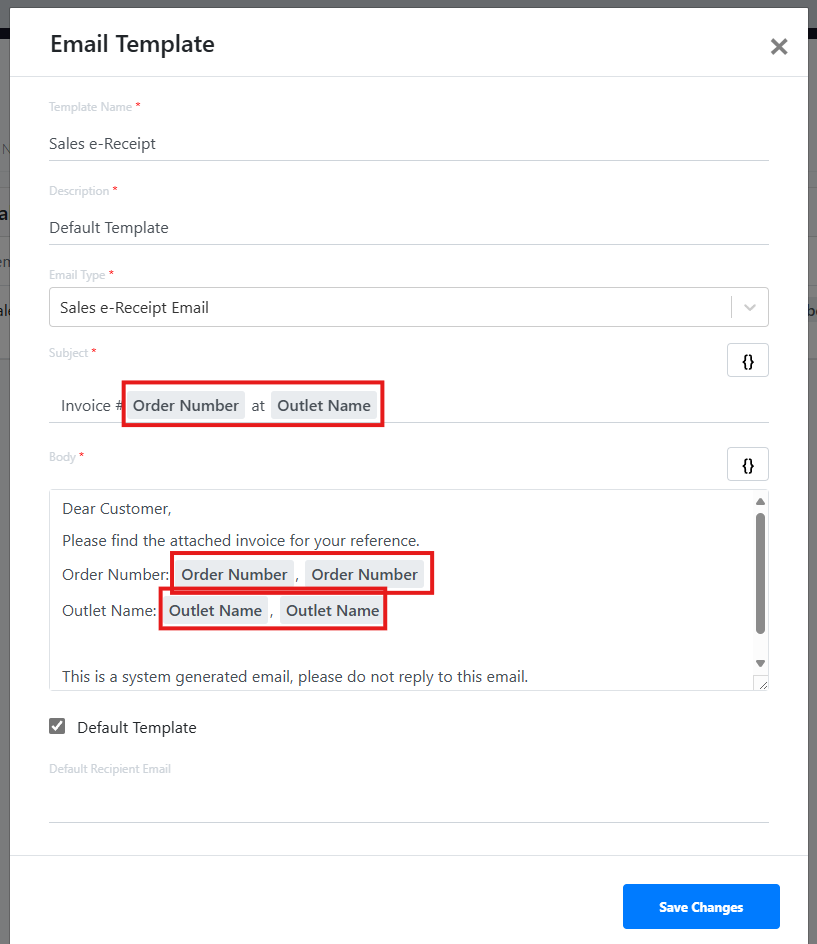
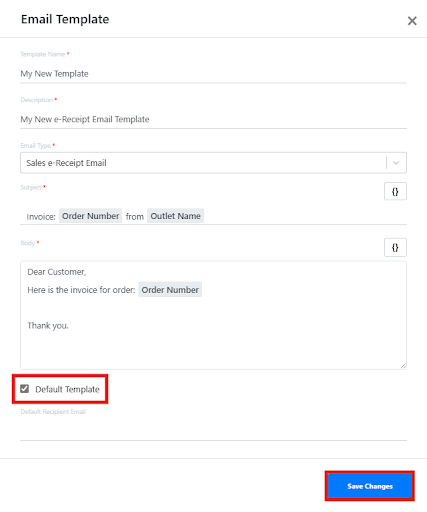
3. The compulsory fields are marked with * (Template Name, Description, Email Type, Subject, Body)
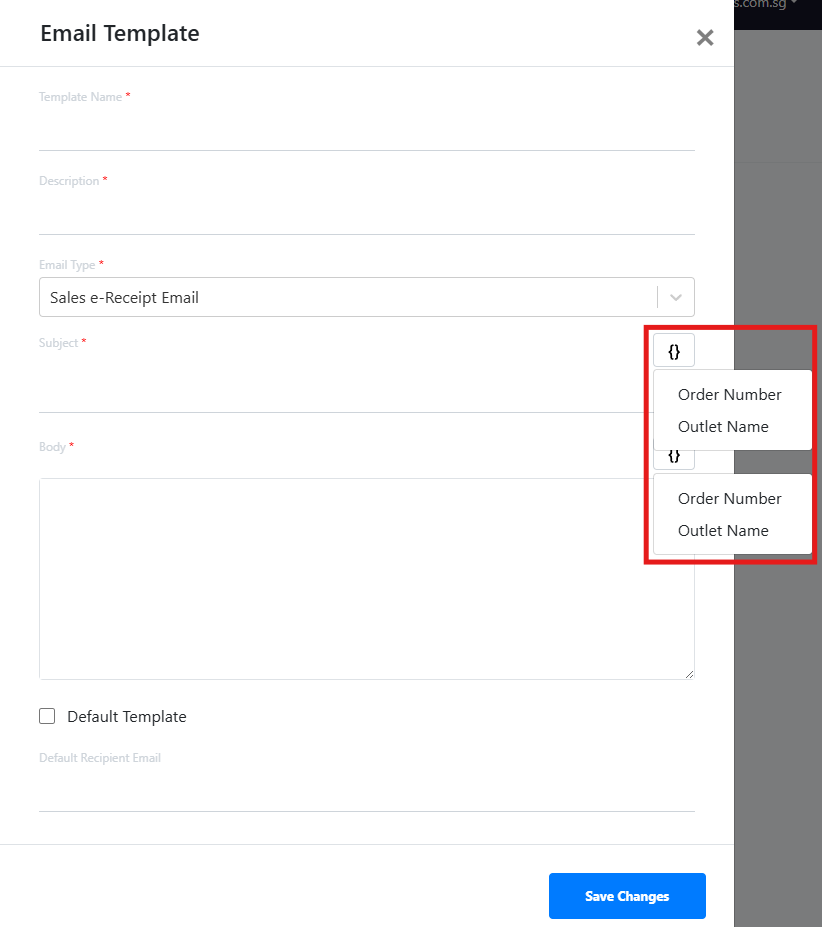
4. You can add in the Order Number and Outlet Name in Subject and Body fields.
5. Click on the “{}” button to add them accordingly.
6. After filling in the Email Template details, click on “Save Changes”
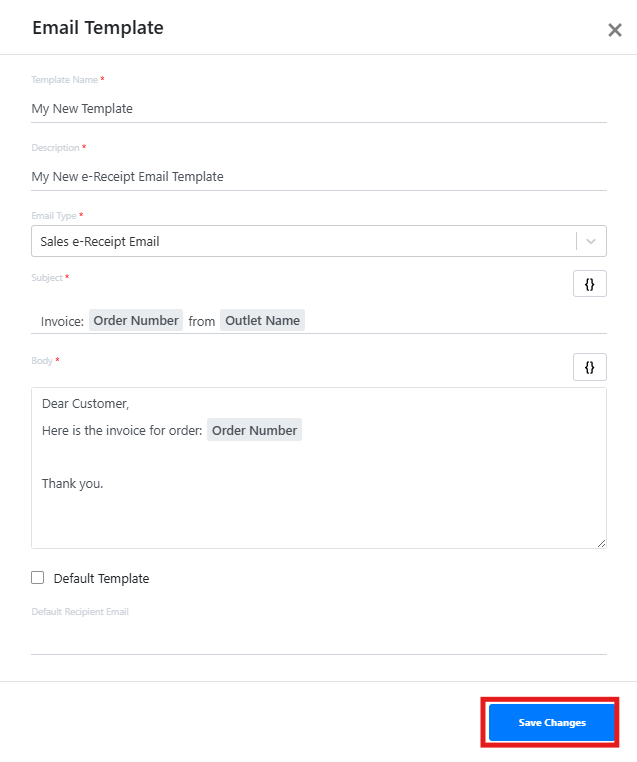
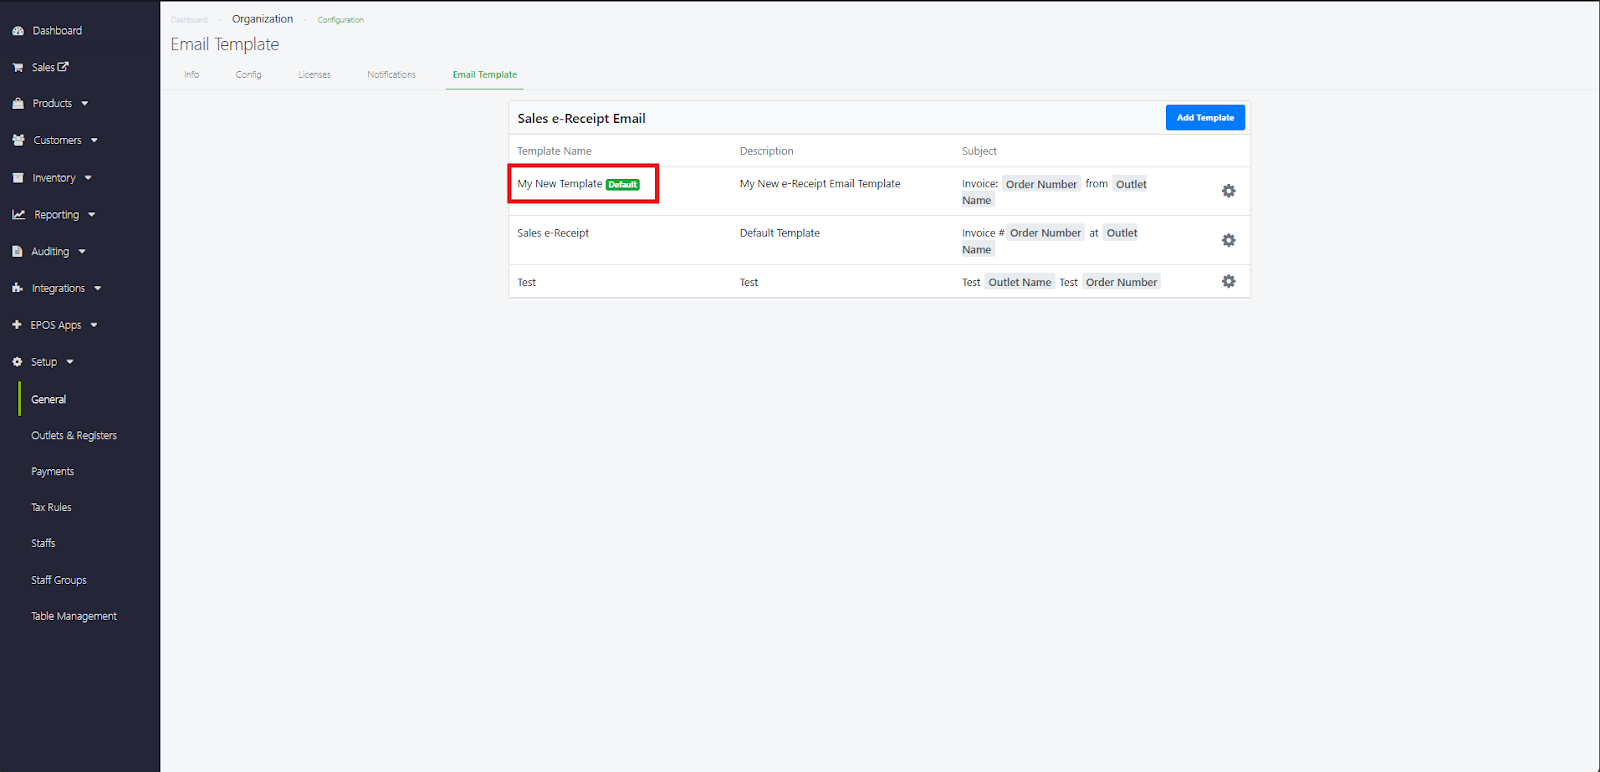
7. The newly created Email Template will appear
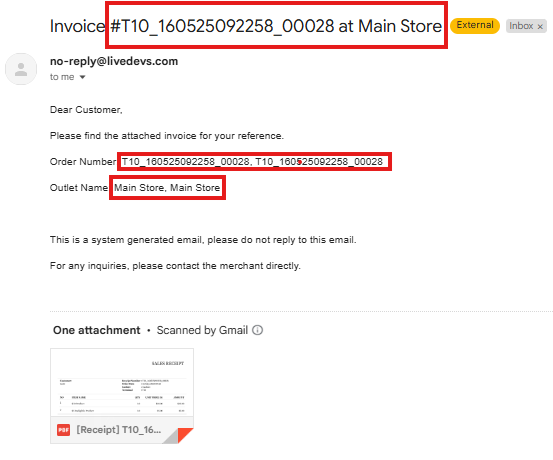
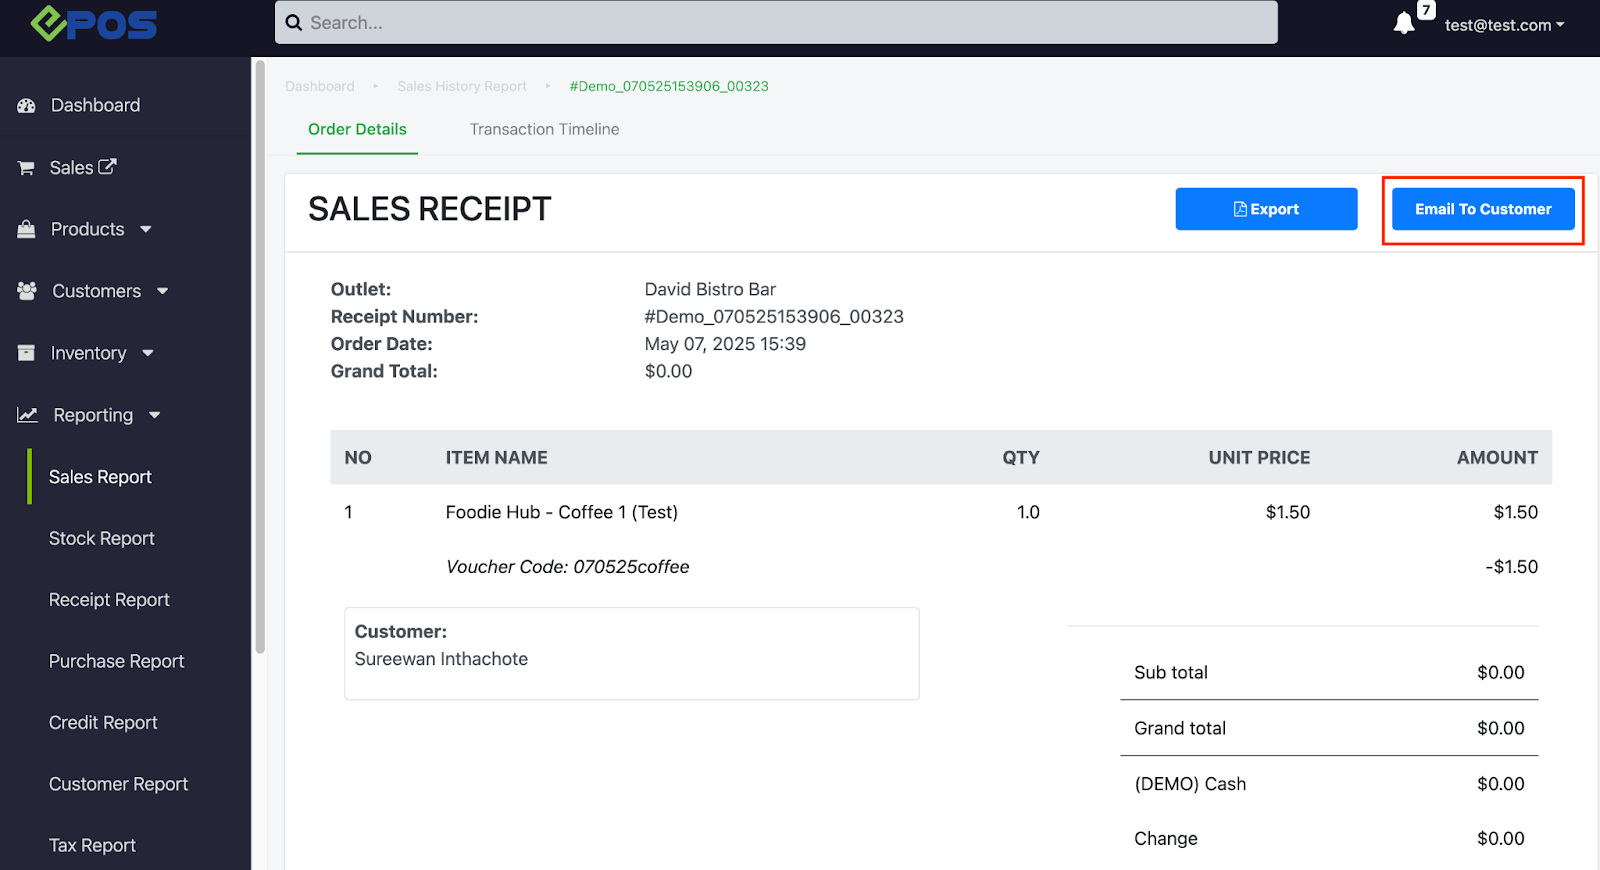
8. Below shows an example of the sent email content based on the template, as well as the receipt attached:
| Email Template | Email Content |
|
|
 |
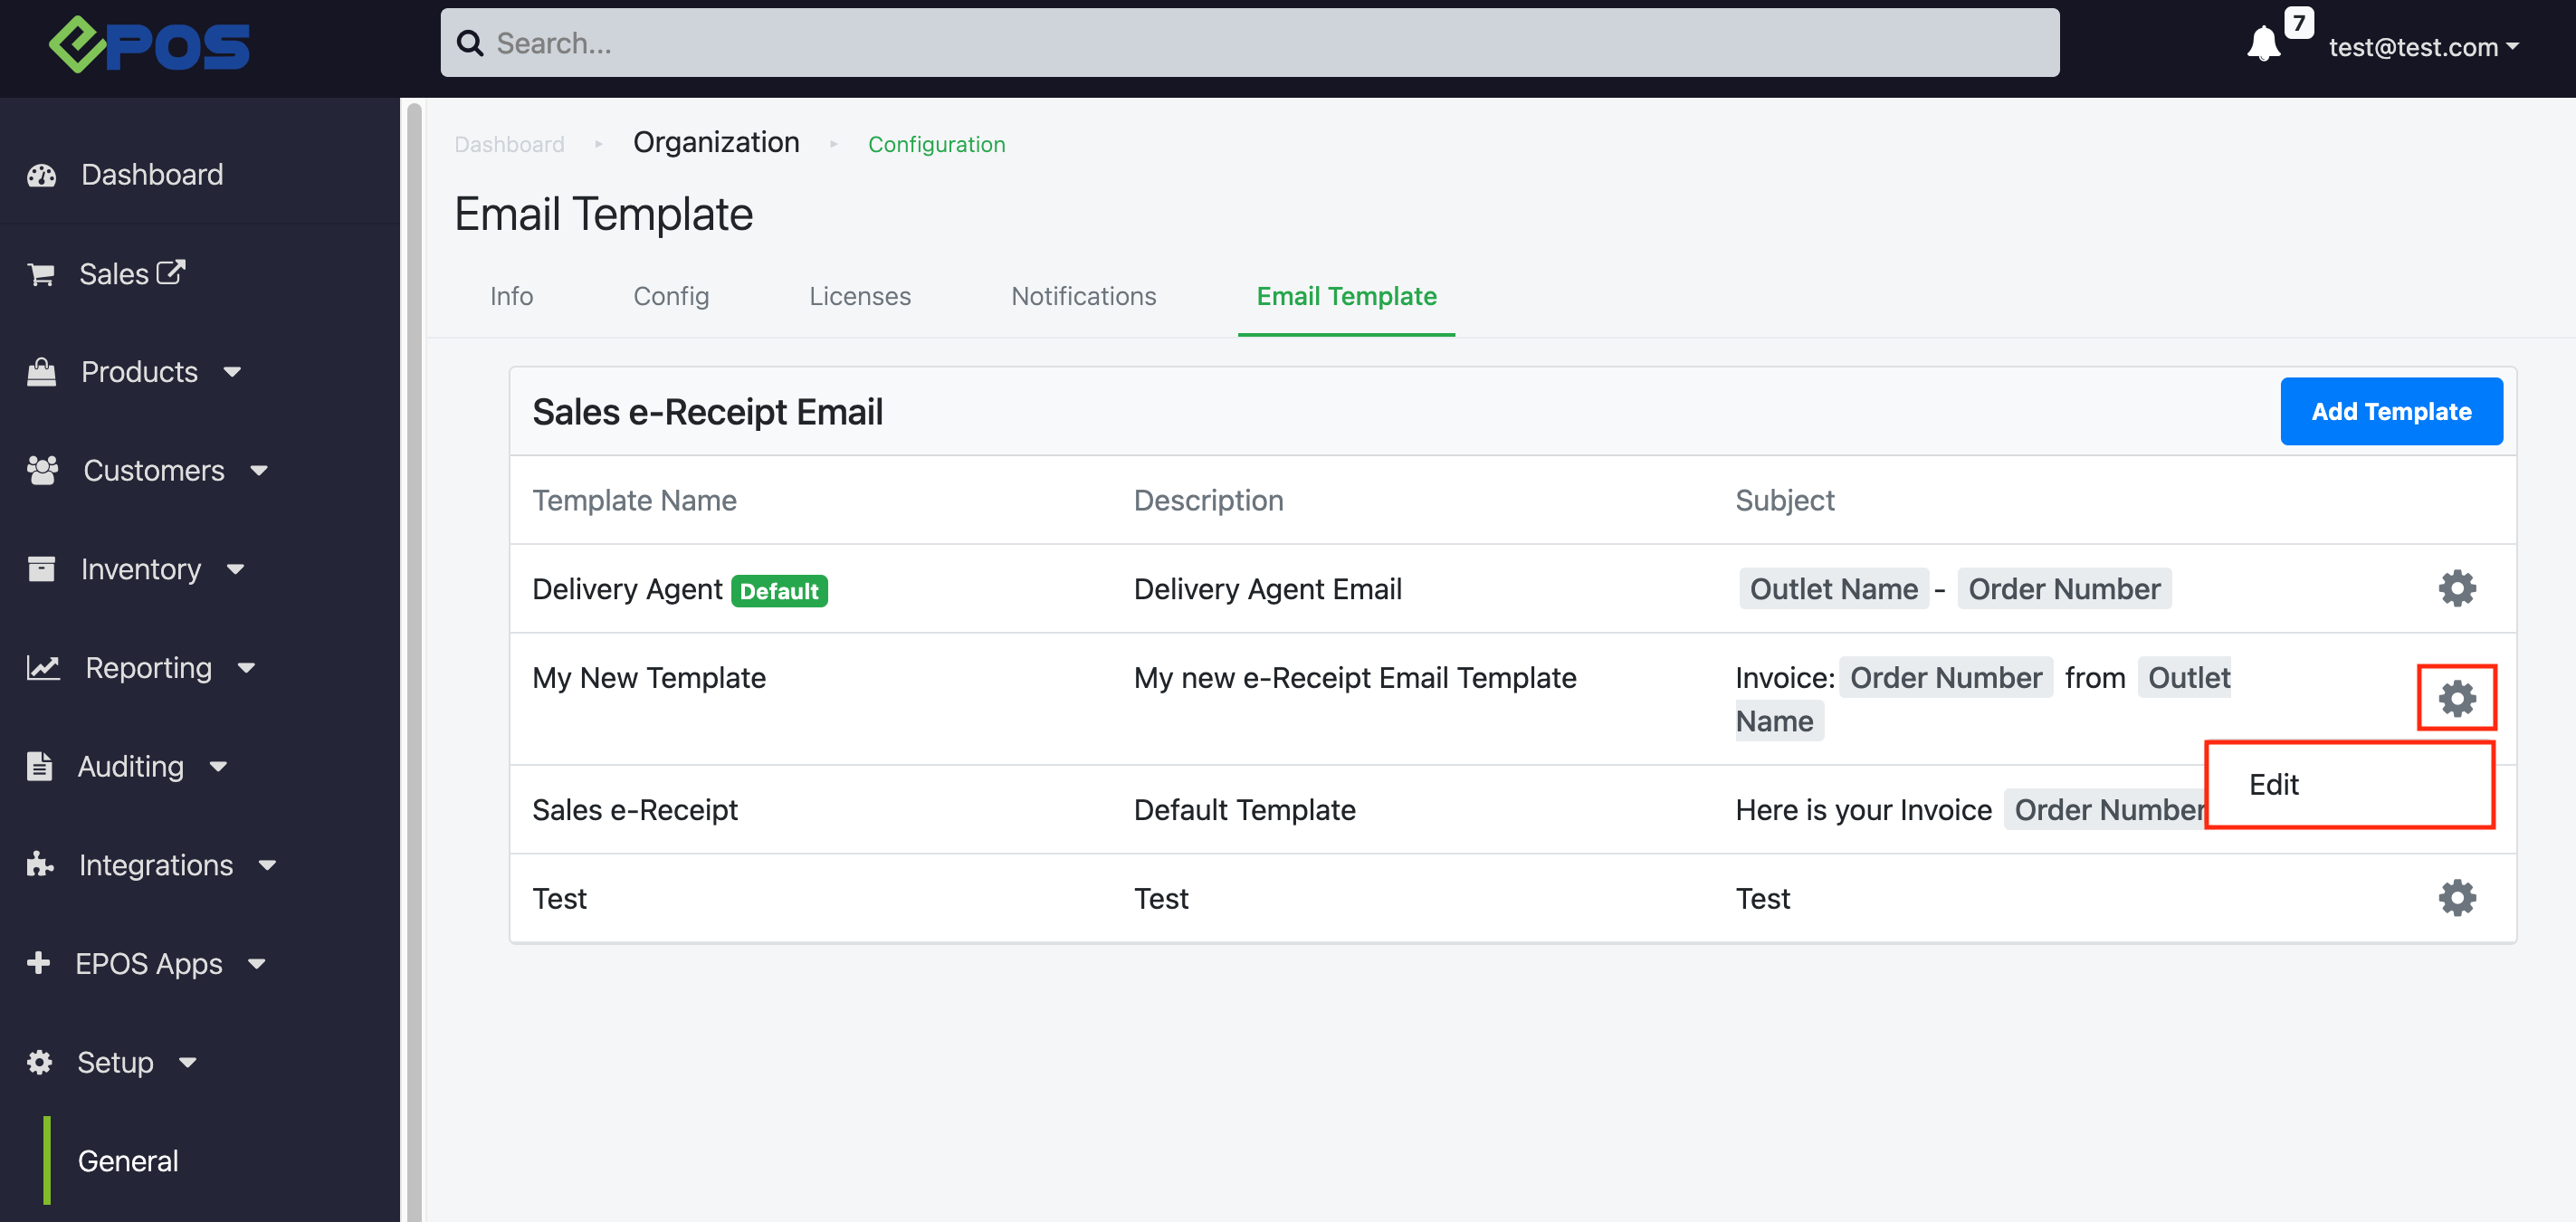
How to set a default template:
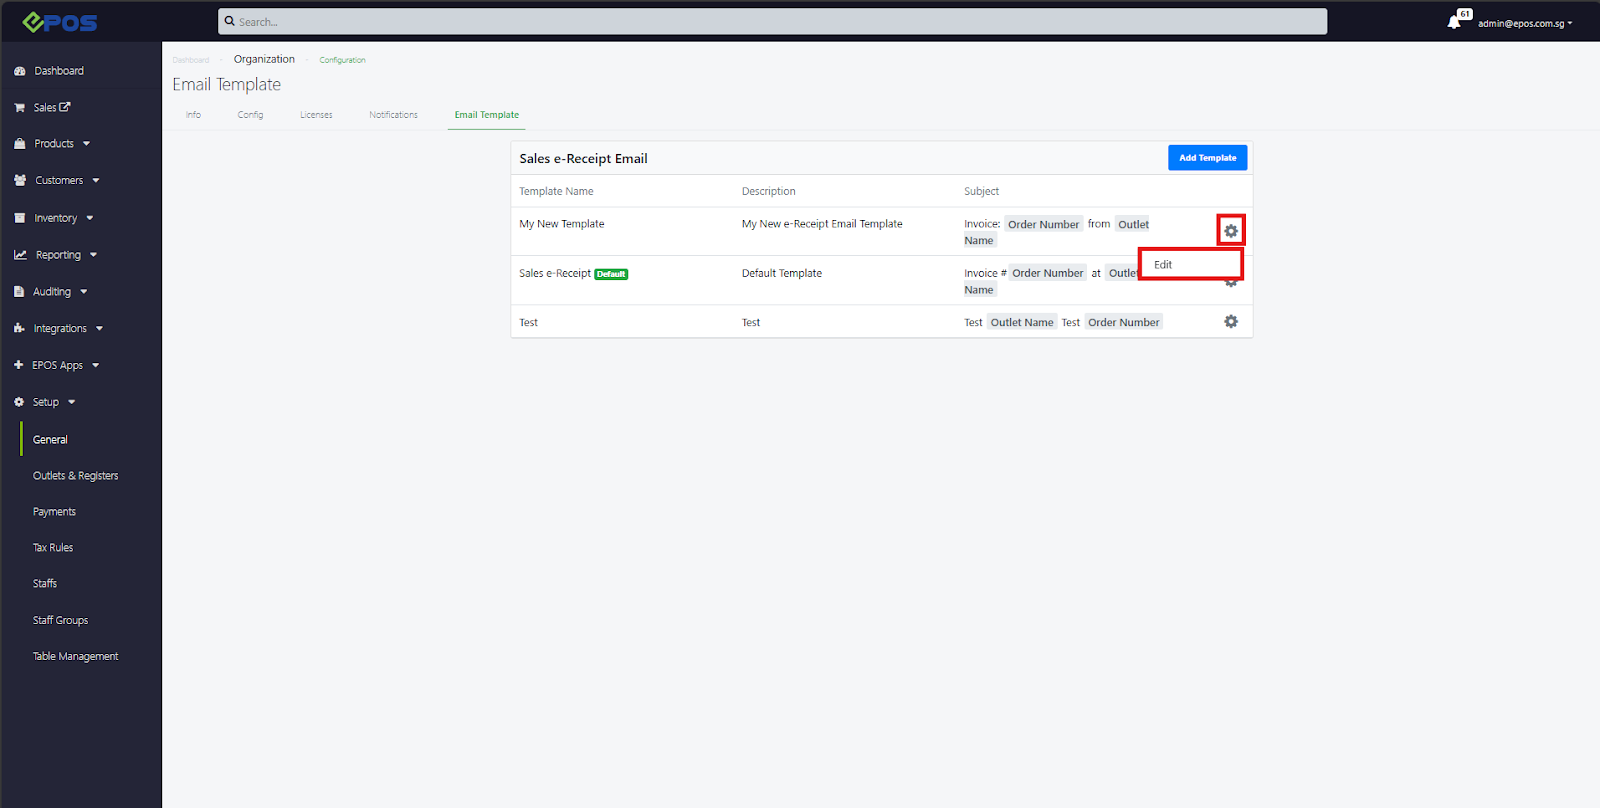
1. Select the “Gear” icon on the template to be set as default and click on “Edit”
2. “Tick” the default template checkbox and click on “Save Changes”
3. The desired Email Template will be set as the default
4. Once the template has been set as default, the email sent from backend would also follow the default sales e-receipt template.
How to set a default email address for Email Template:
1. Select the “Gear” icon on the template to be set as default and click on “Edit”
2. Input email address to be set to default and click “Save Changes”. Note: Optional field
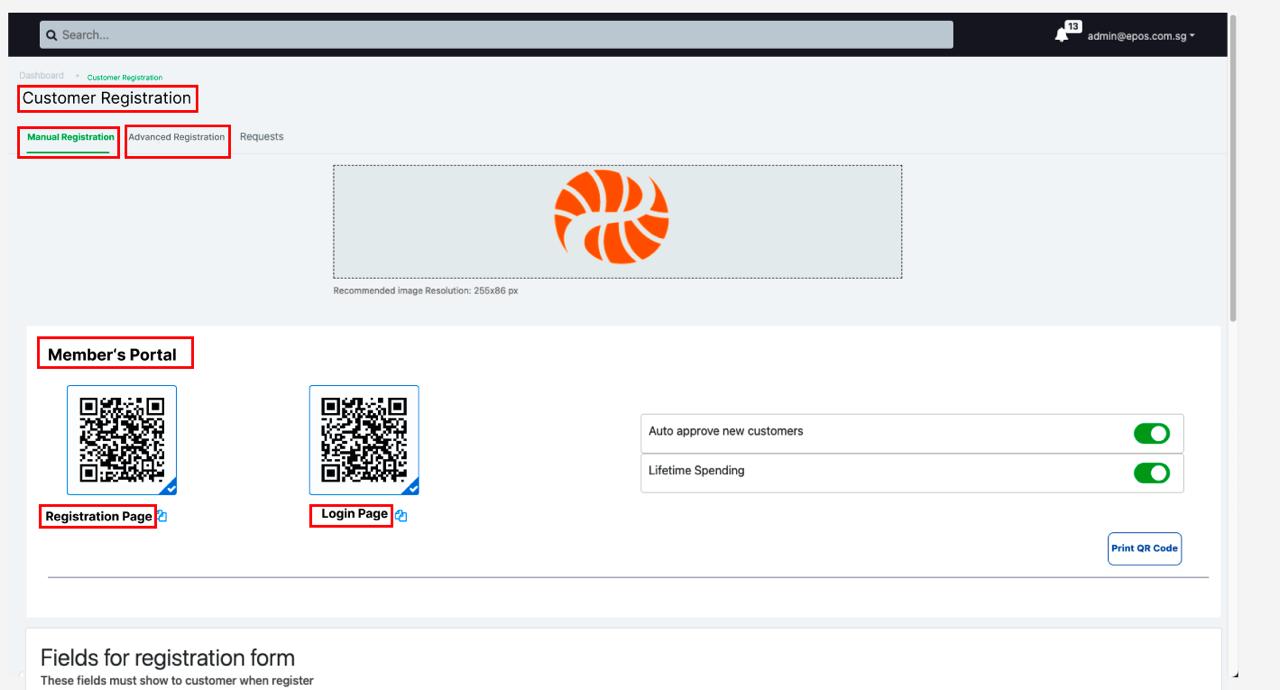
The UI for customer registration page has now been enhanced.
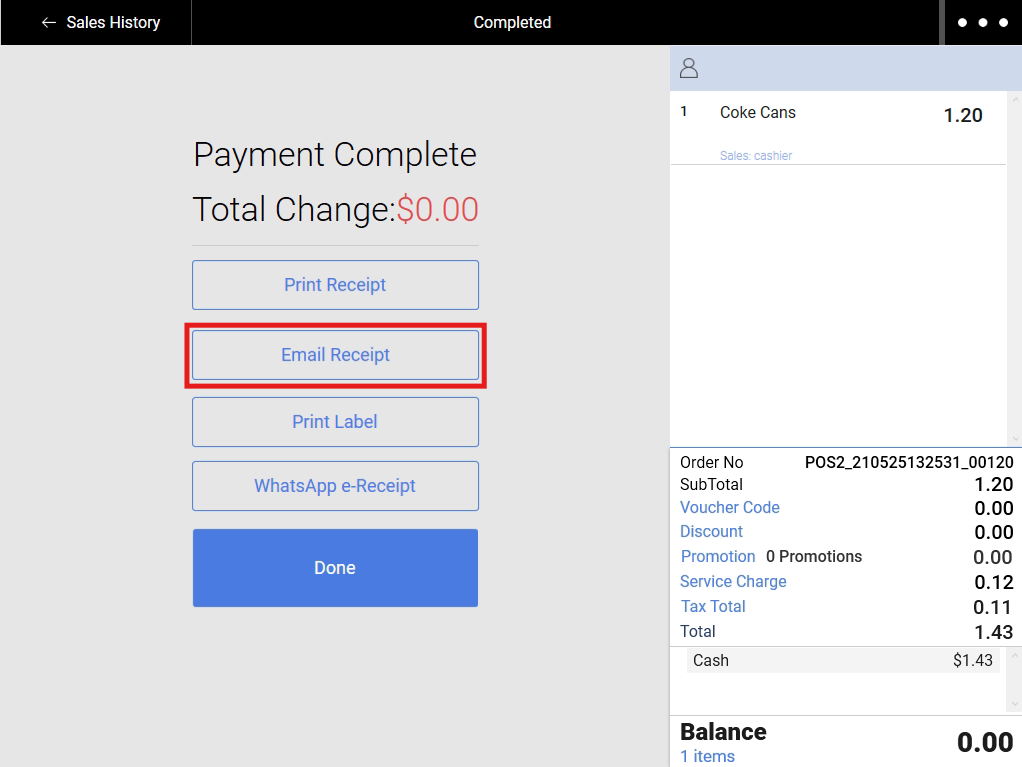
After completion of payment, you may now select different email templates to be sent out.
How it works:
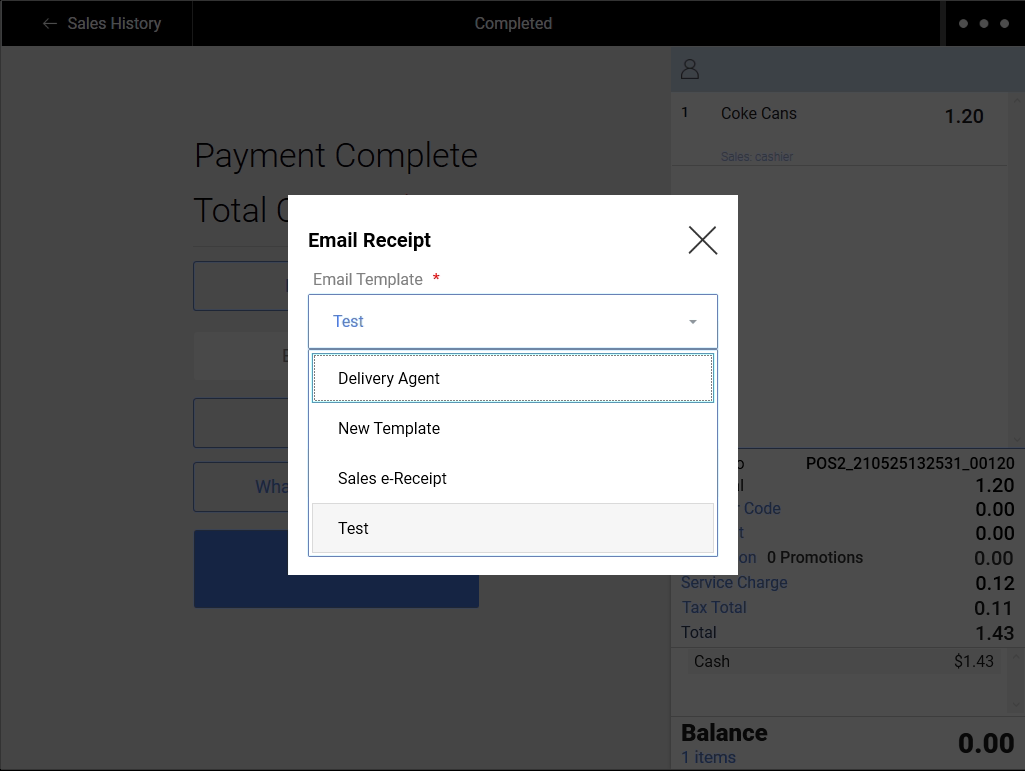
1. After payment, click on “Email Receipt”
2. Email Template will be set to the default template configured in the backend
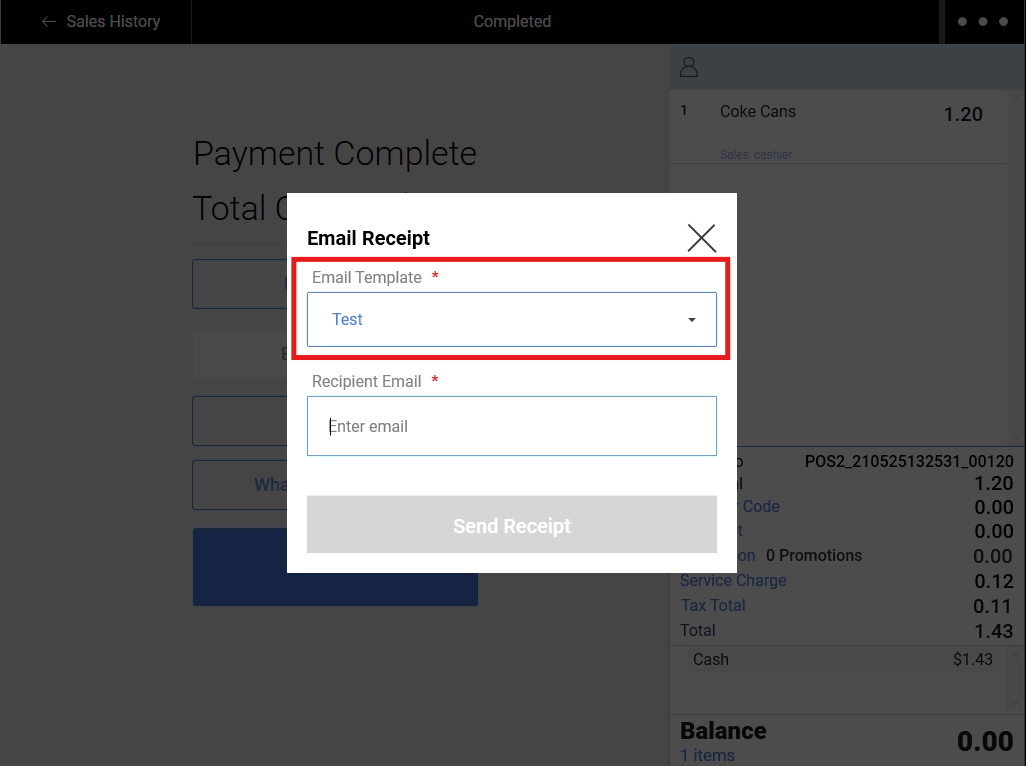
3. Click on dropdown to select other templates available from the backend
4. Recipient Email is the email address the Email Receipt will be delivered to.
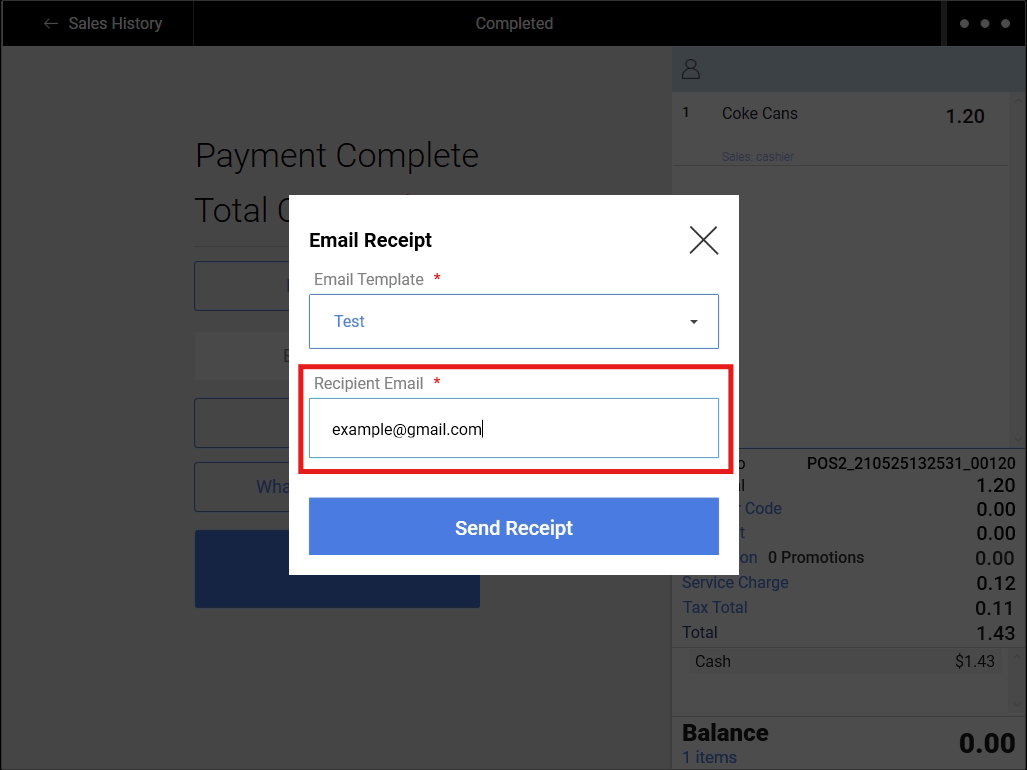
5. Recipient Email will be automatically filled depending on the presence of default recipient email (from the email template) and the customer’s email address.
Below is a table showing the priorities of Recipient Email auto-fill:
| Have Default Recipient Email? | Have Customer Email? | Auto-fill Result |
| No | No | Empty |
| Yes | No | Default Recipient Email |
| No | Yes | Customer’s Email |
| Yes | Yes | Default Recipient Email |
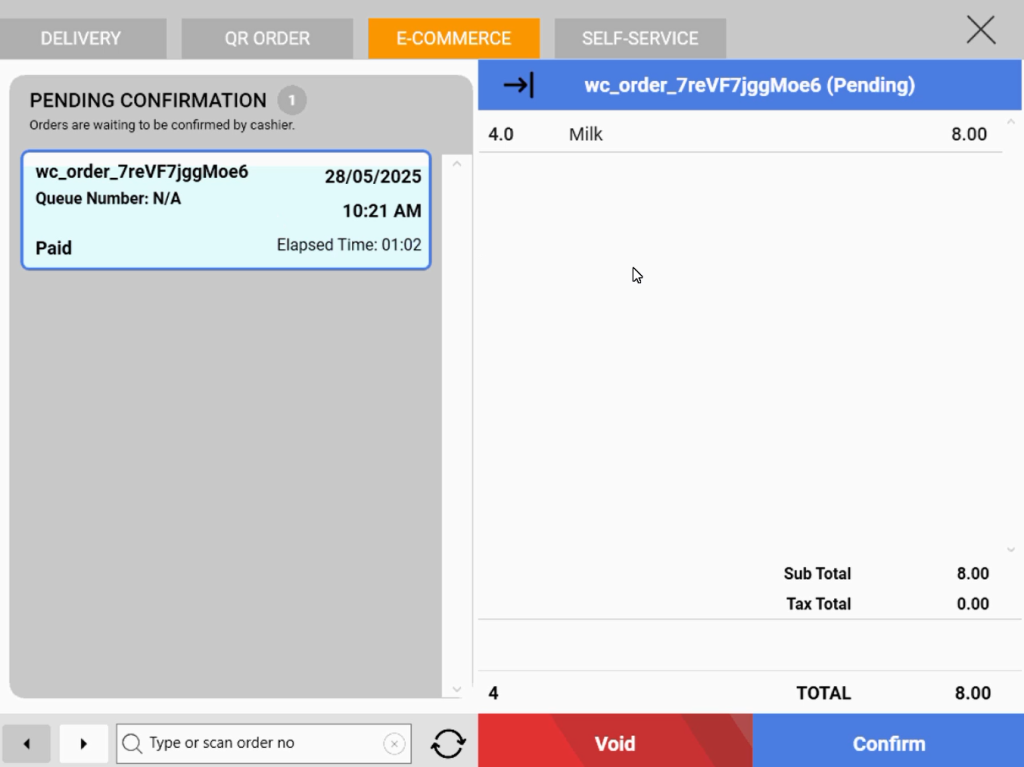
Frontend cashiers can now receive WooCommerce order notifications directly in the Frontend POS !
All WooCommerce will now sync to the Frontend POS under Bell Icon > E-Commerce Tab, cashier can confirm and void the orders directly from POS!
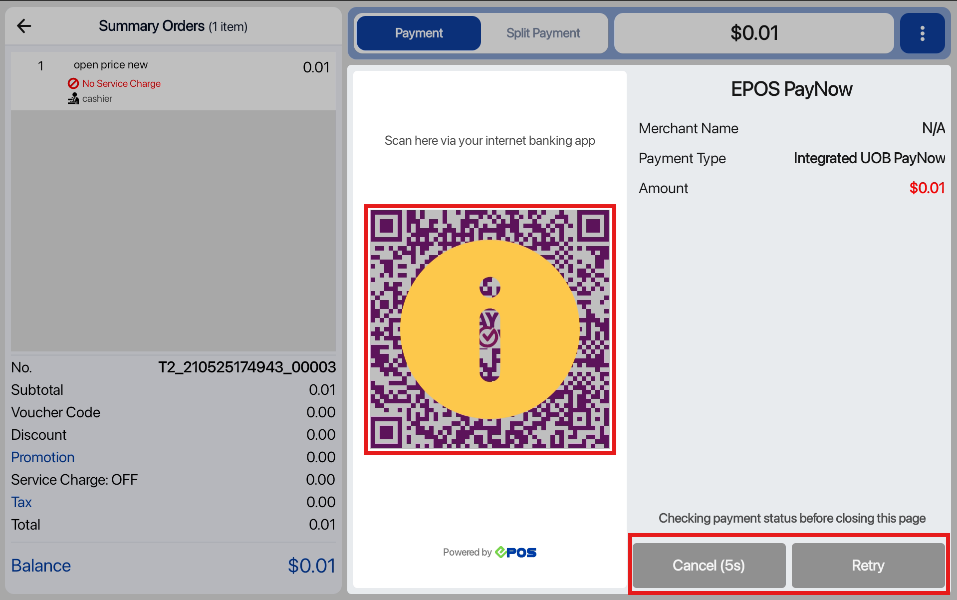
We have now implemented a 5 second delay for cancellation to check payment status before cancelling the PayNow Transaction, for Windows POS.
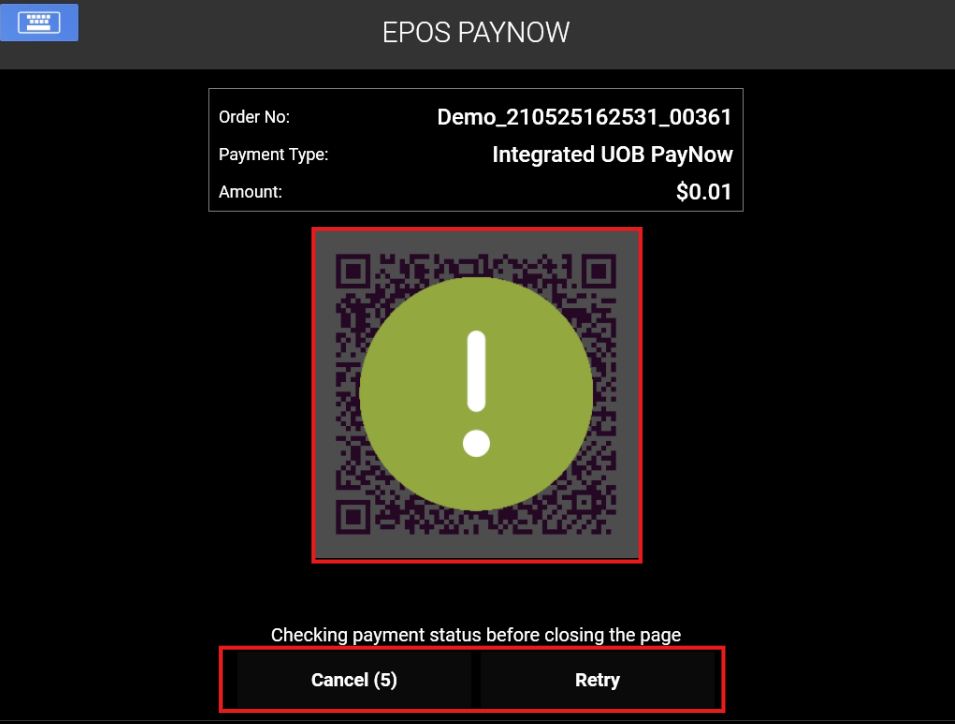
1. When cancelling payment while QR code is active, the QR code will be masked and there will be a 5 second countdown after cancelling payment.
We have now implemented a 5 second delay for cancellation to check payment status before cancelling the PayNow Transaction, for Android POS.
1. When cancelling payment while QR code is active, the QR code will be masked and there will be a 5 second countdown after cancelling payment.
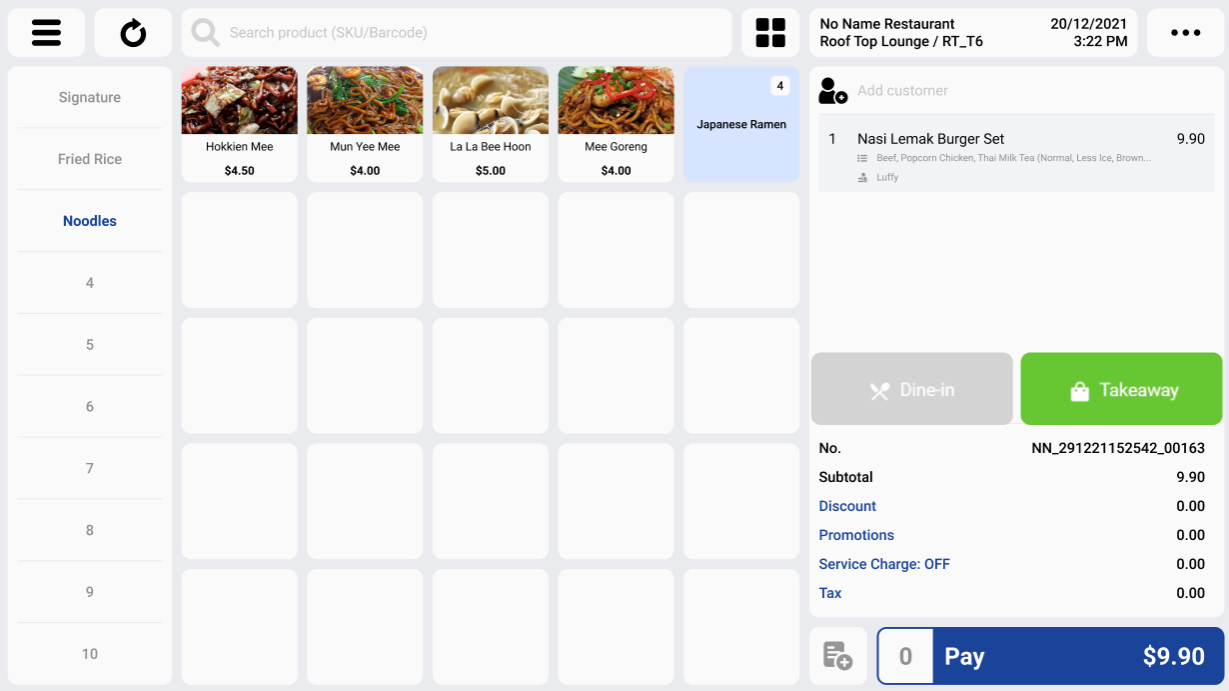
Android POS now supports dine-in and takeaway options, which was previously only supported by the Windows POS.
How it works:
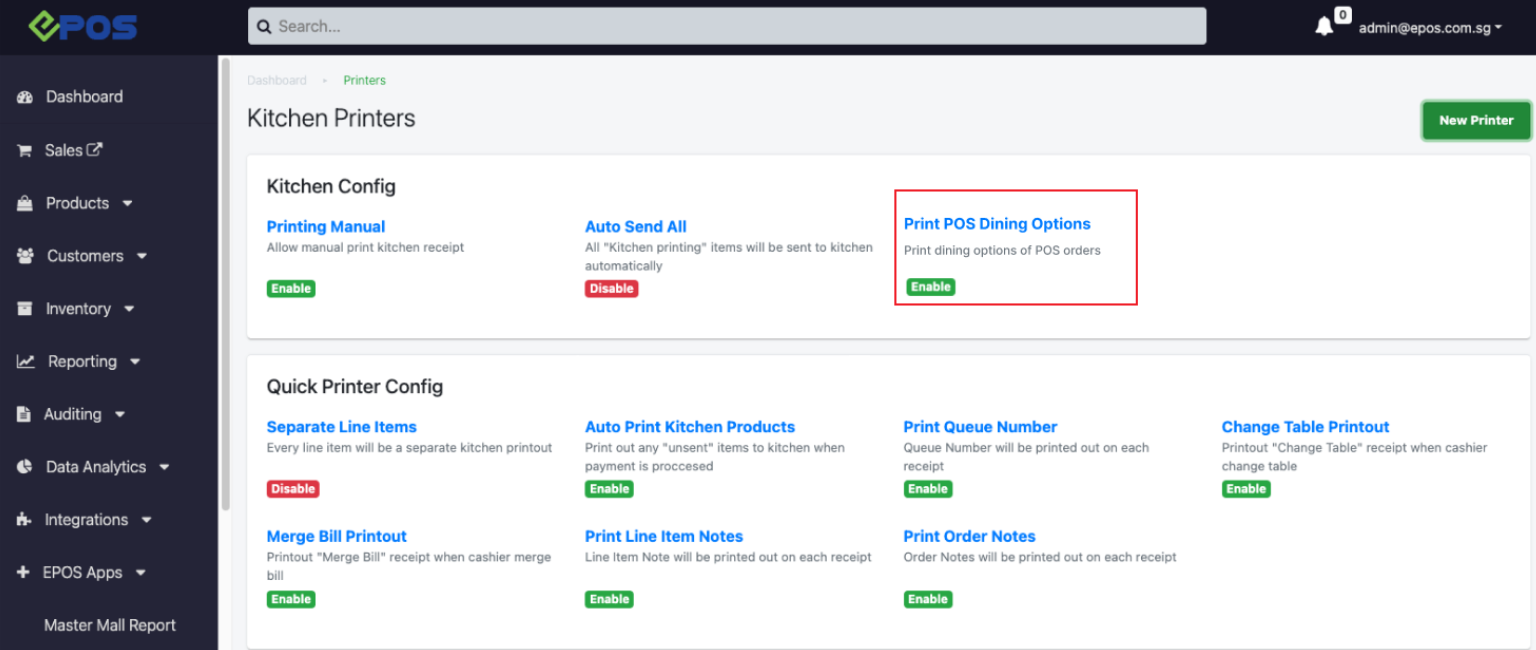
1. User toggles on the “Dining Option Selection” feature from EPOS Backend > EPOS Apps > Kitchen Printing > Print POS Dining Options. Sync the POS for the changes to take effect.
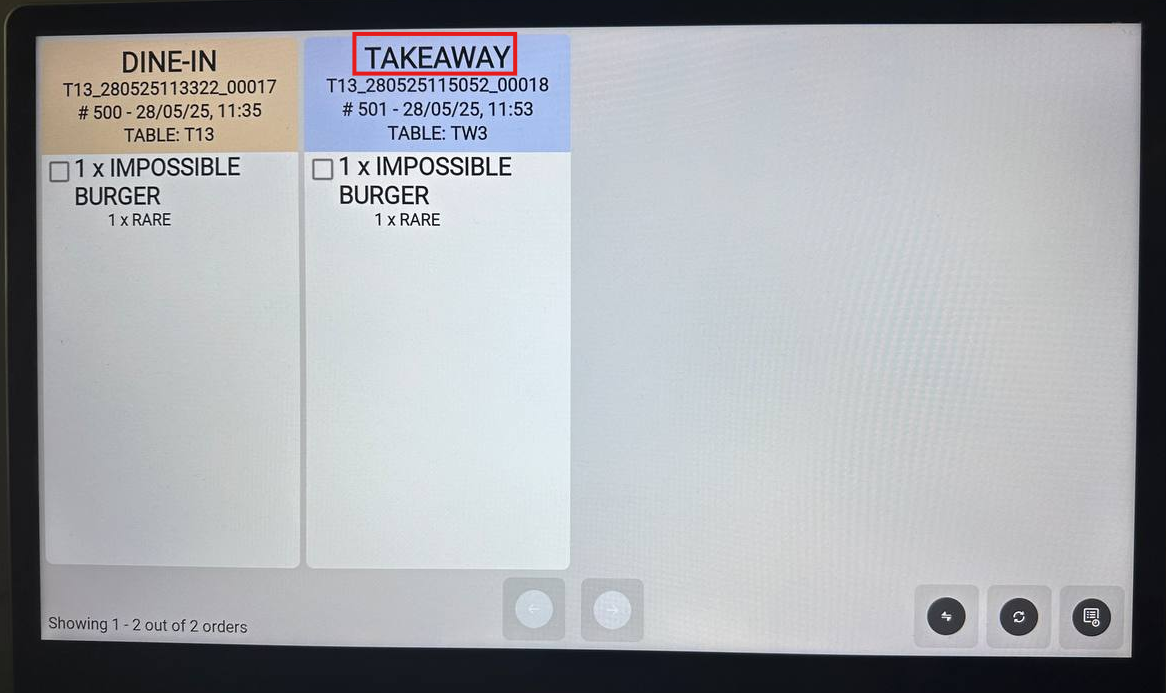
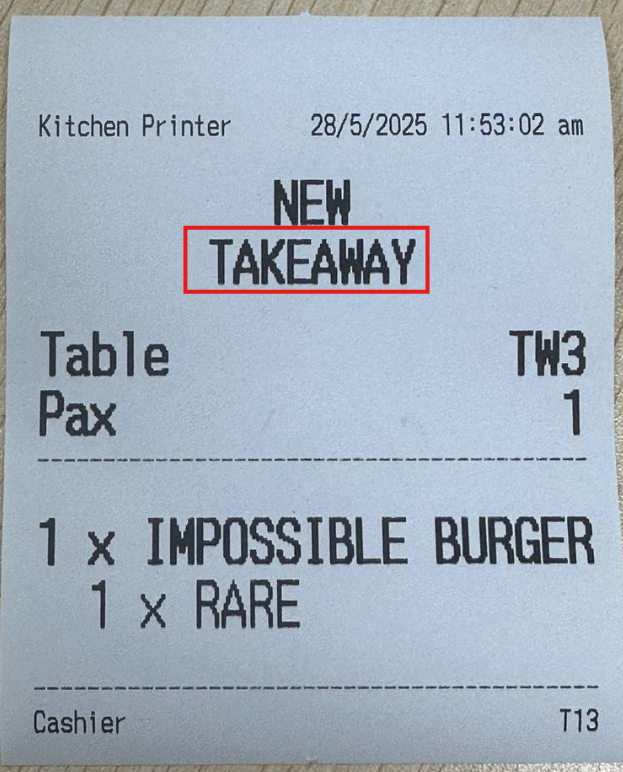
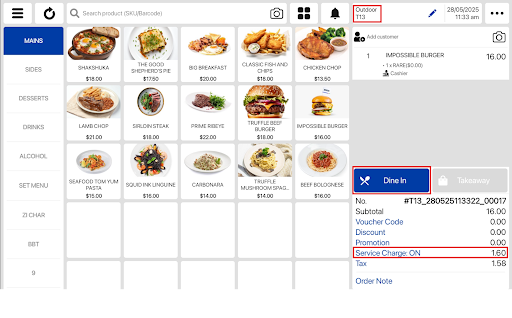
2. In Android POS, users can select between the 2 dining options — Dine-in & Takeaway. For illustration below, “Takeaway” is selected as an example.
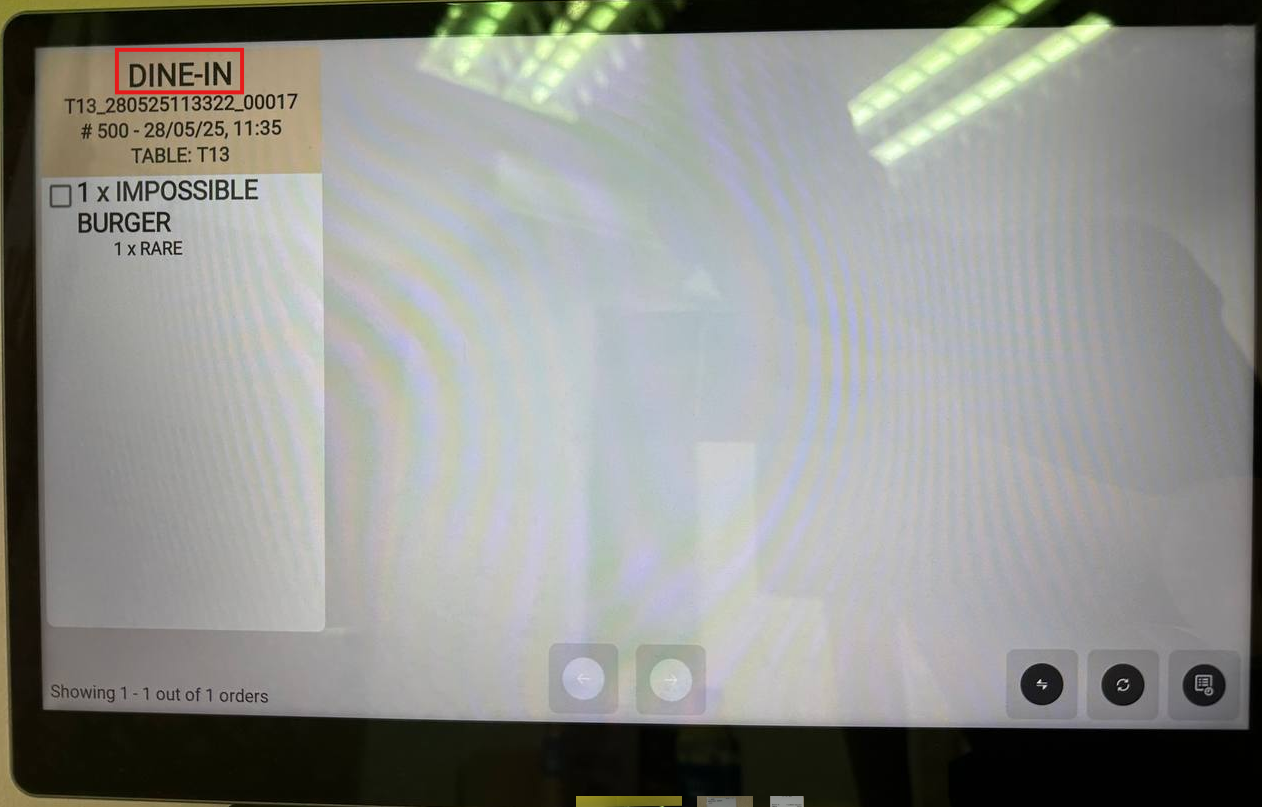
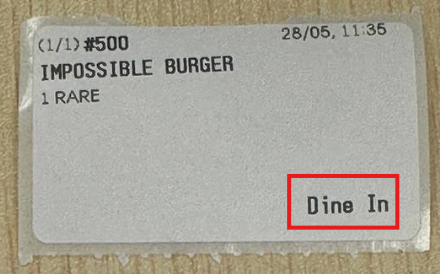
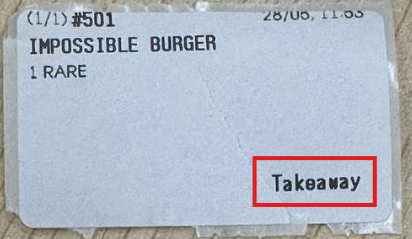
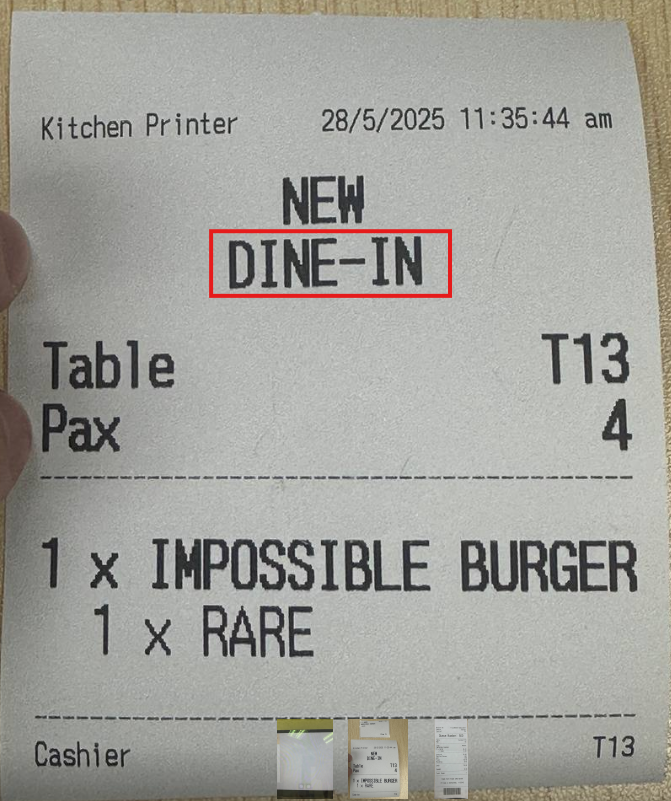
The selected dining option will be displayed on the POS, KDS, Printing Label and Kitchen Slip.
- Selecting ‘Dine In’ automatically applies Service Charge (SVC).
- Selecting ‘Takeaway’ automatically removes SVC.
|
View |
Dine In |
Takeaway |
|
POS |
|
|
|
KDS |
 |
 |
|
Printing Label |
 |
 |
|
Kitchen Slip |
 |
 |
 SVC automatically applied
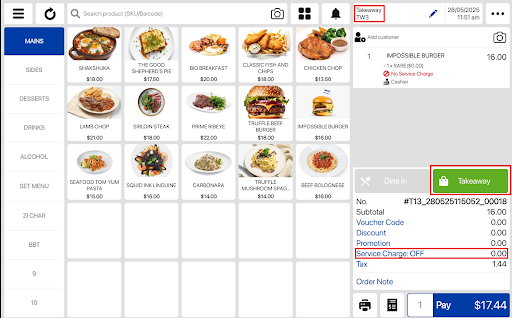 SVC automatically removed
How to Update
For POS related features, user will need to update the POS to the latest version, version 5.224.0.0.
For Backend related features, user are not required to perform any actions, the new features would automatically be updated.
Feedback
We value your input! If you encounter any issues or have suggestions for further improvements, please don’t hesitate to contact us.
Stay Connected
Stay updated with the latest news and updates by following us on our social platforms.
Thank You
We appreciate your continued trust in EPOS. This update is just one of many steps we’re taking to provide you with the best POS system on the market.
If you have any questions or need assistance with the update, please contact our support team at:
Call: 6871 8833 / Email: [email protected] / Whatsapp: 8482 1888
![]()