No products in the cart.
Perform the following steps to create a new invoice.
Contents hide
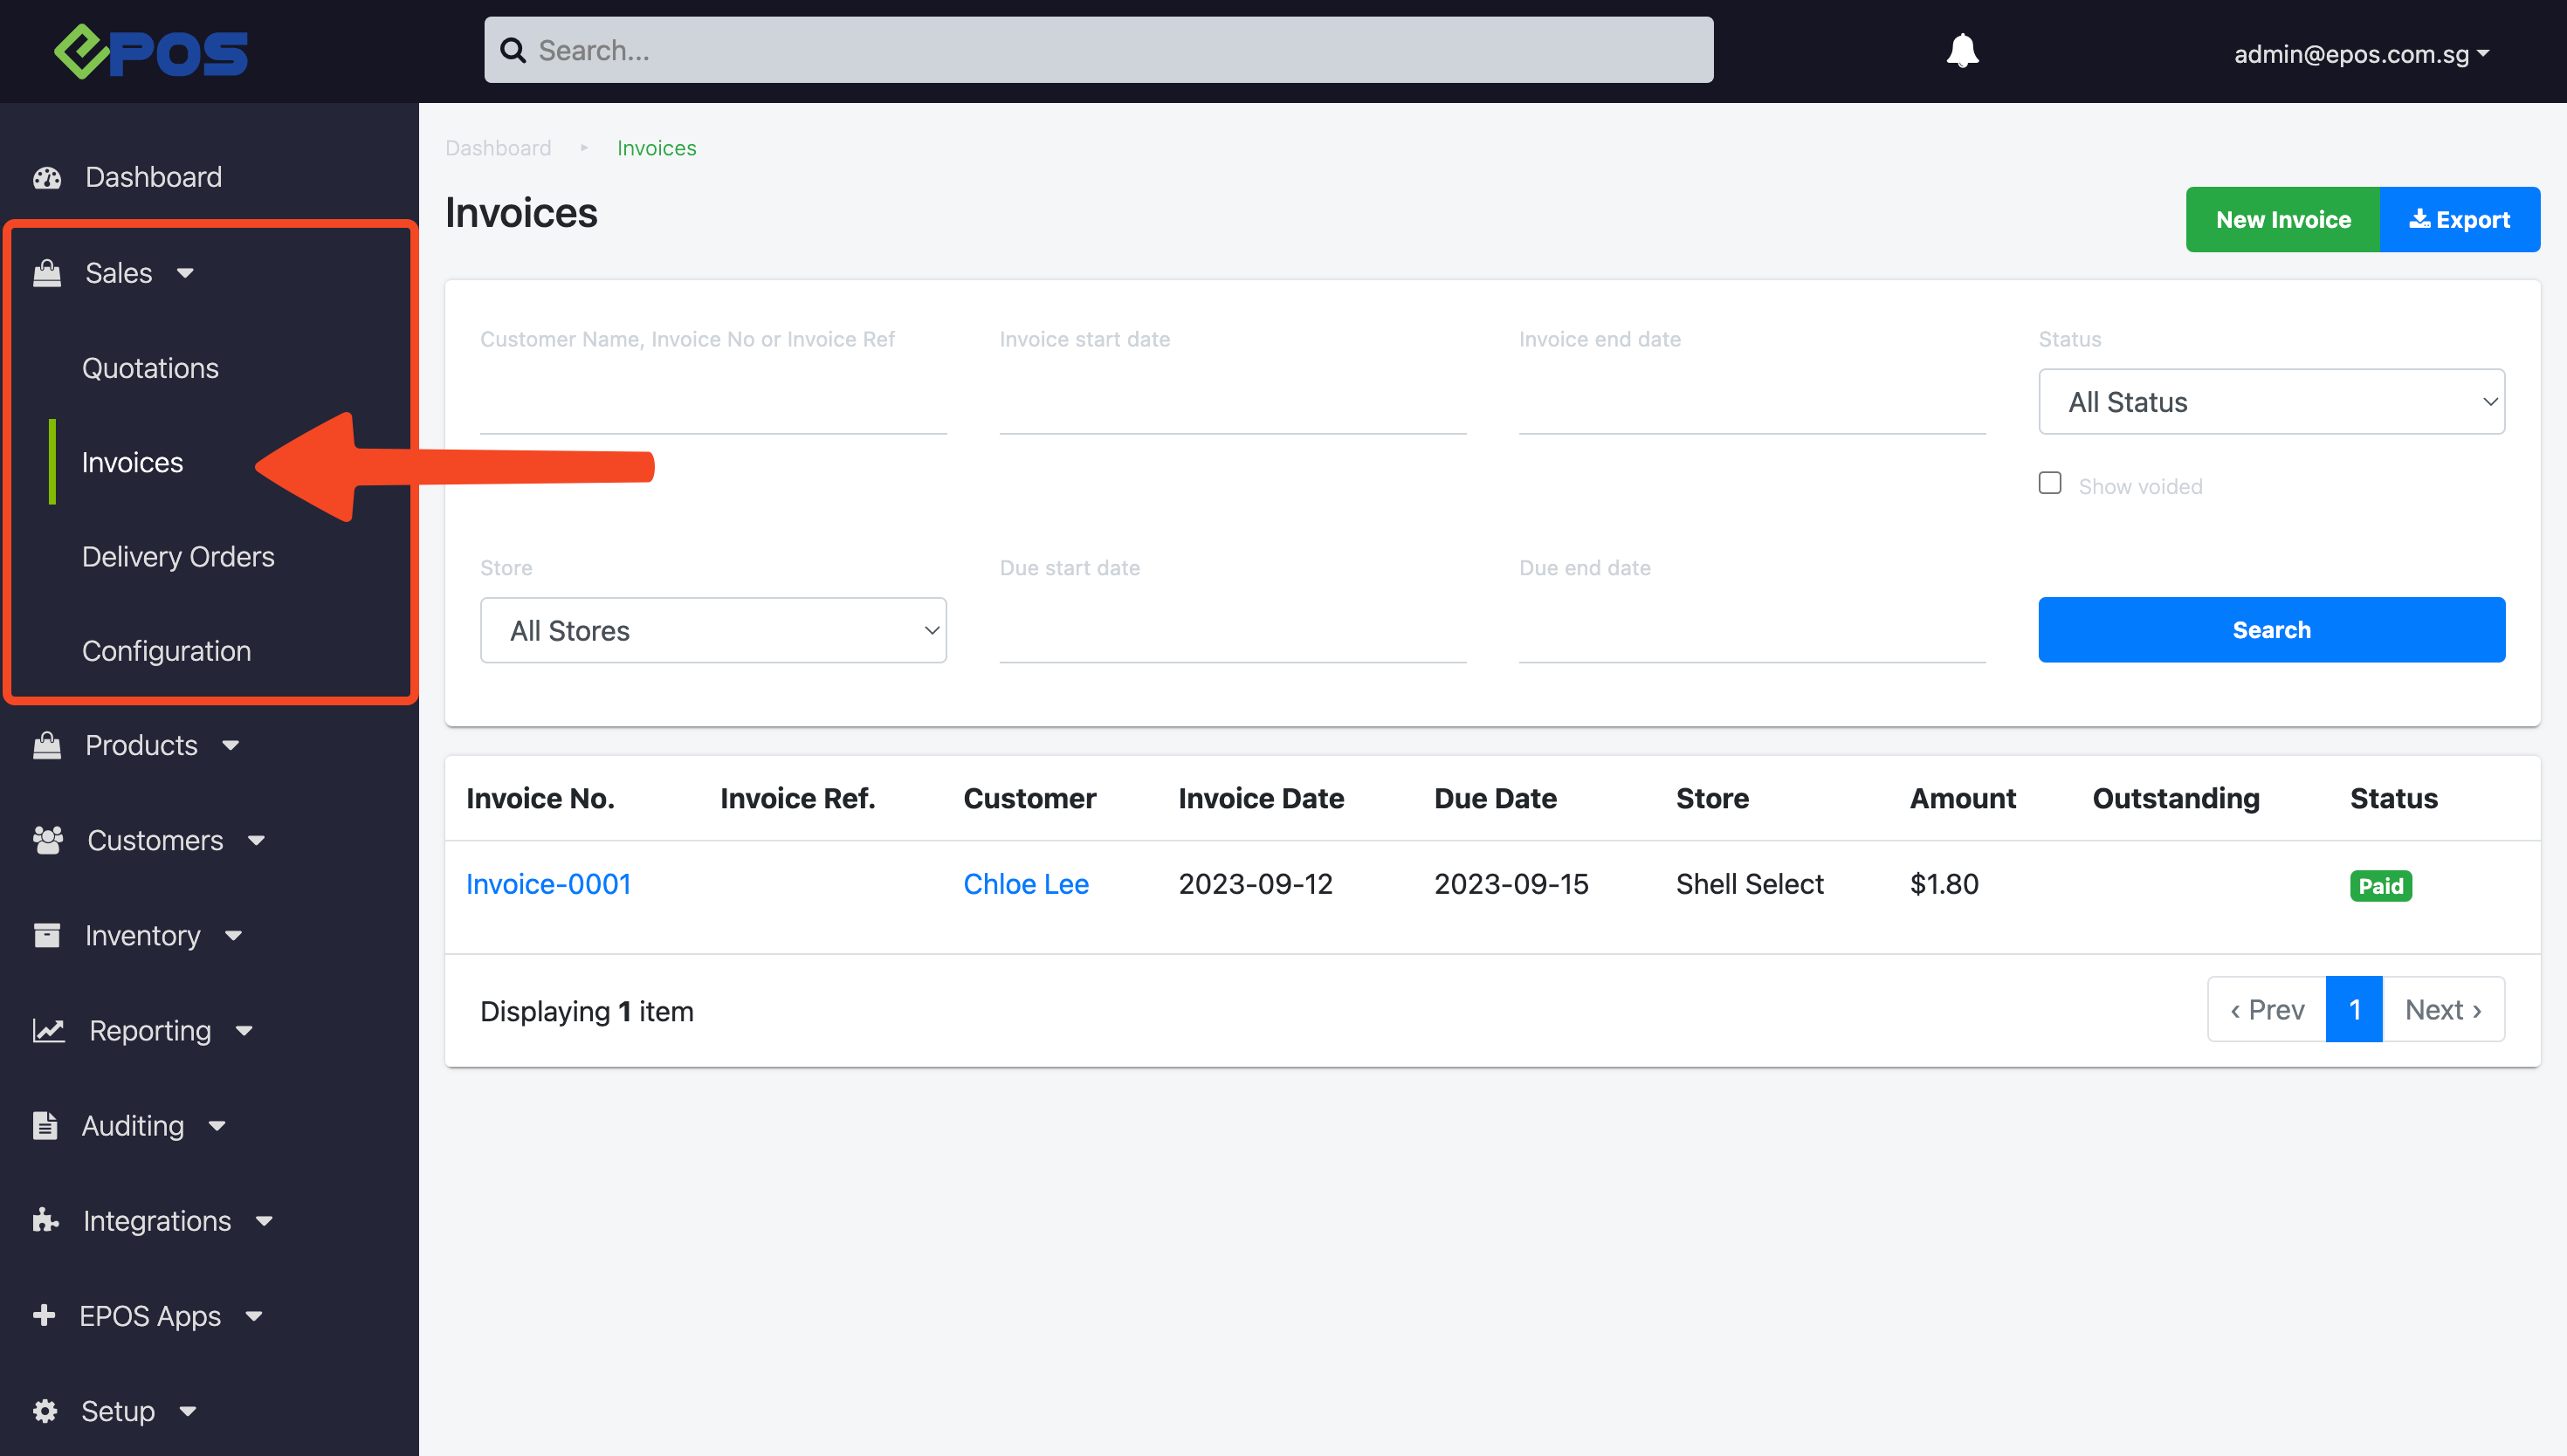
1. To access the Invoices main page, click on the Sales Panel and click on Invoices.

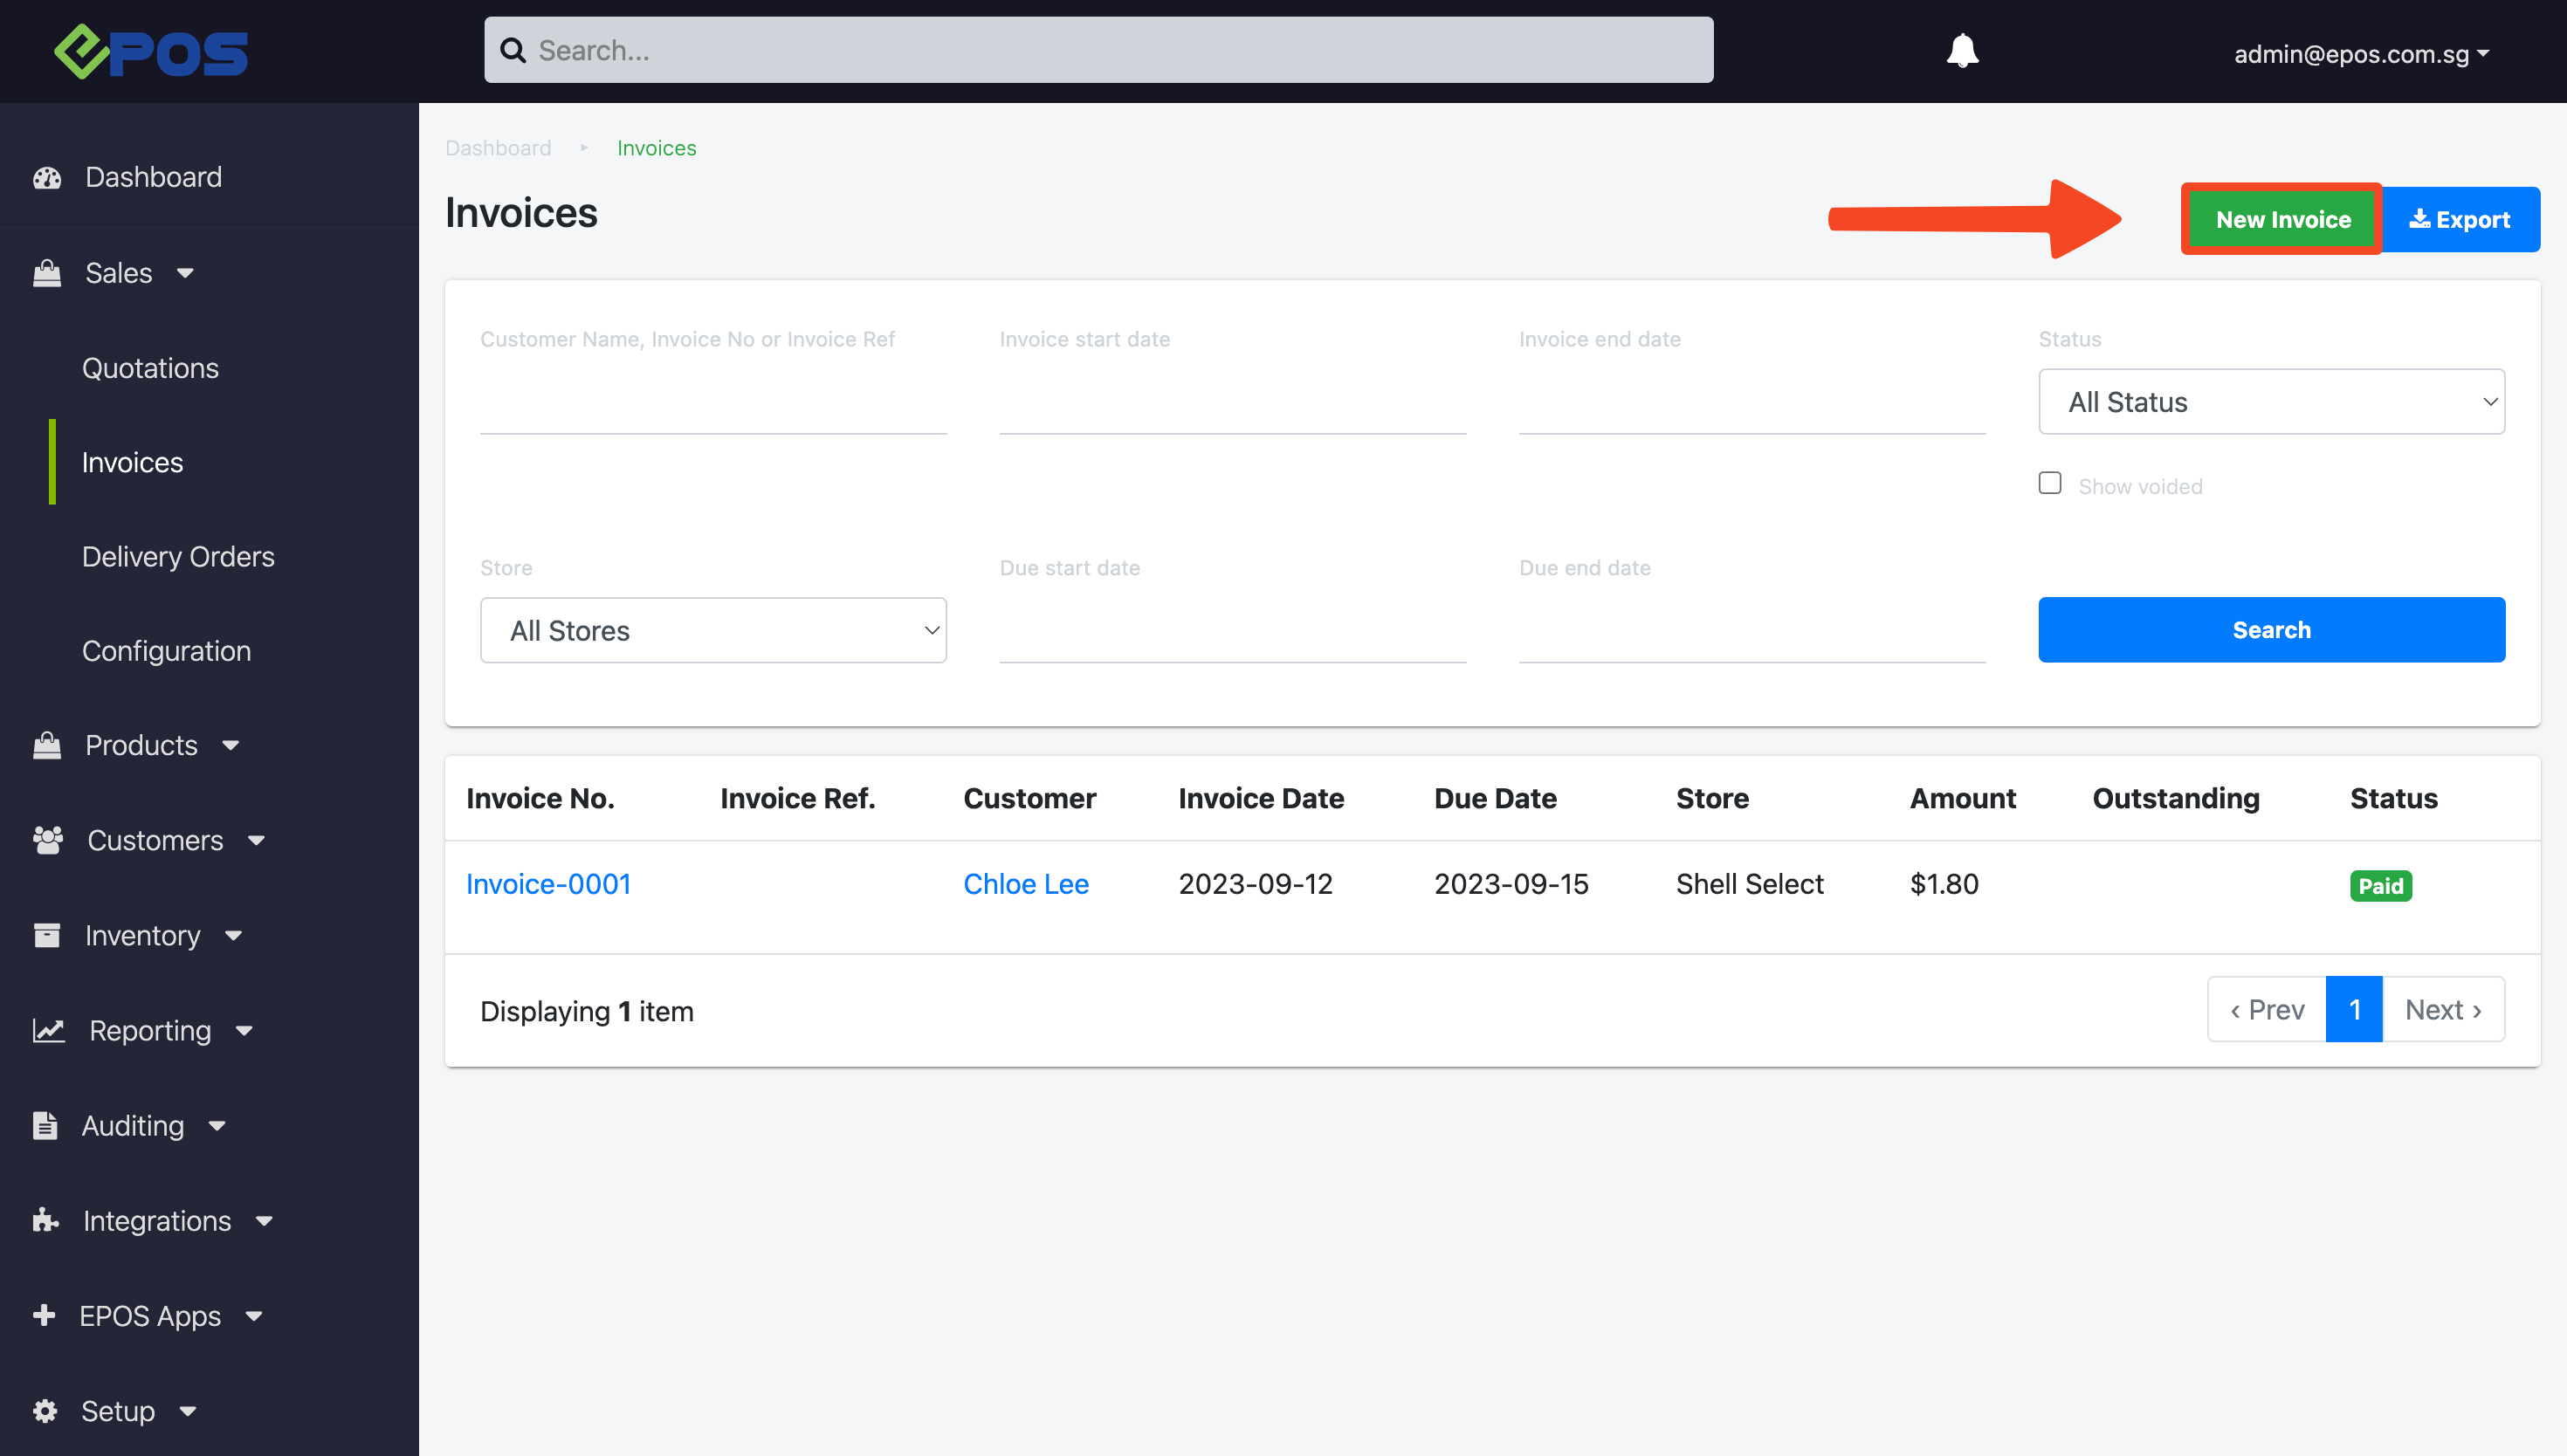
2. Click on “New Invoice” to Create a New Invoice.

3. Fill in the relevant details.

a. Input Invoice Details
b. Add Products / Import From File
Add Products: Click to add products individually
Import From File: Click to bulk import products through a CSV file
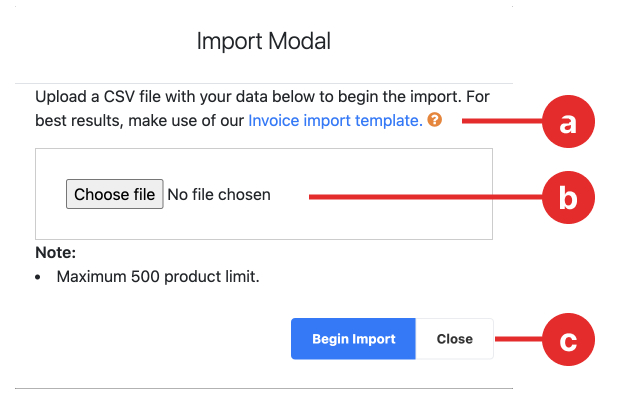
a. Click to download Template
b. Click to import CSV file OR drag and drop file into this area
c. Click to begin importing
c. Product List – Lists all the products part of this invoice
d. Save as draft / Create Invoice
4. Ensure that respective details are entered before creating the invoice: Item Note, Order QTY, Unit Price, Discount (%/$)


💡 Utilise the duplicate and delete action icons to increase your efficiency!
5. Upon clicking on “Create Invoice”, a pop-up will prompt the user to email the newly created invoice to the customer.
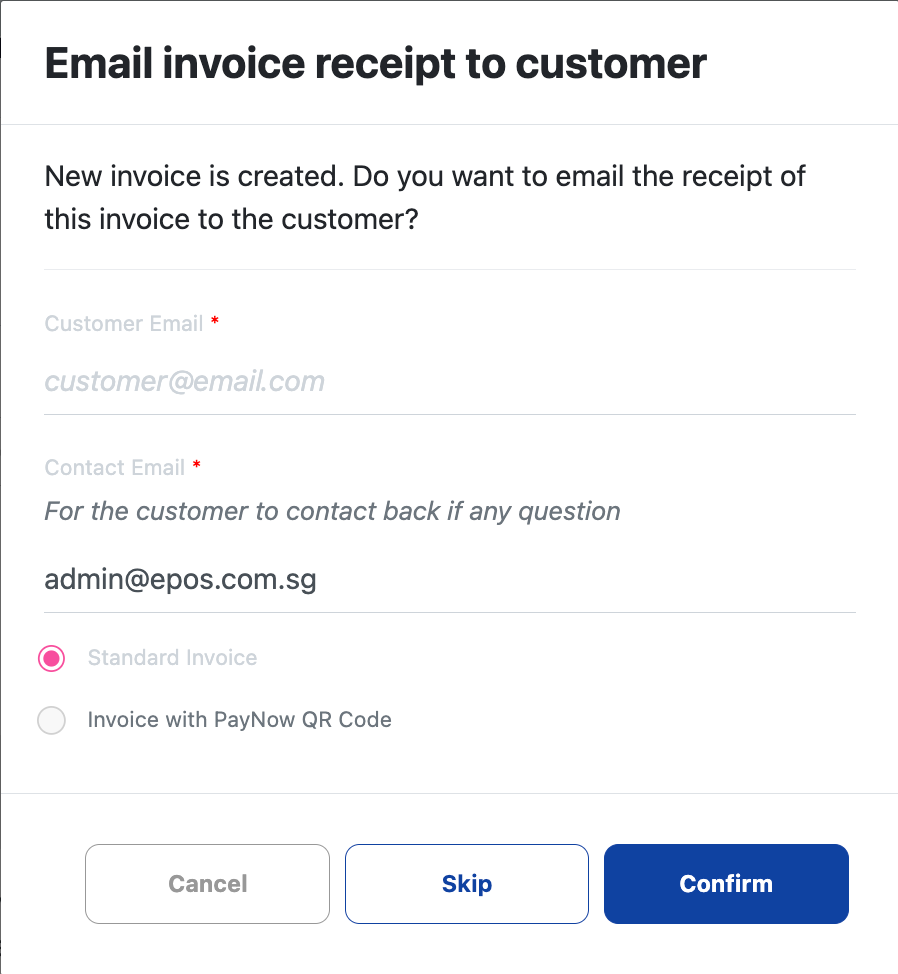
Select Standard Invoice to email a PDF version of the invoice or select Invoice with PayNow QR Code to email an invoice PDF with a dynamic Paynow QR.
💡 For more information on dynamic Paynow QR, see Exporting an invoice to PDF
- Skip to close pop up without sending
- Send to forward the newly created invoice to the customer’s email address.
6. Upon completion, the invoice detail is generated.
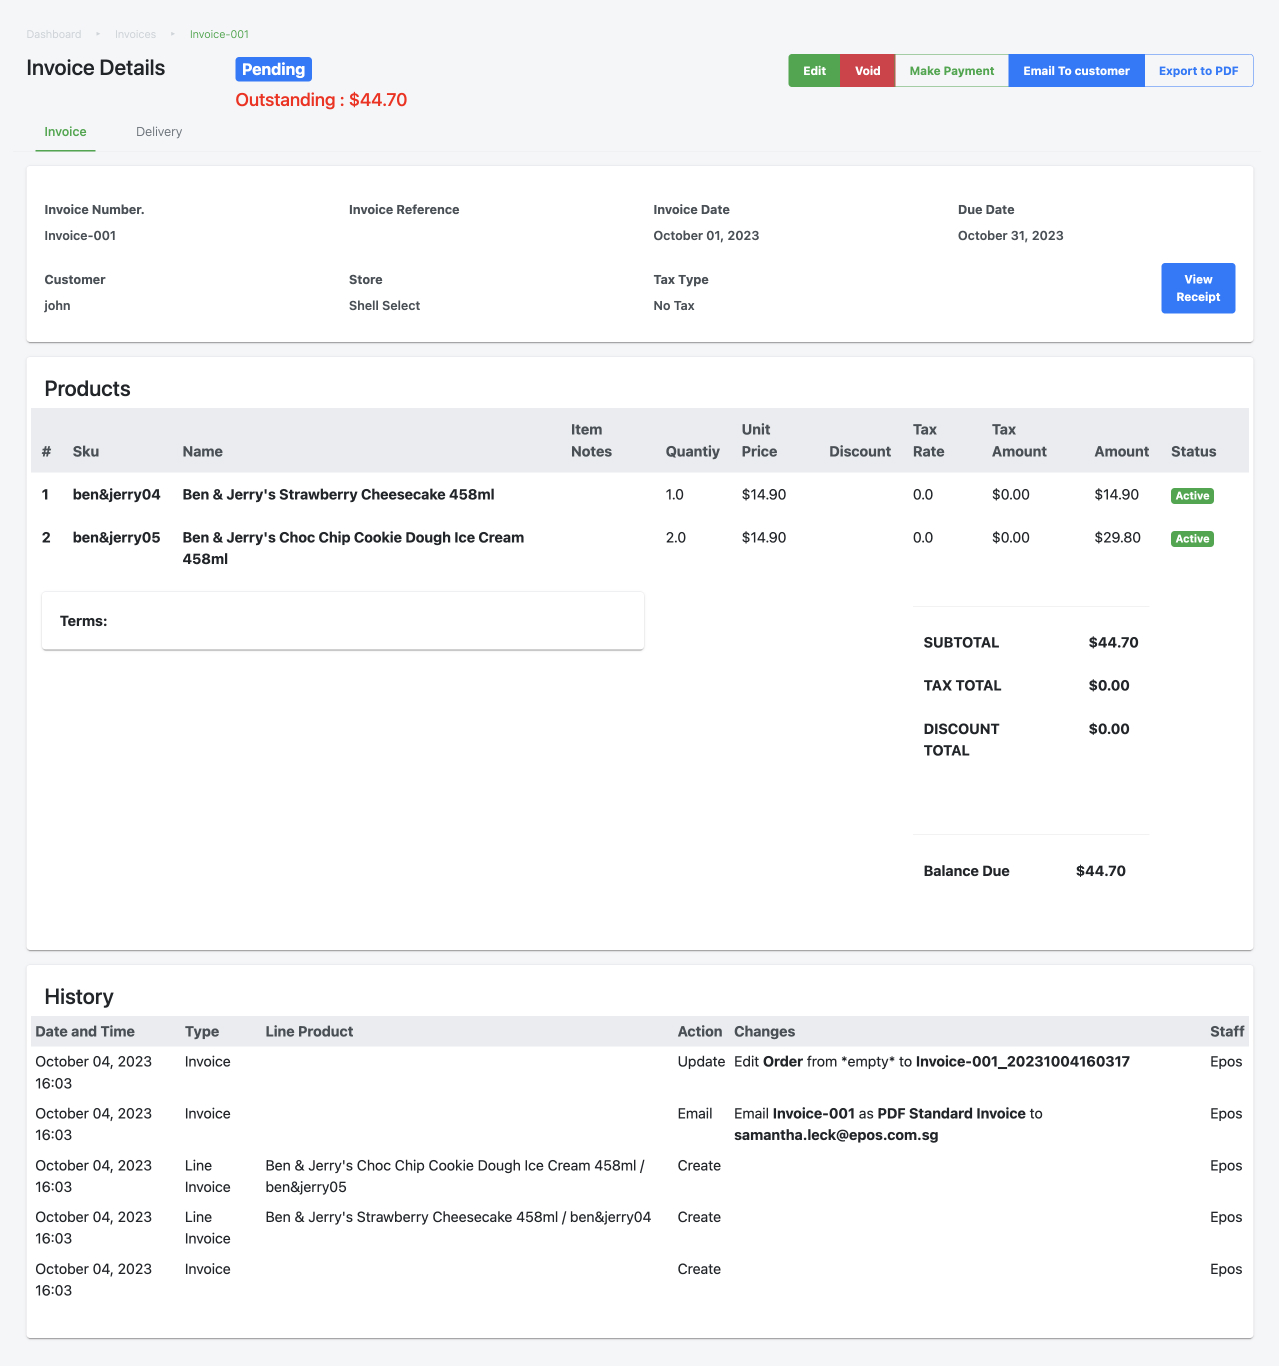
Invoice will be created successfully and now be listed in the invoices list in the main Invoices page once “Created successfully” notification is shown at the top right corner.
💡 Once an invoice is successfully created, it cannot be deleted from the Backend Portal.
💡 The Save as draft button in the Create New Invoice page allows users to save an invoice that they have been working on as a draft in the backend.
Was this article helpful?
YesNo