No products in the cart.
Release Changes
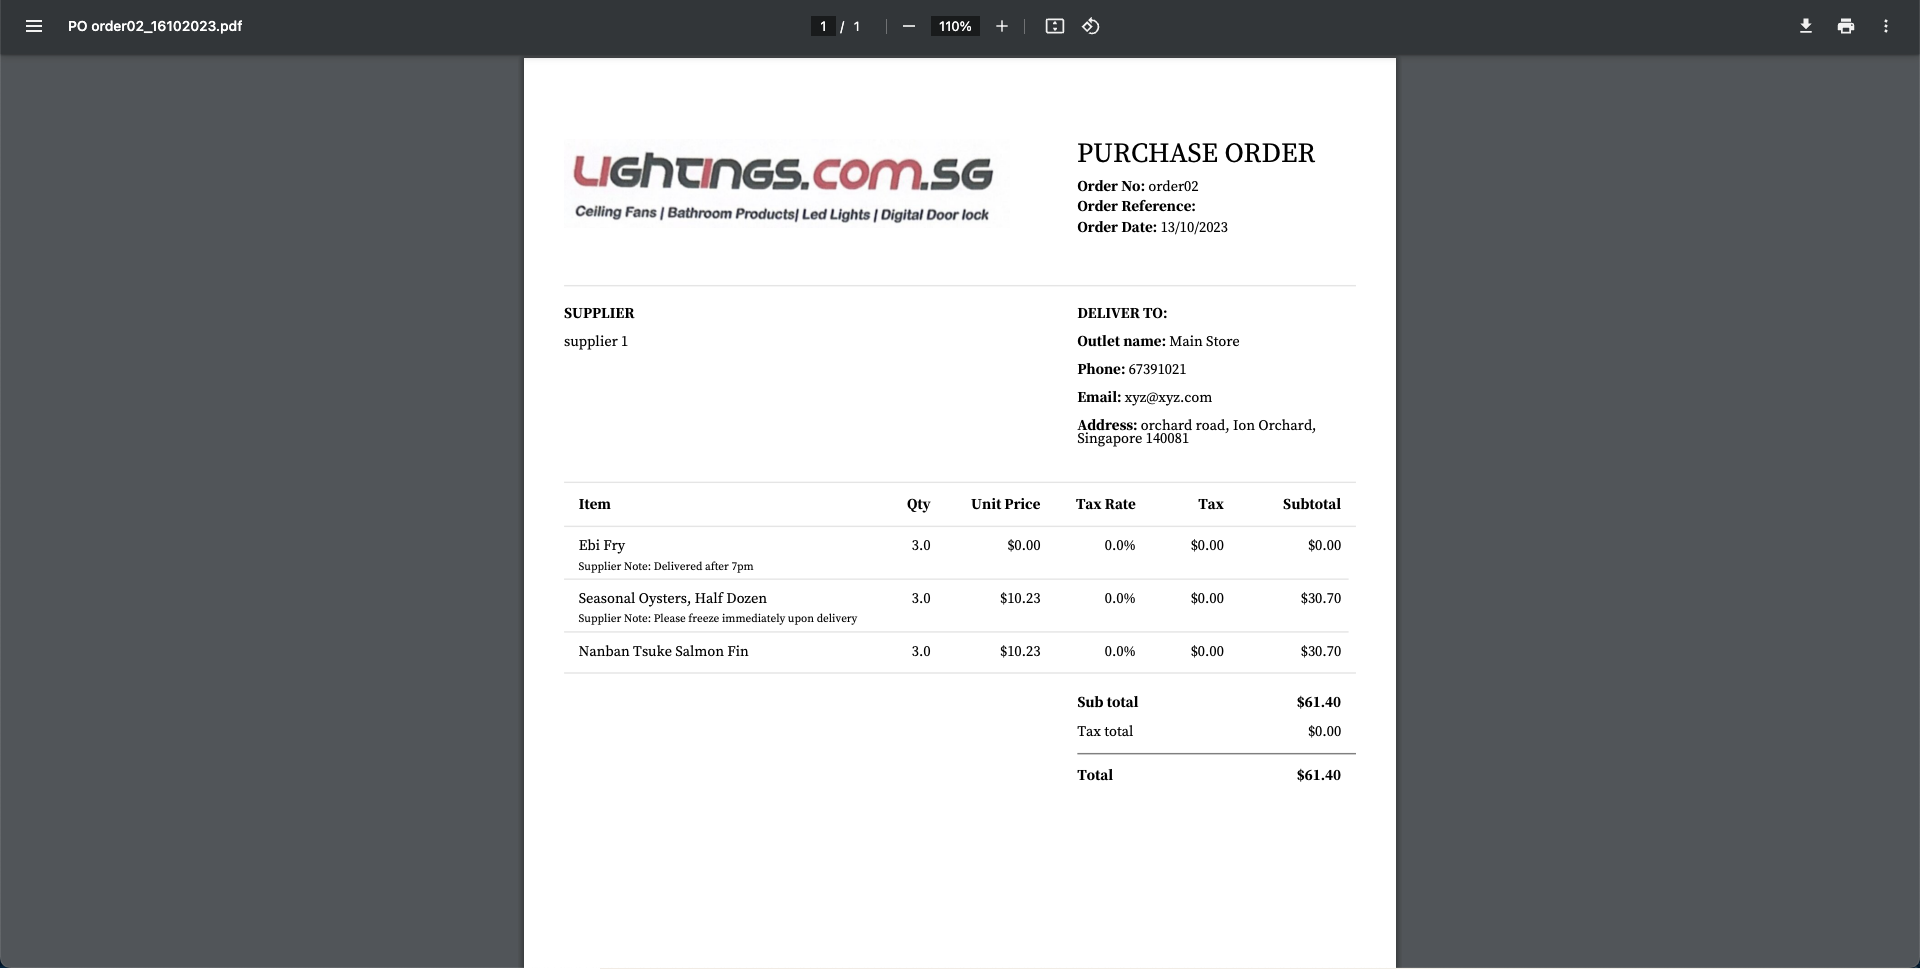
Sep 2023: Added Supplier Notes on Exported PDF File for POs (see step 13)
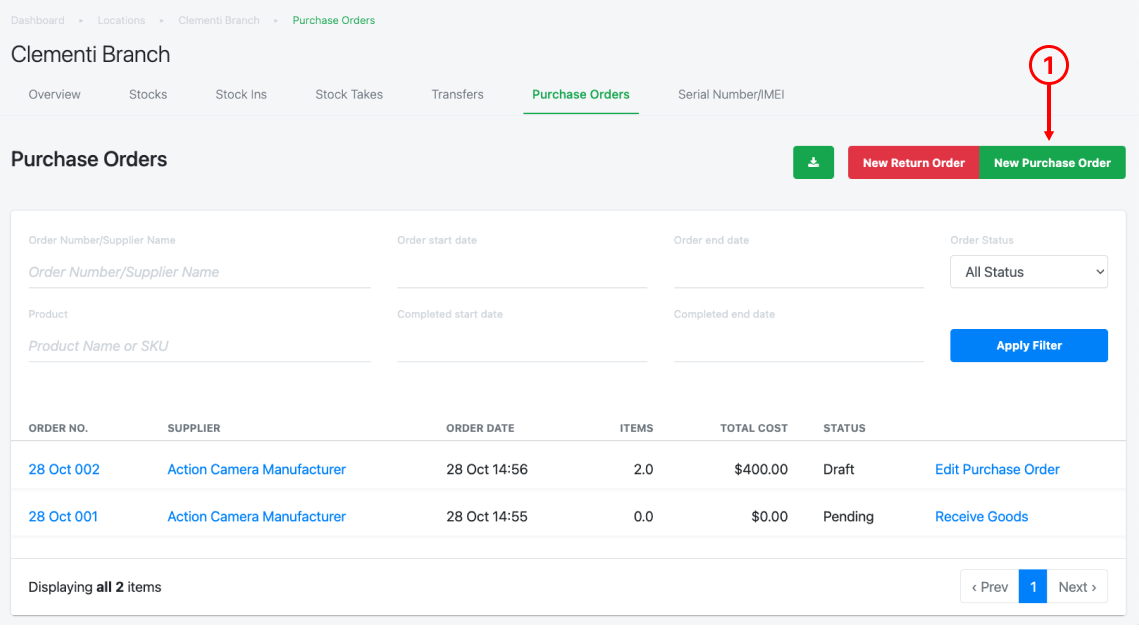
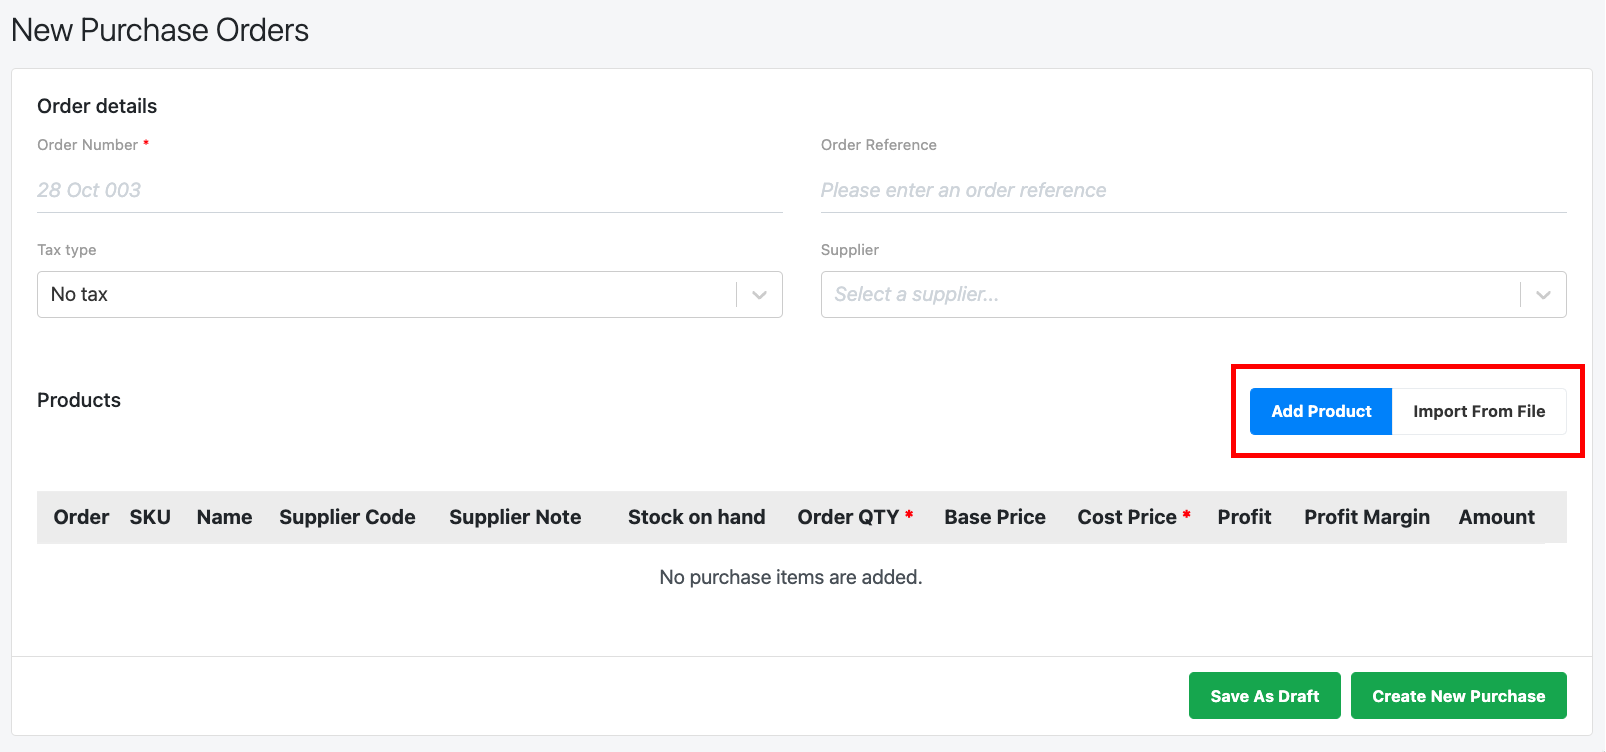
1. To initiate a purchase order, at the Purchase Order page, click on “New Purchase Order”.
2. Insert Order Number and Order Reference.
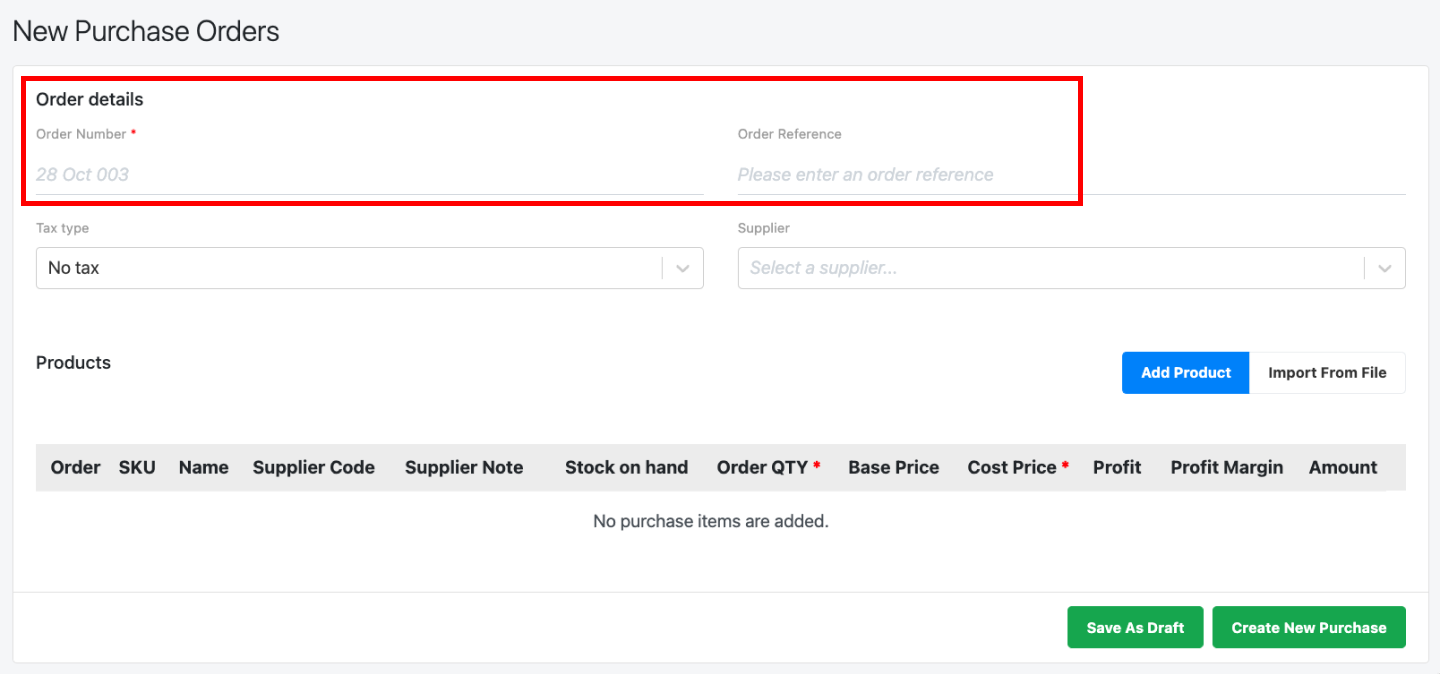
💡 Order Number is auto-filled with incremental sequence based on the last PO created in user’s backend. User can opt to leave it blank and use the auto-filled PO number.
3. Select Tax Type for the Purchase Order.
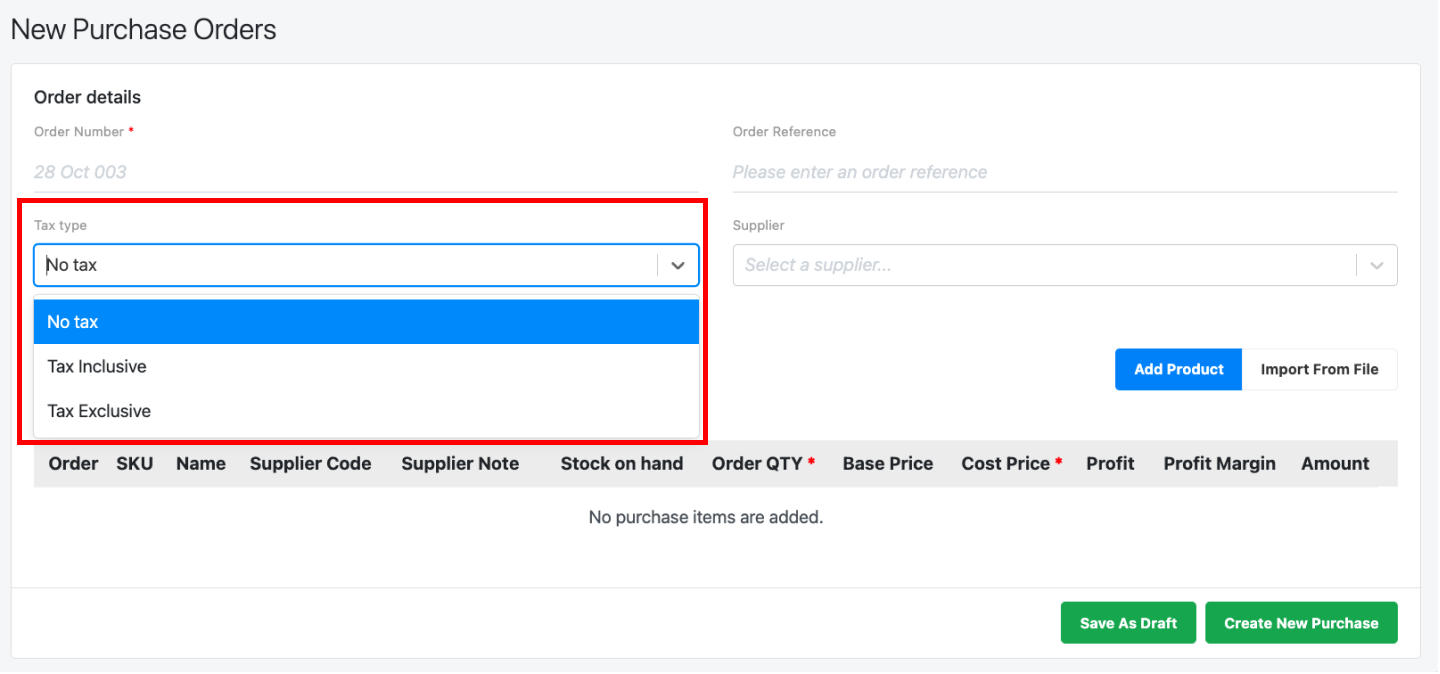
💡 If Tax Inclusive / Tax Exclusive is selected, new columns “Tax rate” and “Tax Amount” will be shown
4. Select Supplier.
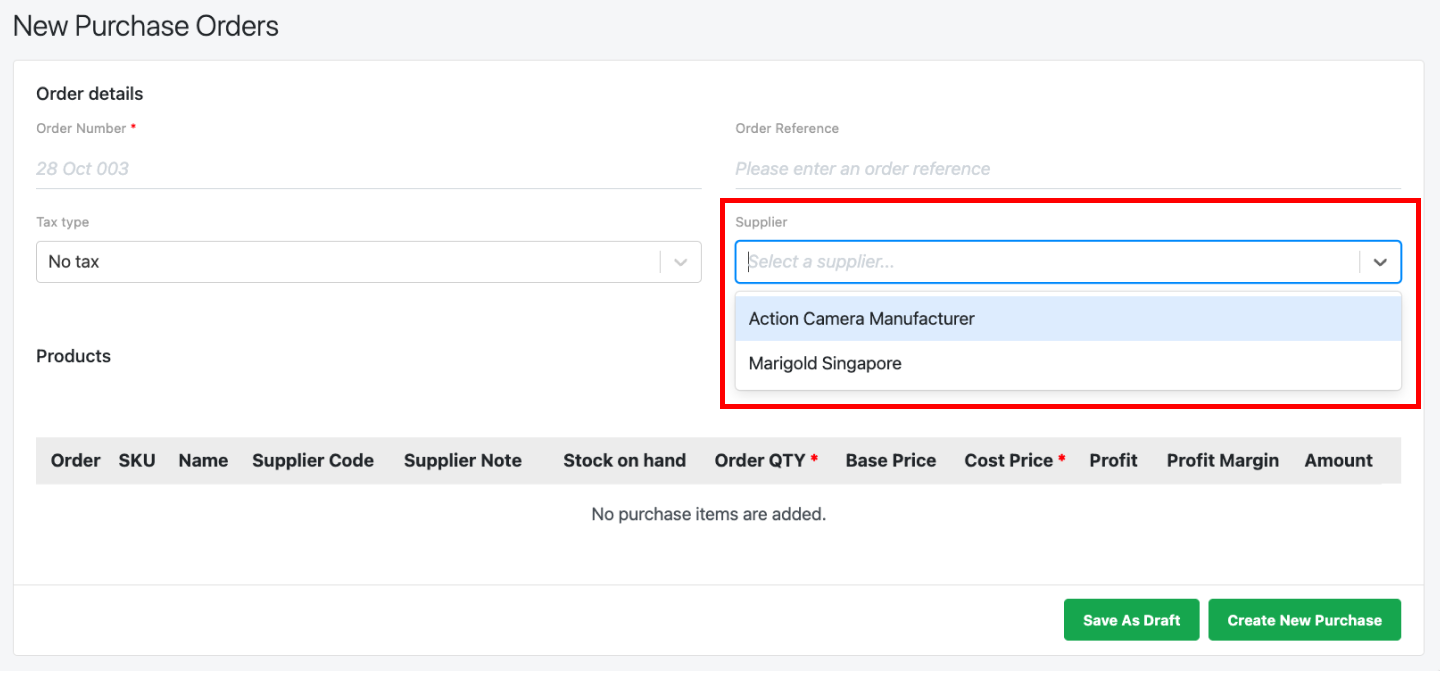
💡 Users must ensure that Suppliers have been created in order for it to be shown in the drop-down list. For more information, see Creating New Supplier.
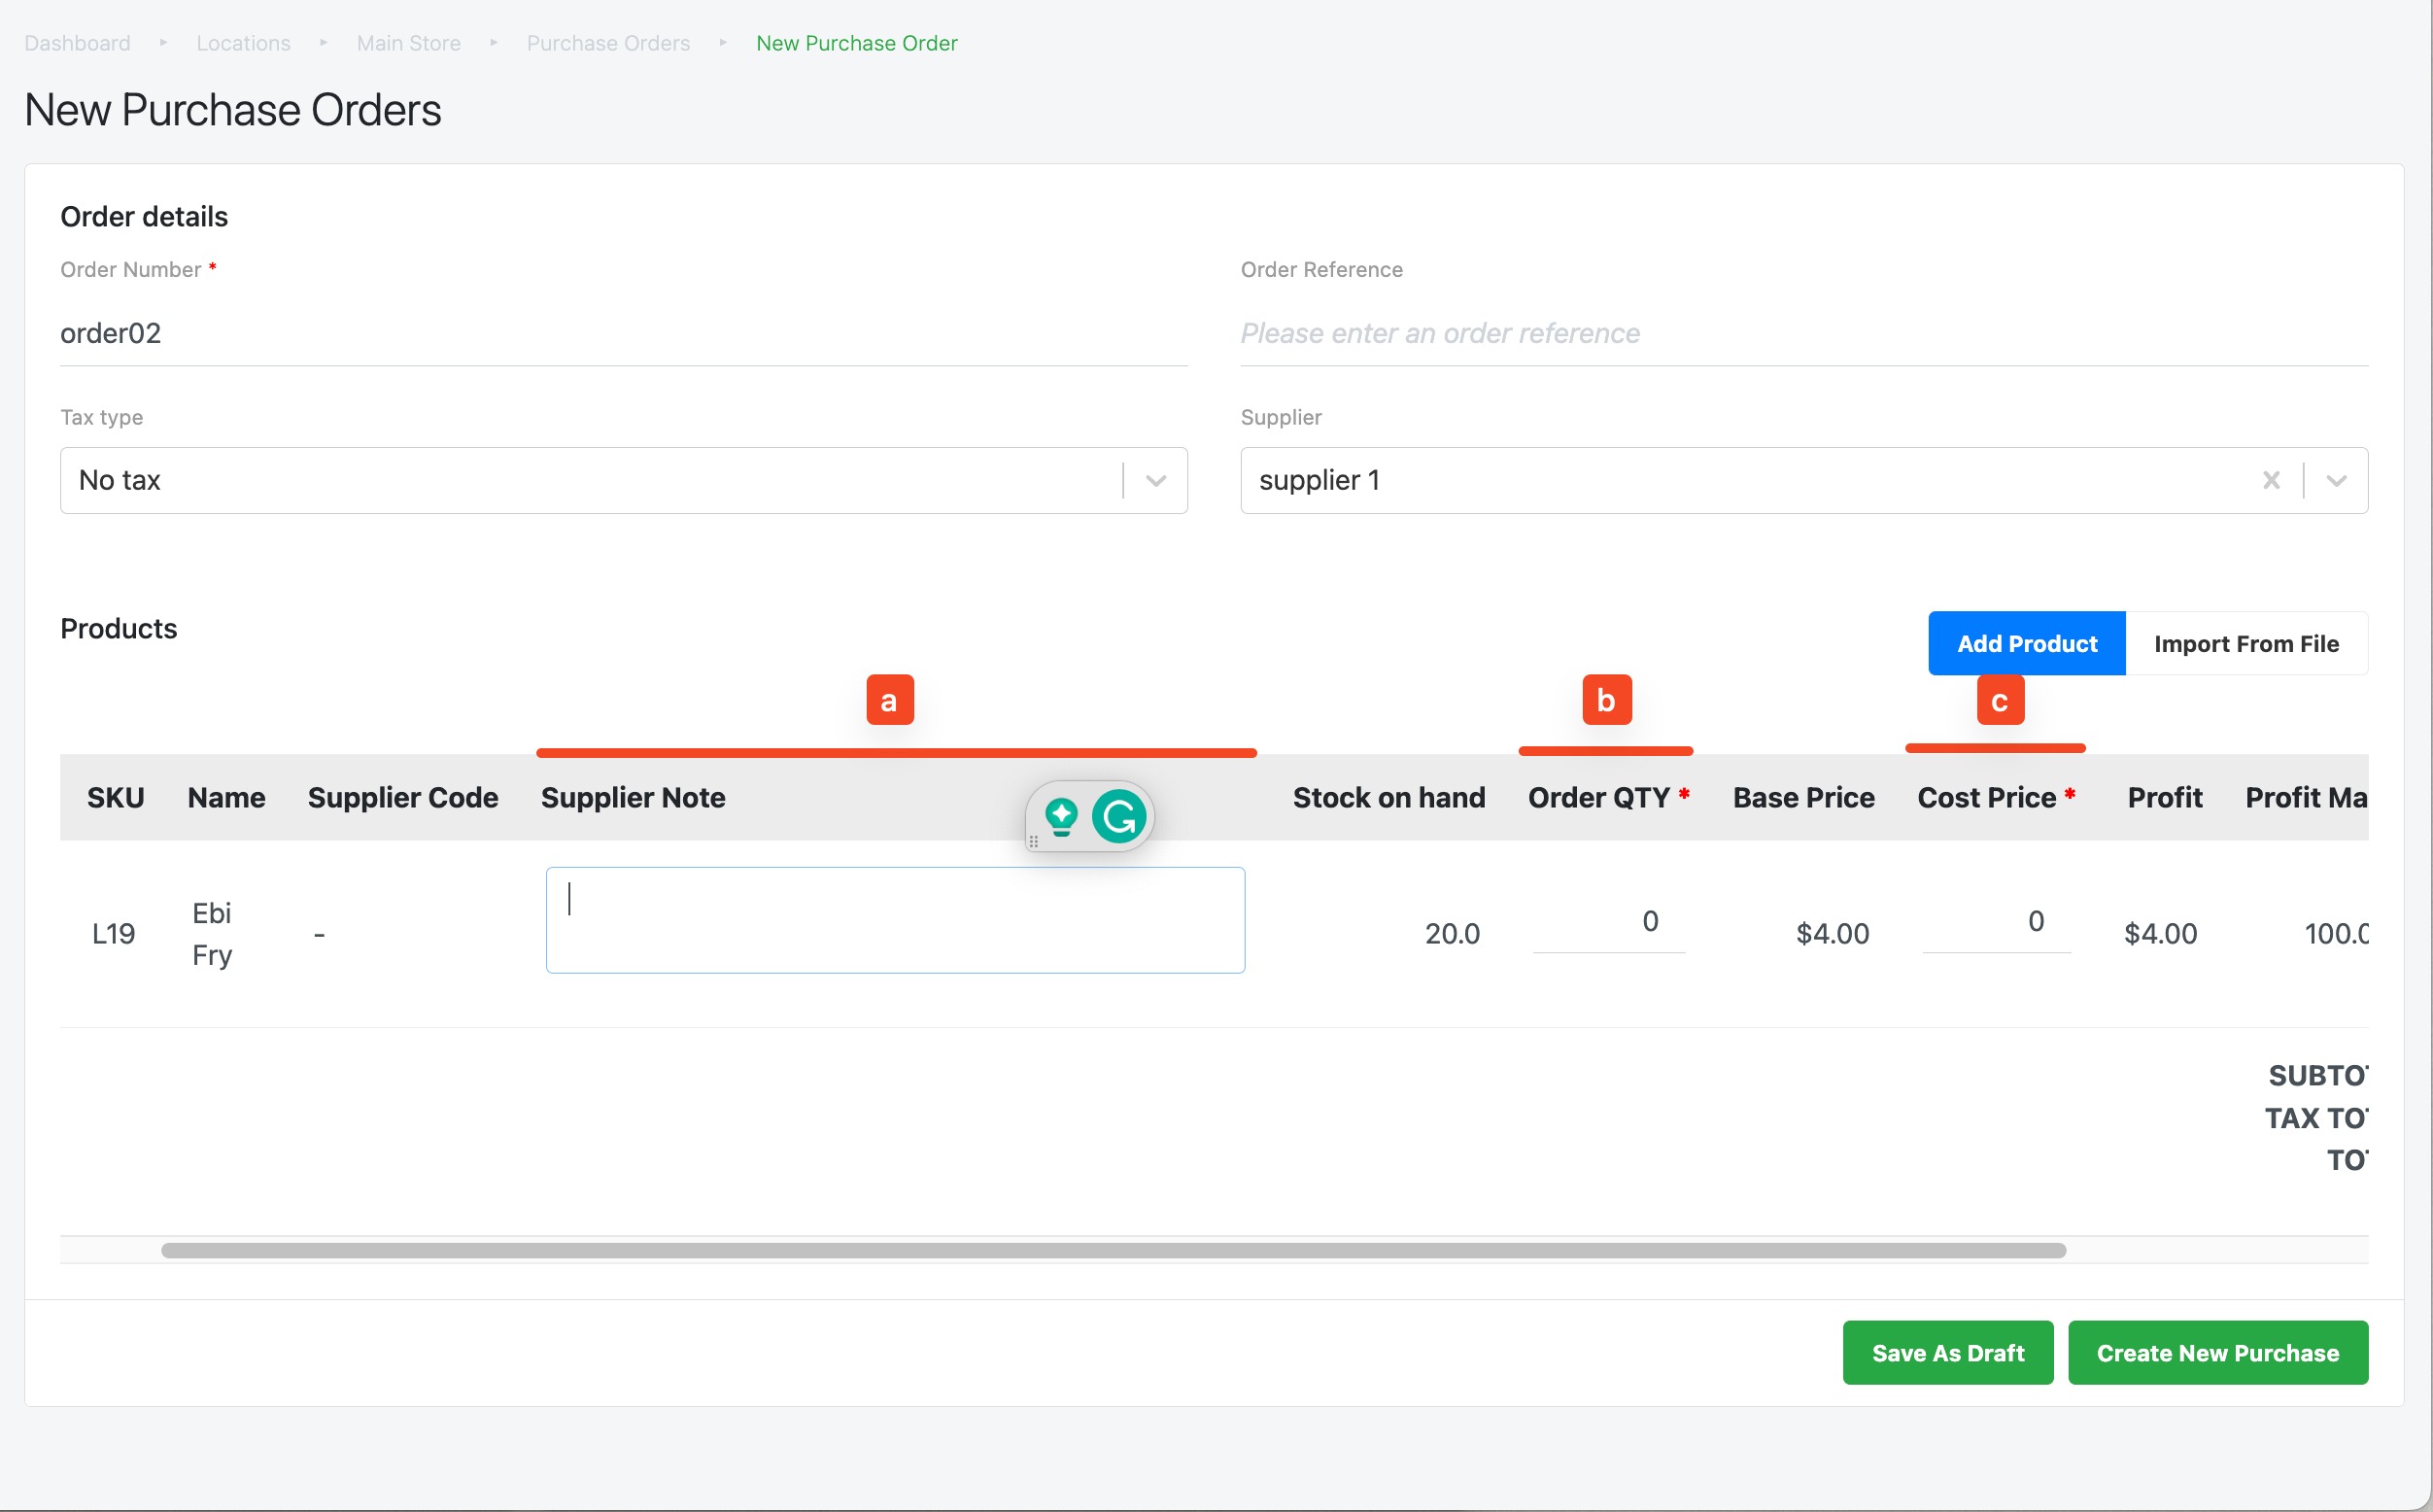
5. Users should then add products for this particular purchase order. Users can do it via Add Product or Import From File.
- Add Product
To add individual products one at a time, click on Add Product. Users can pick individual or multiple products.
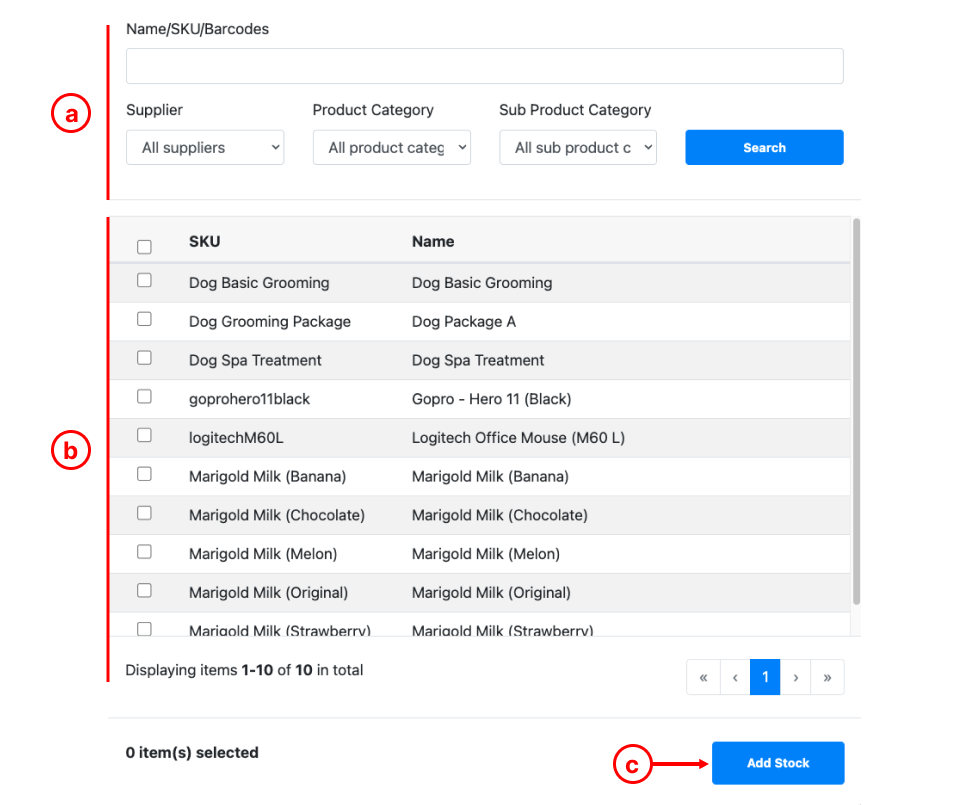
a. Search Panel: Search with name/SKU, supplier, product category or sub-product category.
b. Selection Boxes: ☑️ the selection boxes for applicable products.
c. Click on Add Stock once done.
- Import From File
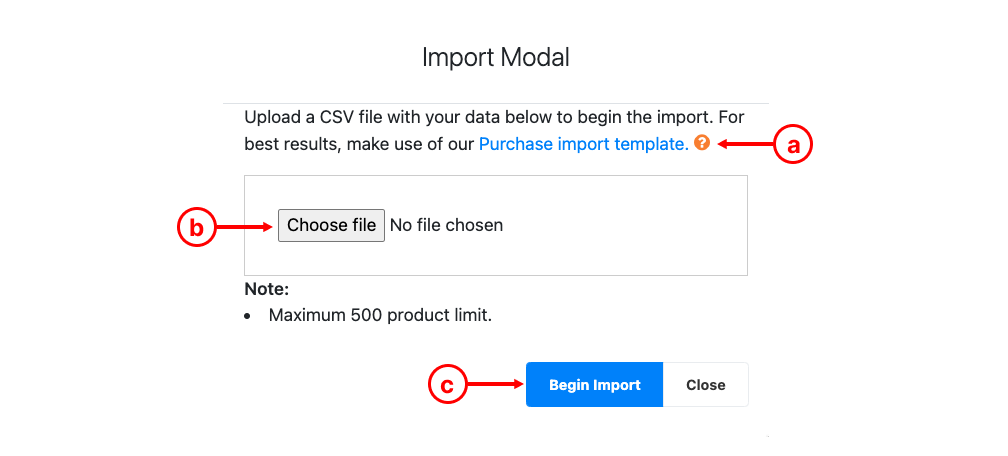
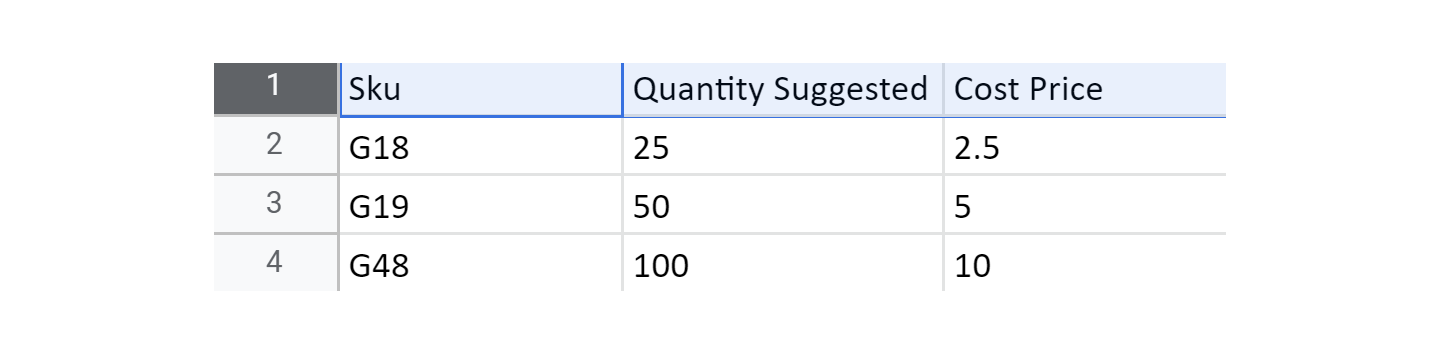
a. Download Transfer Import Template, open the template and enter details in column A (product SKU), column B (quantity suggested), column C (cost price). Once completed, download it as a csv file.
💡 To ensure all barcodes are captured correctly, in Google Spreadsheets, select whole column A, select Format > Number > Plain Text. Users must ensure SKU(s) are entered exactly identical (capital letter and symbols) to BACKEND PORTAL. Importing is limited to only 500 line items.
b. Choose the csv file you have downloaded to upload.
c. Click on Begin Import once done, the entire list of products will be added.
💡 Tax type and tax type is not supported using the bulk import template. Users may configure after importing the products into the Purchase Order.
6. After product(s) are added, enter supplier note, order qty, and cost price.
💡 EPOS backend is able to capture user’s input of cost price of up to 4 decimal places. Users who purchase a large quantity of products are advised to use 4 decimal places for cost price.
7. Users can utilise the duplicate button to capture the “free items” / same products with different cost prices from the supplier in the same purchase order.
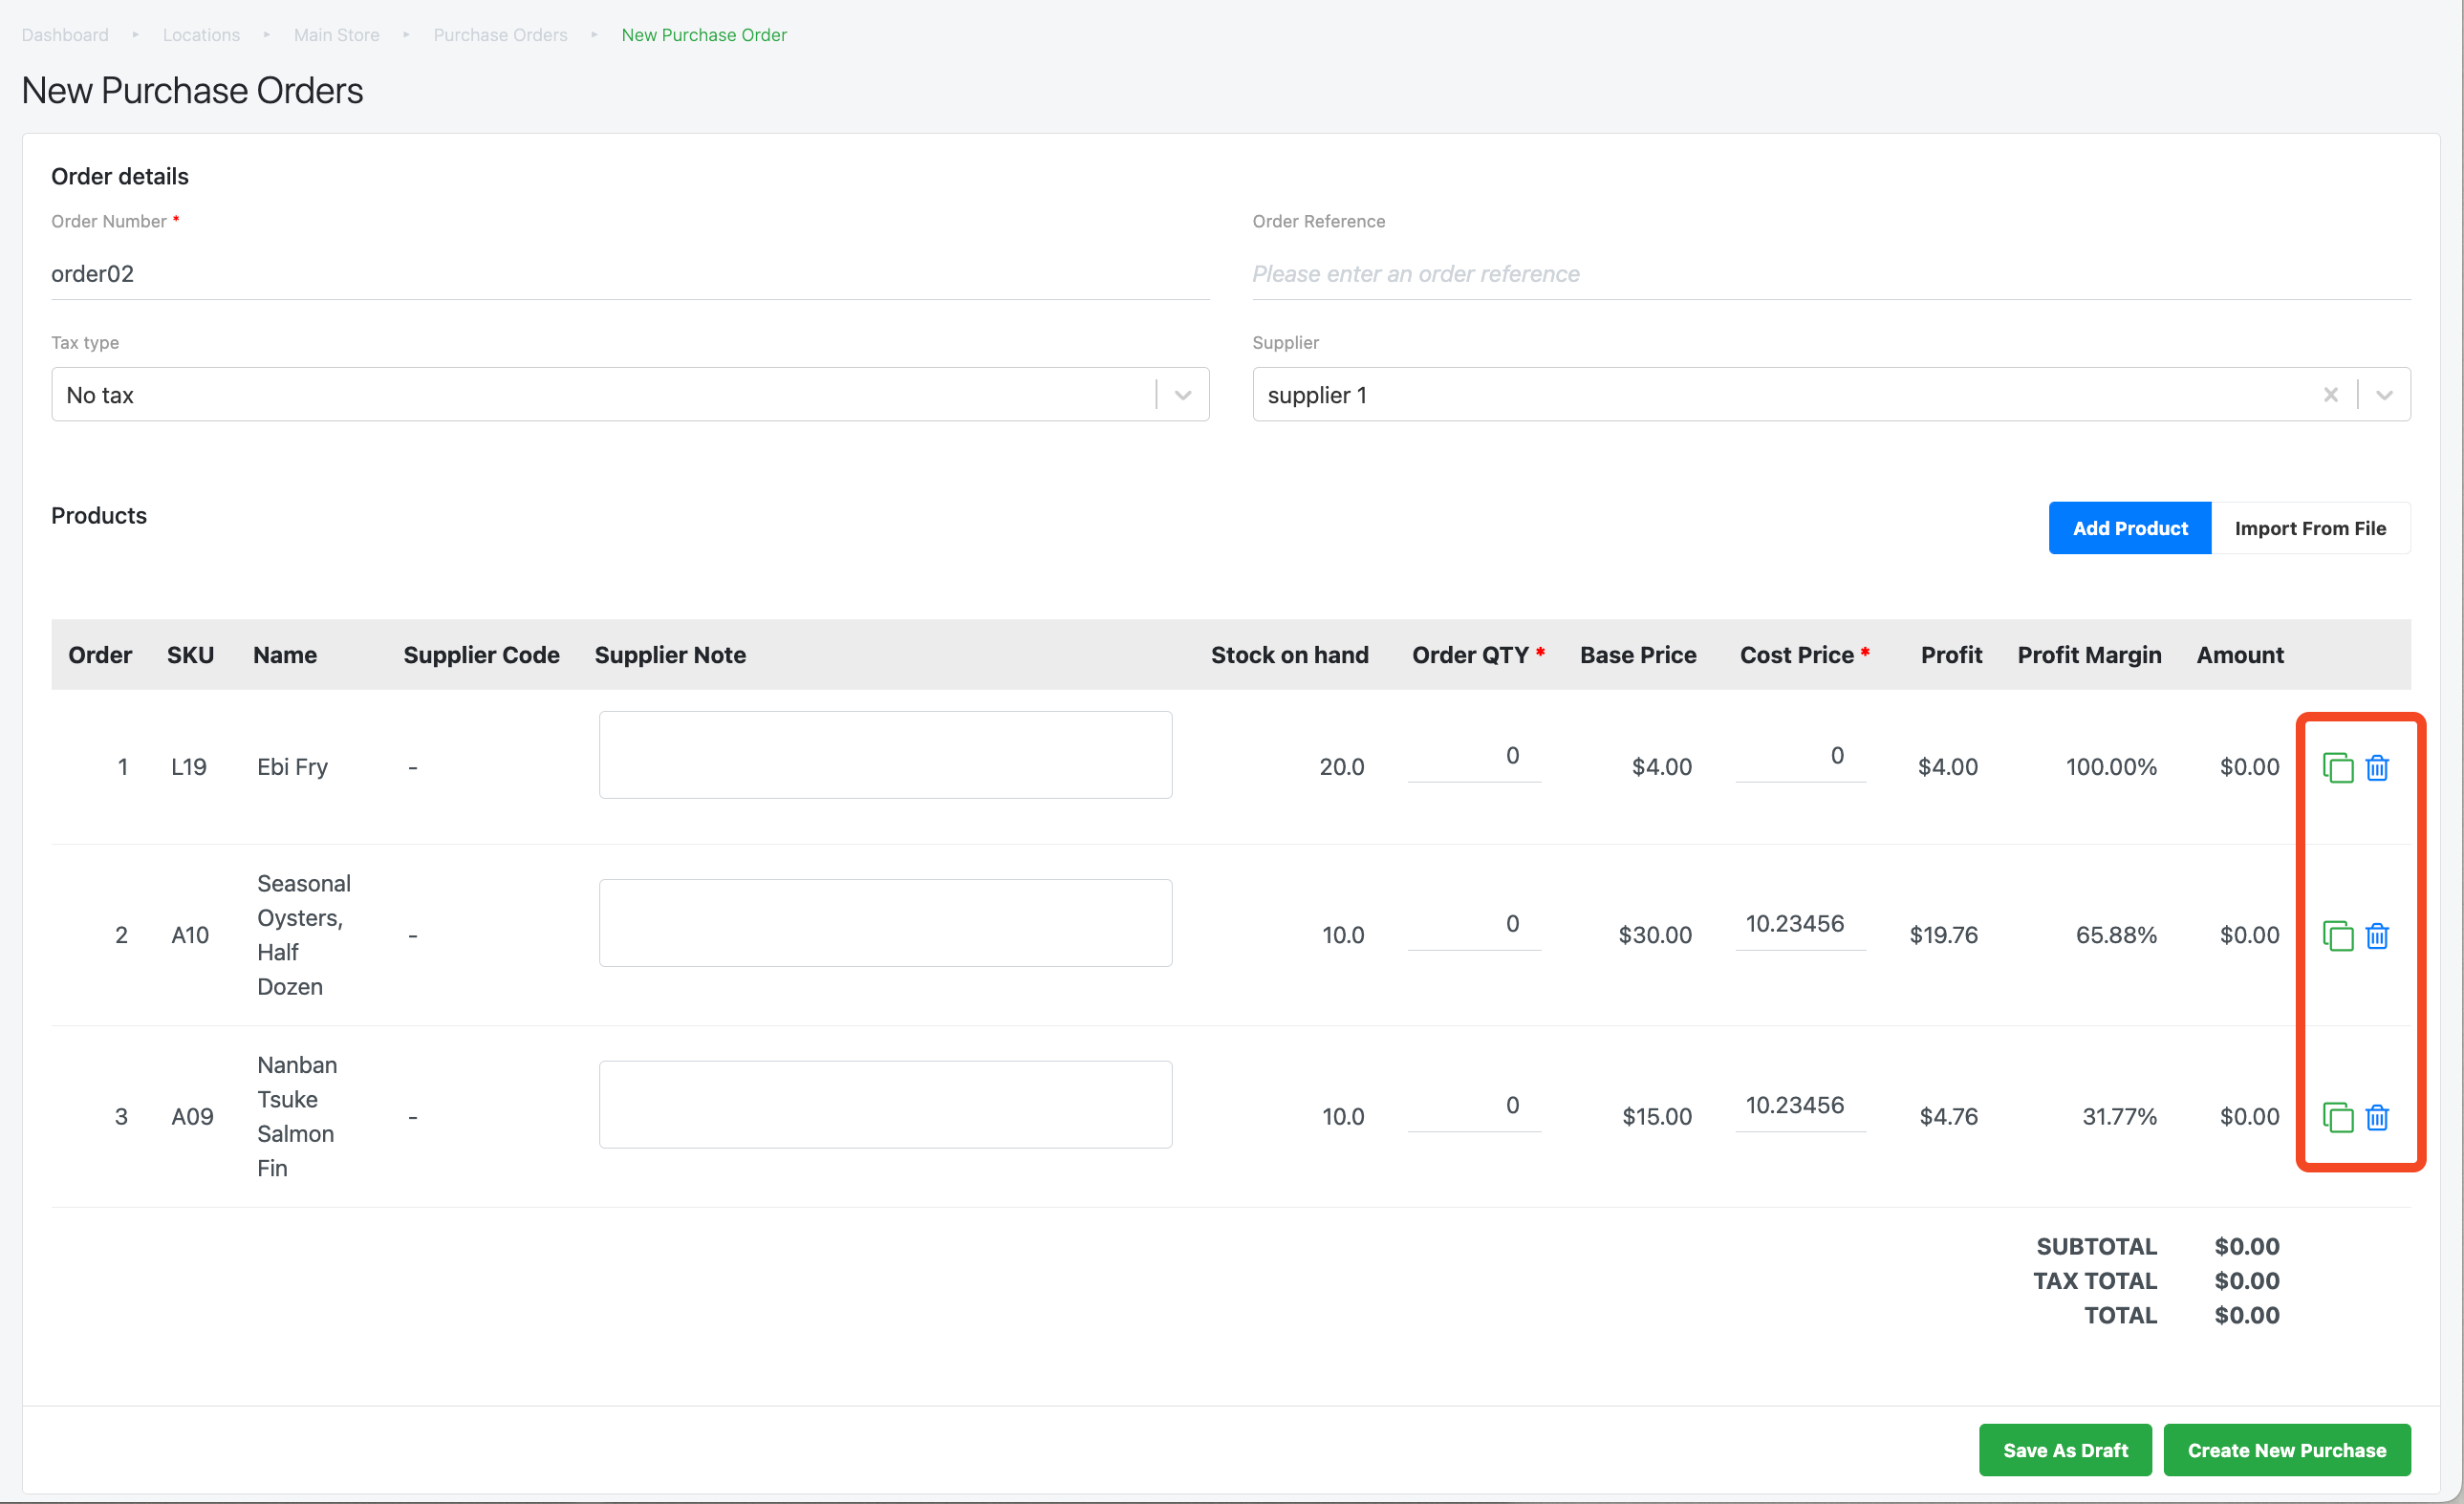
To delete a product from the purchase order, click on 🗑 icon.
8. Users then re-check the purchase order, once confirmed.
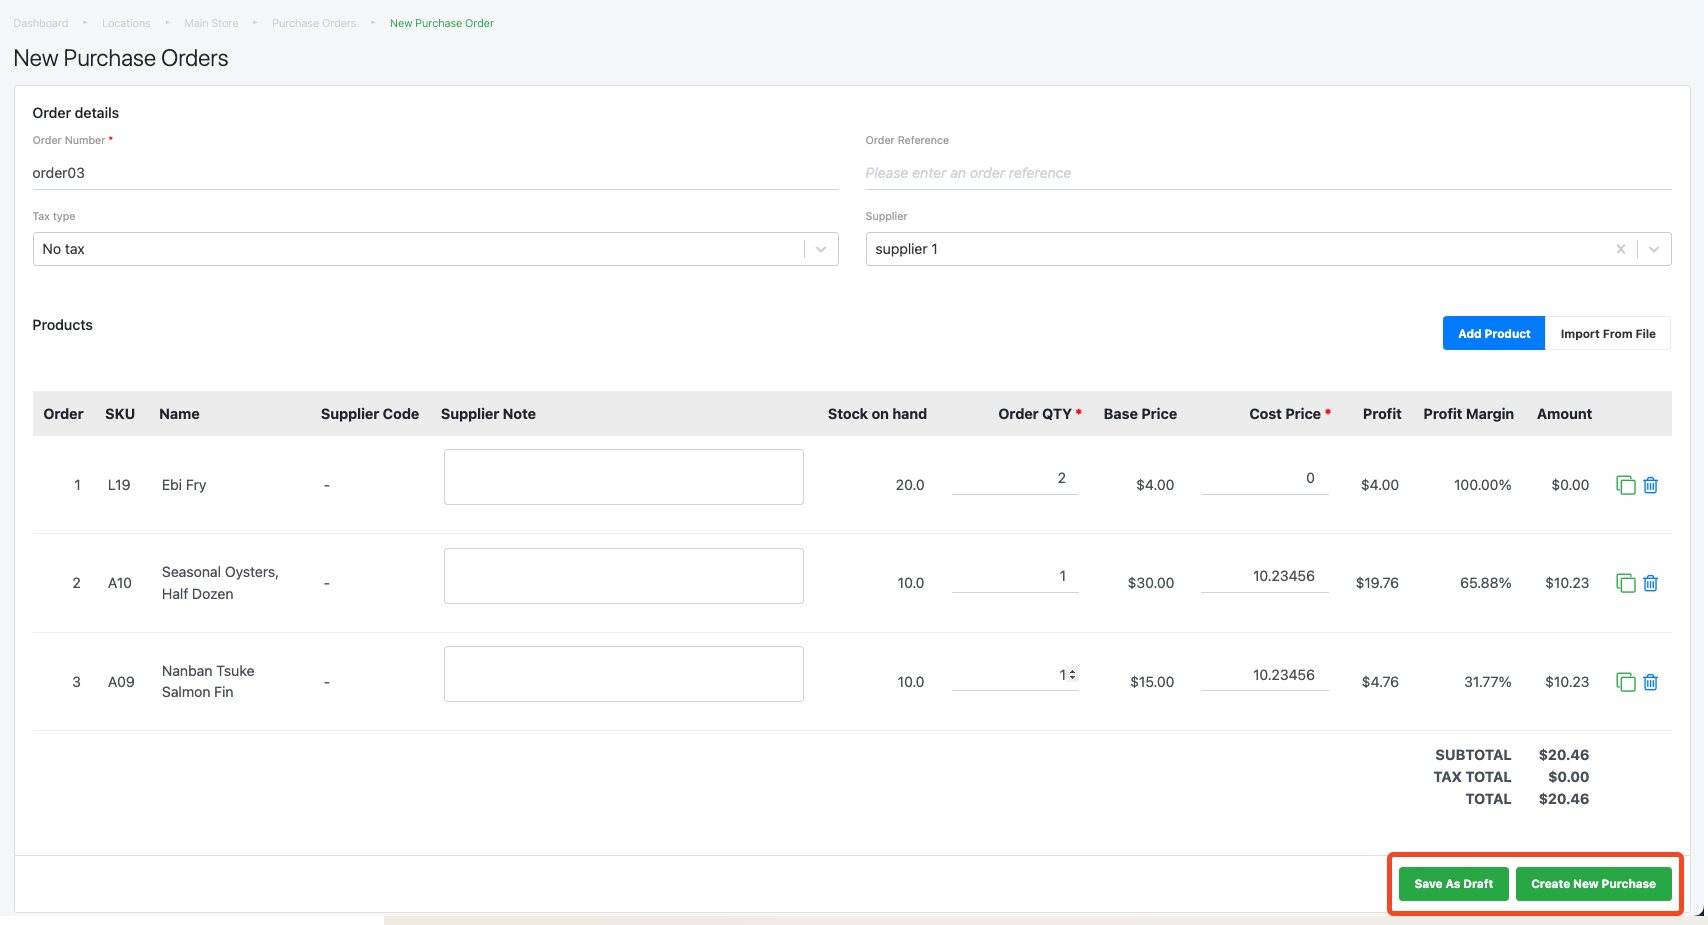
- Click on Save Draft to stall this order and complete it in the future.
- Click Create New Order to proceed.
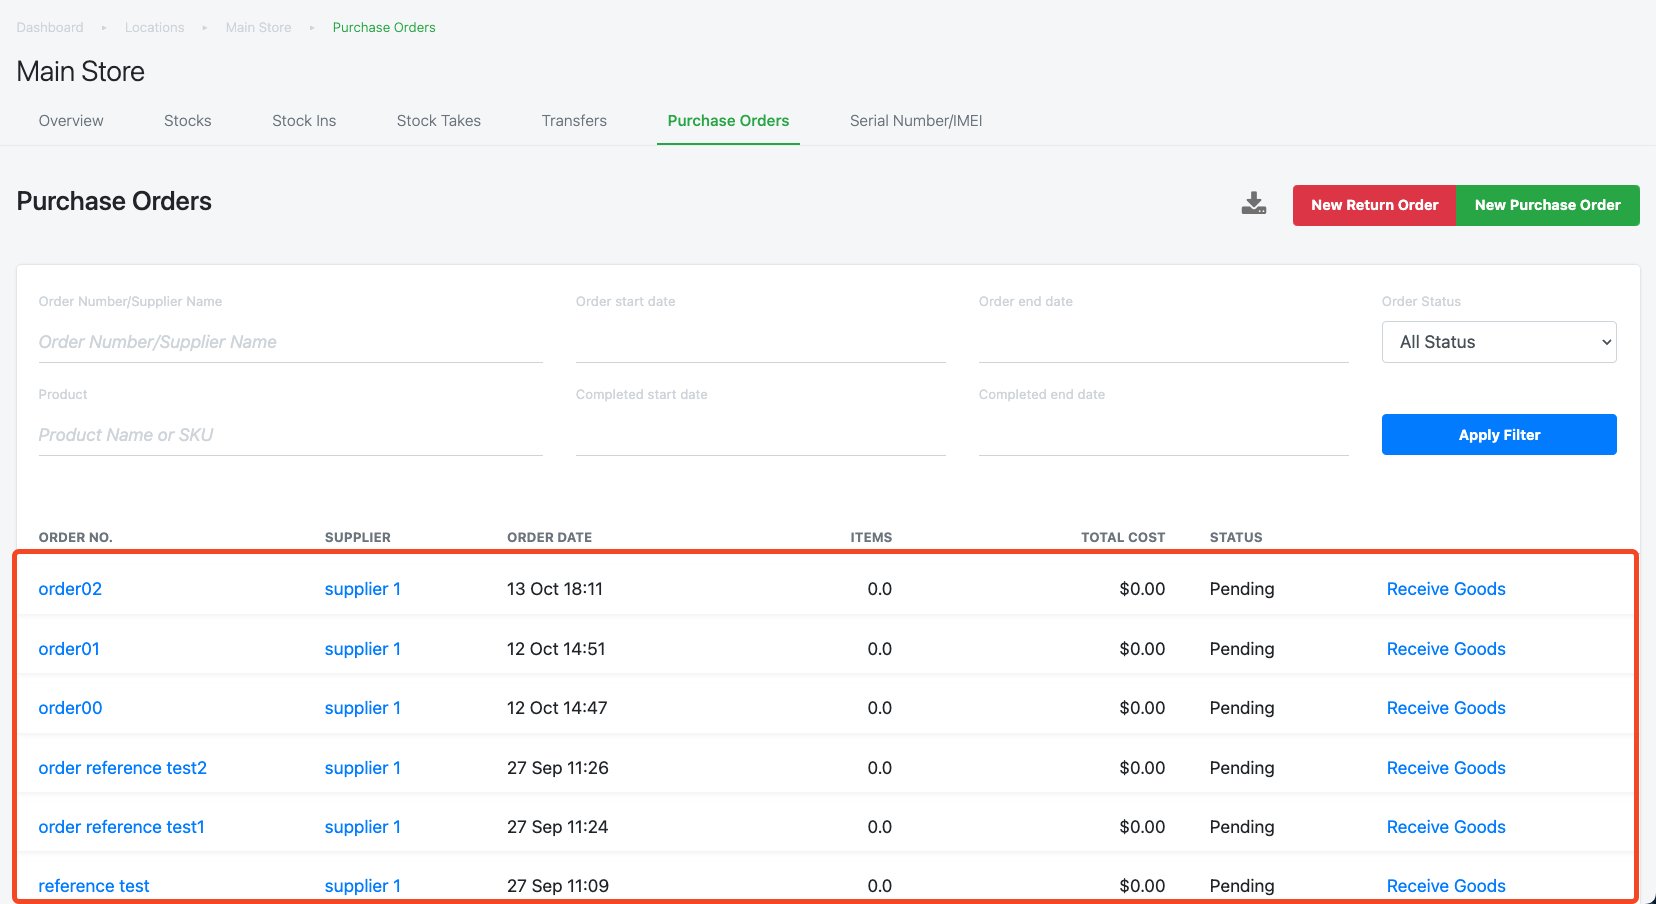
9. Once users click on Create New Order, users will see the Order being created in the list of purchase orders.
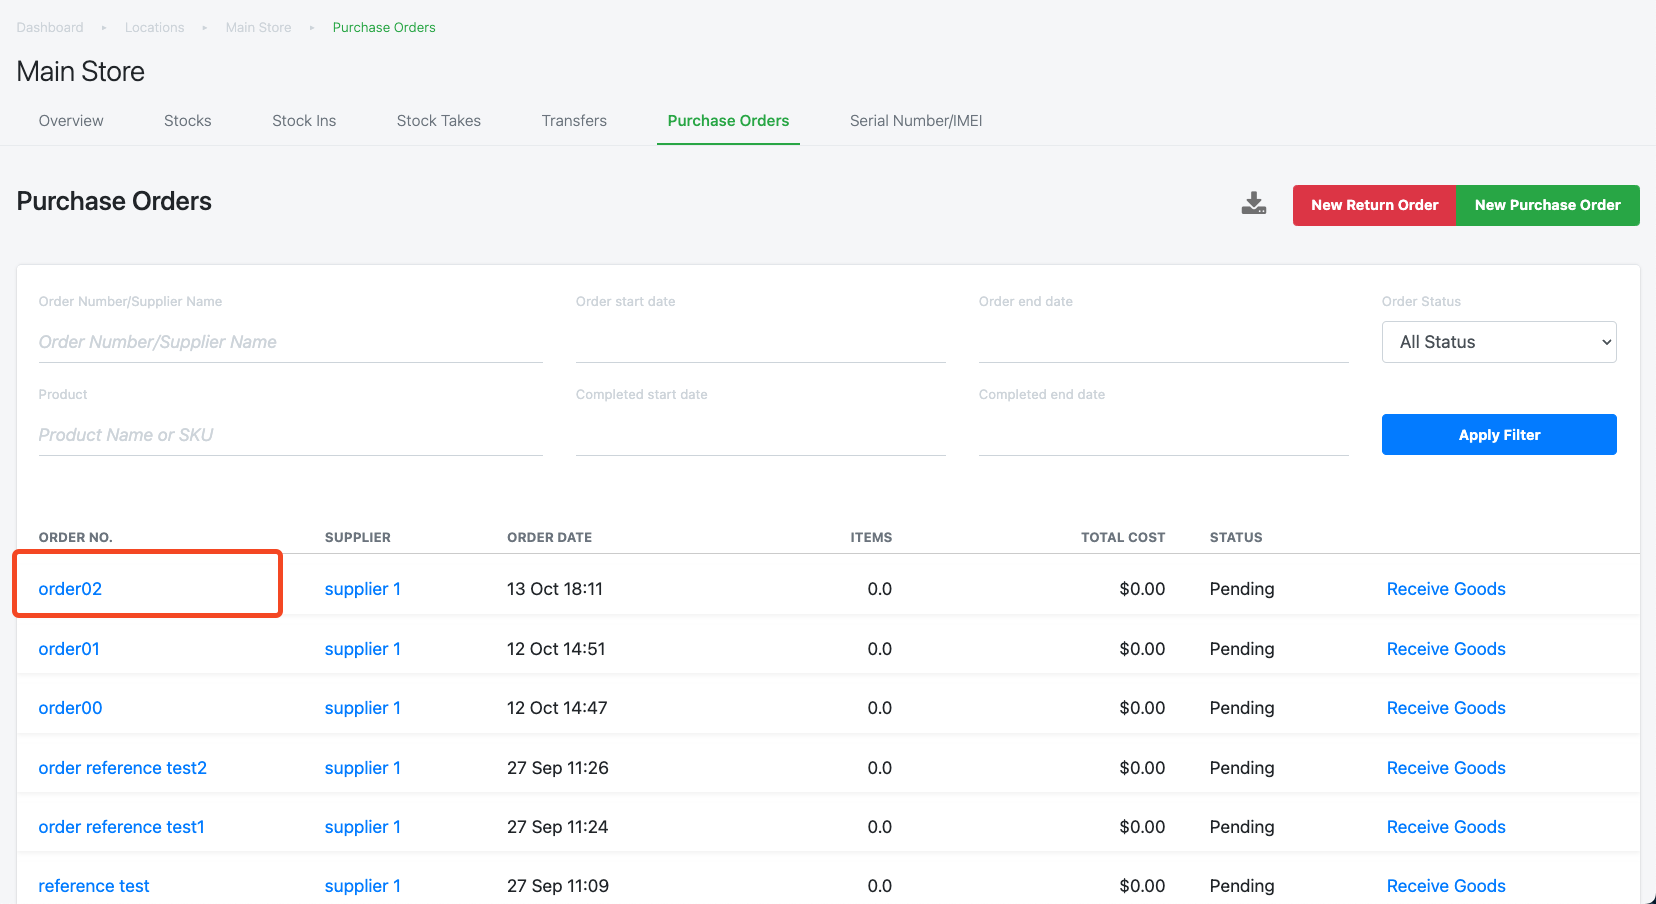
10. To export the PO, click on the appropriate POs.
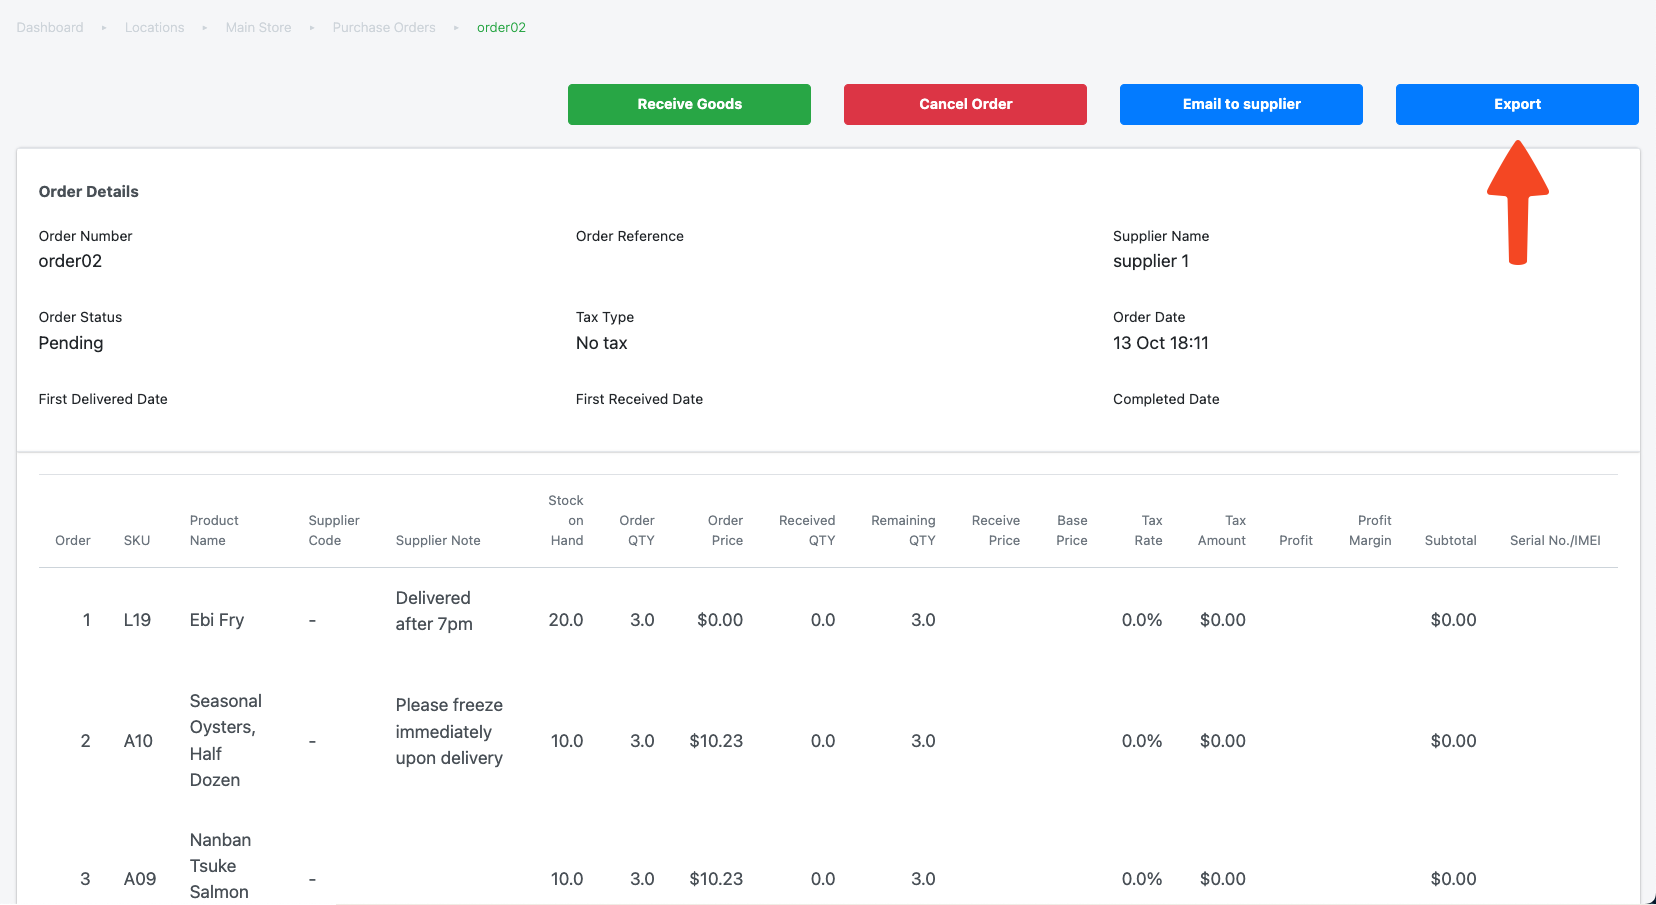
11. Click “Export”.
12. In the pop-up, select the file type and click “Confirm”.

13. The exported file formats would look as follows:
Standard PDF Format
Excel (.csv) Format

Was this article helpful?
YesNo