
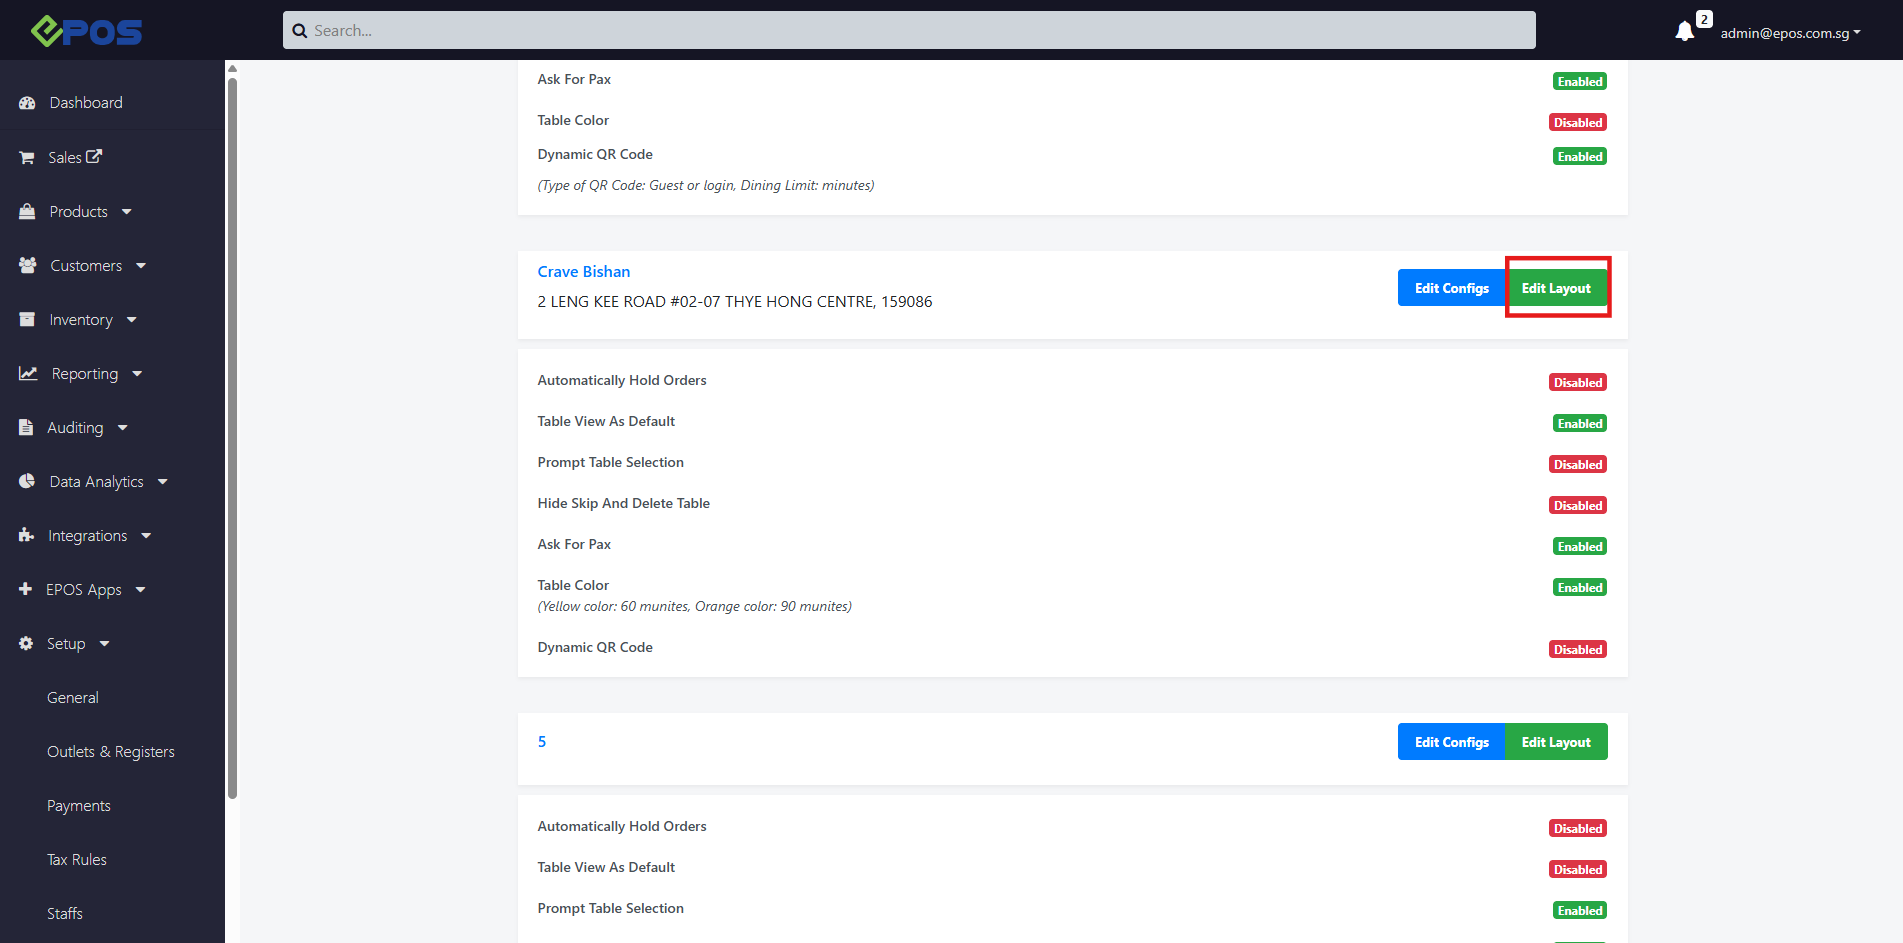
At the Table Management page, Click on the Edit layout button.
Users will then be directed to the Editing Areas page.
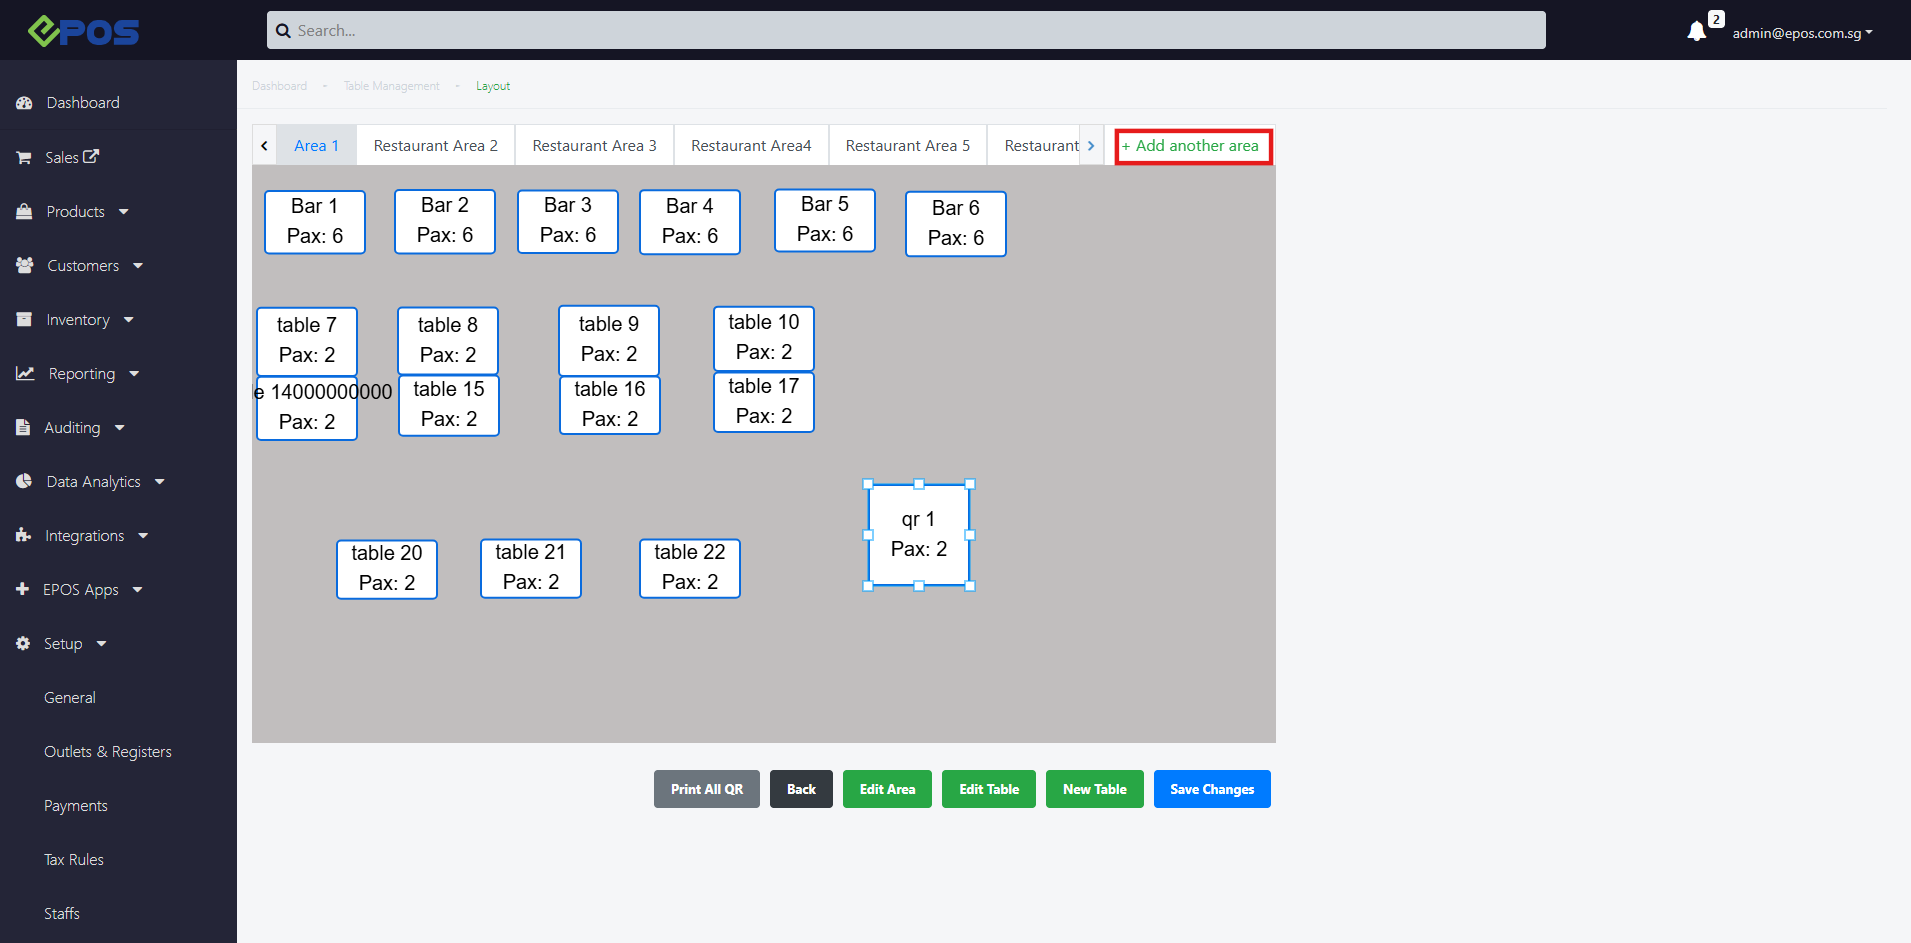
Creating & Editing Areas
1.To create a new area, user can click on “Add another area”.
2. The user must configure the following fields to create the new area
- area name
- default pax number
- default table shape
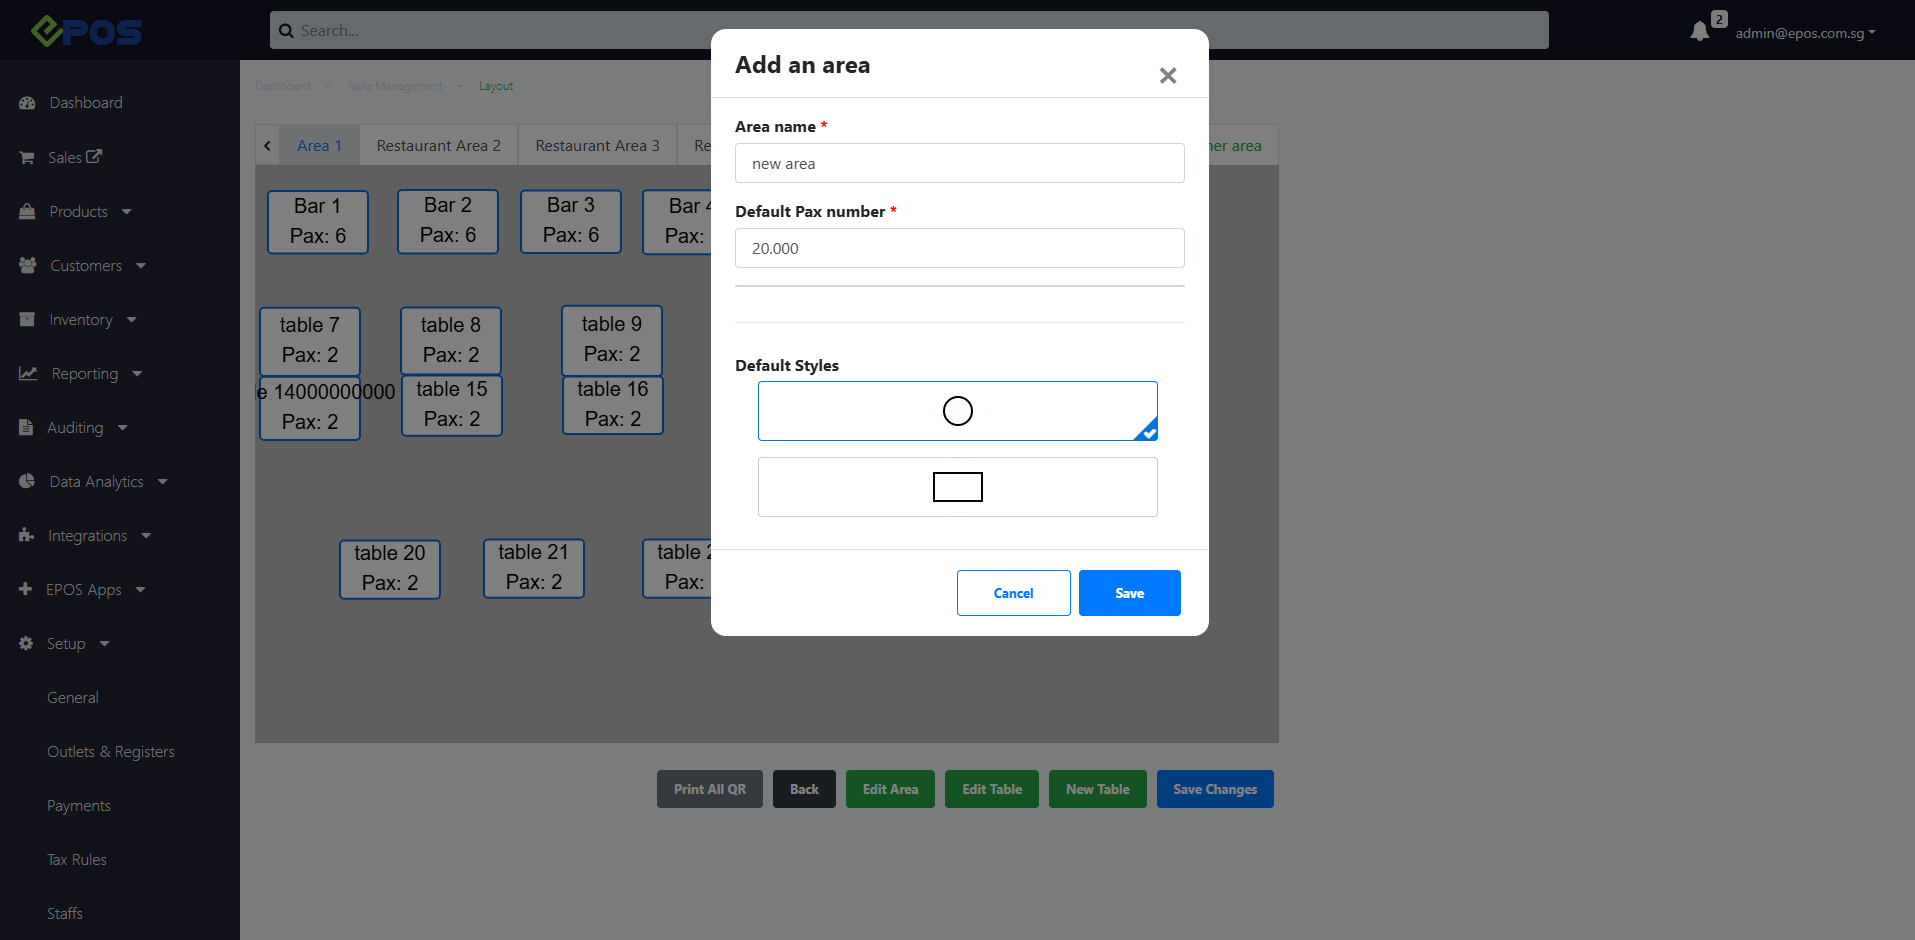
3.The user can click on “save” to add the new area.
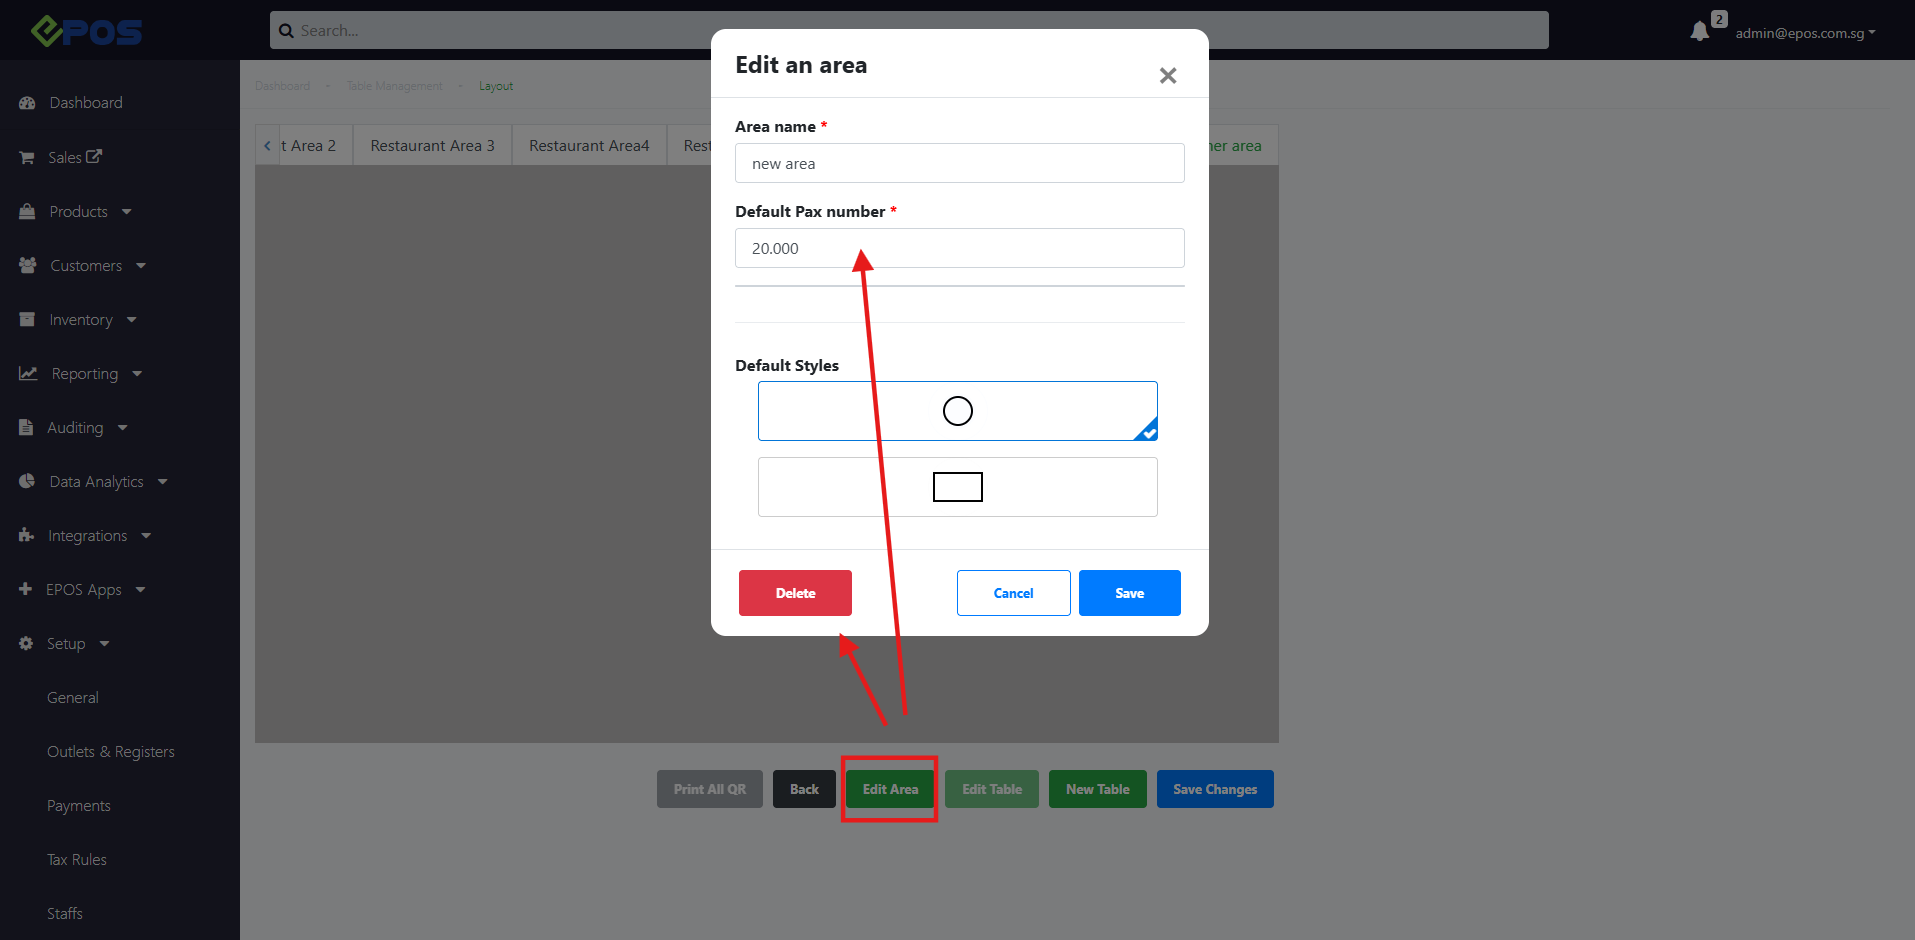
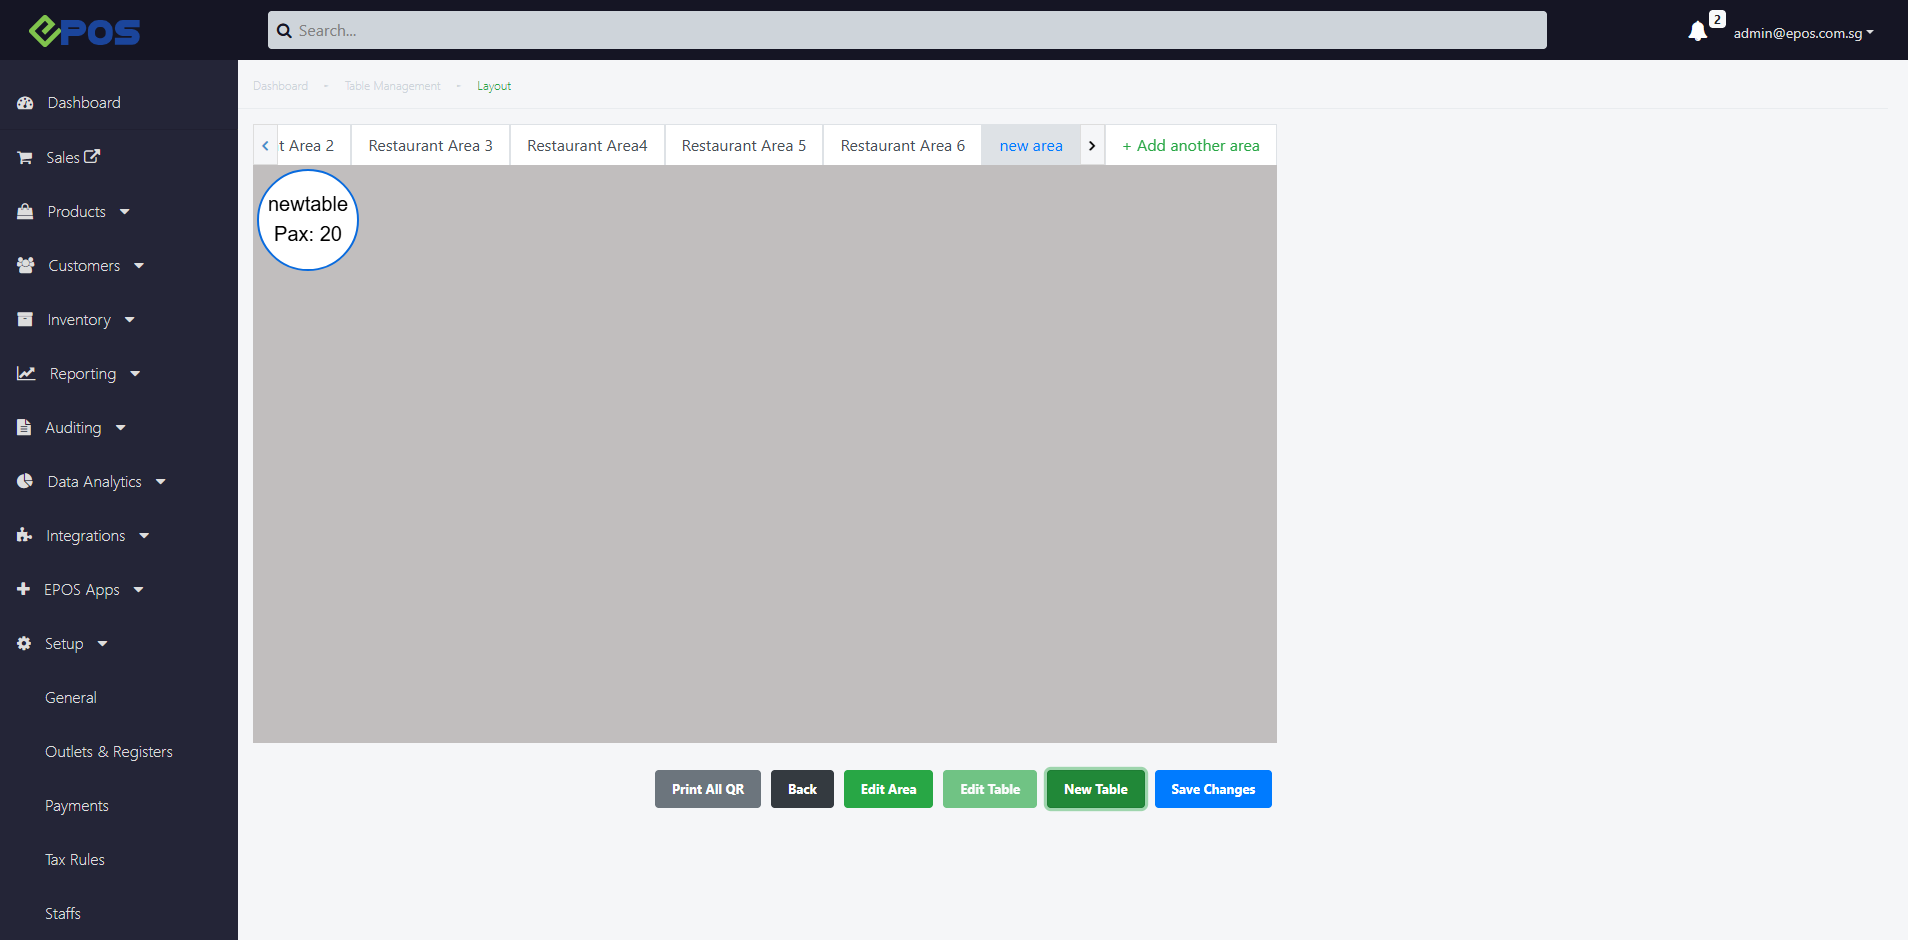
4.Once created, a new area will be shown. Users can also edit/remove the area as needed.
Creating & Editing Tables
1. Users can then scroll down further to create a new table in the area created, under the Add New Table section
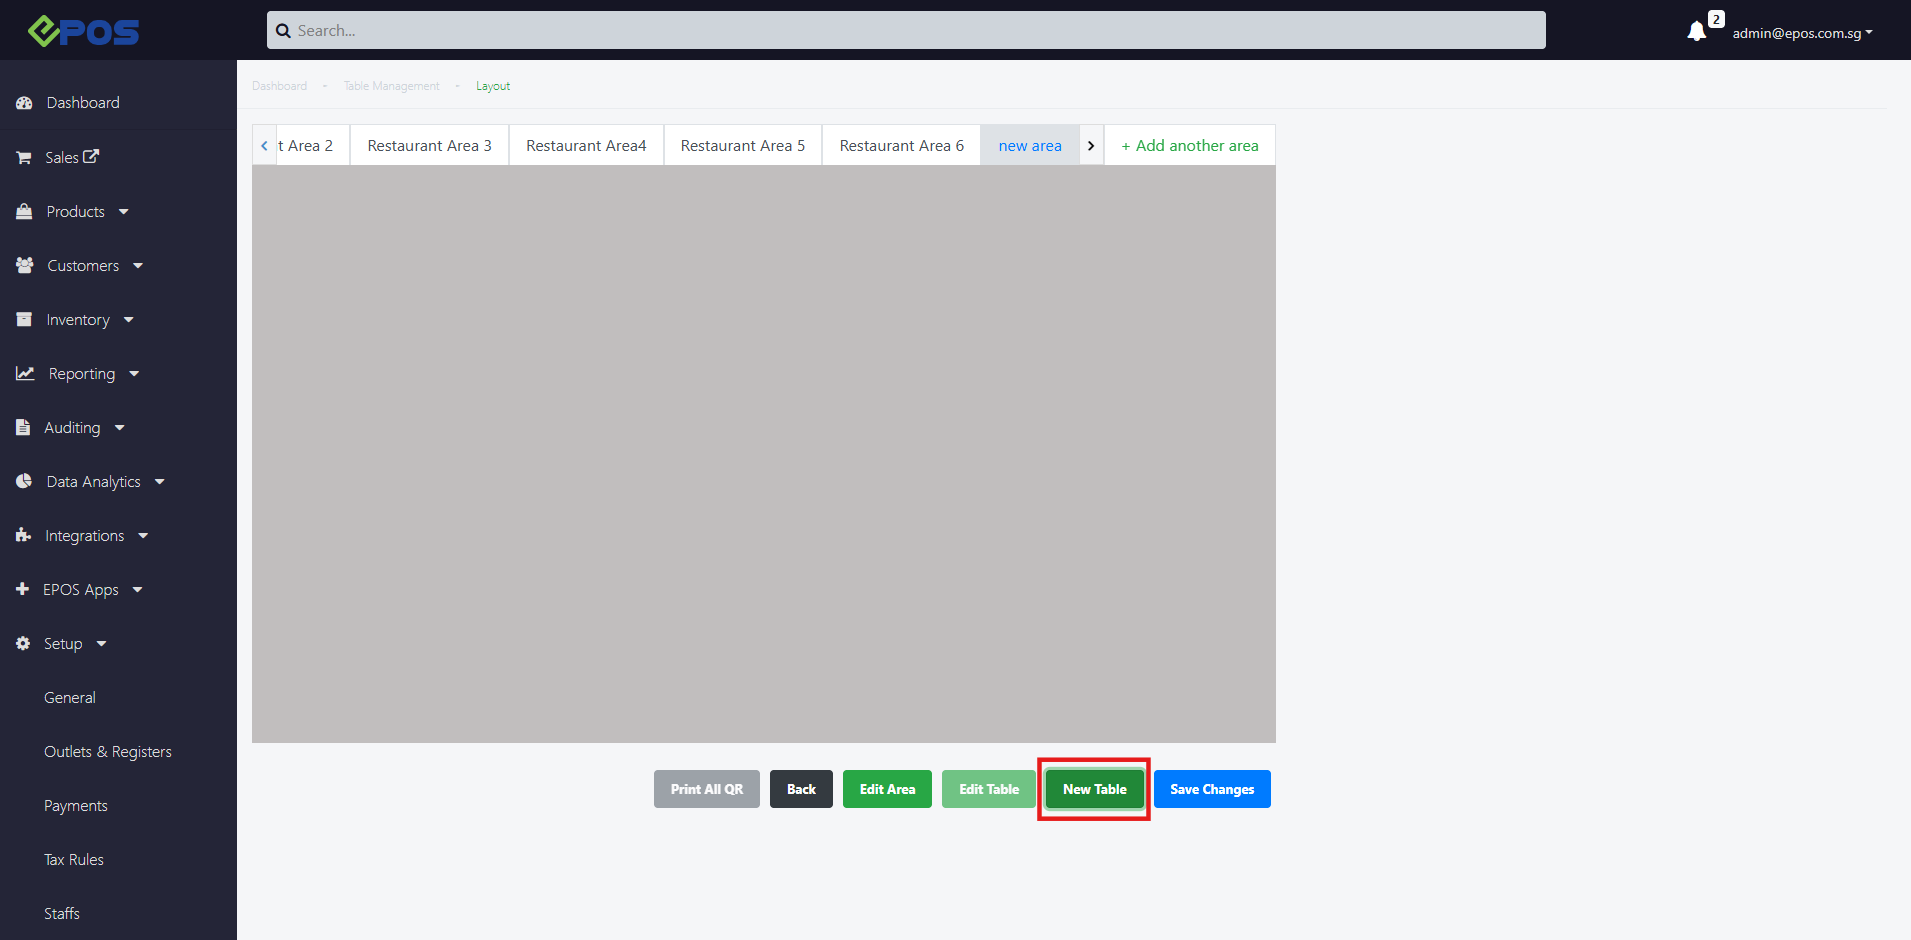
2.The user must configure the following fields to create the new table
- Table name
- default pax at the table
- default table shape
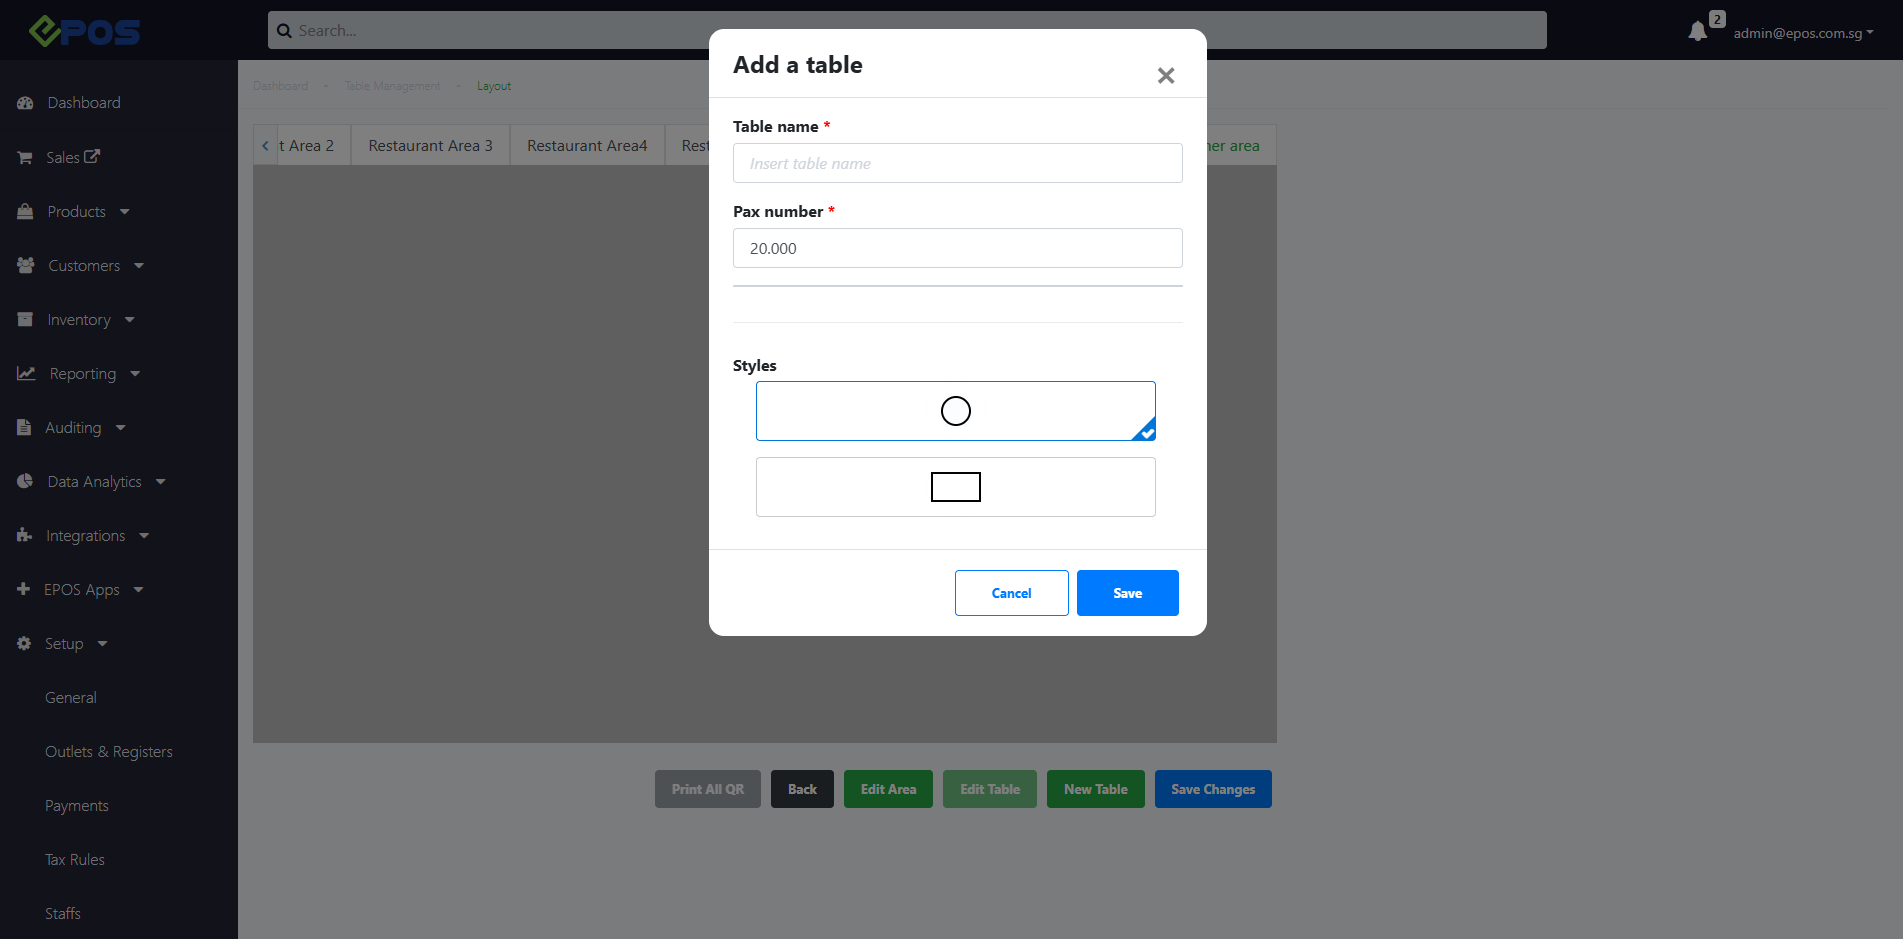
3. Click on “save” to create Table once done.
4. Likewise, the user can edit the configurations of the table or delete the table, by clicking on the relevant table, and clicking the “edit table” button.
In this page, users will be able to access the QR codes directing to the store’s webapp. The user can opt to print the QR directly from this page as well.

5. After all the tables are created and updated, users can proceed to arrange the tables. The user can drag and resize the tables to suit the restaurant’s table layout within the window provided.

6. After performing the layout edits, click on Save Changes.
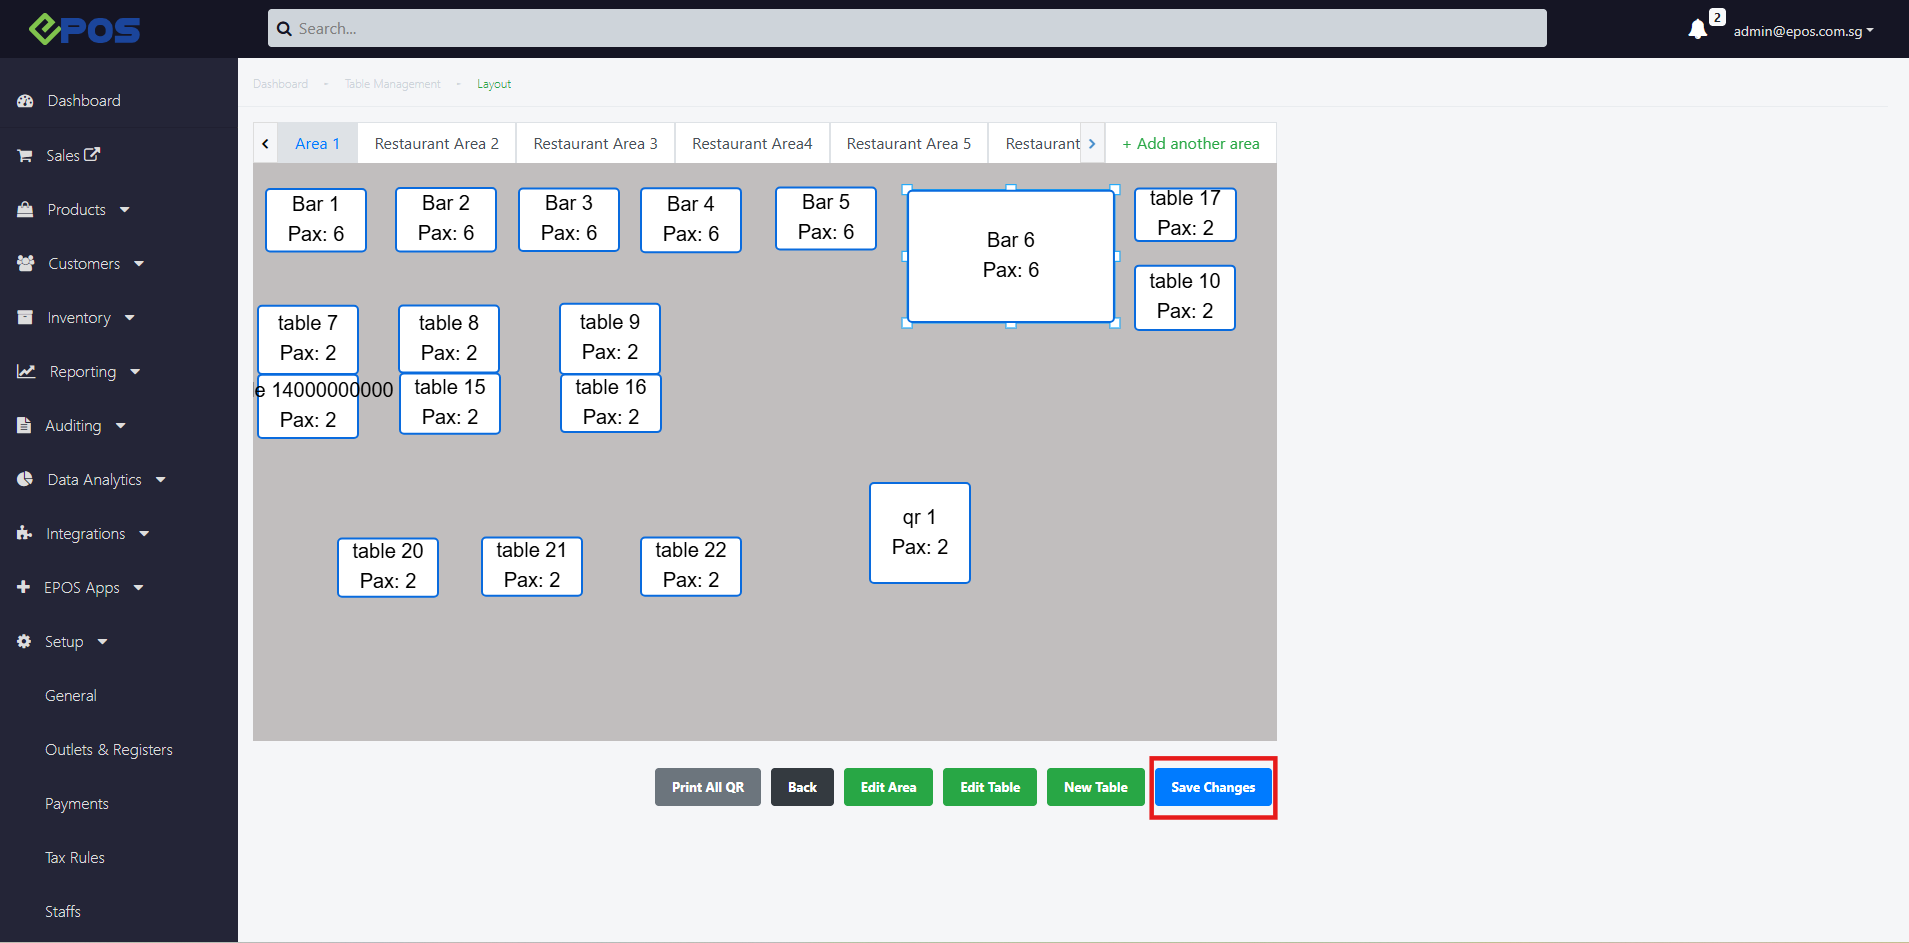
Once all editing and changes are done, users should remember to click the “Save Changes” button to save the changes. These changes will be updated into the POS.