Staff can add or change a customer’s email address from the Customer Details window on the Windows POS, without going to the Backend. Customers need an email address on their account to reset their password and to receive the email OTP when redeeming credits.
The steps below apply to both Gold POS and Apexa POS. The screenshots are from Apexa POS.
Before you start: Staff permission
Staff will only see the edit icon if their staff group is allowed to edit customer details. To set this, go to Backend > Setup > Staff Groups, select the staff group, open the POS Permissions tab, select Edit Customer Details and choose a permission.
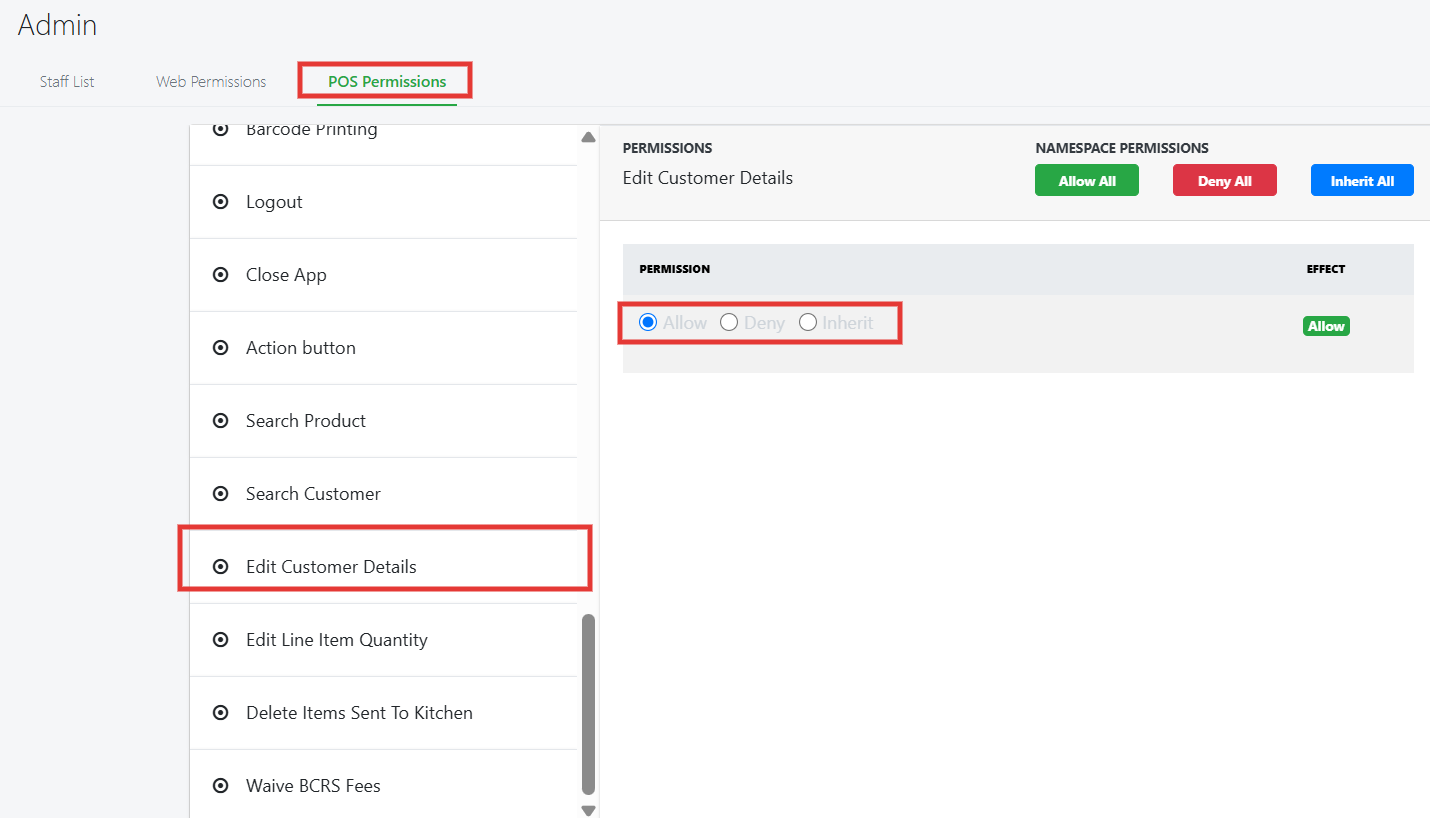
- Allow: staff in the group can edit customer emails on the POS. The edit icon appears beside the Email field.
- Deny: staff in the group cannot edit customer emails. There is no edit icon beside the Email field.
- Inherit: if any staff in the group is set to Allow, the whole group can edit customer emails. If all staff in the group are set to Deny, the group cannot.
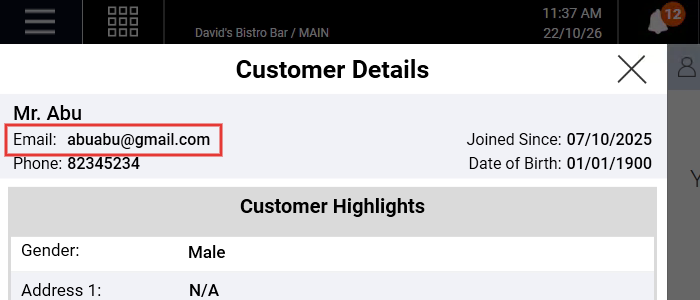
Customer Details when the permission is set to Deny:
Follow the steps below on how to add or edit a customer’s email address
1. Search for the customer and open their Customer Details window. See Customer Information for how to do this.
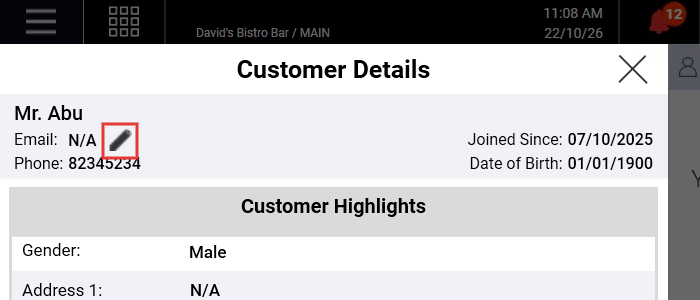
2. Click on the edit icon beside the Email field. If the customer has no email address yet, the field shows N/A.
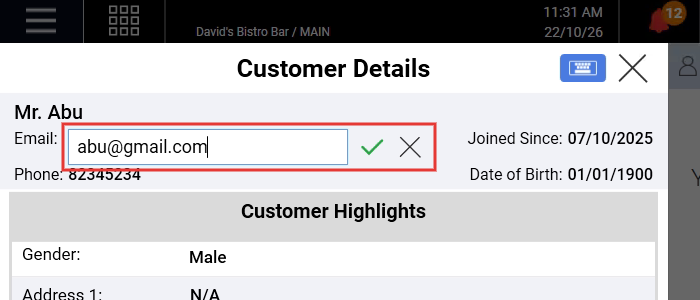
3. The Email field becomes a text box, with a tick (save) and a cross (cancel) beside it.
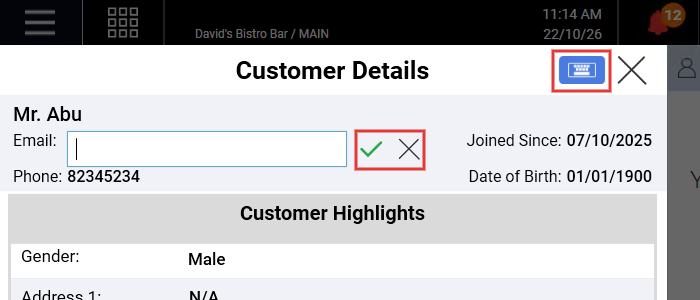
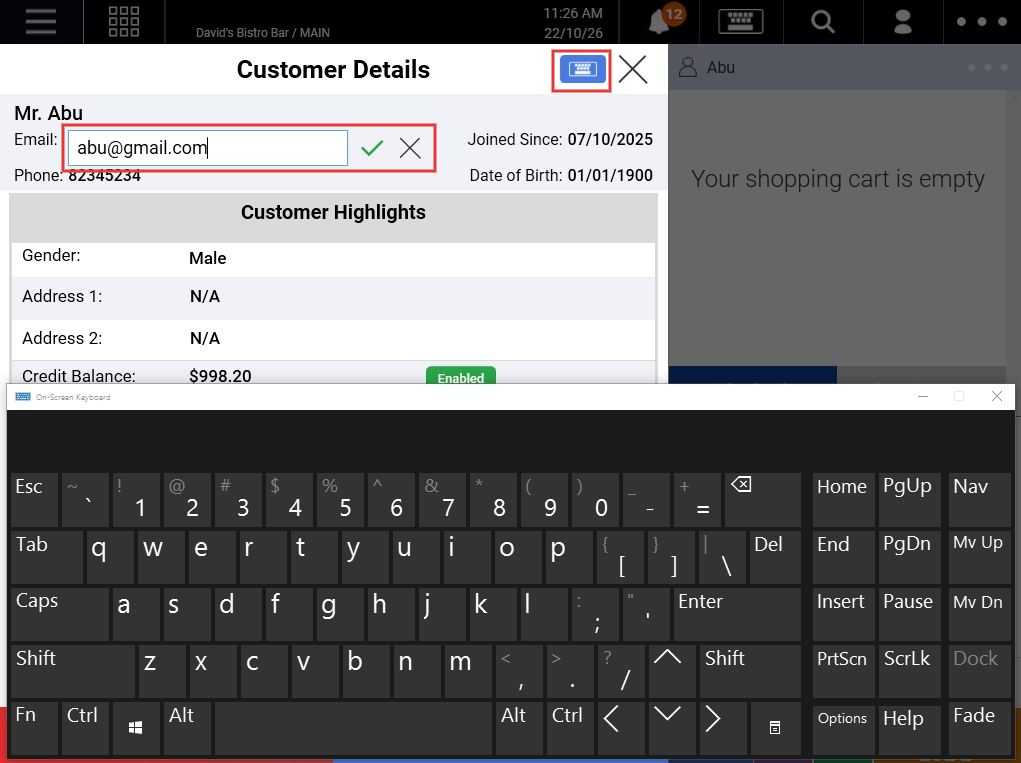
4. Key in the customer’s email address. To open the on-screen keyboard, click on the keyboard button at the top right of the Customer Details window.
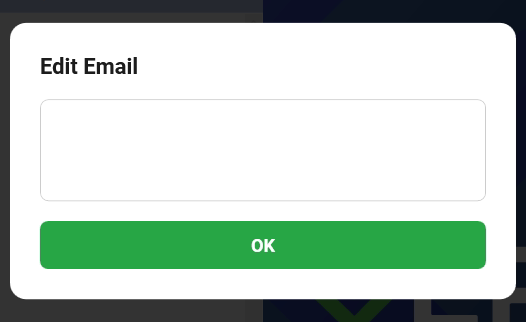
5. When you click on the text box, an Edit Email window with a keyboard also appears on the customer screen. The customer can key in their own email address and tap OK to save it.
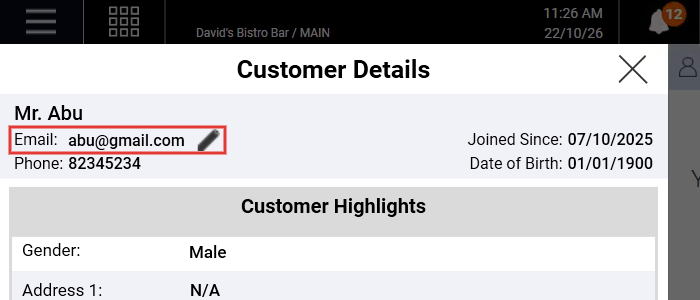
6. Click on the tick to save the email address, or the cross to cancel. The saved email address shows in Customer Details.
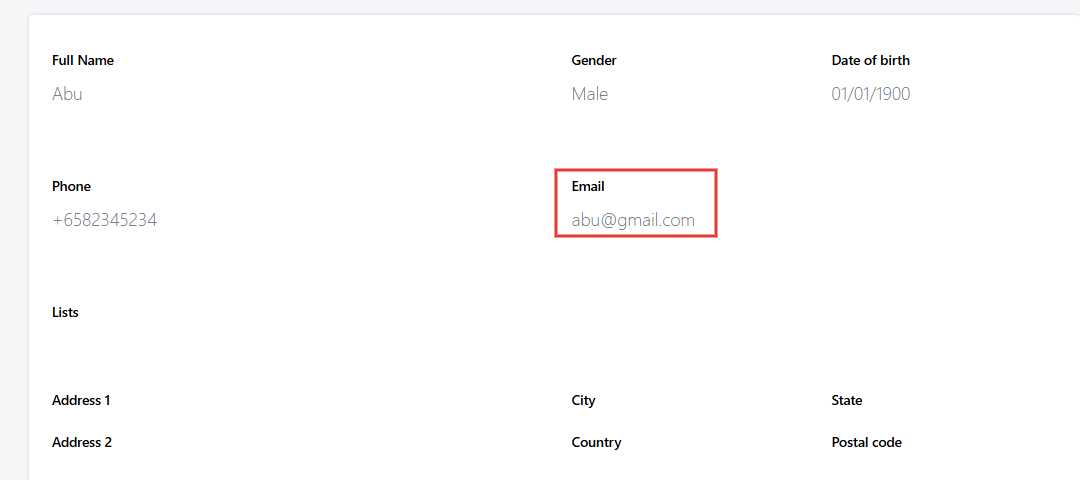
7. The email address is synced to the Backend. You can see it under Backend > Customers > Customers by selecting the customer.
Updating an existing email address
Follow the same steps. The text box shows the customer’s current email address, so you can change it and click on the tick to save.
Error messages
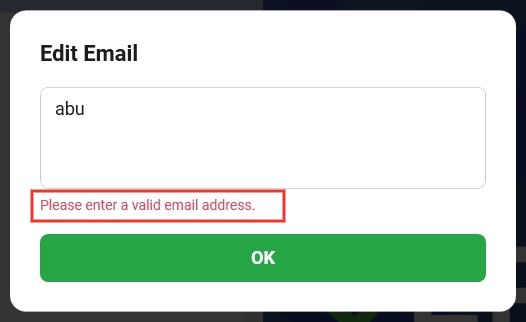
“Please enter a valid email address.”
Shown below the text box on the staff screen and the customer screen when the email address is not in a valid format (for example, “abu”). Correct the email address and save again.
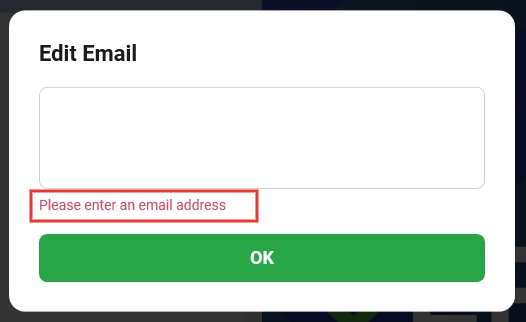
“Please enter an email address”
Shown when the text box is left empty for a customer who already has an email address saved. A saved email address can be changed, but not removed.
Leaving the email empty
If the customer has no email address saved, you can leave the text box empty and click on the tick. The Email field stays as N/A.
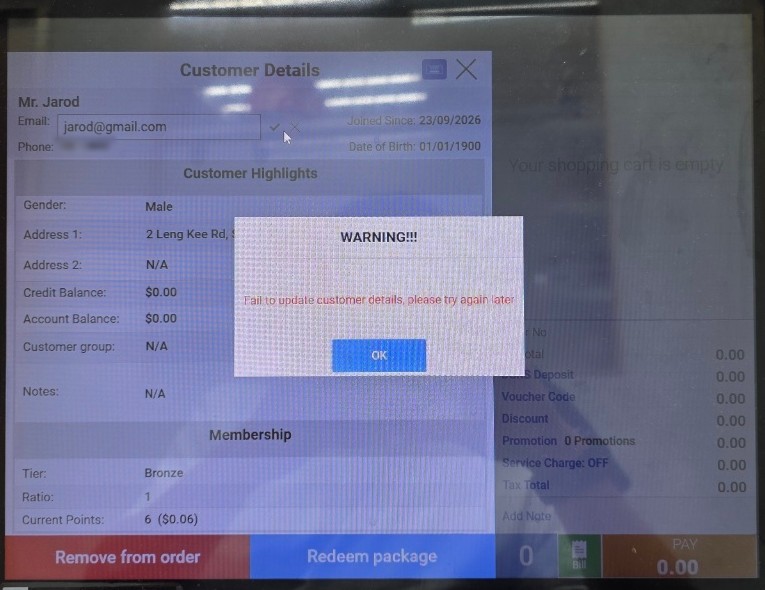
“Fail to update customer details, please try again later”
Shown in a Warning popup when the POS cannot sync the change to the Backend. Click on OK and try again later.