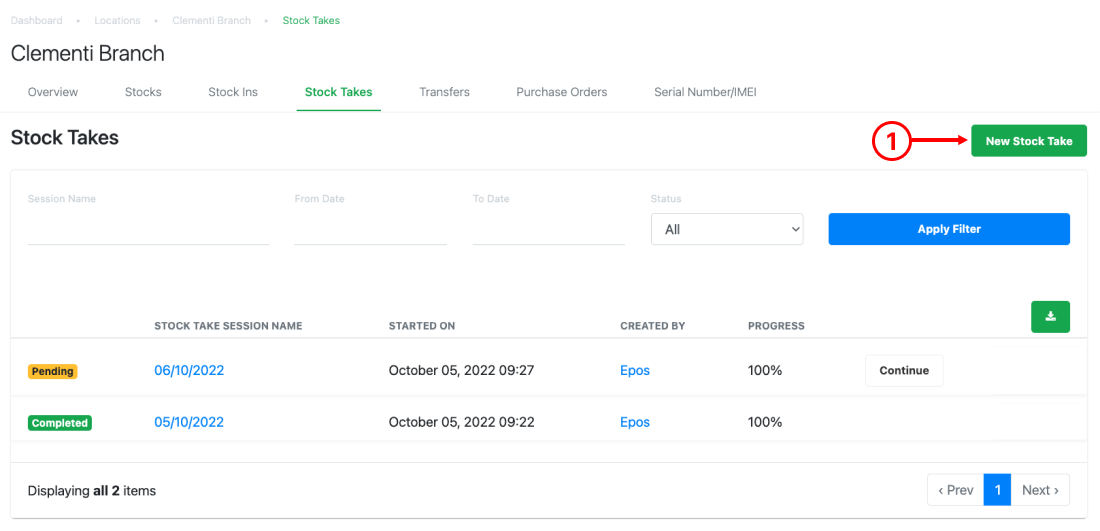
1. To initiate a stock take, at the Inventory Stock Take page, click on New Stock Take.
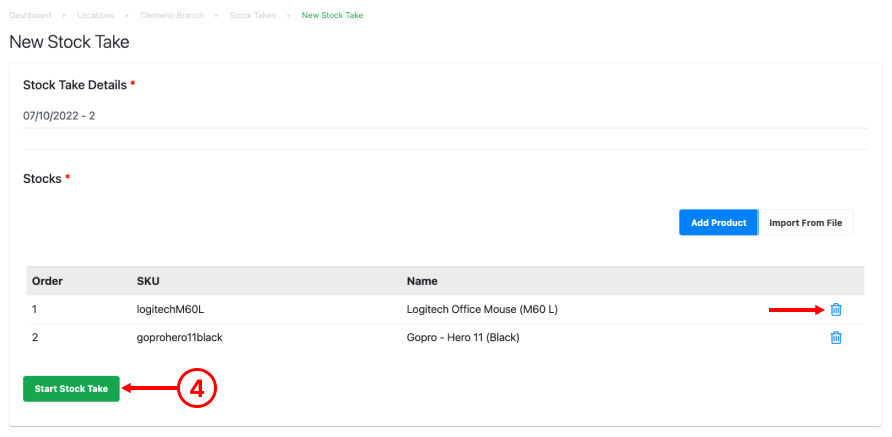
2. Users will be directed to the New Stock Take page. Here, users should first enter a name or reference for the stock take session.
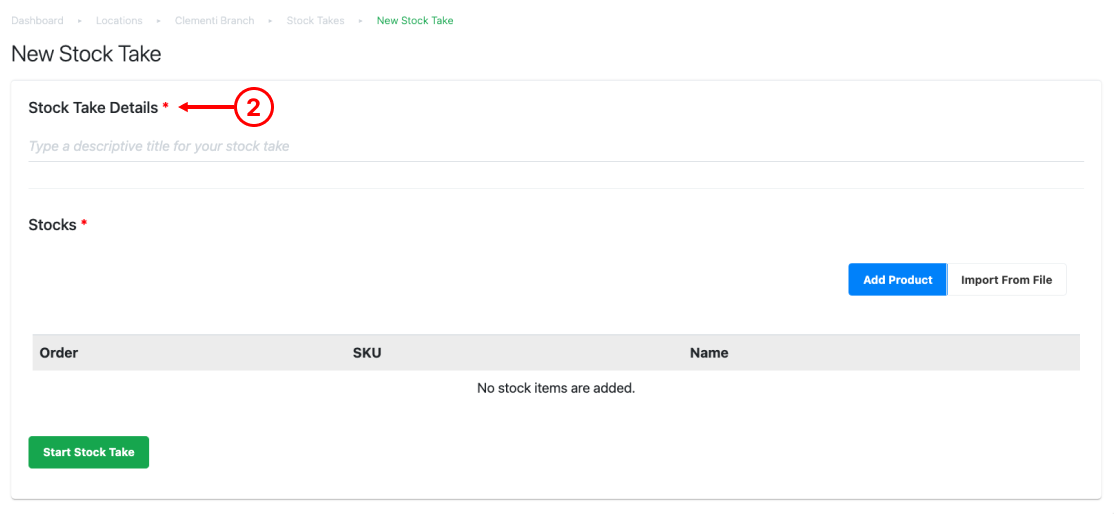
💡 It is recommended to enter a meaningful stock take session name or reference, so it will be helpful in the future for users to retrace stock-in history, e.g. Date.
3. Users should then enter products for this particular stock-in. Users can do it via either Add Product/ Import From File.
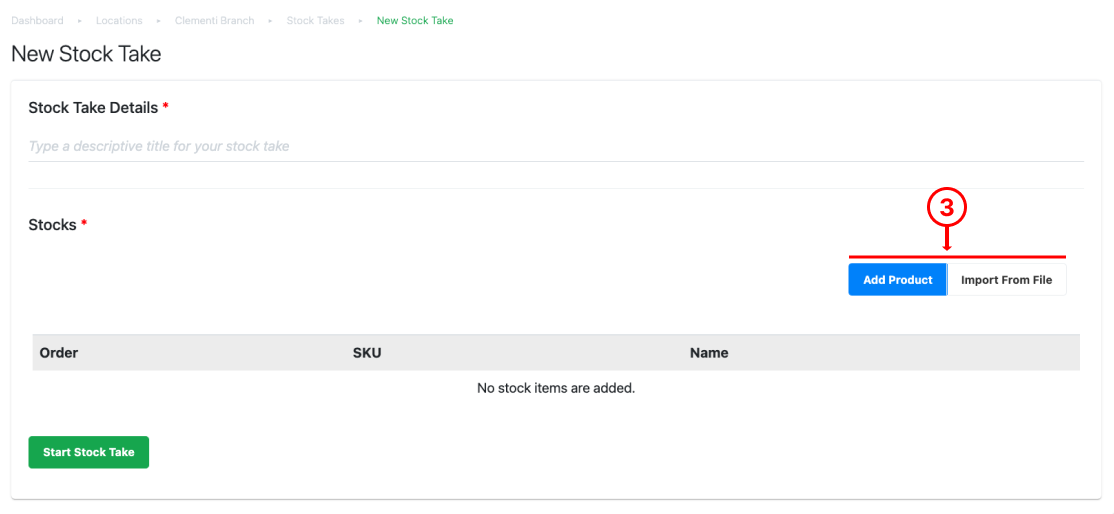
● Add Product
To add individual products one at a time, click on Add Product. Users can pick individual or multiple products.

a. Search Panel: Search with name/SKU, supplier, product category or sub-product category.
b. Selection boxes: ☑️ the selection boxes for applicable products.
c. Click on Add Stock once done.
● Import From File
Alternatively, users can utilize the Import From File function to bulk import a list of products to this particular stock take.
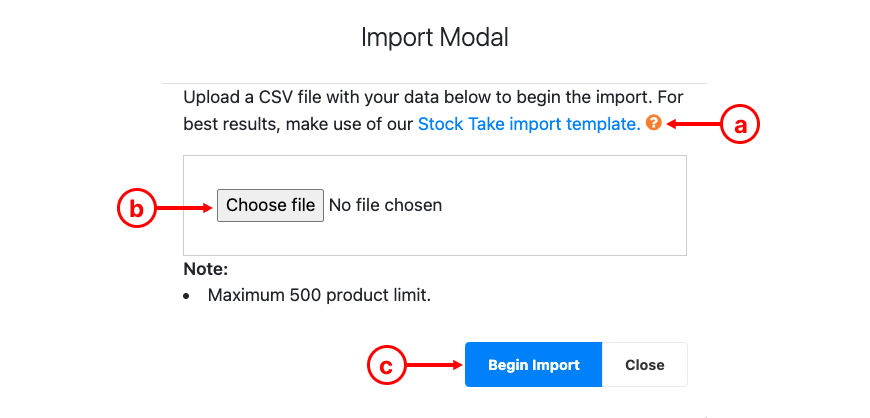
a. Download Stock Take import Template, open the template and enter details in column A (product SKU), column B (stock count). Once completed, download it as a csv file.
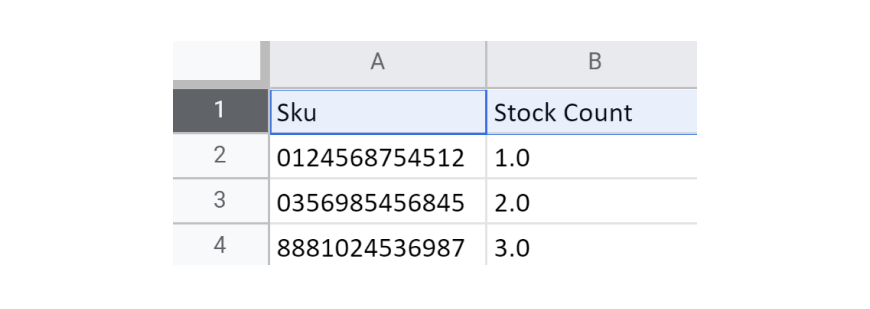
💡 To ensure all barcodes are captured correctly, in Google Spreadsheets, select whole column A, select Format > Number > Plain Text. Importing is limited to only 500 line items.
b. Choose the csv file you have downloaded to upload.
c. Click on Begin Import once done, the entire list of products will be added.
4. Once a product is added, users can click on the Bin icon to remove a particular product from the stock take. Once finalized, click on Start Stock Take to proceed.
5. Users shall then enter the actual stock count to the Actual Count field.
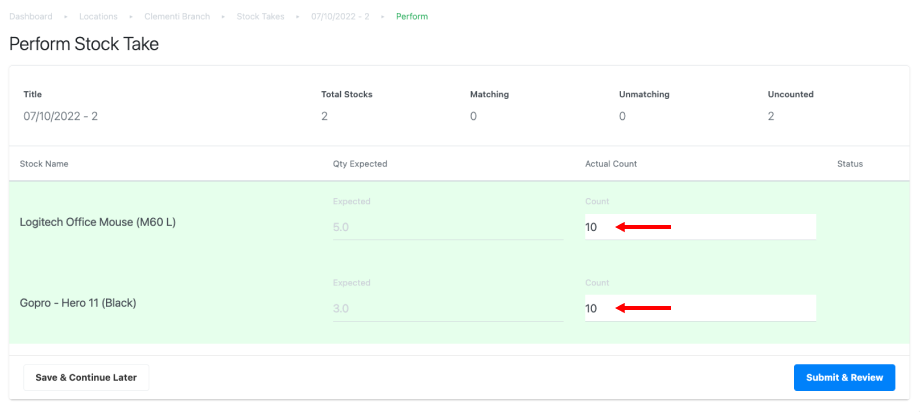
💡 If users imported the products with Stock Take Import Template as described in step 3, the Actual Count field will be directly mapped as per the quantity entered in the Stock Take Import Template.
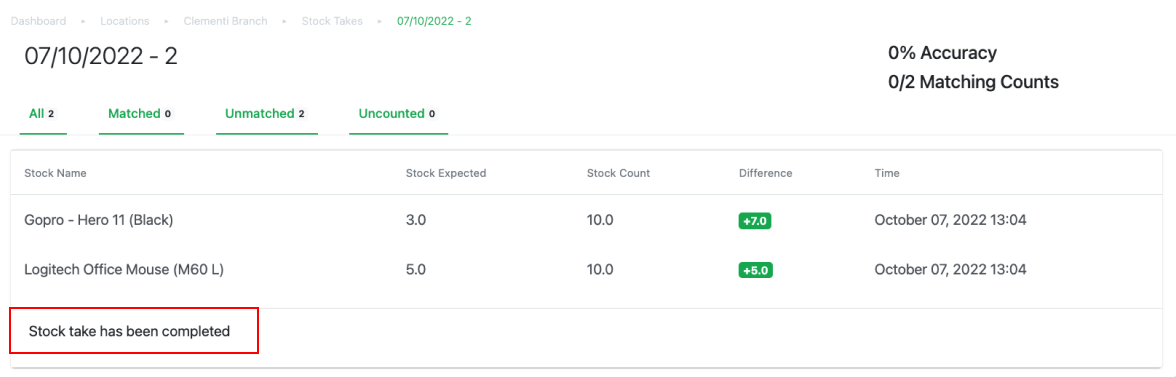
6. Information of the stock take session will be shown. It is recommended to provide reasons for discrepancies shown between Qty Expected and Actual Count for each product.
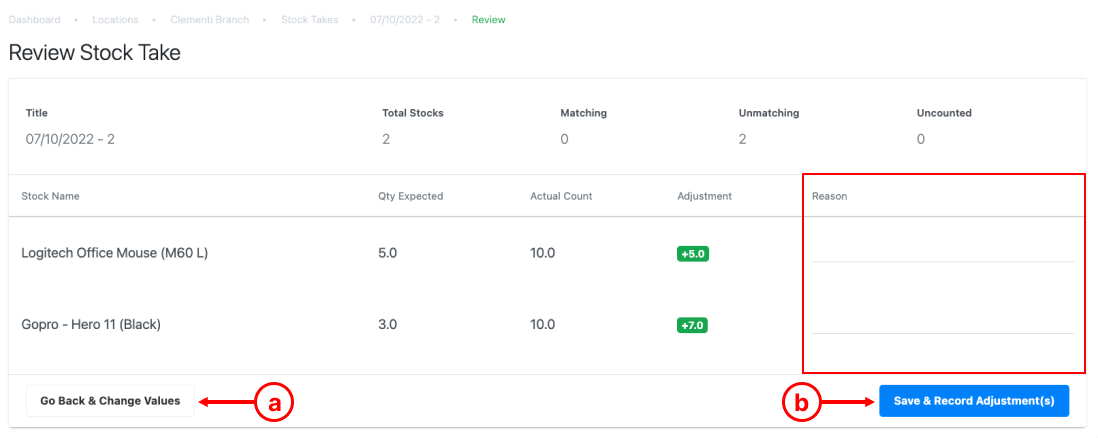
a. Go Back & Change Value
Allows users to return to the previous page to re-enter actual stock count.
b. Save & Record Adjustments
Once users finalize the reasons for each discrepancy, click on Save & Record Adjustments; stock take session will be completed and stock level for the products in this session will be re-adjusted according to the adjusted quantity.
7. Stock Take is now finalized, and users are able to filter the stock take list based on stocktake accuracy.