
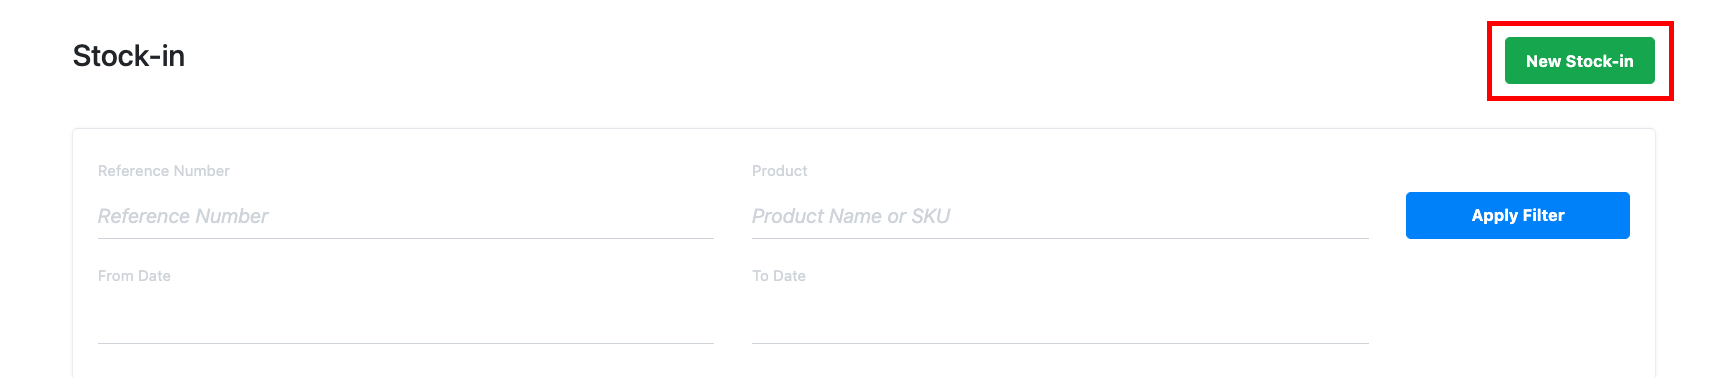
1. To initiate a stock in, at the Inventory Stock In Page, click on New Stock-in.
2. Users will be directed to the New Stock-in page. Here, users should first enter a reference number for the stock-in.
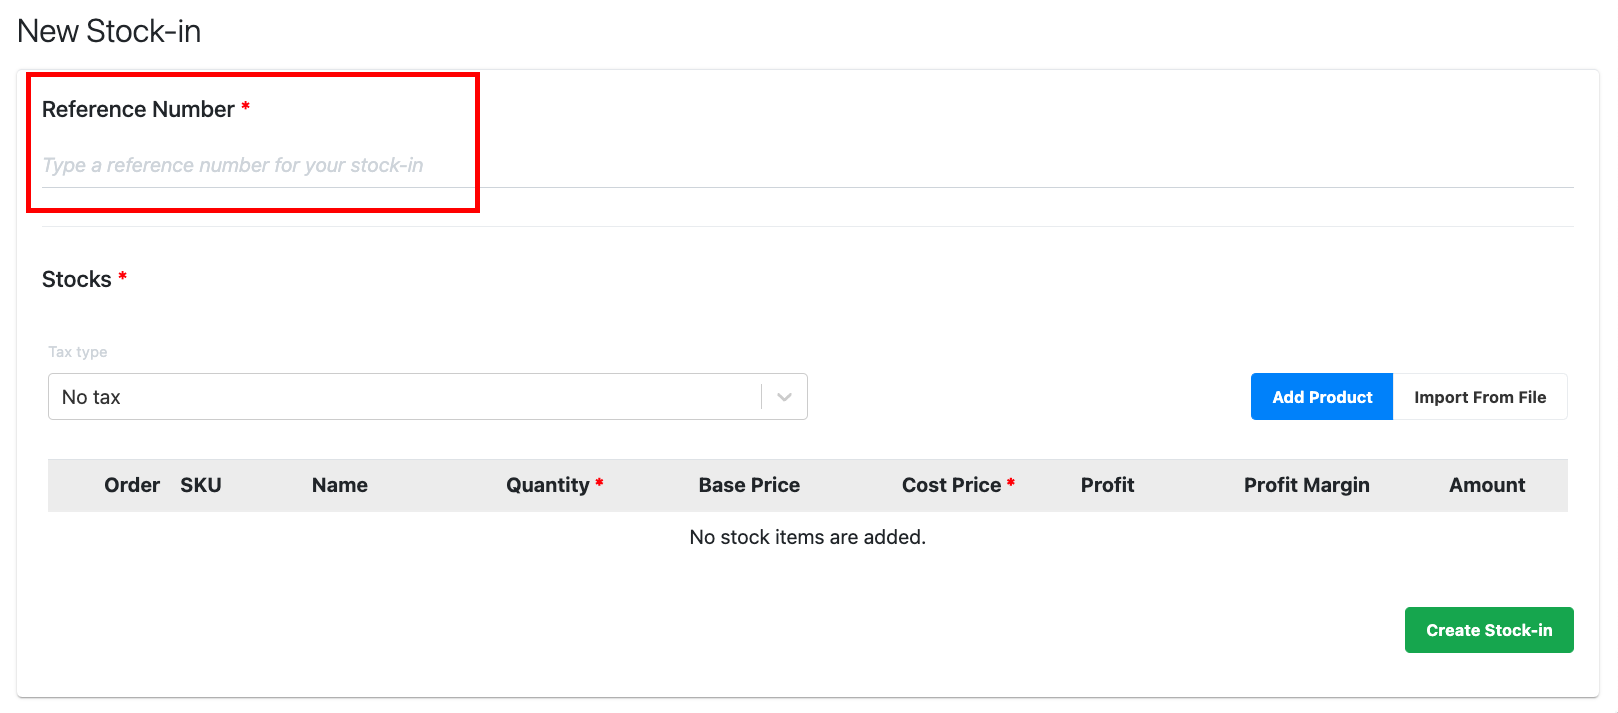 💡 It is recommended to enter a meaningful reference number, so it will be helpful in the future for users to retrace stock-in history. Eg. Date
3. Users should then enter products for this particular stock-in. Users can do it via either Add Product/ Import From File.
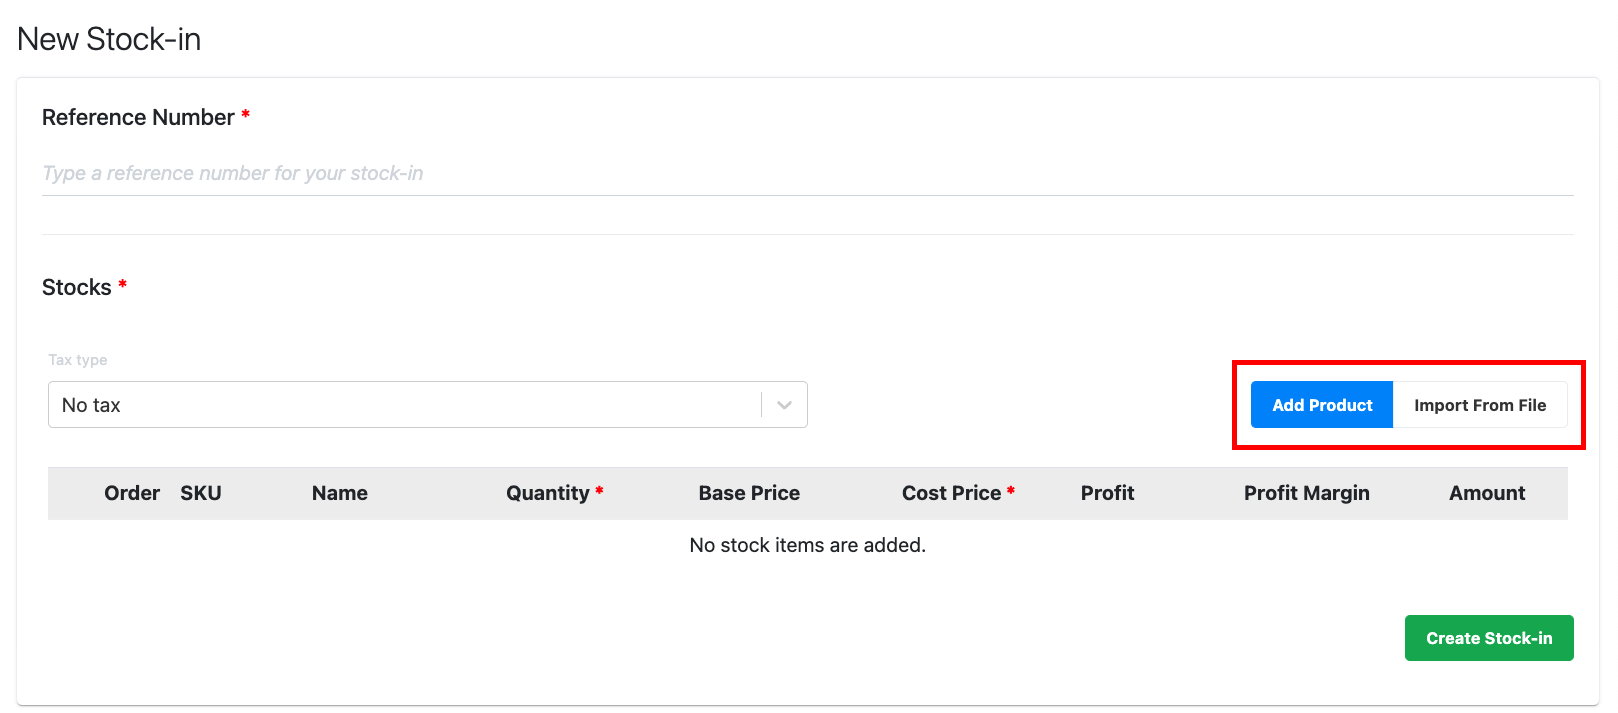
● Add Product
To add individual products one at a time, click on Add Product. Users can pick individual or multiple products.
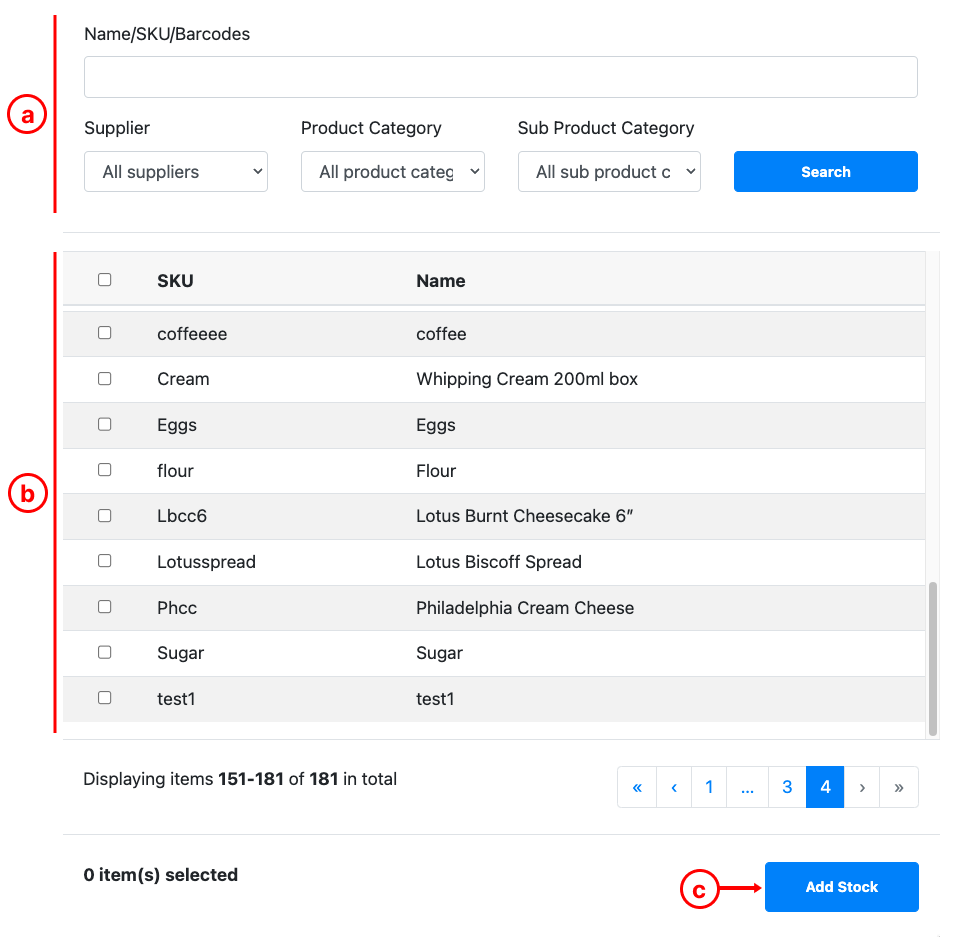
a. Search Panel: Search with name/SKU, supplier, product category or sub-product category.
b. Selection boxes: ☑️ the selection boxes for applicable products.
c. Click on Add Stock once done.
● Import From File
Alternatively, users can utilize the Import From File function to bulk import a list of products to this particular stock-in.
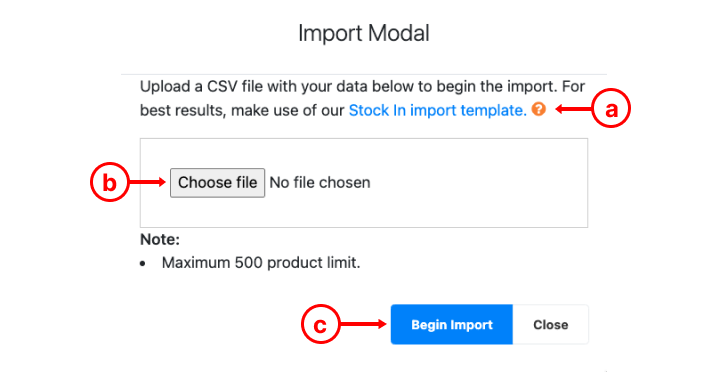
a. Download Stock In import Template, open the template and enter details in column A (product SKU), column B (product cost price), column C (Quantity). Once completed, download it as a csv file.
💡 To ensure all barcode are captured correctly, in Google Spreadsheets, select whole column A, select Format > Number > Plain Text. Importing is limited to only 500 line items.
b. Choose the csv file you have downloaded to upload.
c. Click on Begin Import once done, the entire list of products will be added.
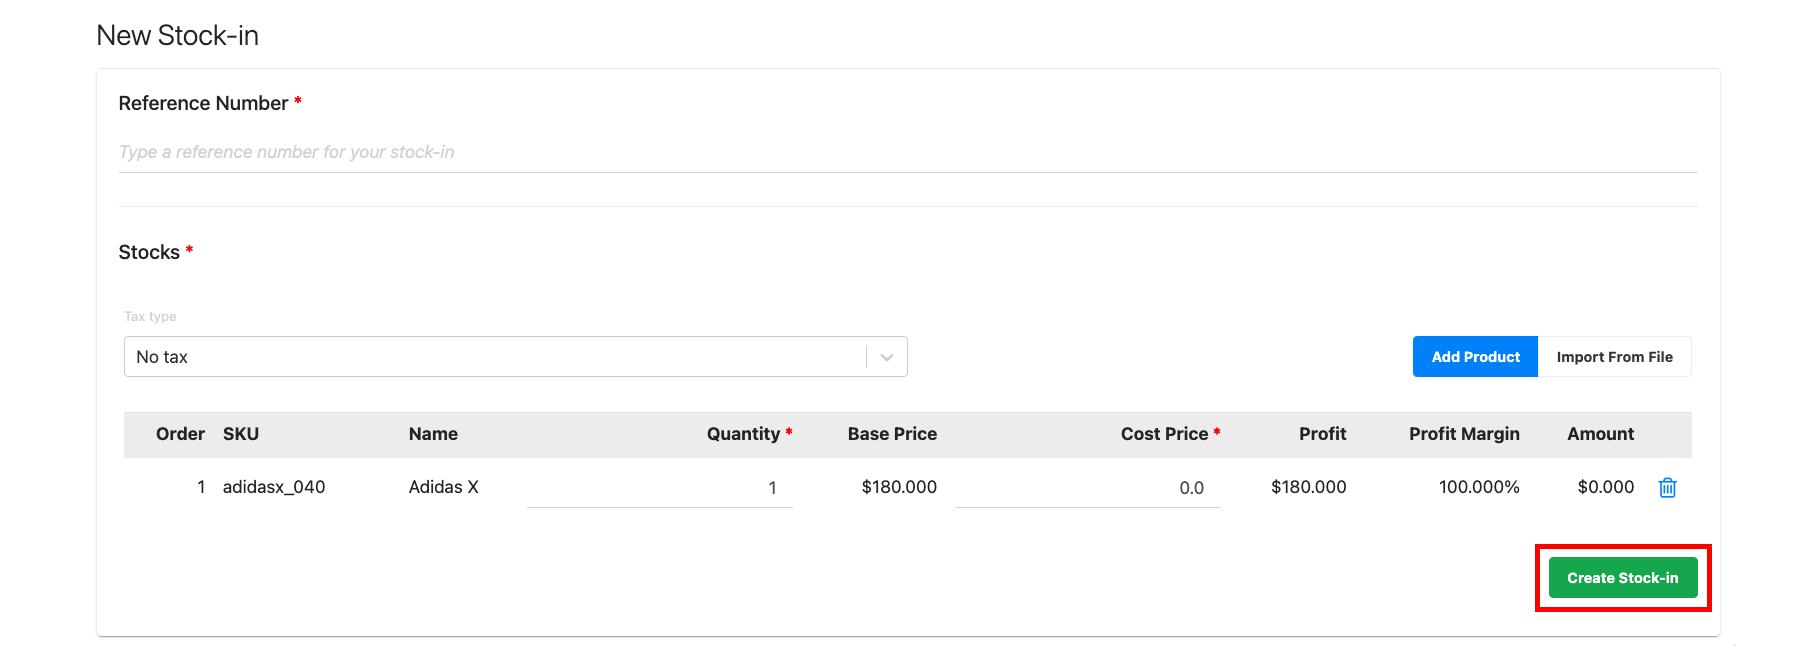
4. Once the product is added, make sure all relevant fields are filled up.
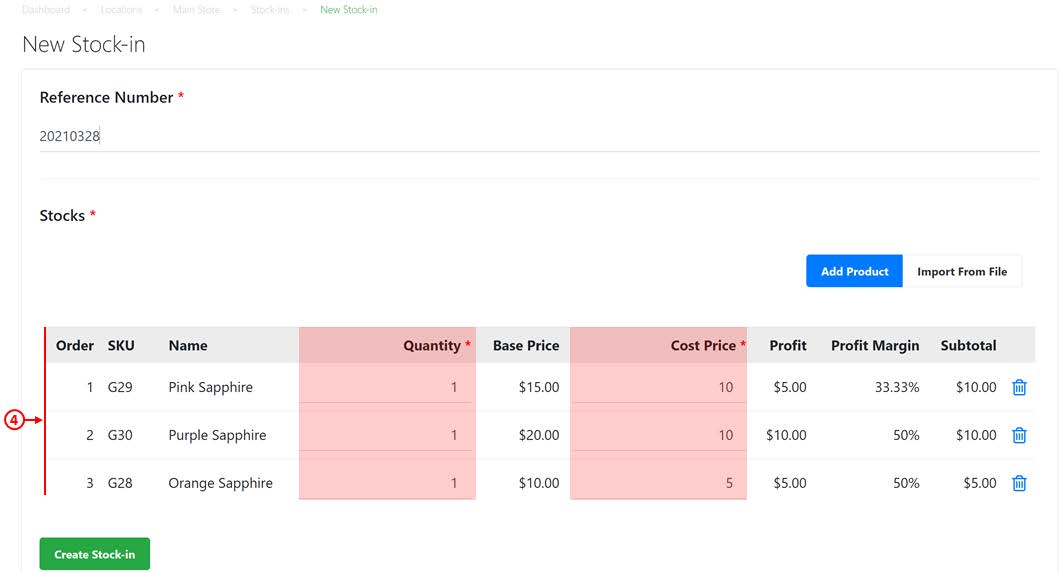
💡 EPOS backend is able to capture user’s input of cost price of up to 4 decimal places. Users who purchase a large quantity of products are advised to use 4 decimal places for cost price.
5. Profit, profit margin and subtotal will be tabulated automatically based on the quantity and cost price entered. Once done, click on Create Stock-in.
6. Users will then be directed back to the Stock-in page, the list is now updated.