
Users can perform stock transfers between different outlets. Therefore, this section will only be applicable to users who have multiple outlets registered in the backend portal.
To access the Stock Transfers page, under Inventory, click on the Transfers tab.
![]()
1. Transfer Stock
Allows users to initiate a new stock transfer. For more information, see Creating and Completing a Stock Transfer.
2. Filter and Search
Allows users to filter and search the list of stock transfers based on status, locations/outlets, and transfer types.
💡 Transfer type: the results include stock from stock transfer and stocks from purchase order
3. List of Stock Transfers
Shows users the list of stock transfers (default: pending completion), with its related information.
- Reference Number (manual key in/ auto-generated)
- Date/ Time Created
- Source of stock transfer (from)
- Destination of stock transfer (to)
- Pickups/ Deliveries
- Order completion
4. Transfer Details and Configuration
Click on the reference number to access the details related to the stock transfer. For more information, see Stock Transfer Details & Configurations.
5. Outlet’s Inventory Overview
Click on the name of the outlet to access that particular outlet inventory overview page.
6. Quick Settings
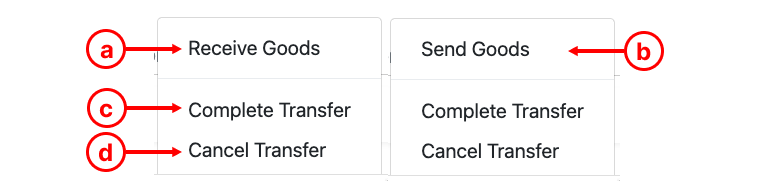
a. Send Goods (Originated Outlet): Direct users to the send goods page.
b. Receive Goods (Designated Outlet): Direct users to the receive goods page.
c. Allow users to complete transfer, if stock transferred is received by designated outlet.
d. Cancels stock transfer operation.