No products in the cart.
Release Changes
Oct 2023: Implementation of the display of total cost price of transferred goods. (See step 8 & 10)
Before proceeding further, users shall ensure that there are multiple outlets created in their backend portal. If created, users can refer to the following steps for transferring stocks between outlets.
Contents hide
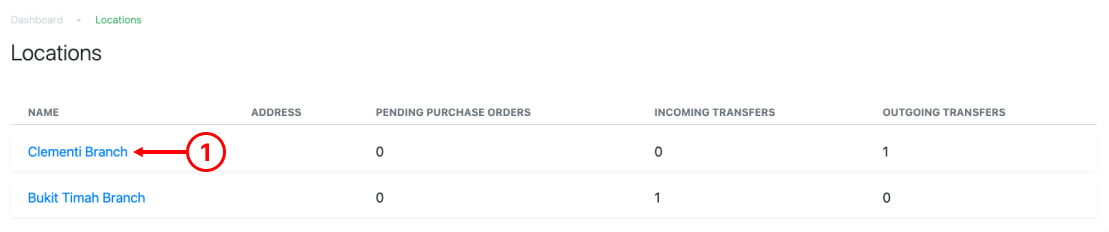
1. On the feature panel, under Inventory, click on Inventory. Select the originating outlet (source).
2. Under Transfer Tab, click on Transfer Stock.

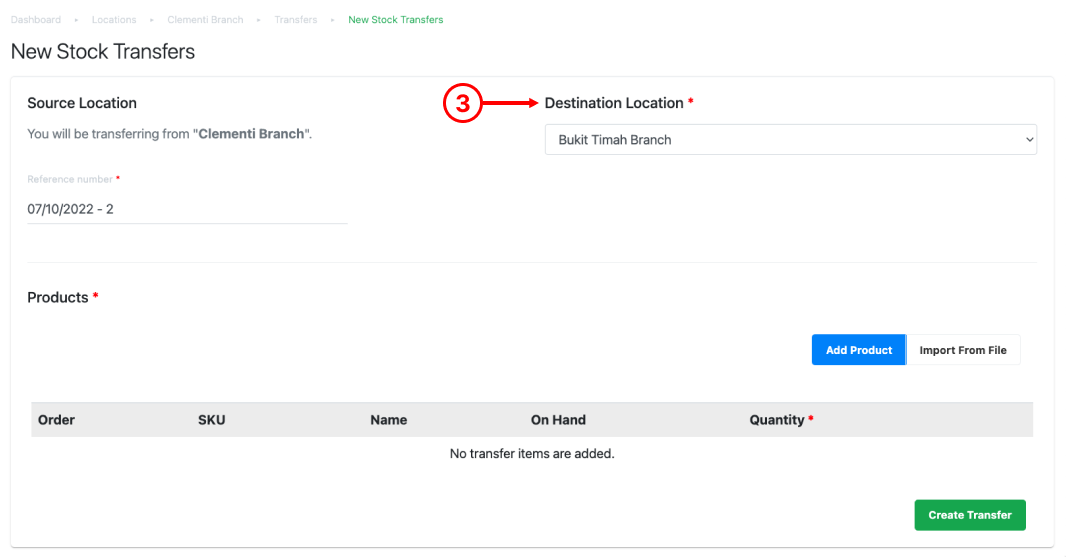
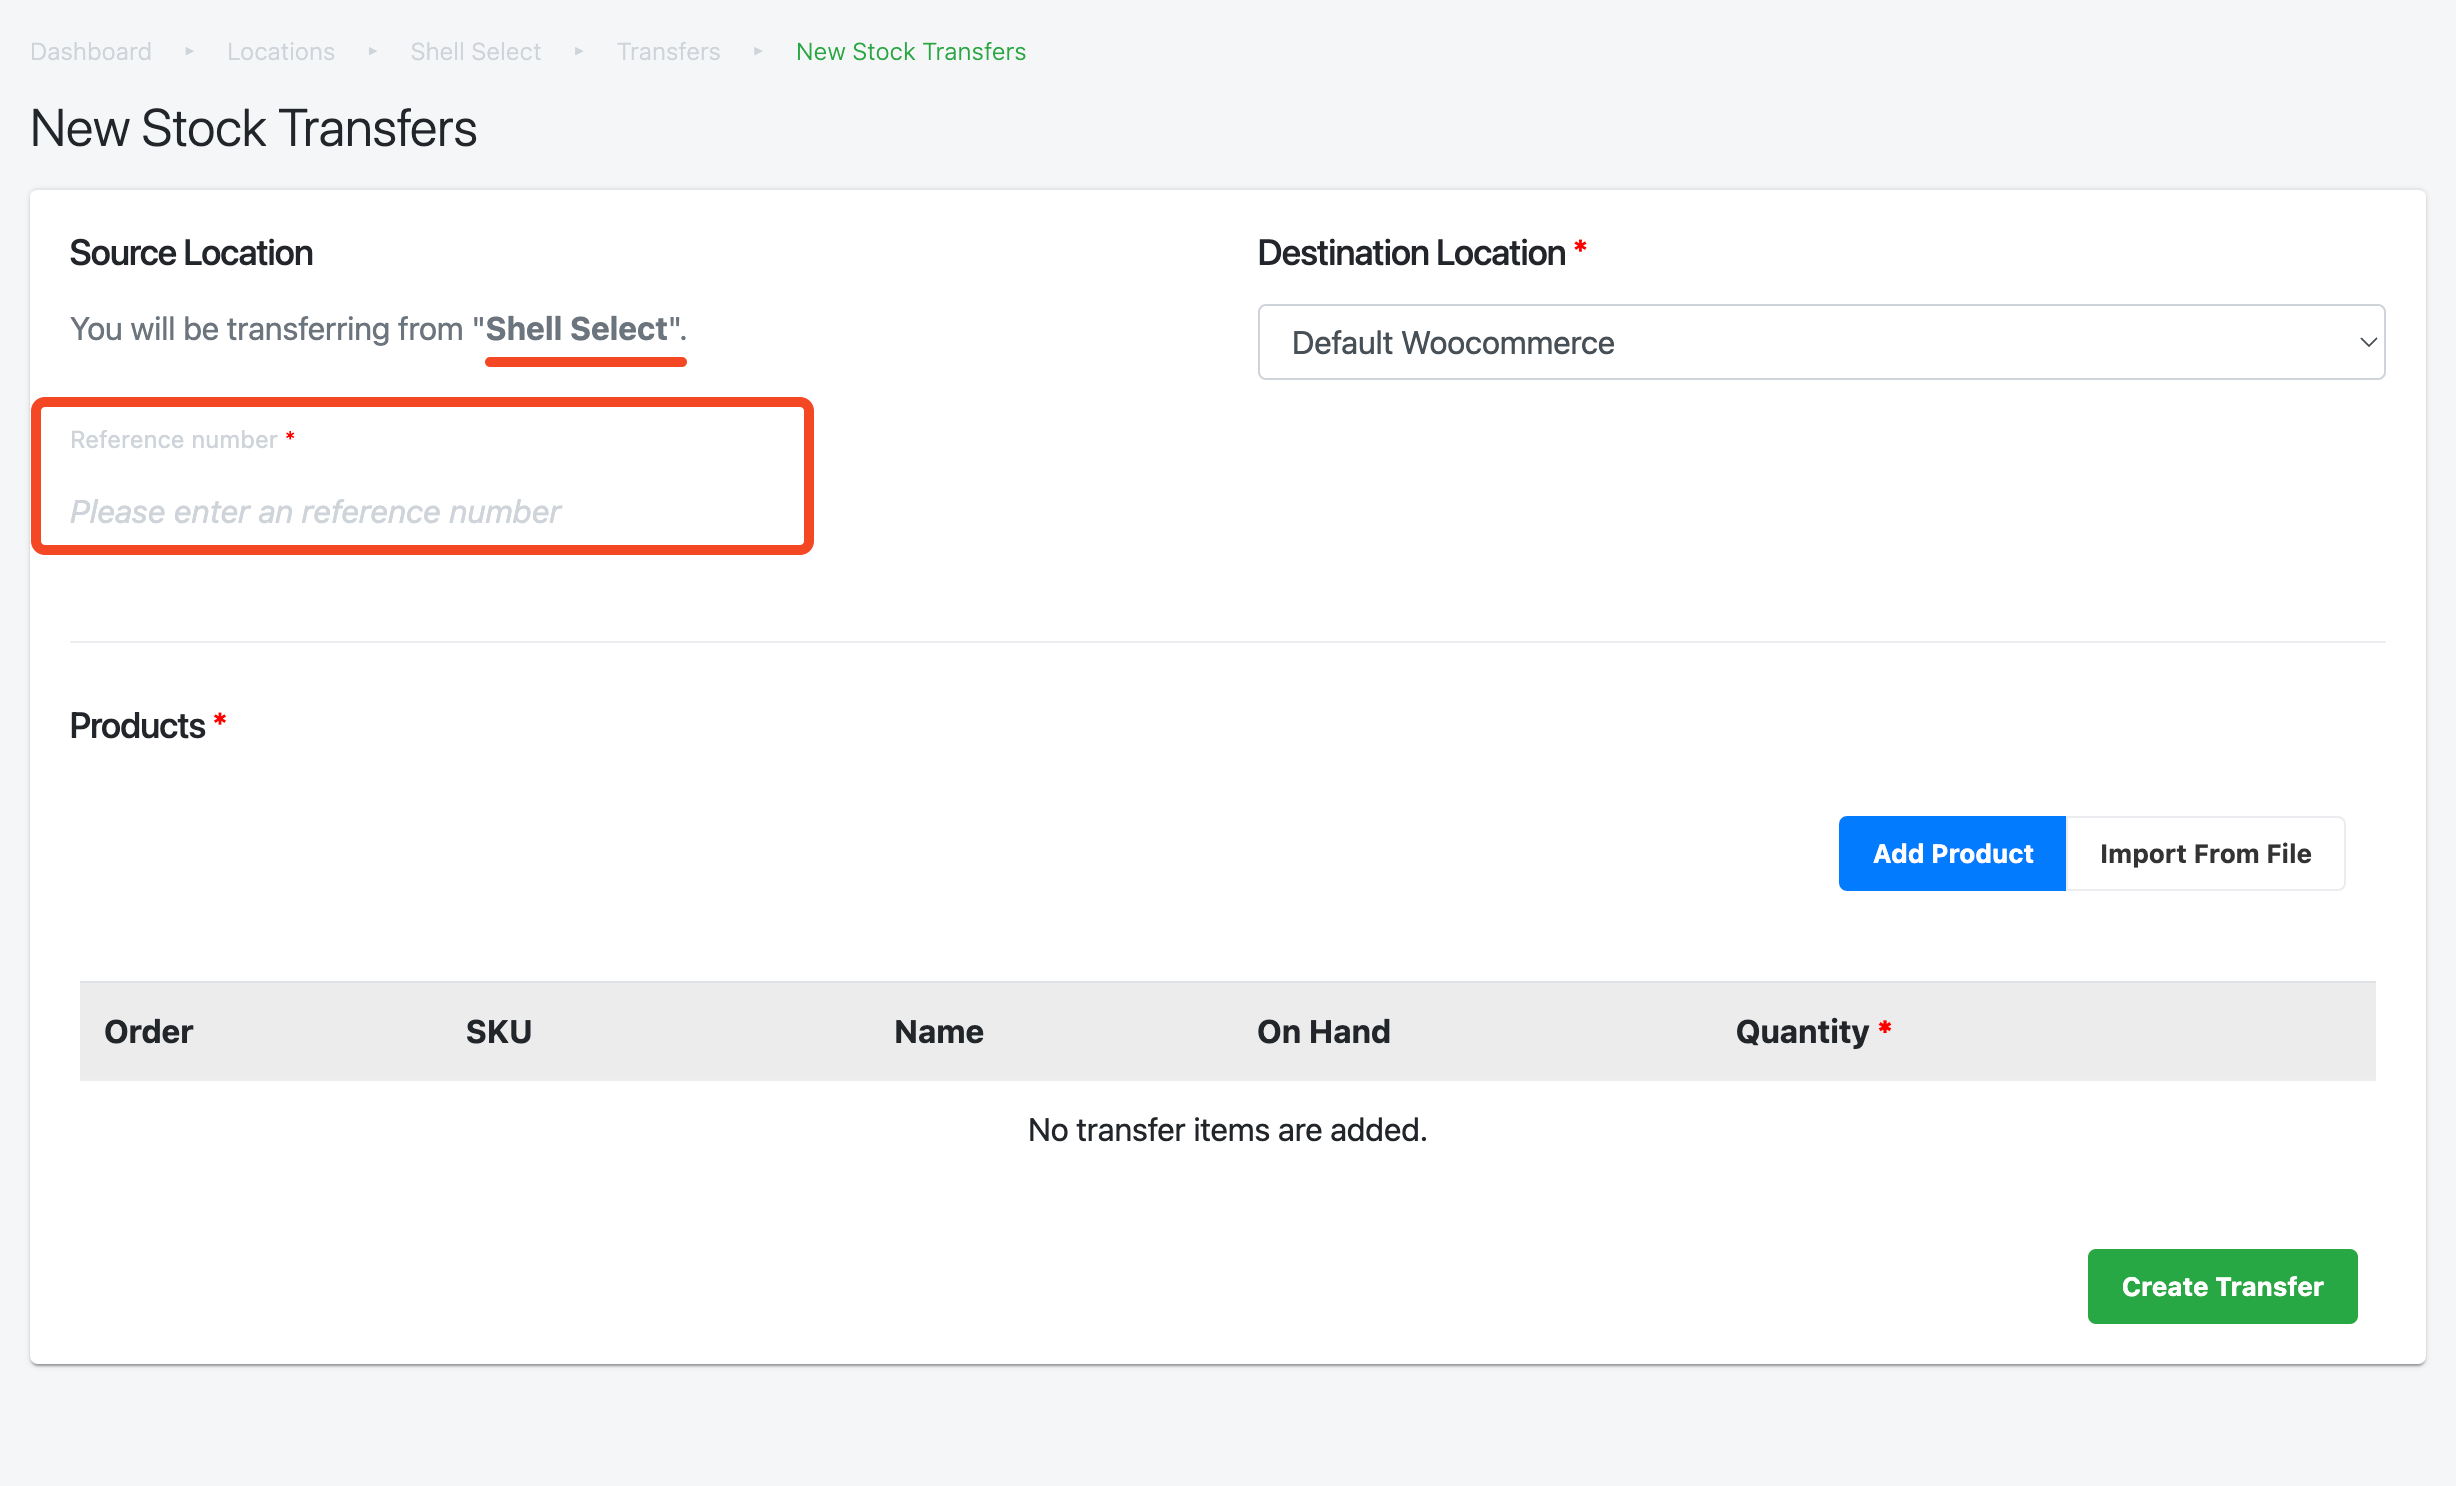
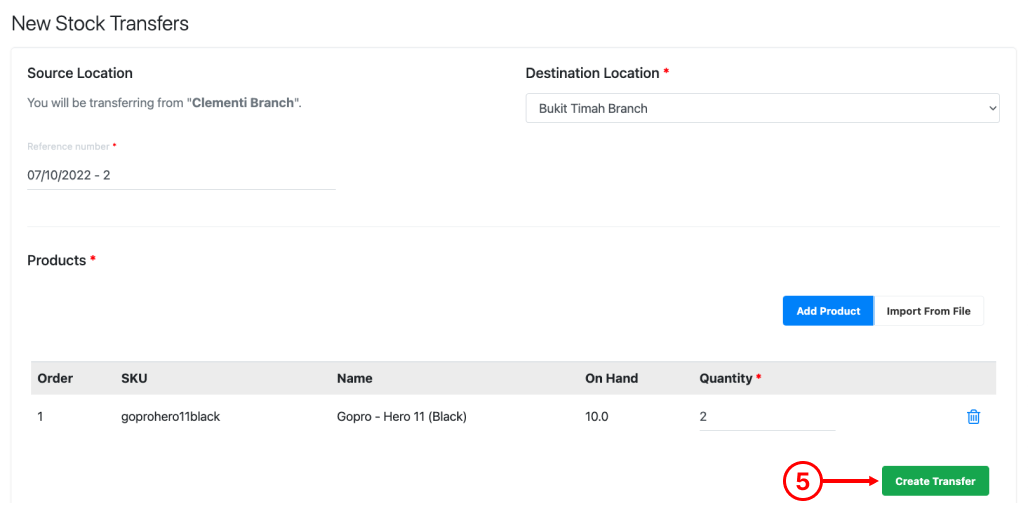
3. Users will then be directed to the New Stock Transfers Page. Here, users shall pick a destination and re-verify the transfer is being done between two correct locations. Fill in the Reference Number as well
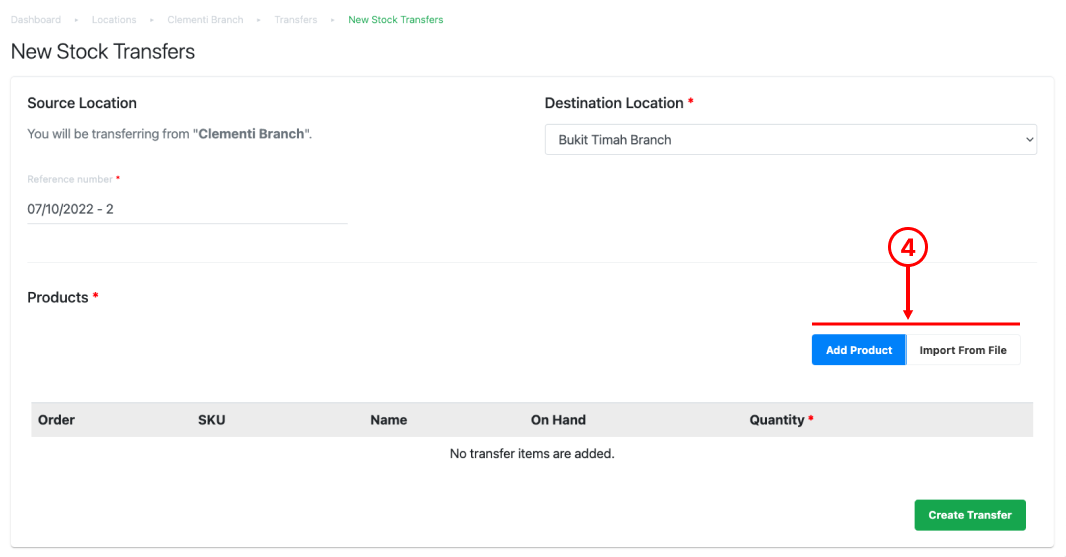
4. Users should then enter products for this particular stock transfer via either Add Product/ Import From File.
Add Product
To add individual products one at a time, click on Add Product. Users can pick individual or multiple products.
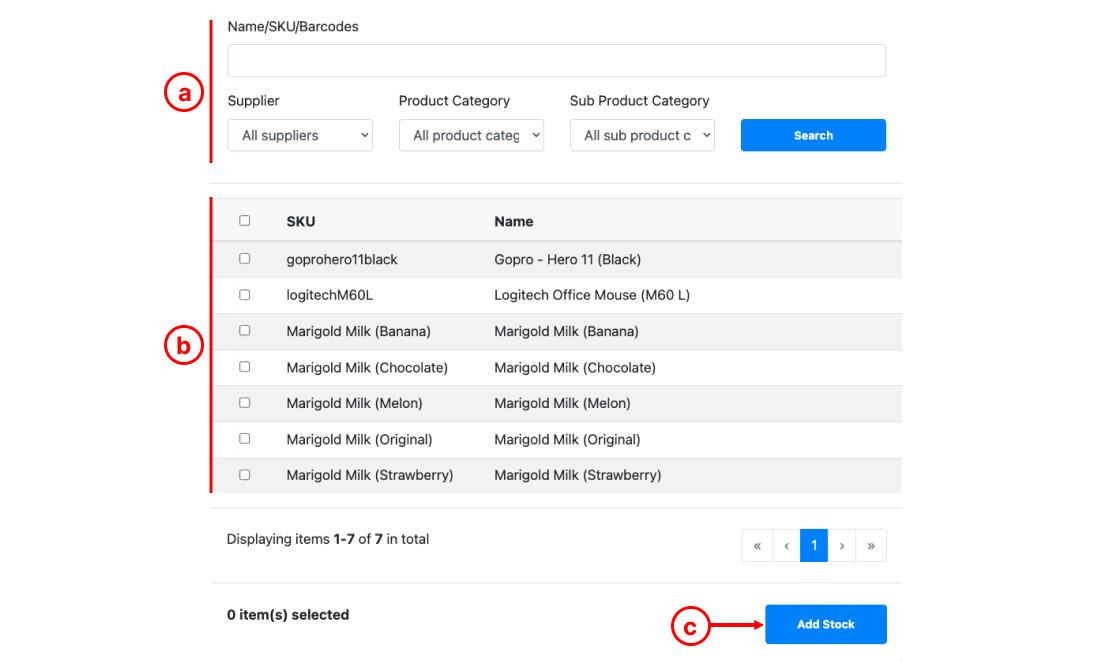
a. Search Panel: Search with name/SKU, supplier, product category or sub-product category.
b. Selection boxes: ☑️ the selection boxes for applicable products.
c. Click on Add Stock once done.
Import From File
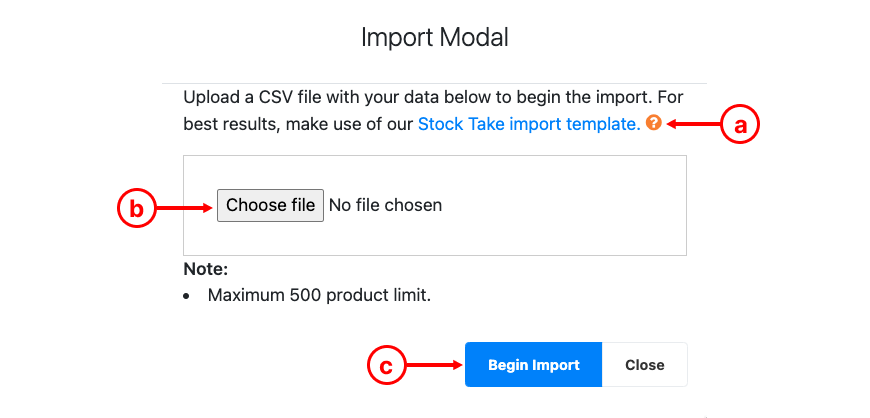
a. Download Transfer import Template, open the template and enter details in column A (product SKU), column B (originating outlet), column C (quantity). Once completed, download it as a csv file.
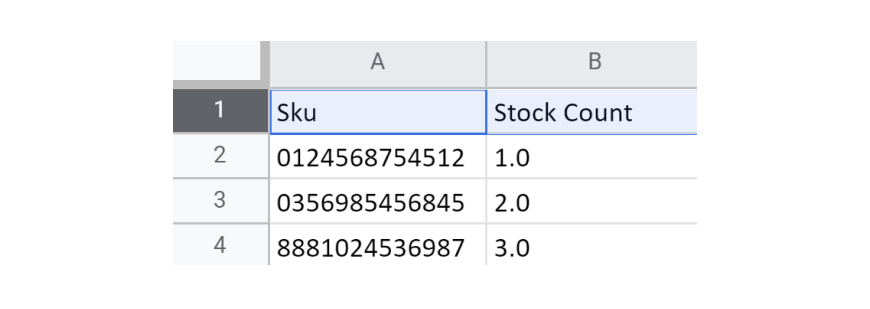
💡 To ensure all barcodes are captured correctly, in Google Spreadsheets, select the entire column A, select Format > Number > Plain Text. Users must ensure SKU(s) are entered exactly identical (capital letter and symbols) to BACKEND PORTAL. Importing is limited to only 500 line items.
b. Choose the csv file you have downloaded to upload.
c. Click on Begin Import. Once completed, the entire list of products will be added.
💡 For more information, refer to the common error messages shown while importing product list via csv file for Stock Transfer.
5. After product(s) are added, enter quantity. If products are added via Import Template, quantity will be auto-filled. Click on Create Transfer.
6. Users will then be directed to the Transfer Details Page.
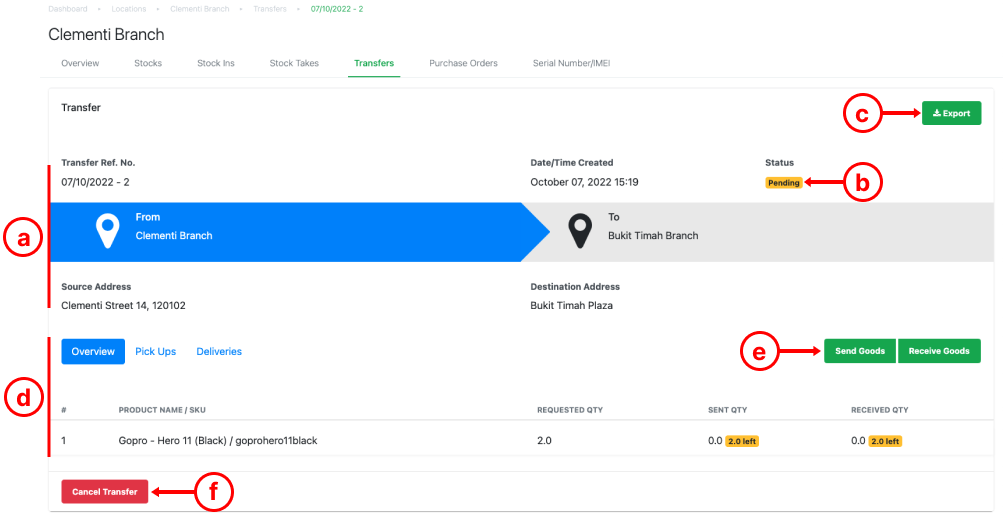
a. Transfer reference details: Transfer Reference Number, Date/Time Created, From & To
b. Status of Transfer: Completed/ Pending
c. Export Transfer Details
d. Stock Transfer Details: Product Name/SKU, Requested Qty, Sent Qty, Received Qty
e. Send Goods
f. Receive Goods
g. Cancel Transfer
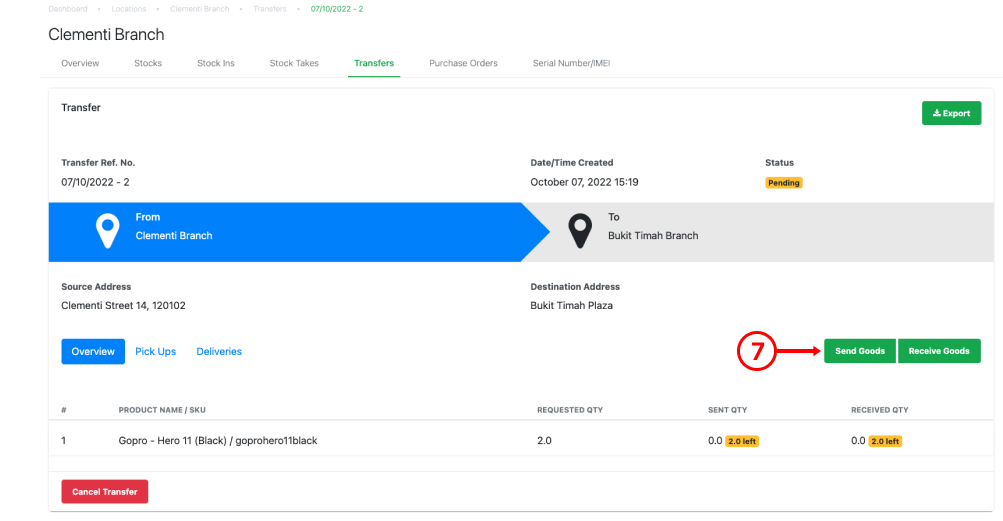
7. To proceed, click on Send Goods.
8. Users can enter a reference number and ensure requested qty and send qty are tallied. Once confirmed, click on Send Goods.
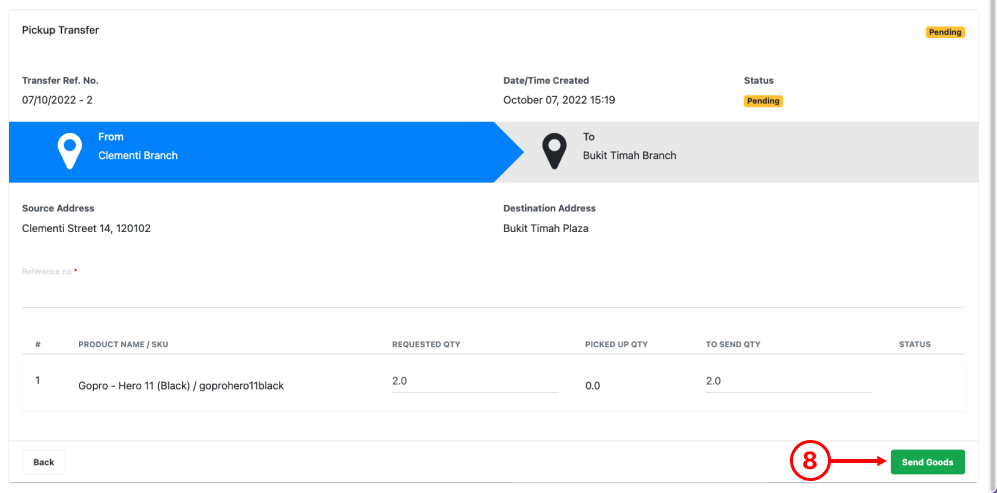
The “Total Cost Price of Sent Goods” will be shown at the bottom of the page to indicate the amount to charge the retail outlet after the stock transfer is completed.
💡 Total Cost Price of Sent Goods is calculated by FIFO Inventory method and will take the input quantity and cost price. If no cost price has been set, the system will take either $0, or the default product cost price, depending on the global config selected at Set Up (See Config Tab – point 5).
![]()
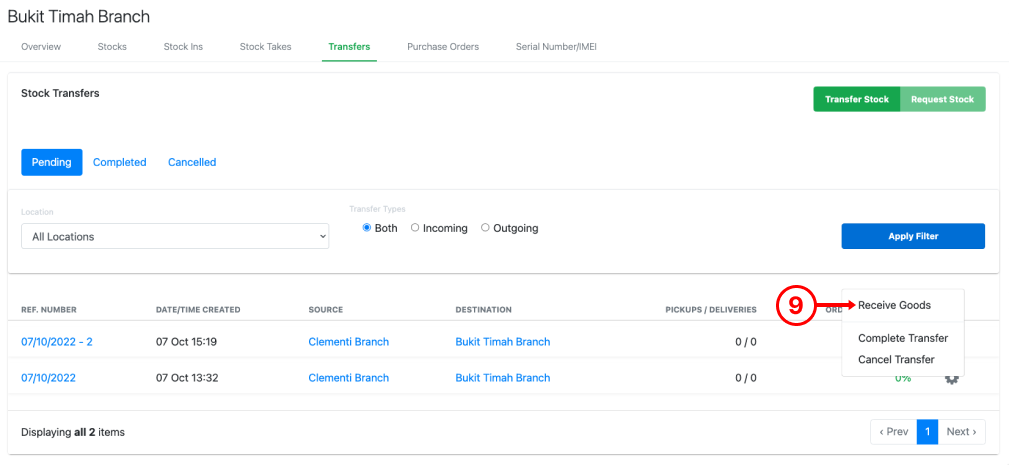
9. On the Inventory page, select the destination outlet. At the transfer tab, select the relevant transfer to be completed. Click on the reference number.
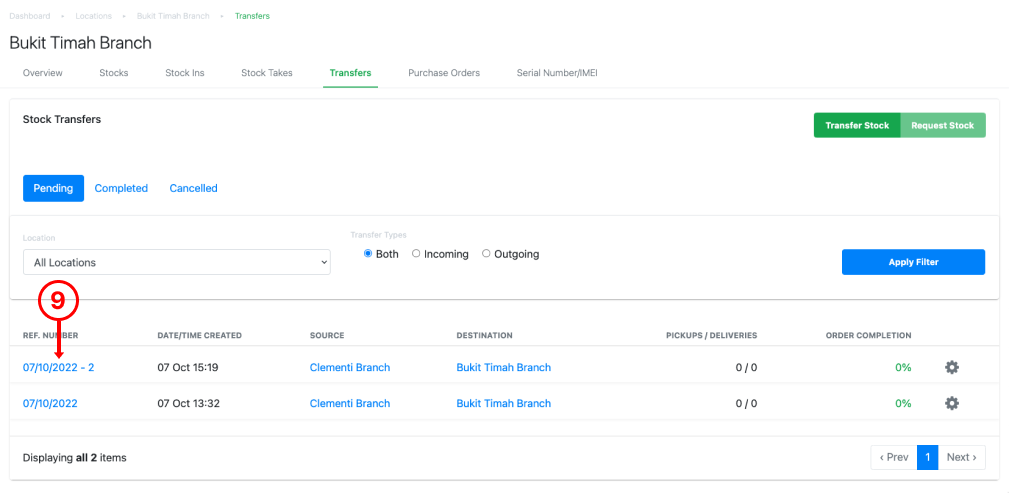
Alternatively, at the relevant transfer, click on Quick Setting button, and select Receive Goods.
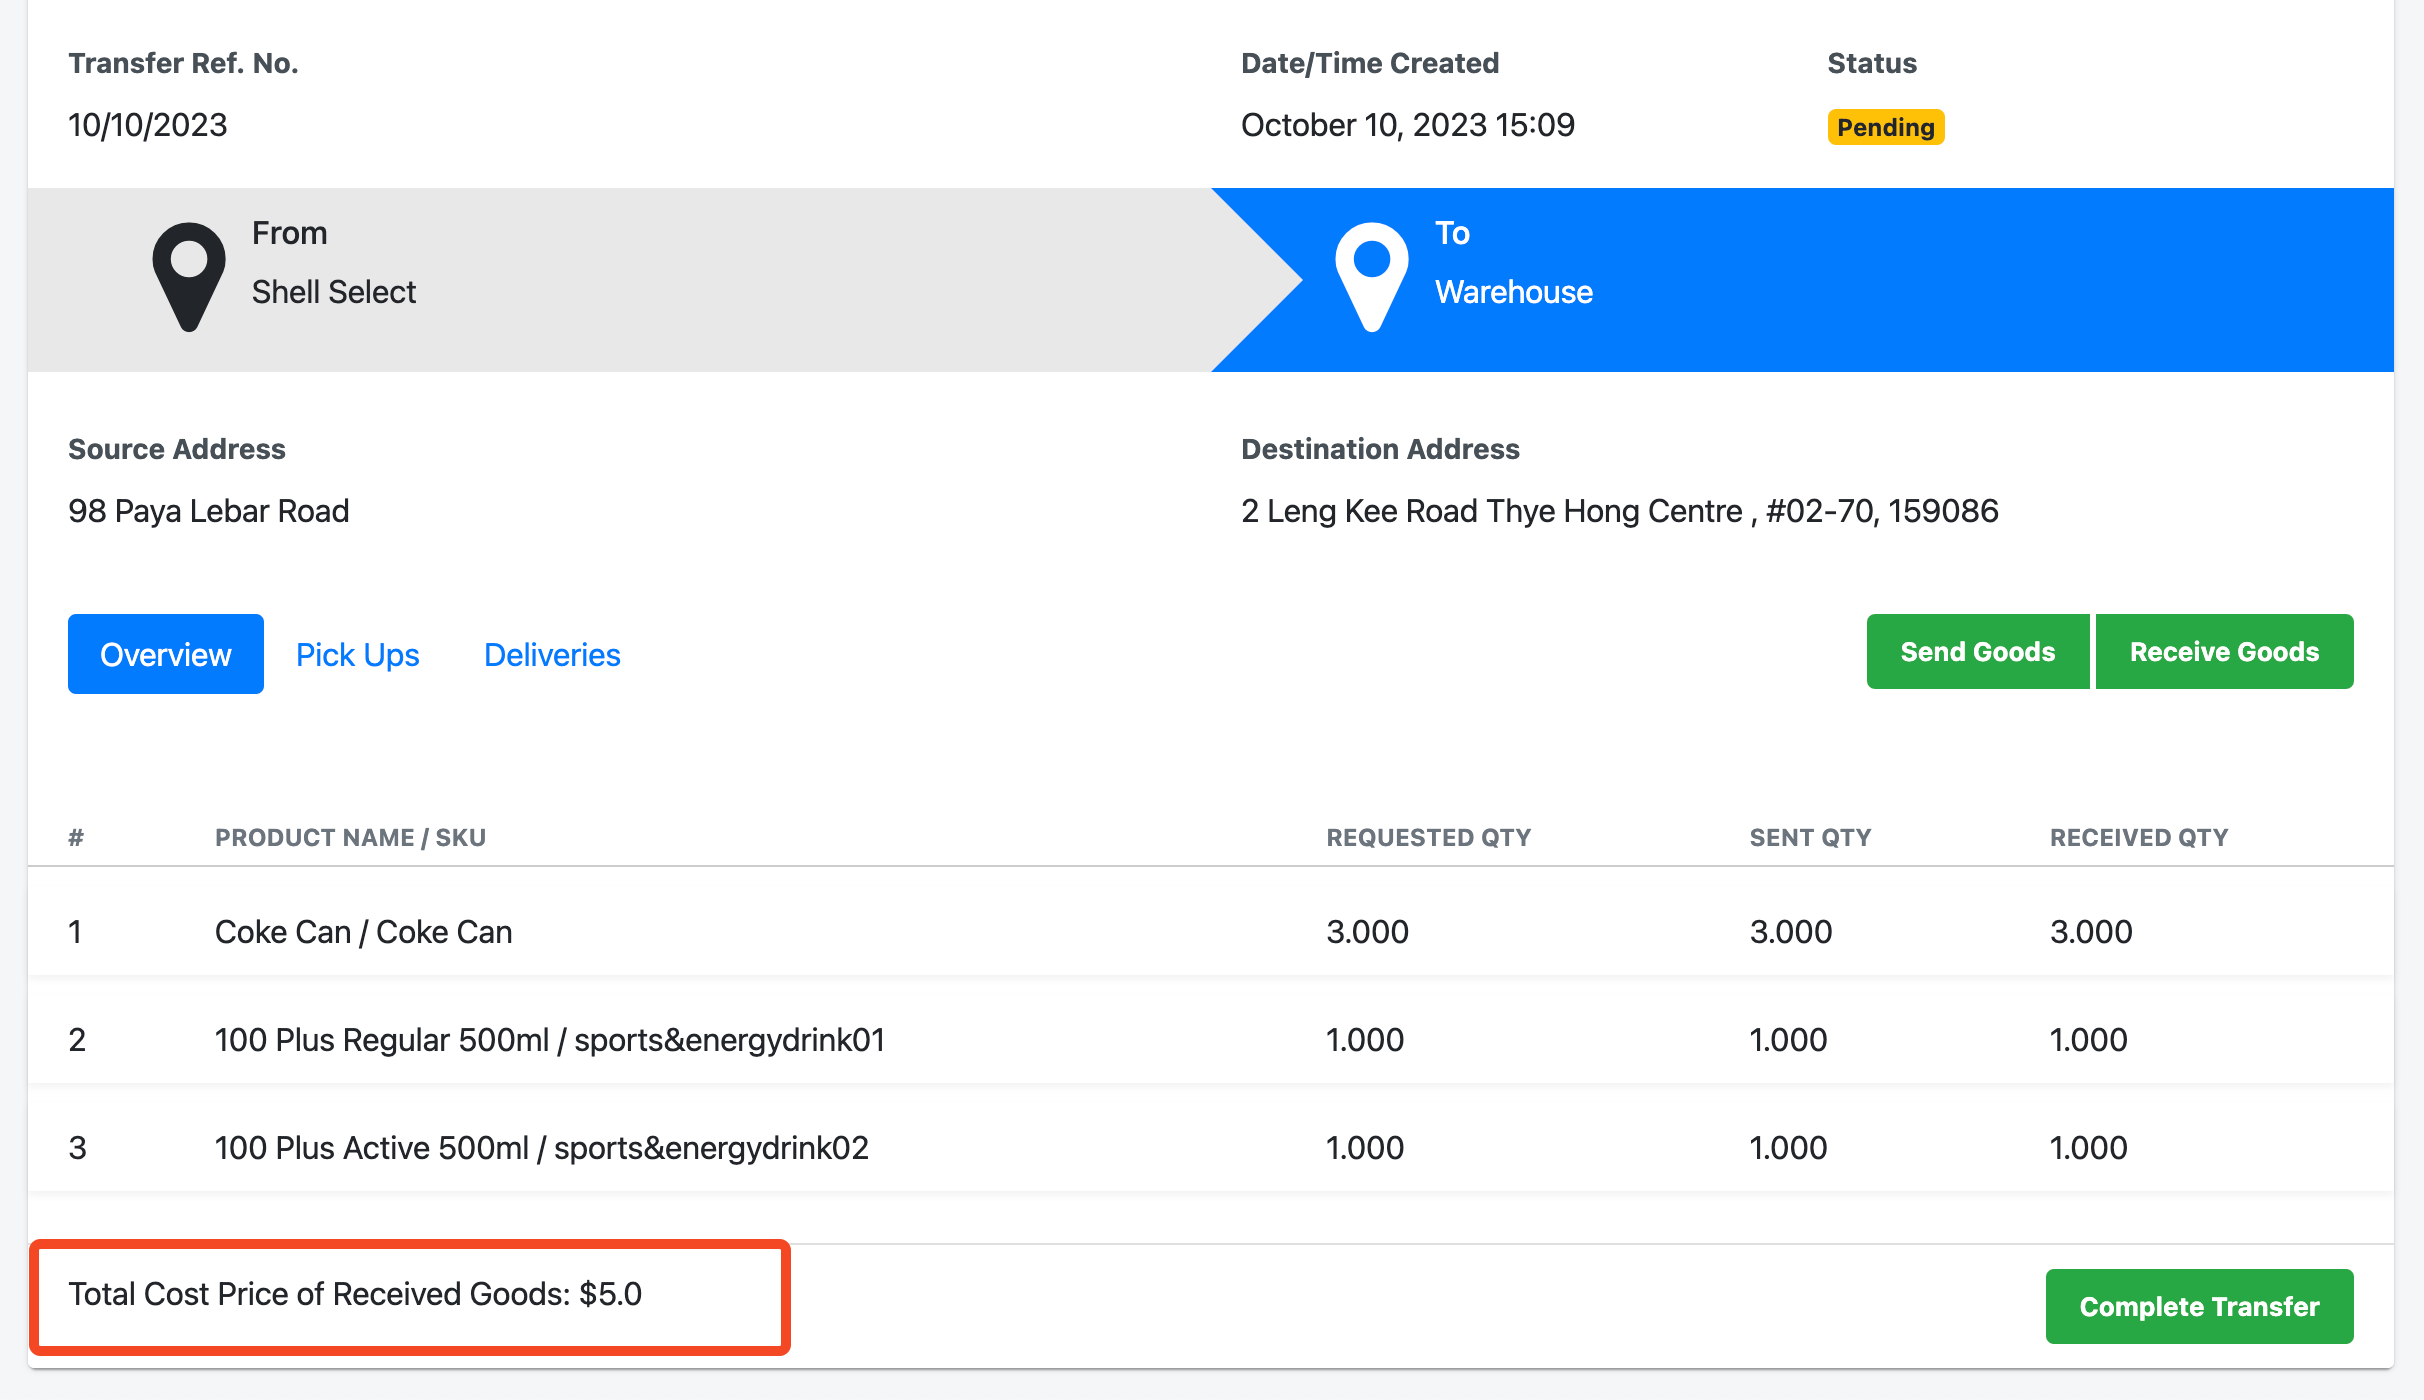
10. Here, users must enter a reference number, ensure To Receive Qty is tallied, and click on Receive Goods.

The “Total Cost Price of Received Goods” will be shown at the bottom of the page to indicate the amount to pay the retail outlet after the stock transfer is completed.
💡 Total Cost Price of Received Goods is calculated by FIFO Inventory method and will take the input quantity and cost price. If no cost price has been set, the system will take either $0, or the default product cost price, depending on the global config selected at Set Up (See Config Tab – point 5).
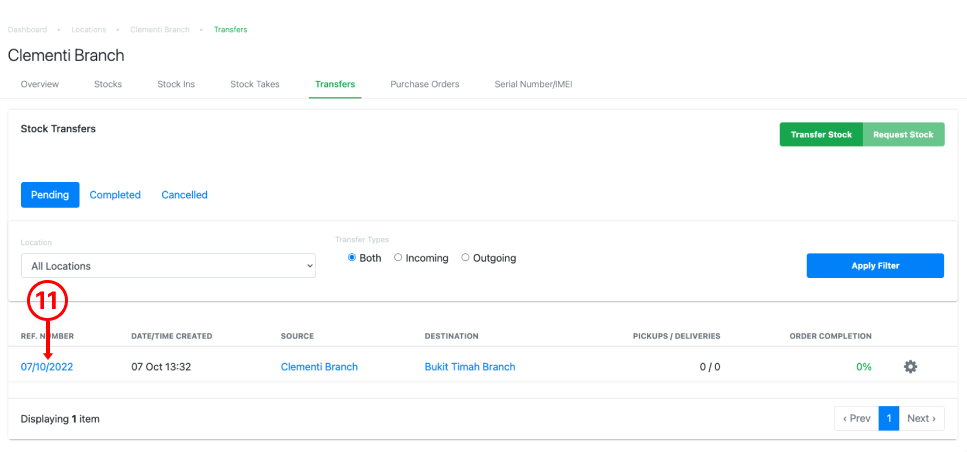
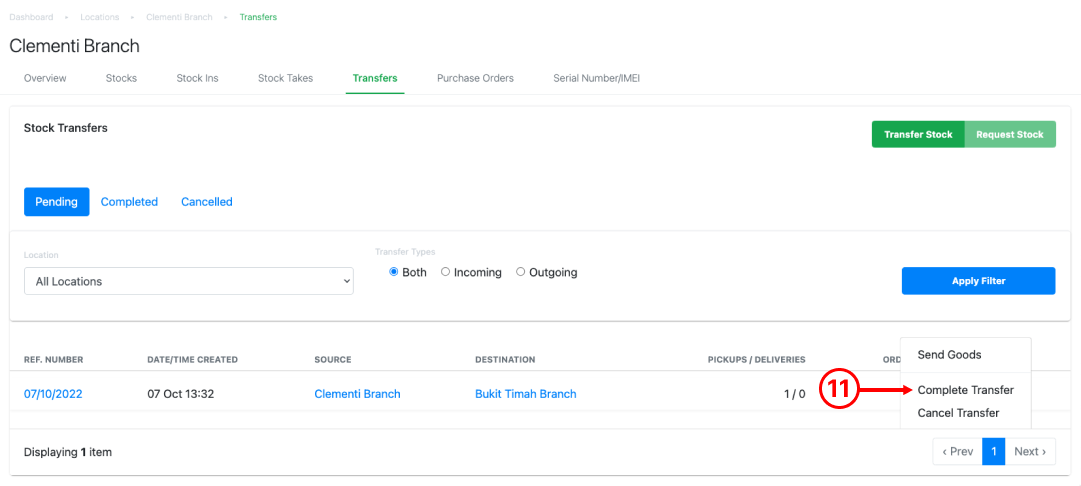
11. To complete transfer, users must return to the origination outlet. Click on the relevant transfer.
Click on Complete Transfer.
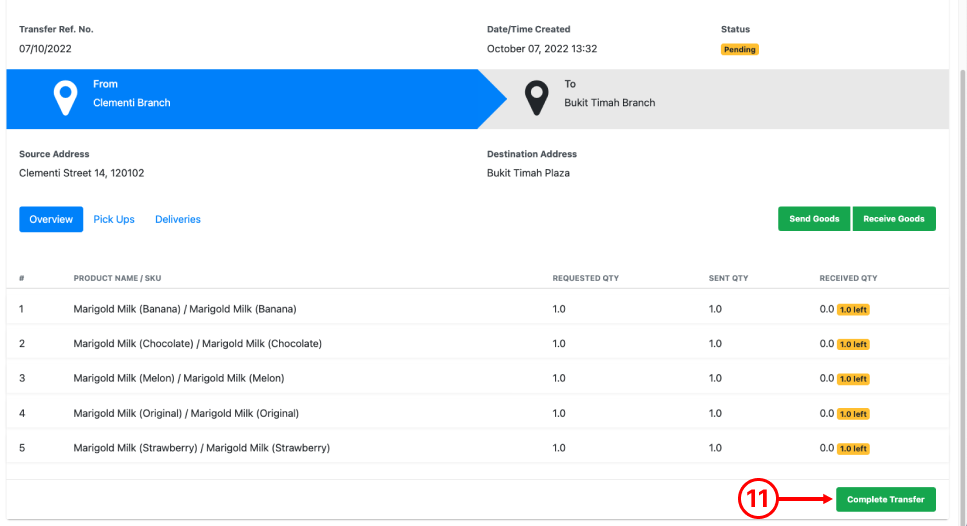
Alternatively, at the relevant transfer, click on Quick Setting button, and select Complete Transfer.
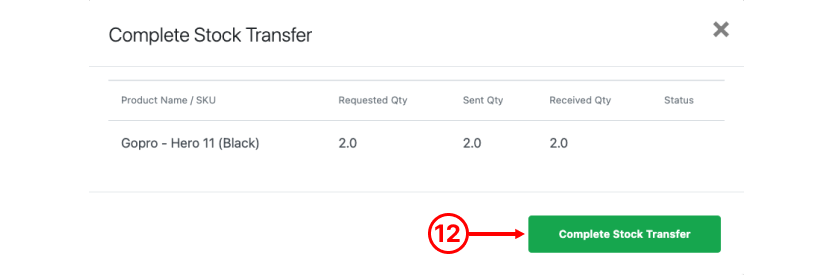
12. Click on Complete Stock Transfer.
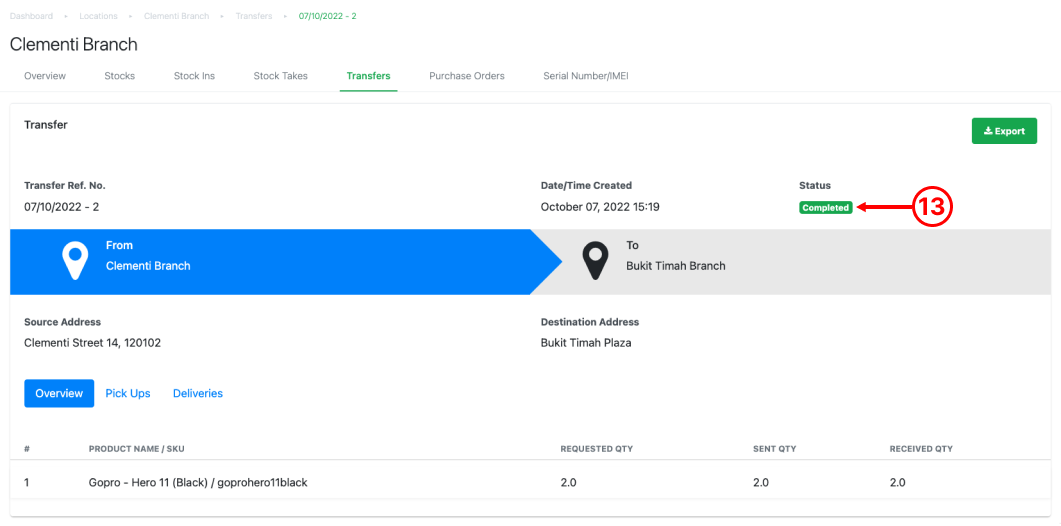
13. Once a transfer is completed, status update will be shown as “Completed” at the transfer details.
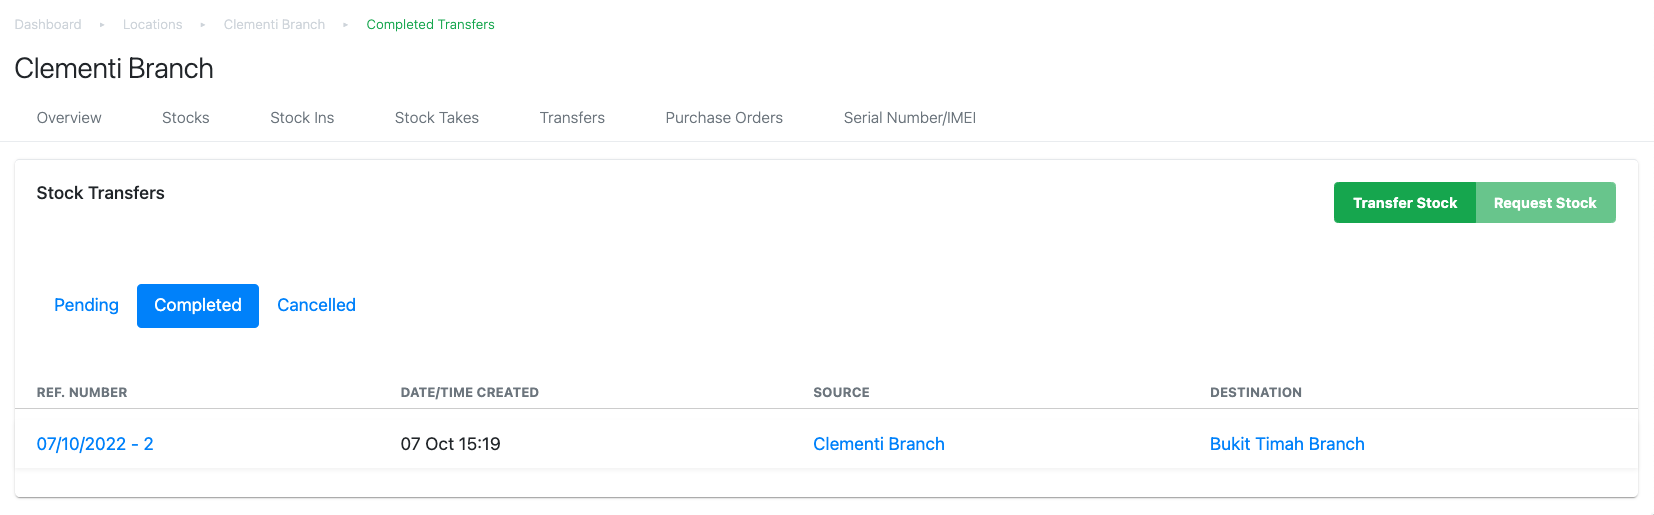
Users may check the completed transfer record at Locations > Outlet Name > Transfers > Completed.
Was this article helpful?
YesNo