This section provides a detailed description and step-by-step guide related to managing customers and customer memberships in the backend portal.
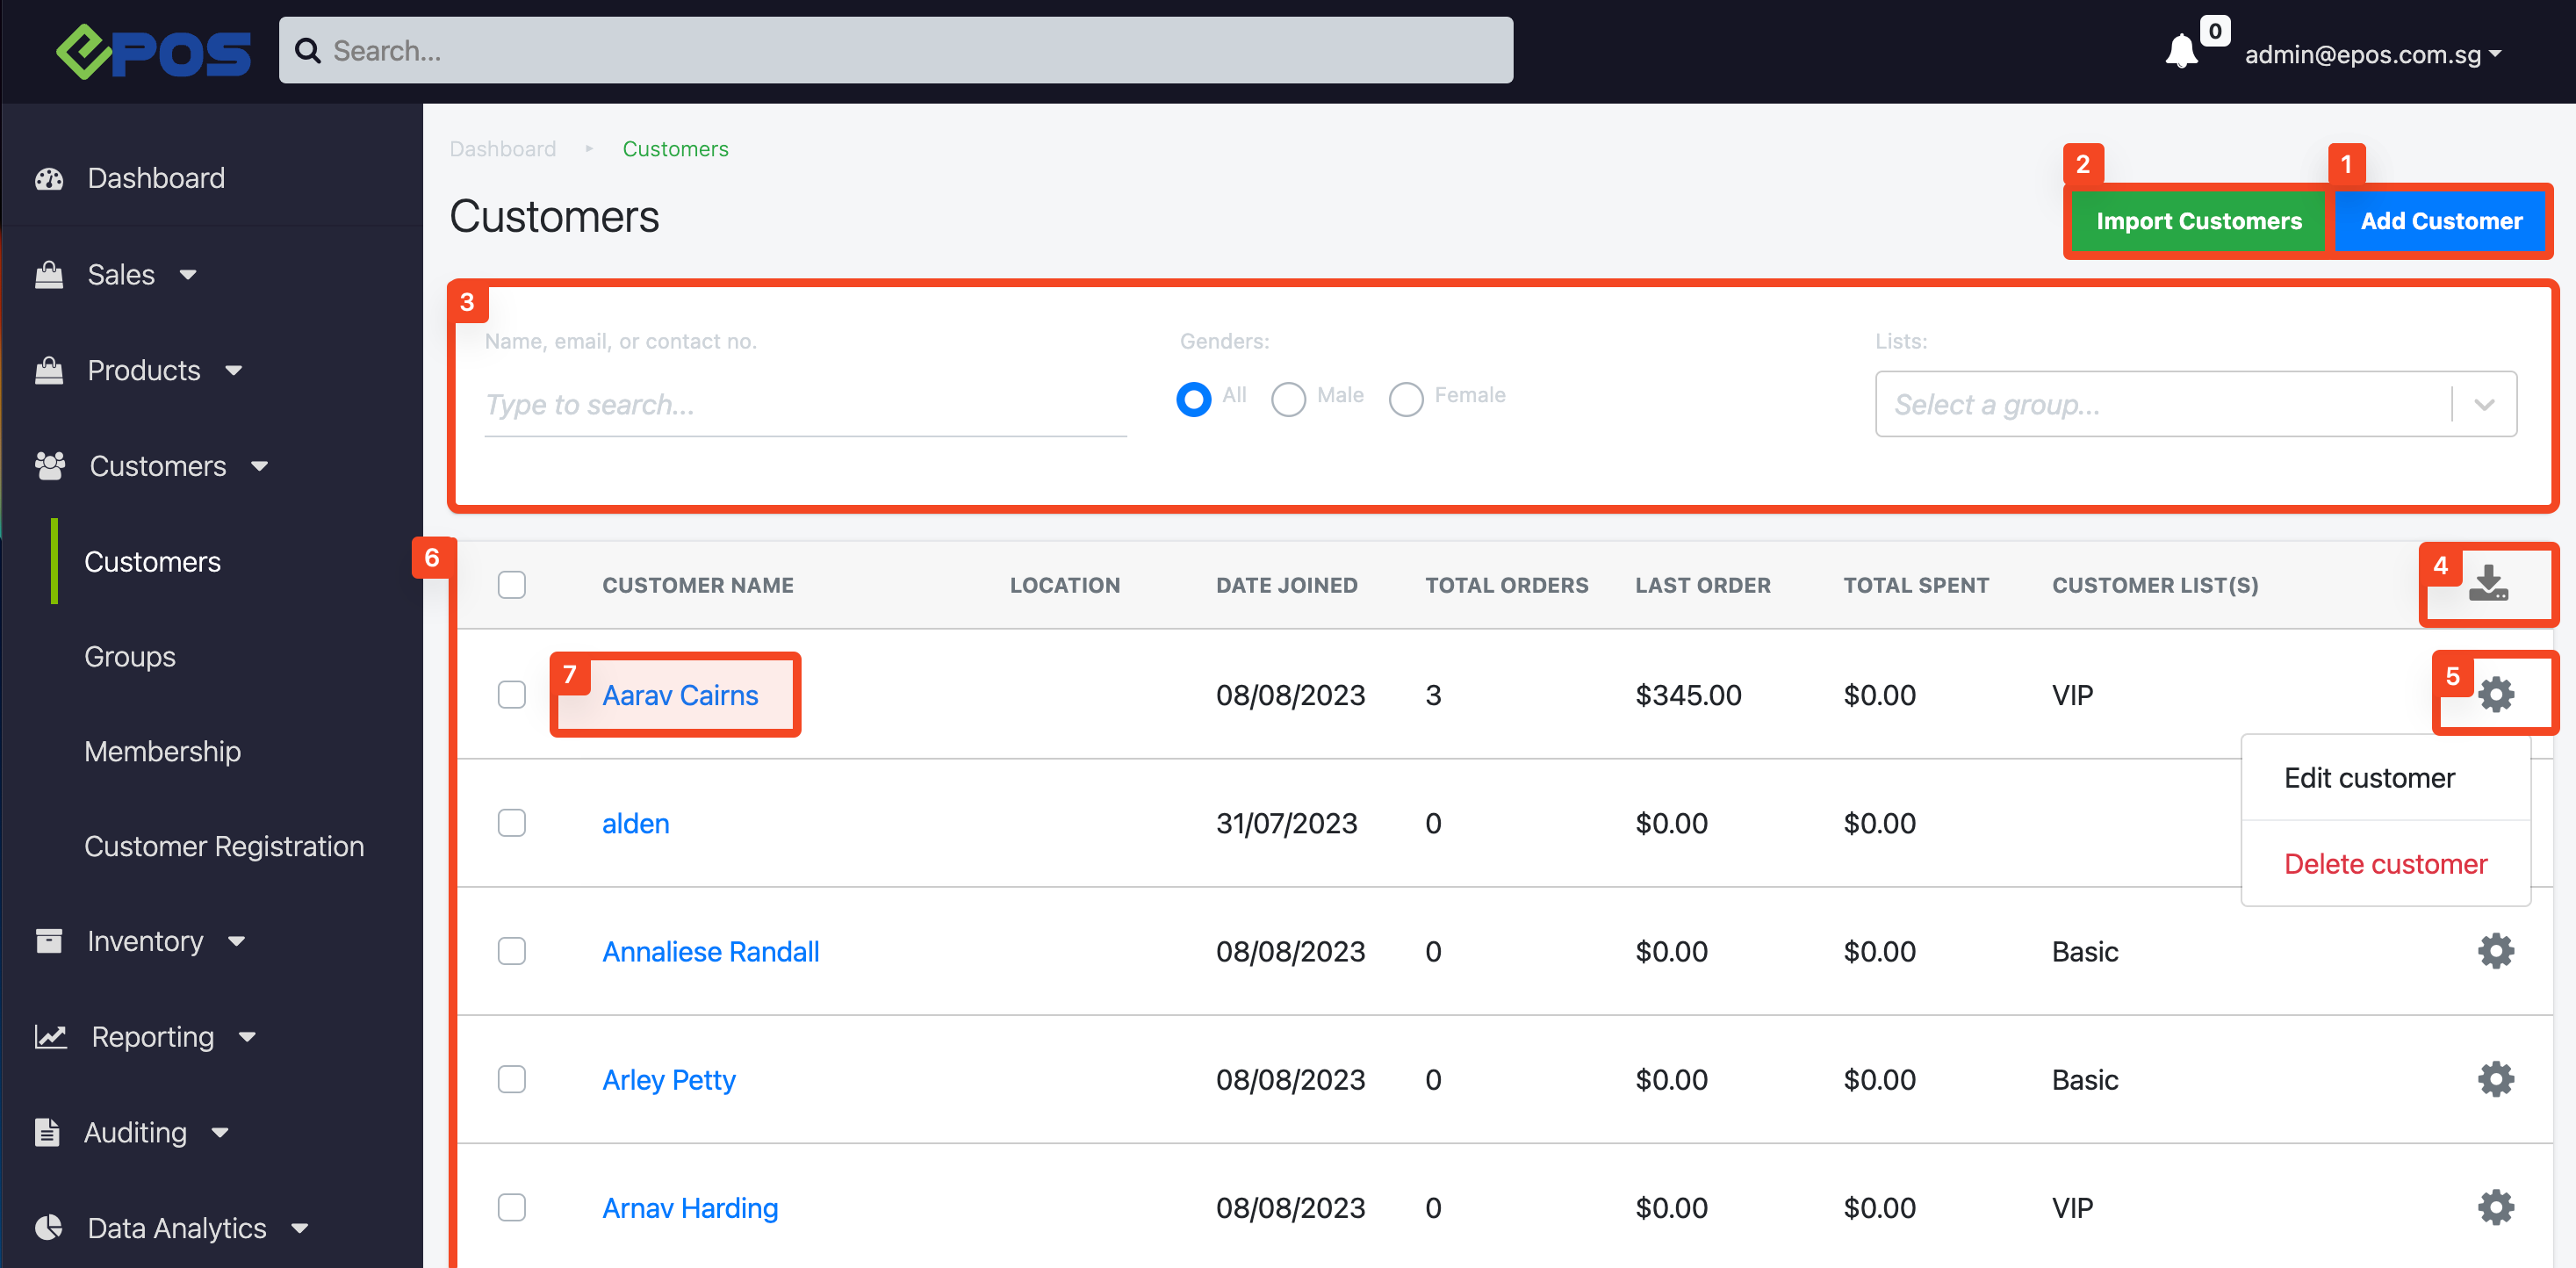
From the EPOS Features Panel, click on Customers to access the Customers Main Page. At this page, users will see the list of customers and customers’ details registered in the database.
1. Adding a New Customer
Enables users to create a customer into the portal.
Provides users the ease to search for a particular customer through name, email address, contact numbers, lookup ID and filter them by gender and different customer groups or memberships.
4. Export Customer List
Download the list of selected customers and relevant information in CSV format.
5. Customer Settings
Users can access quick settings of a particular customer.
6. Customer List
Shows the entire list of customers registered into the portal based on the filter or search criteria defined by users.
7. Customer Configurations
Enables users to access customer details, e.g. Order History, Credit History,
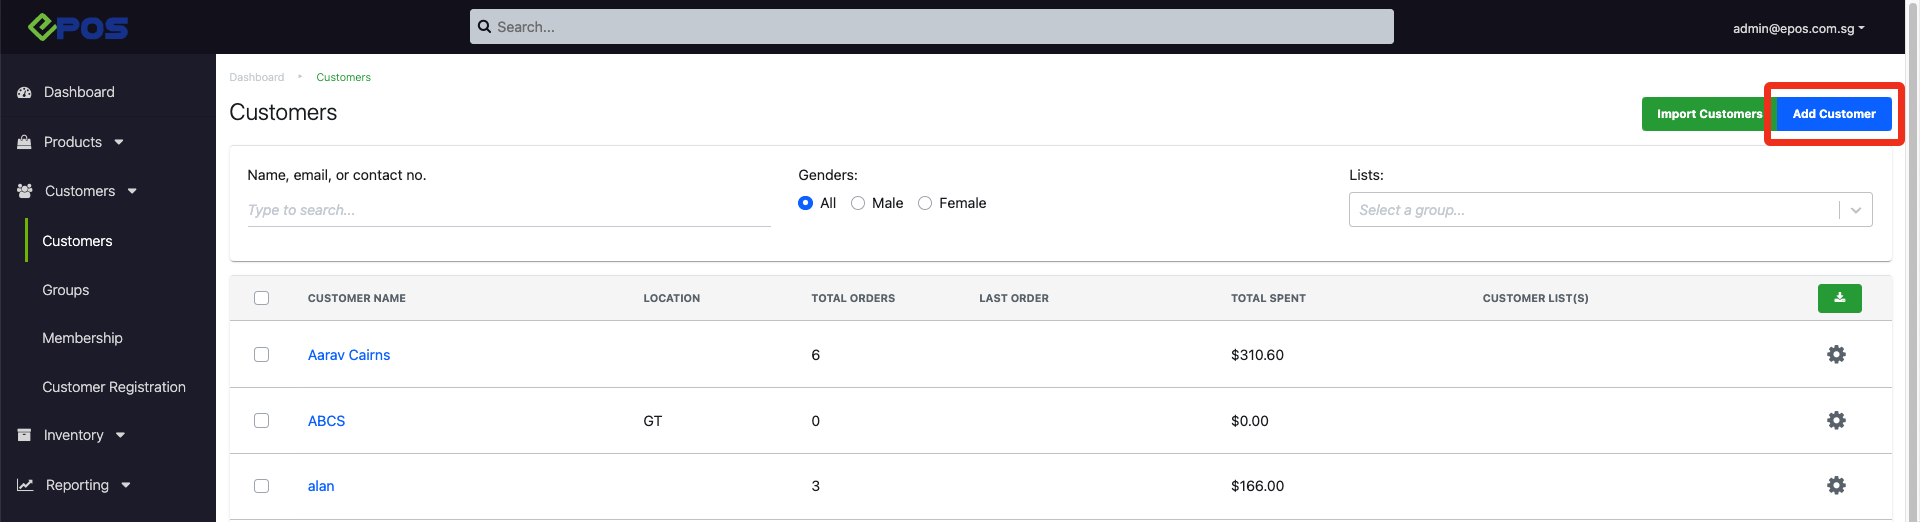
To add a new customer, access the Customer main page and click on AddCustomer.
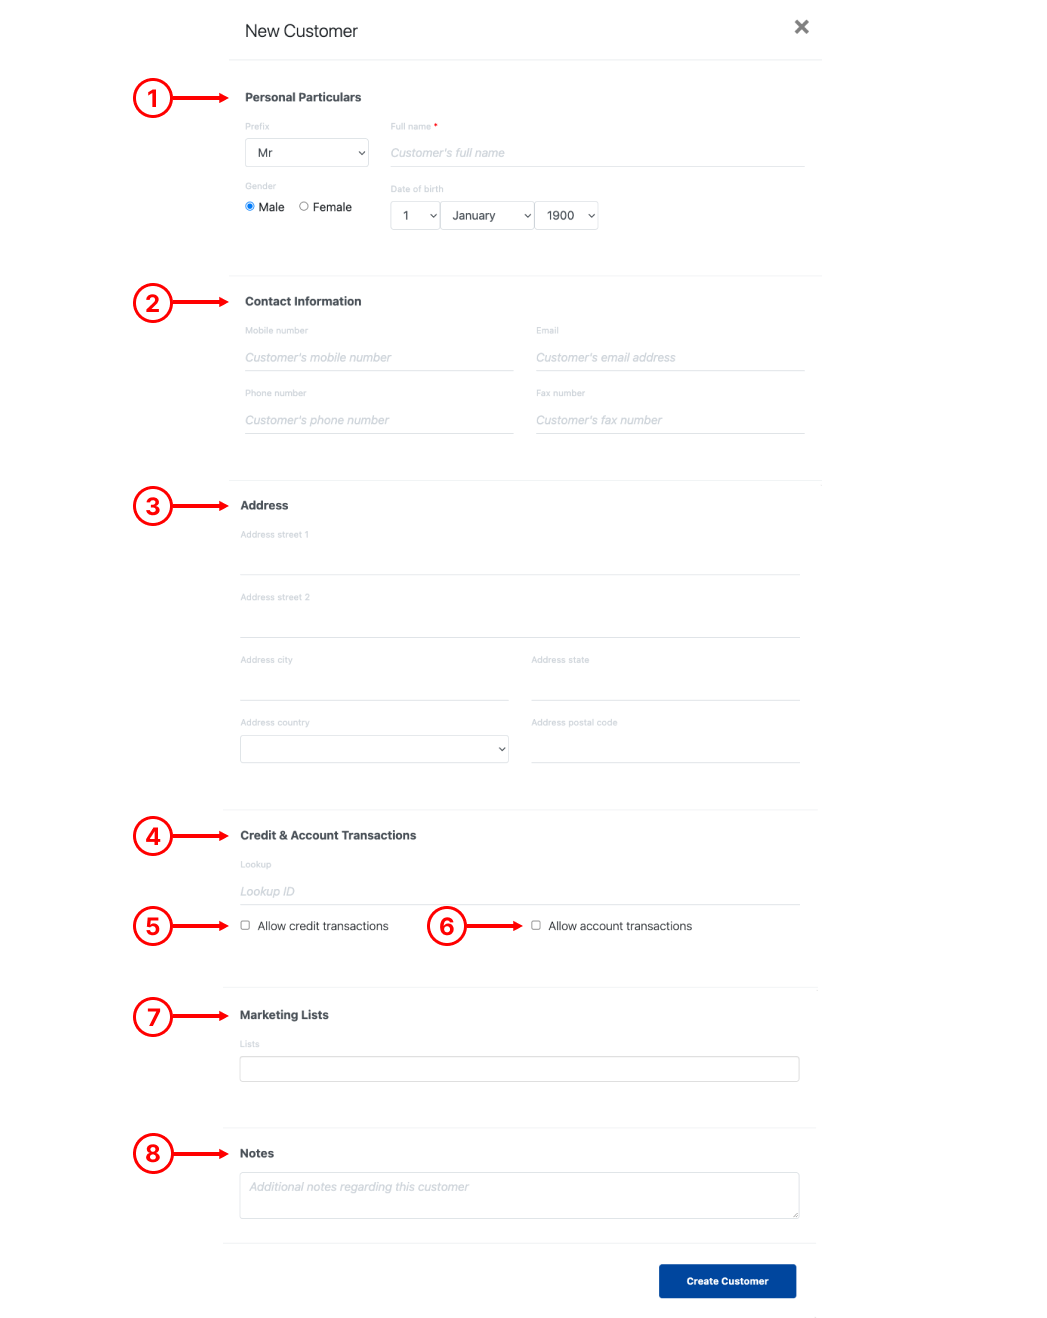
A window will be shown, fields marked with * are mandatory fields which should not be left blank.
1. Personal Particulars
Ensure Customer’s name is entered. Select customer’s particulars as relevant.
2. Contact Information
Enter customer’s contact as applicable.
💡 Mobile Number & Phone Number can be used to retrieve Customer at the POS when needed.
3. Customer’s Address
This field is optional, users can choose to leave blank if not applicable.
4. Lookup ID
Allows users to assign specific customer ID for every customer.
5. Allow credit transaction
☑️ the checkbox to enable customers to purchase and spend credits.
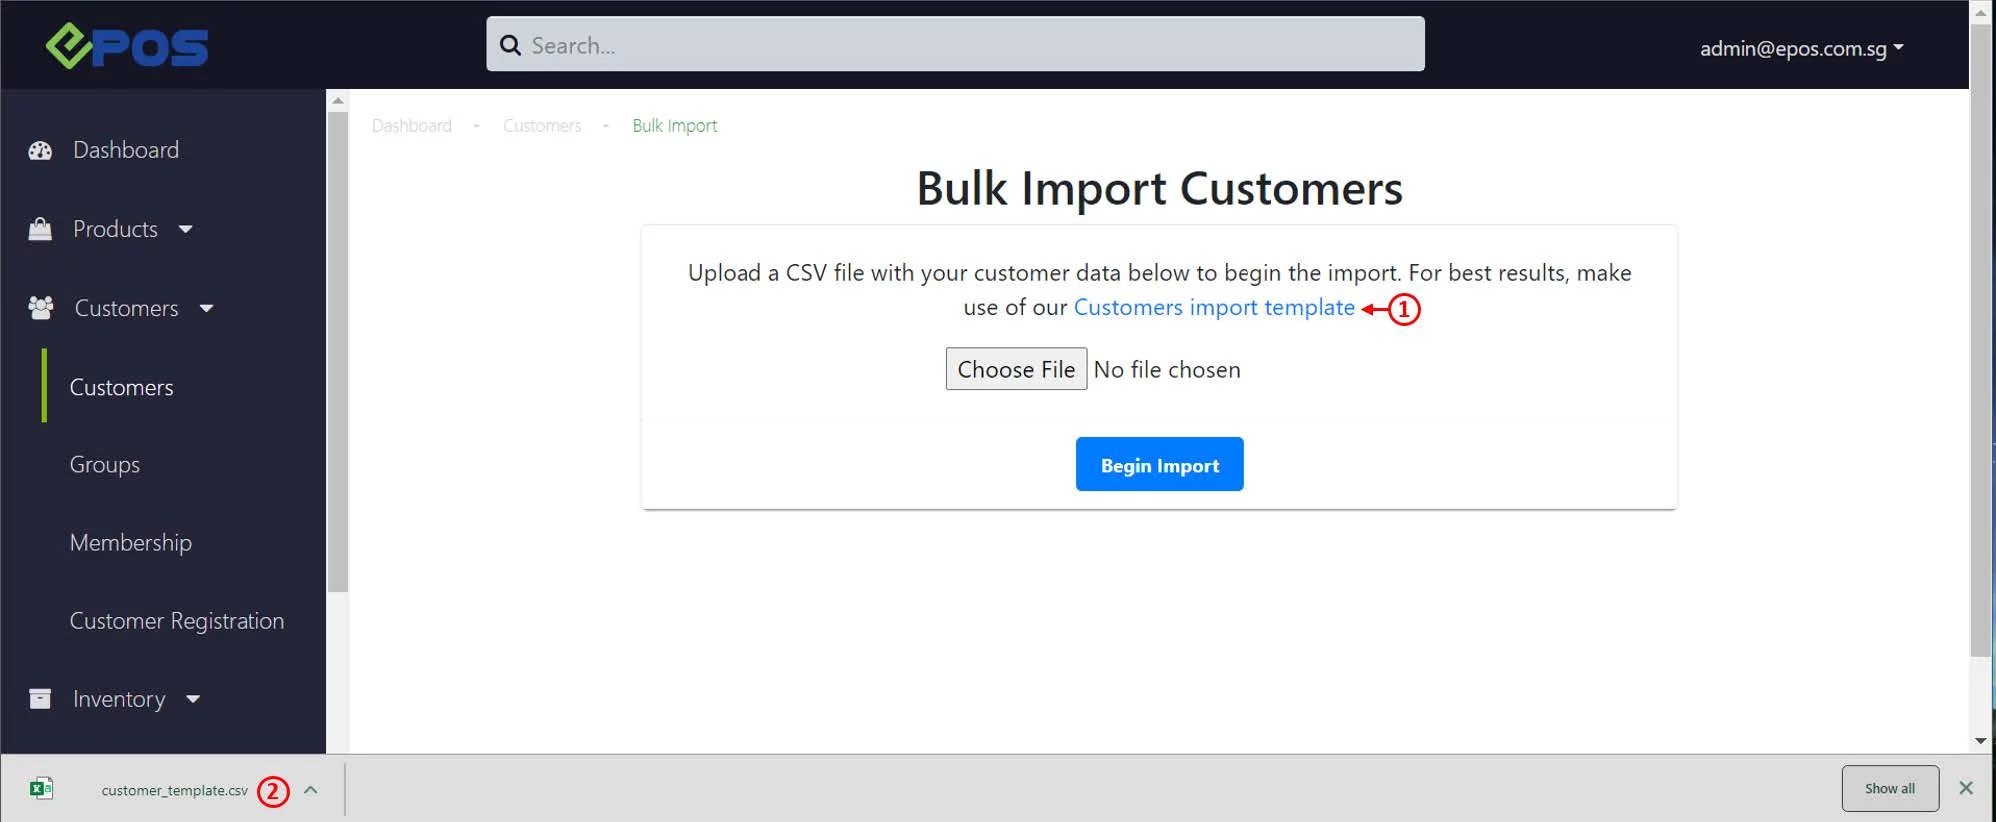
5. Save the CSV file once all data has been input into the spreadsheet.
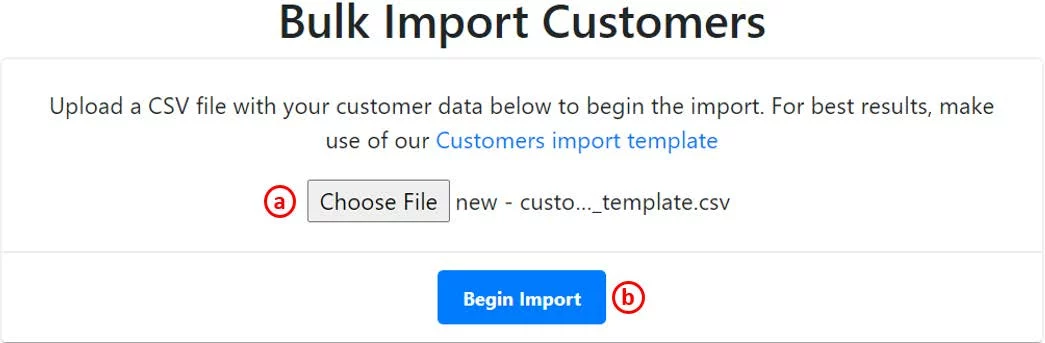
6. To import customer data,
a. Click on ChooseFile to select the updated CSV file.
b. Click on BeginImport.
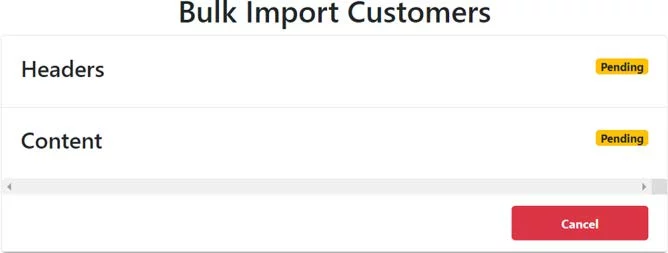
7. Once uploaded, users will be directed to this screen.
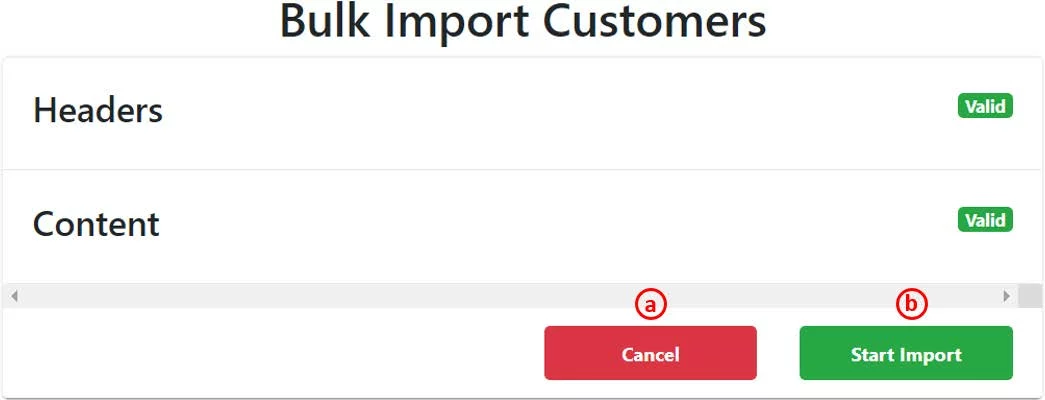
8. Wait until the Pending status turns Valid.
a. Click on Cancel Import to return to the previous page.
b. Click on StartImport to begin importing the customer data in the CSV file.
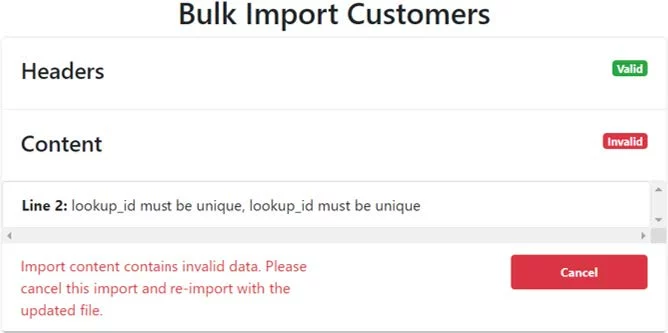
9. Should there be any Invalid status, users must take note of the error messages.
Click on CancelImport to return to the previous page.
Users should amend the CSV file according to the remark given.
Re-import the CSV file once done.
10. Users should take note of the common error messages, during the process of bulk importing customers data into the backend portal
XYZ needs to be remapped, or ignored It indicates that users used the wrong customer import template. Users shall refer to step 1 and step 2 above to download the right customer import template.
lookup_id must be unique Each lookup id must be unique, users must ensure that there is no duplication. Required field, unless added on POS/frontend.
Phone number has already been taken Duplicated phone number is detected which exists in the backend portal.
date_of_birth should be in right format : DD/MM/YYYY Users must enter correct date format, e.g. 08/10/1992
membership_expiry_date must be on or after today Users must enter the membership expiry date on or after today. For more information on checking duplication, see Creating New Product with Bulk Import, Step 10.
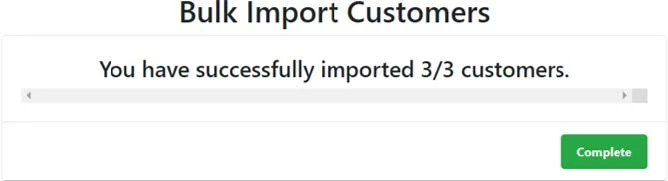
11. Upon successful import of customers, users will be prompted of the total number of customers imported. Click on Complete to return to the Customer main page.
Refer to the list below for the Customer Bulk Import Columns and the general guidelines to fill in the columns accordingly.
A*.full_name
Enter customer’s full name.
B. address_street_1
Enter customer address details.
C. address_street_2
Enter customer address details.
D. address_postal_code
Enter postal code of customer address.
E. address_city
Enter the city of customer address.
F. address_state
Enter the state of customer address.
G. address_country
Enter the country of customer address.
H. notes
Enter remarks, if needed.
I. email
Enter customer’s email address.
J. phone_number
Enter customer’s phone number. (home, office number, etc.)
K. identifier_value
L. identifier_type
M. date_of_birth
Enter customer’s birthday in DD/MM/YY format.
N. gender
Enter male or female.
O. prefix
Enter Mr/ Mrs/ Ms/ Dr.
P*.mobile_number
Enter customer’s mobile number.
💡 This information can be used to search for customers at POS.
Q. fax_number
Enter customer’s fax number
R*.lookup_id
Users can choose to enter ID number or phone number or membership ID.
S. membership_tier
Enter membership tier. For more information, see Membership Tier.
T. membership_point
Allow users to import membership points associated with the customer.
U. membership_expire_date
Enter membership tier expiry date in DD/MM/YY format.
V. credit_balance
Allow users to import credit balances associated with the customer.
W. customer_group_names
Enter the customer group. For more information, see Customer Groups.
X. allow_credit_transactions
Only enter TRUE or FALSE.
“TRUE” to allow customers to purchase and spend credits.
“FALSE” or left blank to disallow.
Y. allow_account_transactions
Only enter TRUE or FALSE.
“TRUE” to allow this field to enable customers perform on-account transactions.
“FALSE” or left blank to disallow.
💡 Once enabled, customers’ payments can be owed and only to be cleared in the future.
* Compulsory fields
💡 Any optional columns which are not carrying any data can be deleted to enhance data import speed.