No products in the cart.
In this post, we will go through the user flow for manual accept order.
For more context on manual accept order, refer to the details below.
- User will have to liase with their Delivery Platform Account Manager to turn off the auto accept order config
- When auto accept order config is toggled OFF, this means that all delivery orders made by customers will need to be manually accepted by the cashier first. Thereafter, it will be accepted by the Delivery Platform.
- Manual accept is currently only applicable to GrabMart platform.
1. To access the delivery module on the POS, click on the bell button at the Sales page 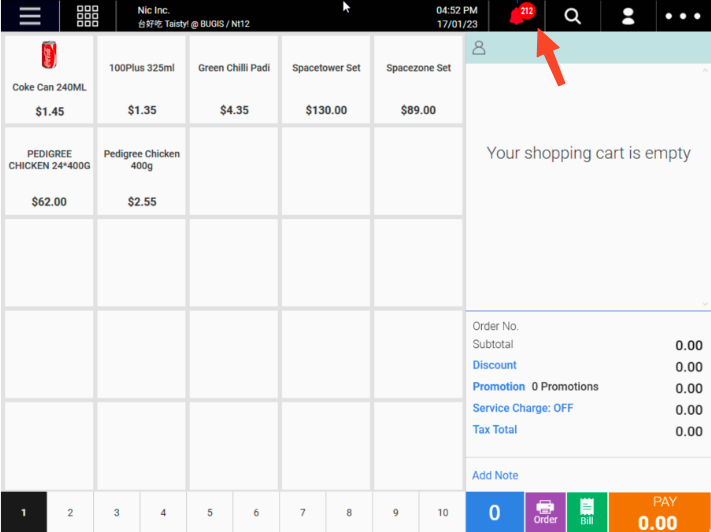
2. Click on the “Delivery” tab to access the Delivery module 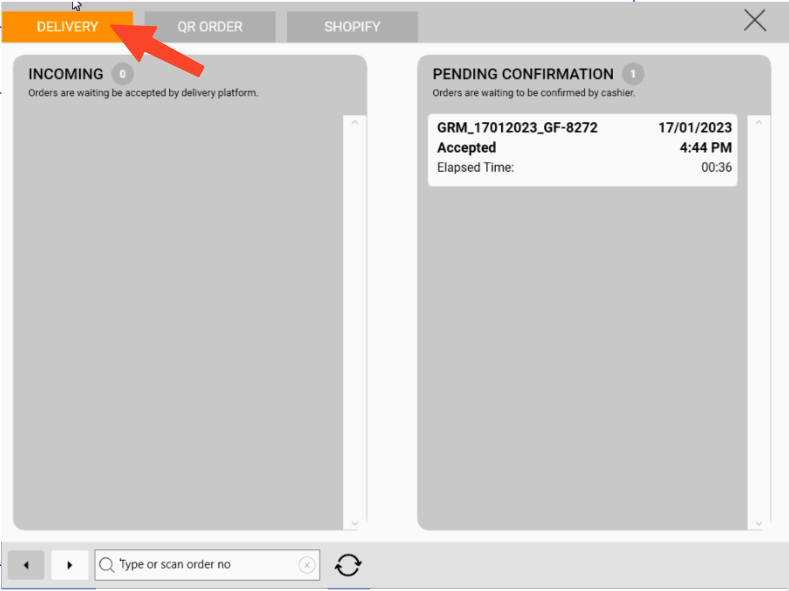
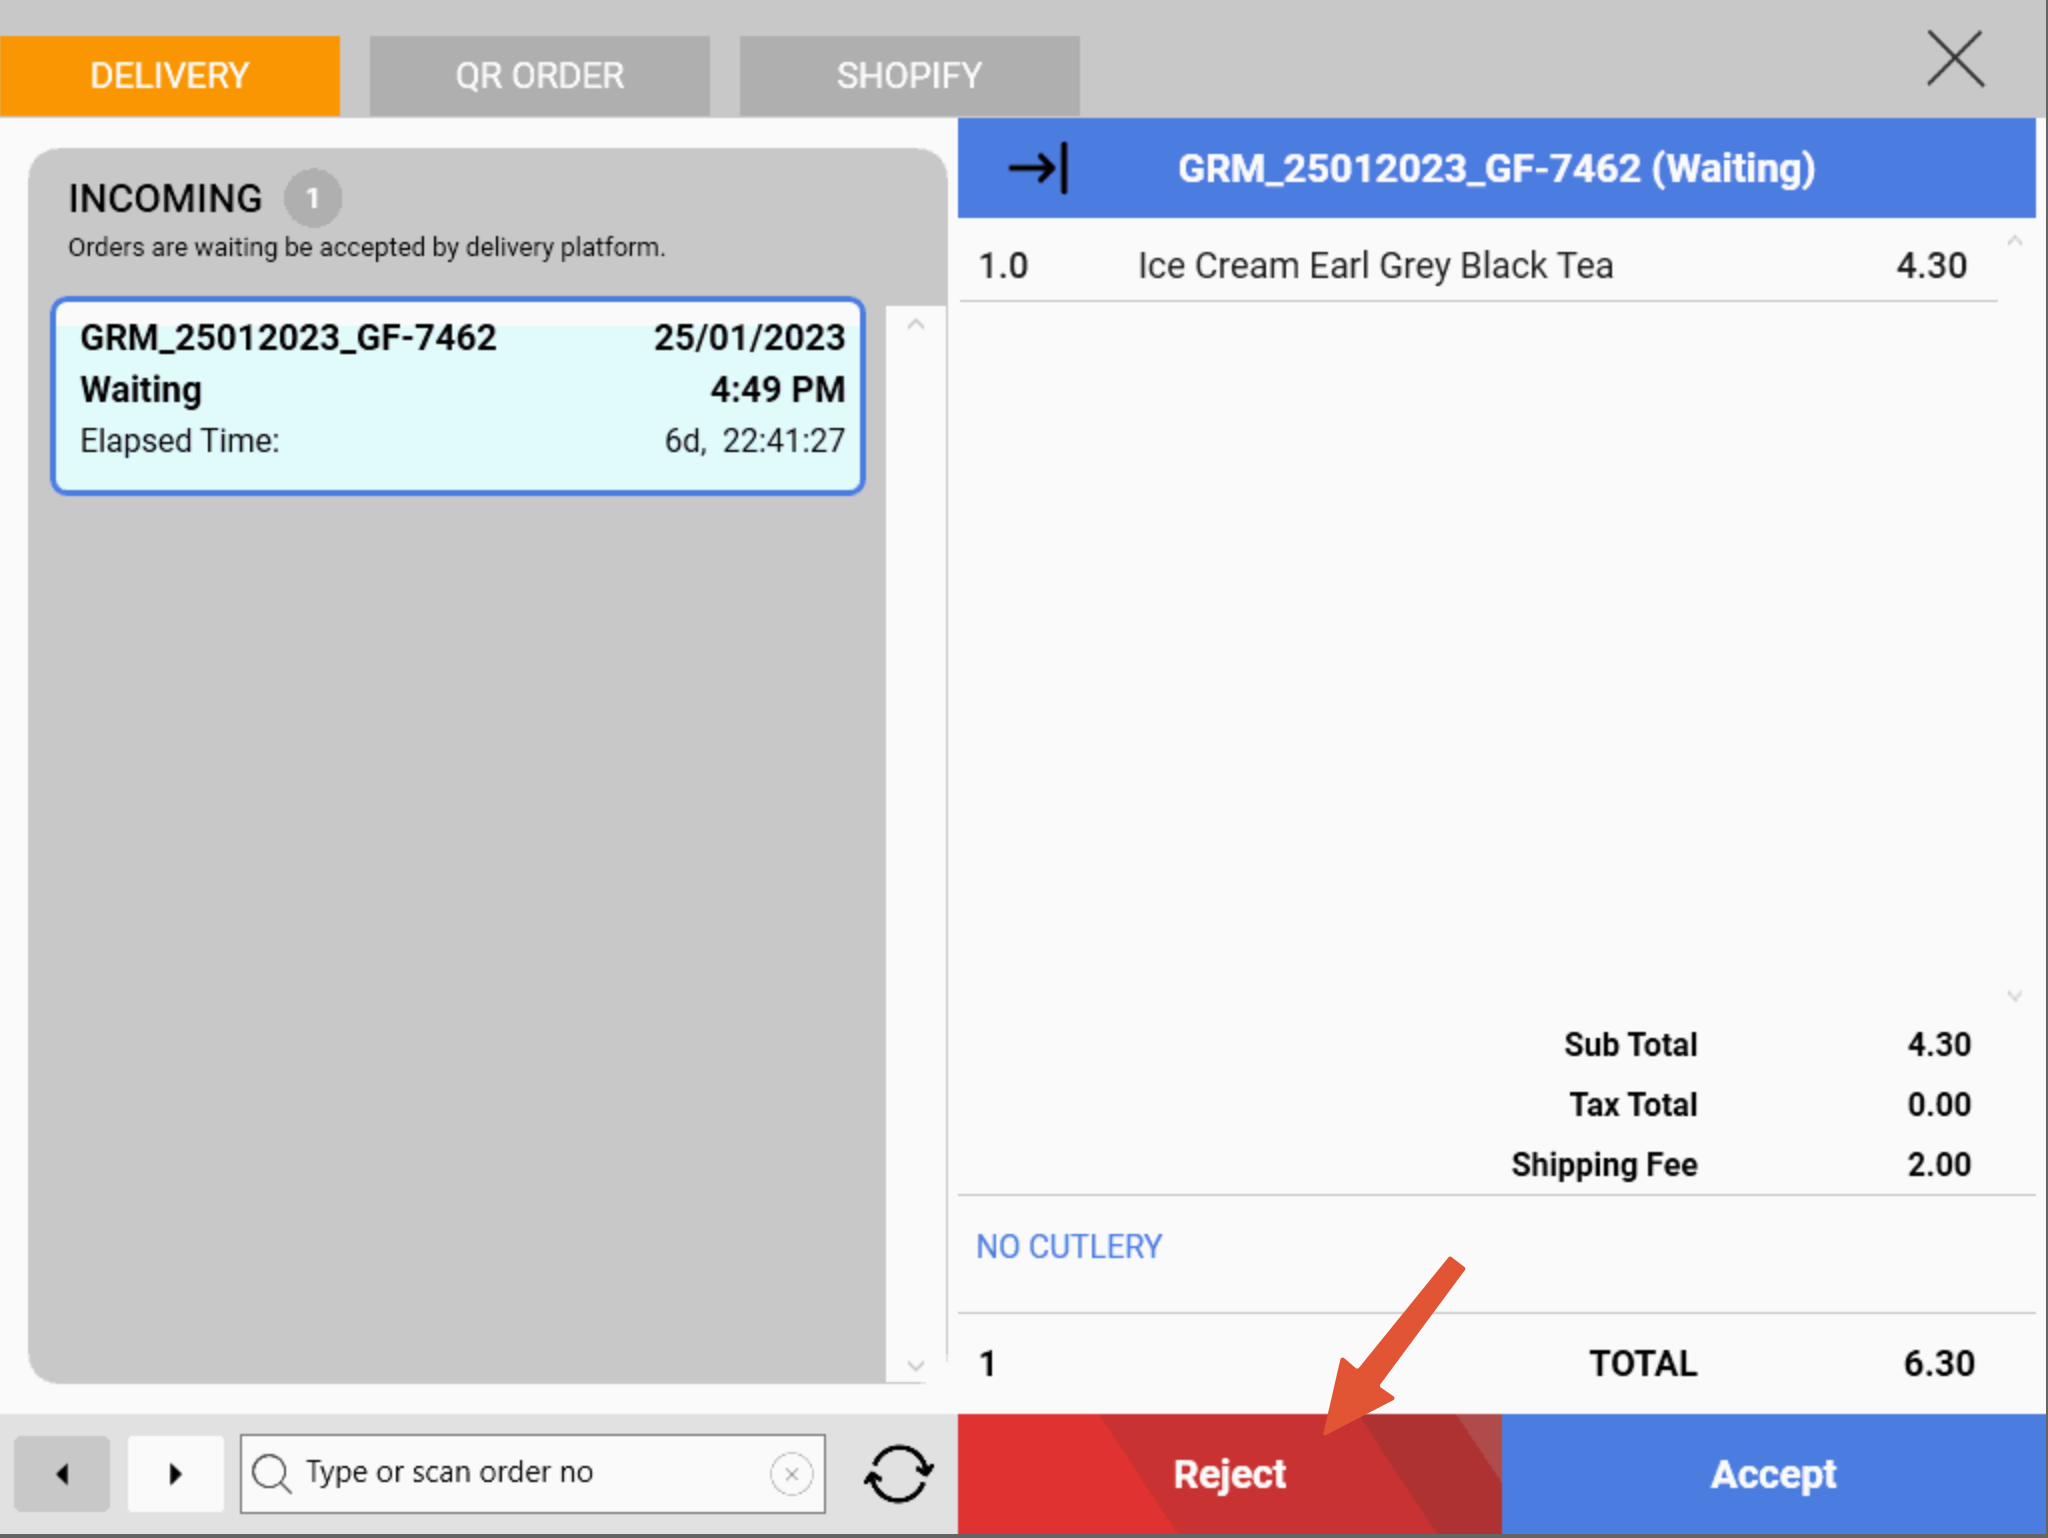
3. When an order has been made by customer, the order will flow into the “INCOMING” column.
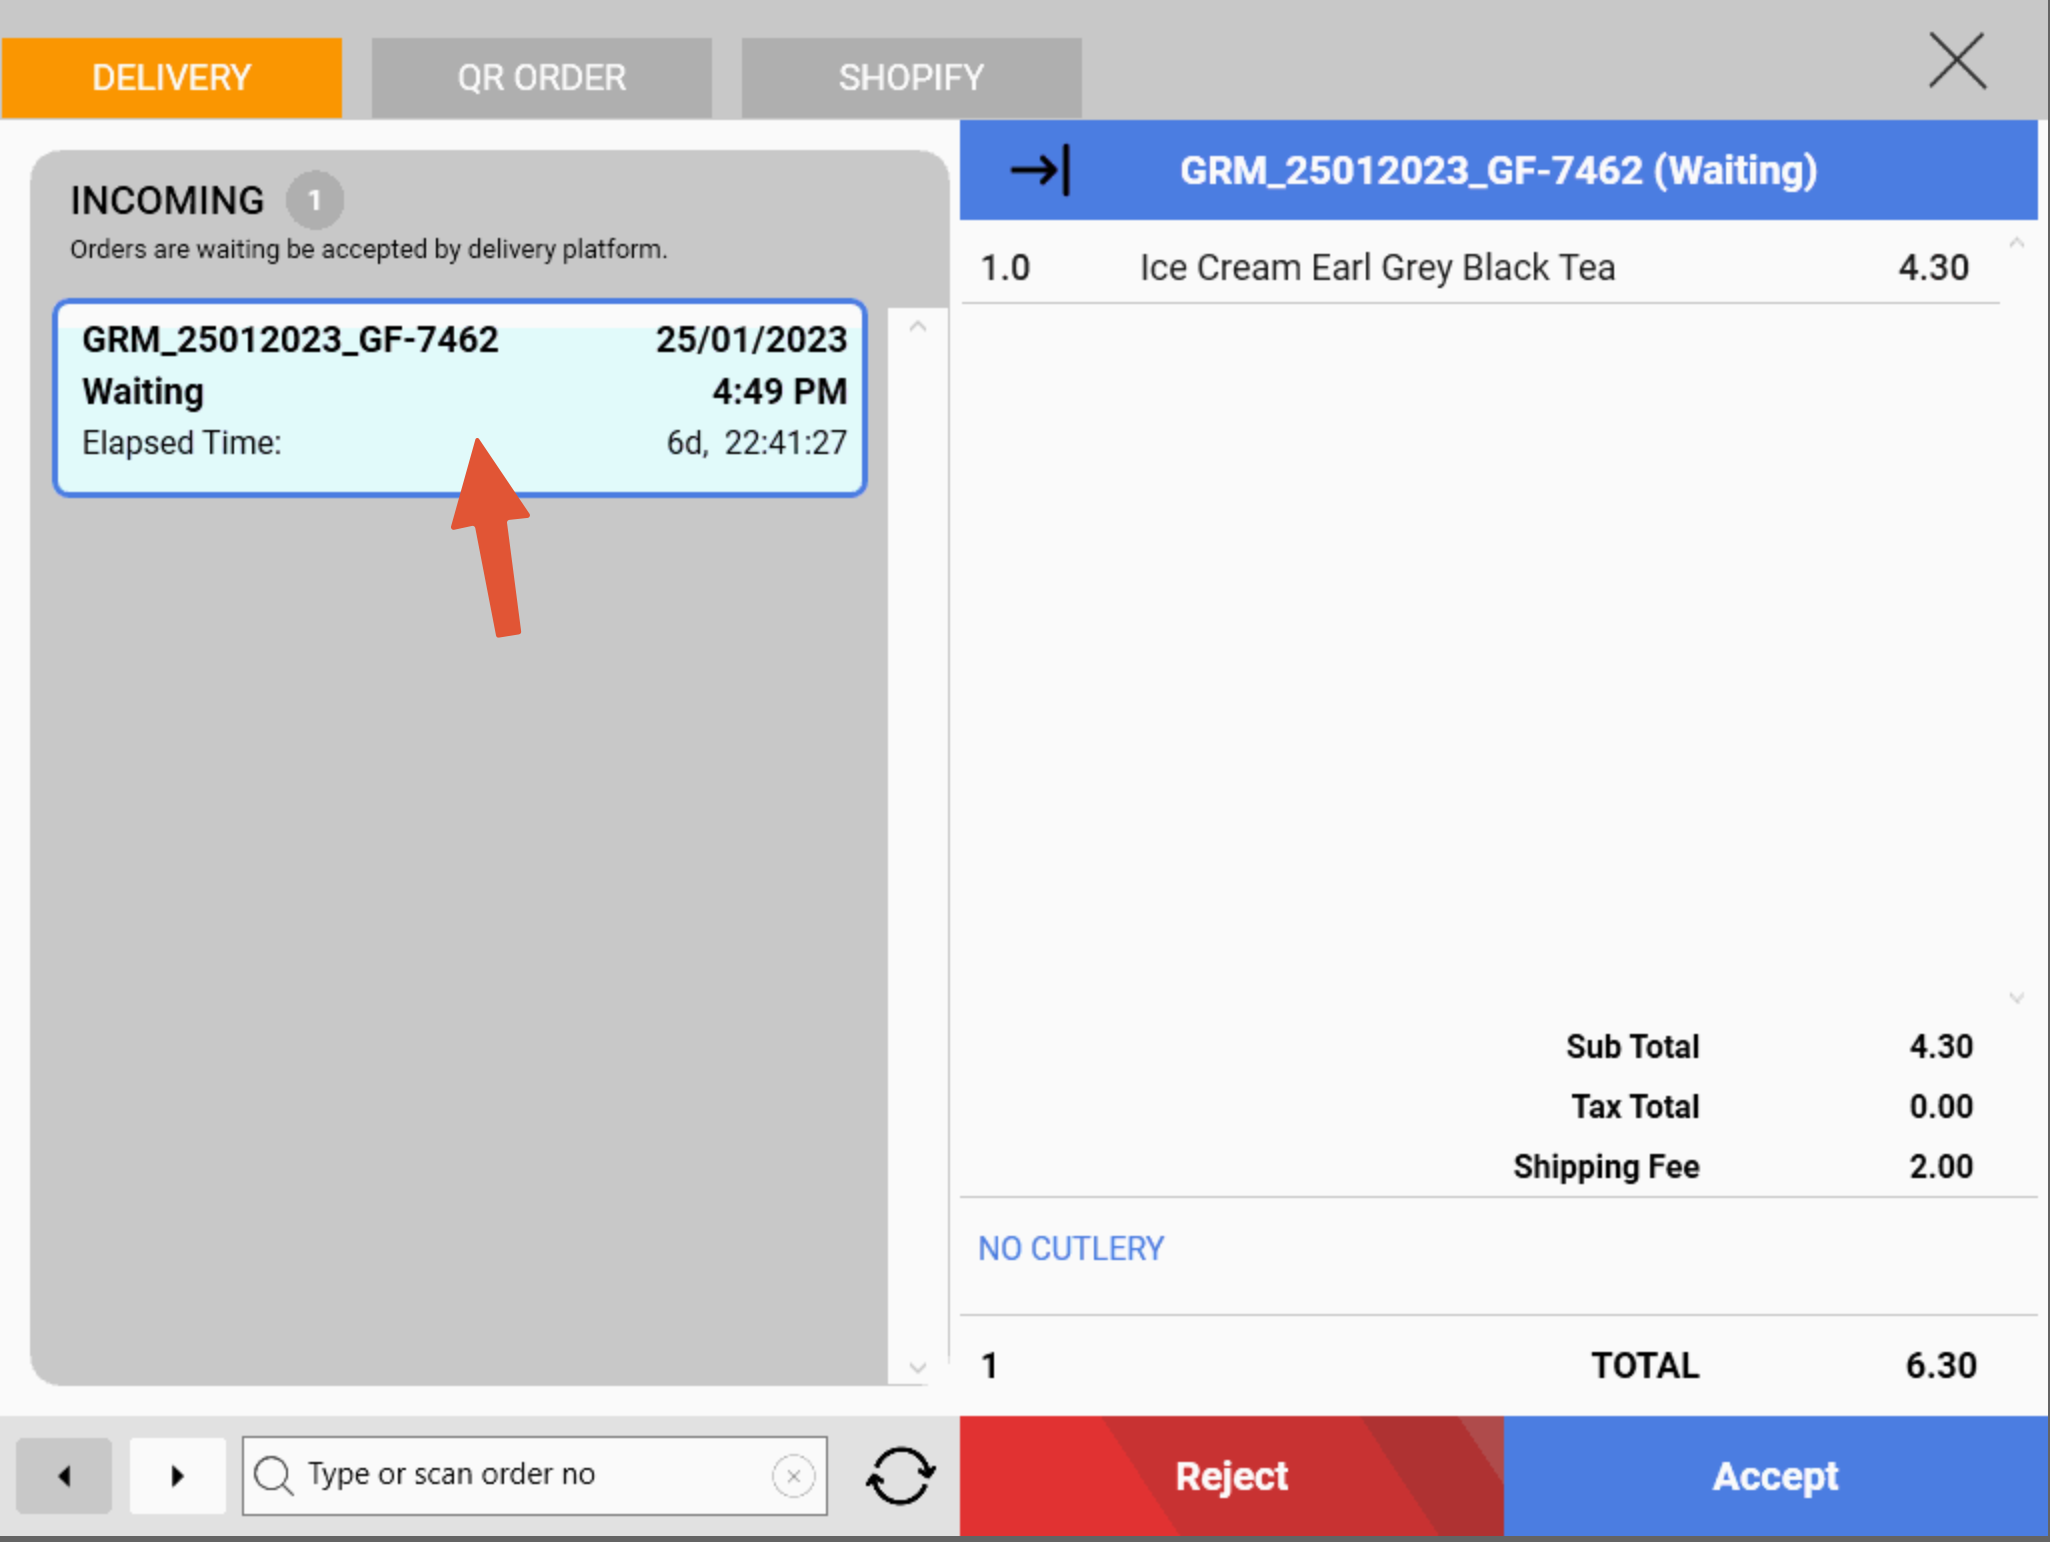
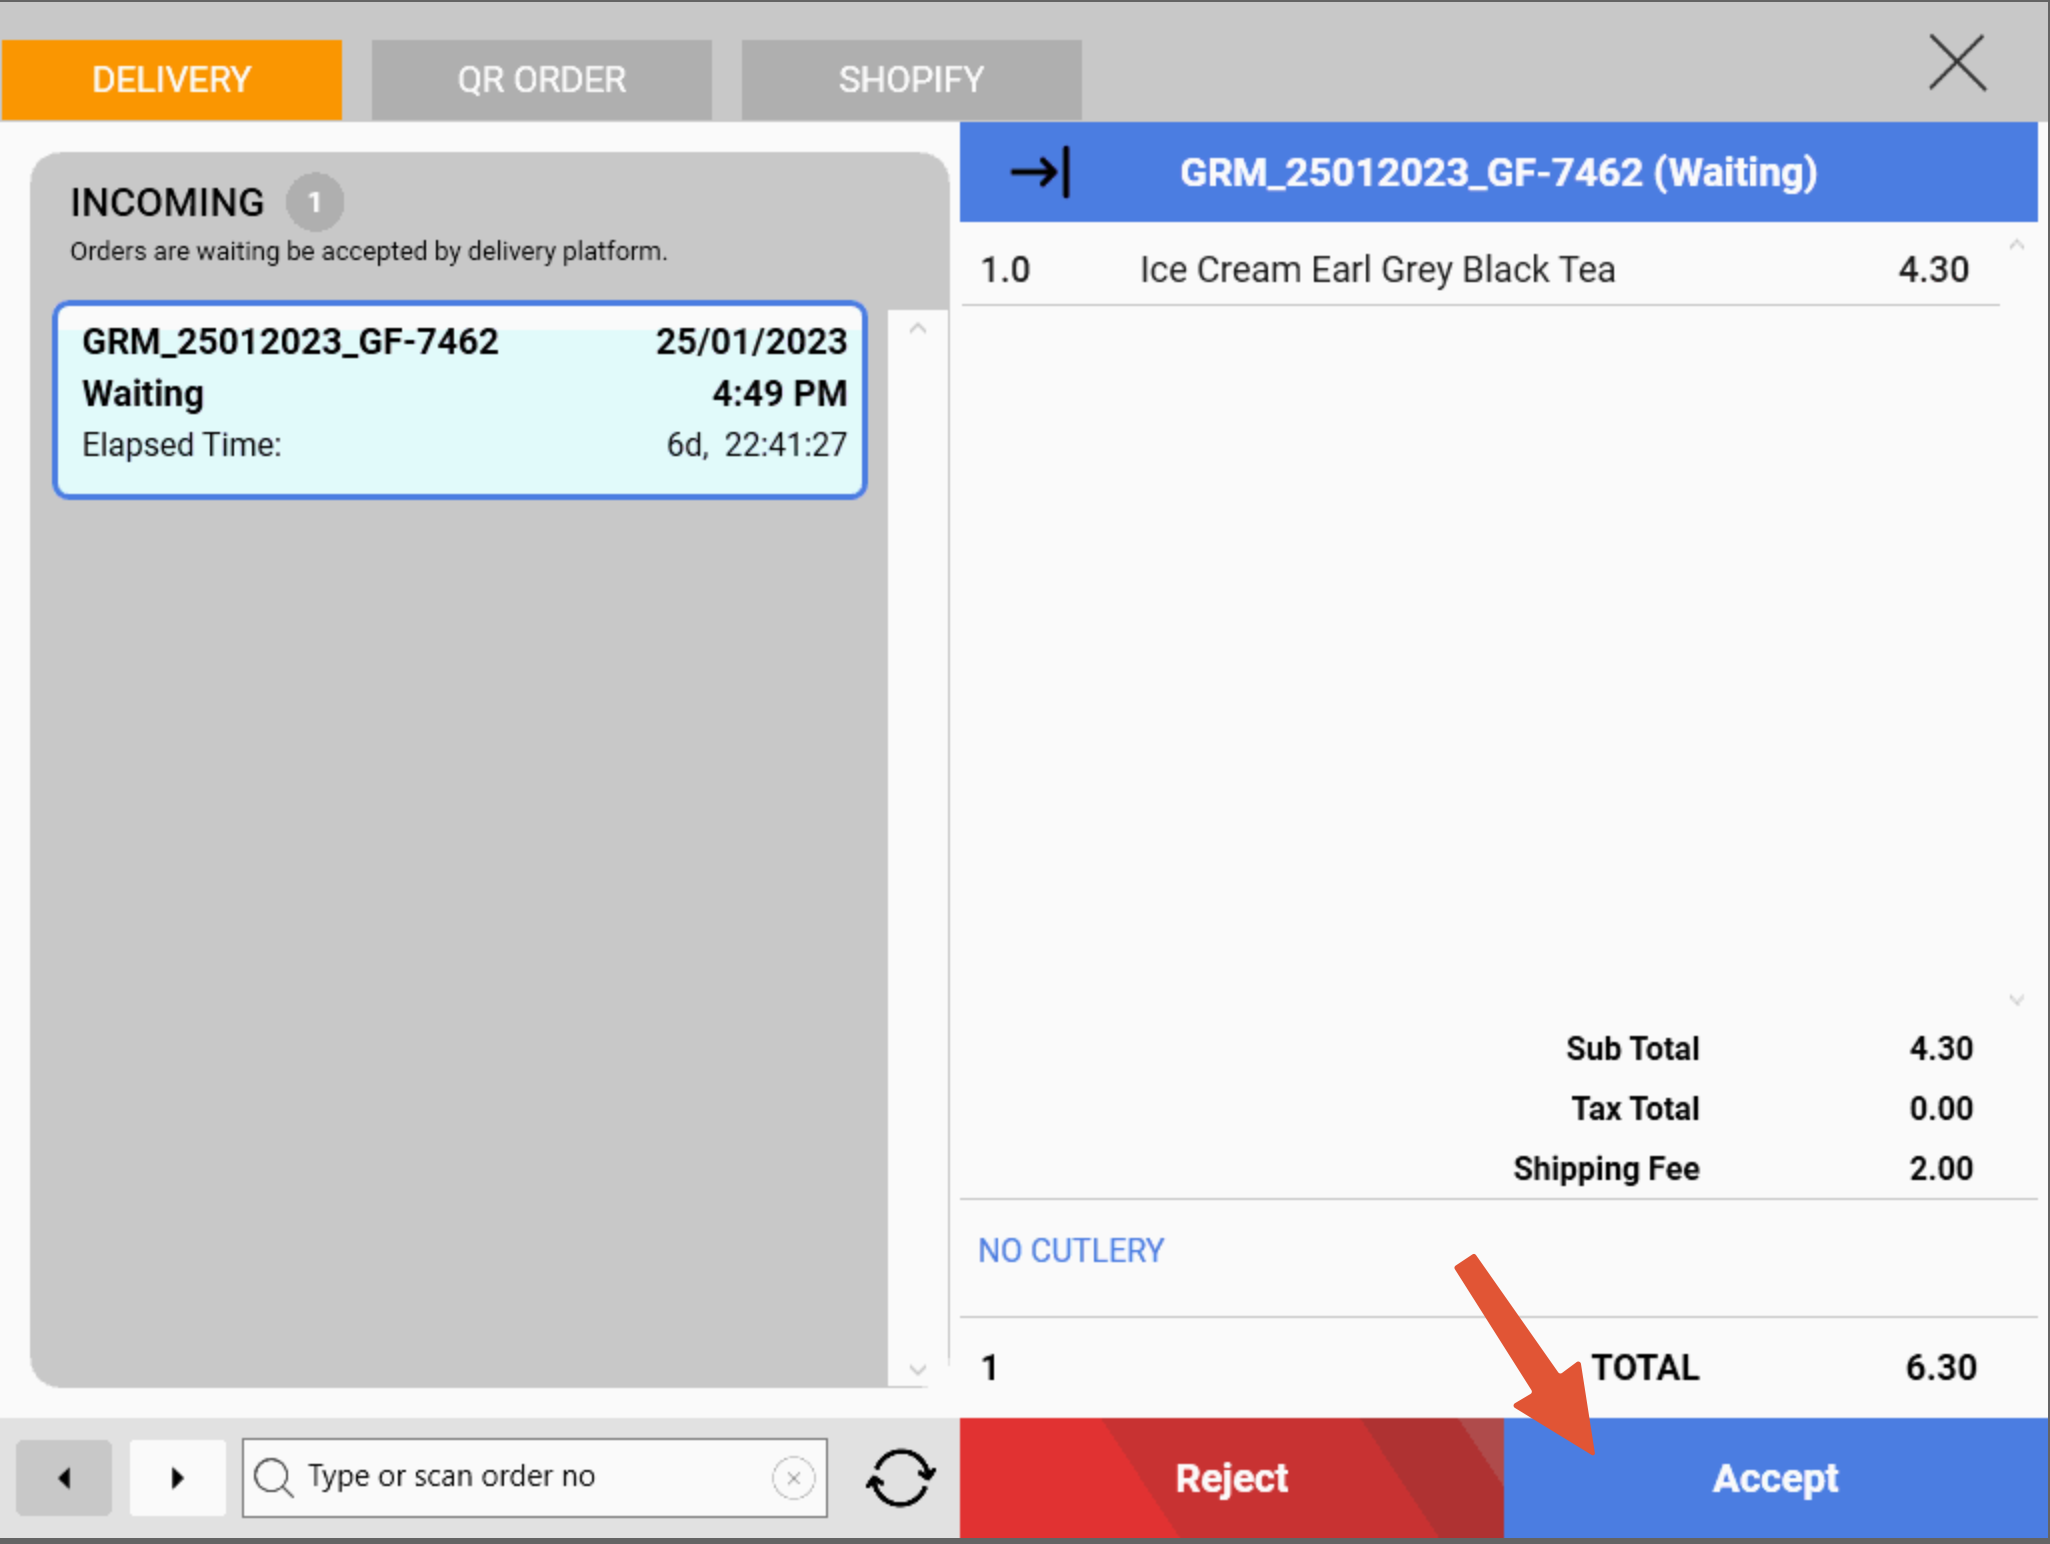
4. User can choose to either accept or reject this order.
a) To accept the order, click on the “Accept” button.
b) To reject the order, click on the “Reject” button
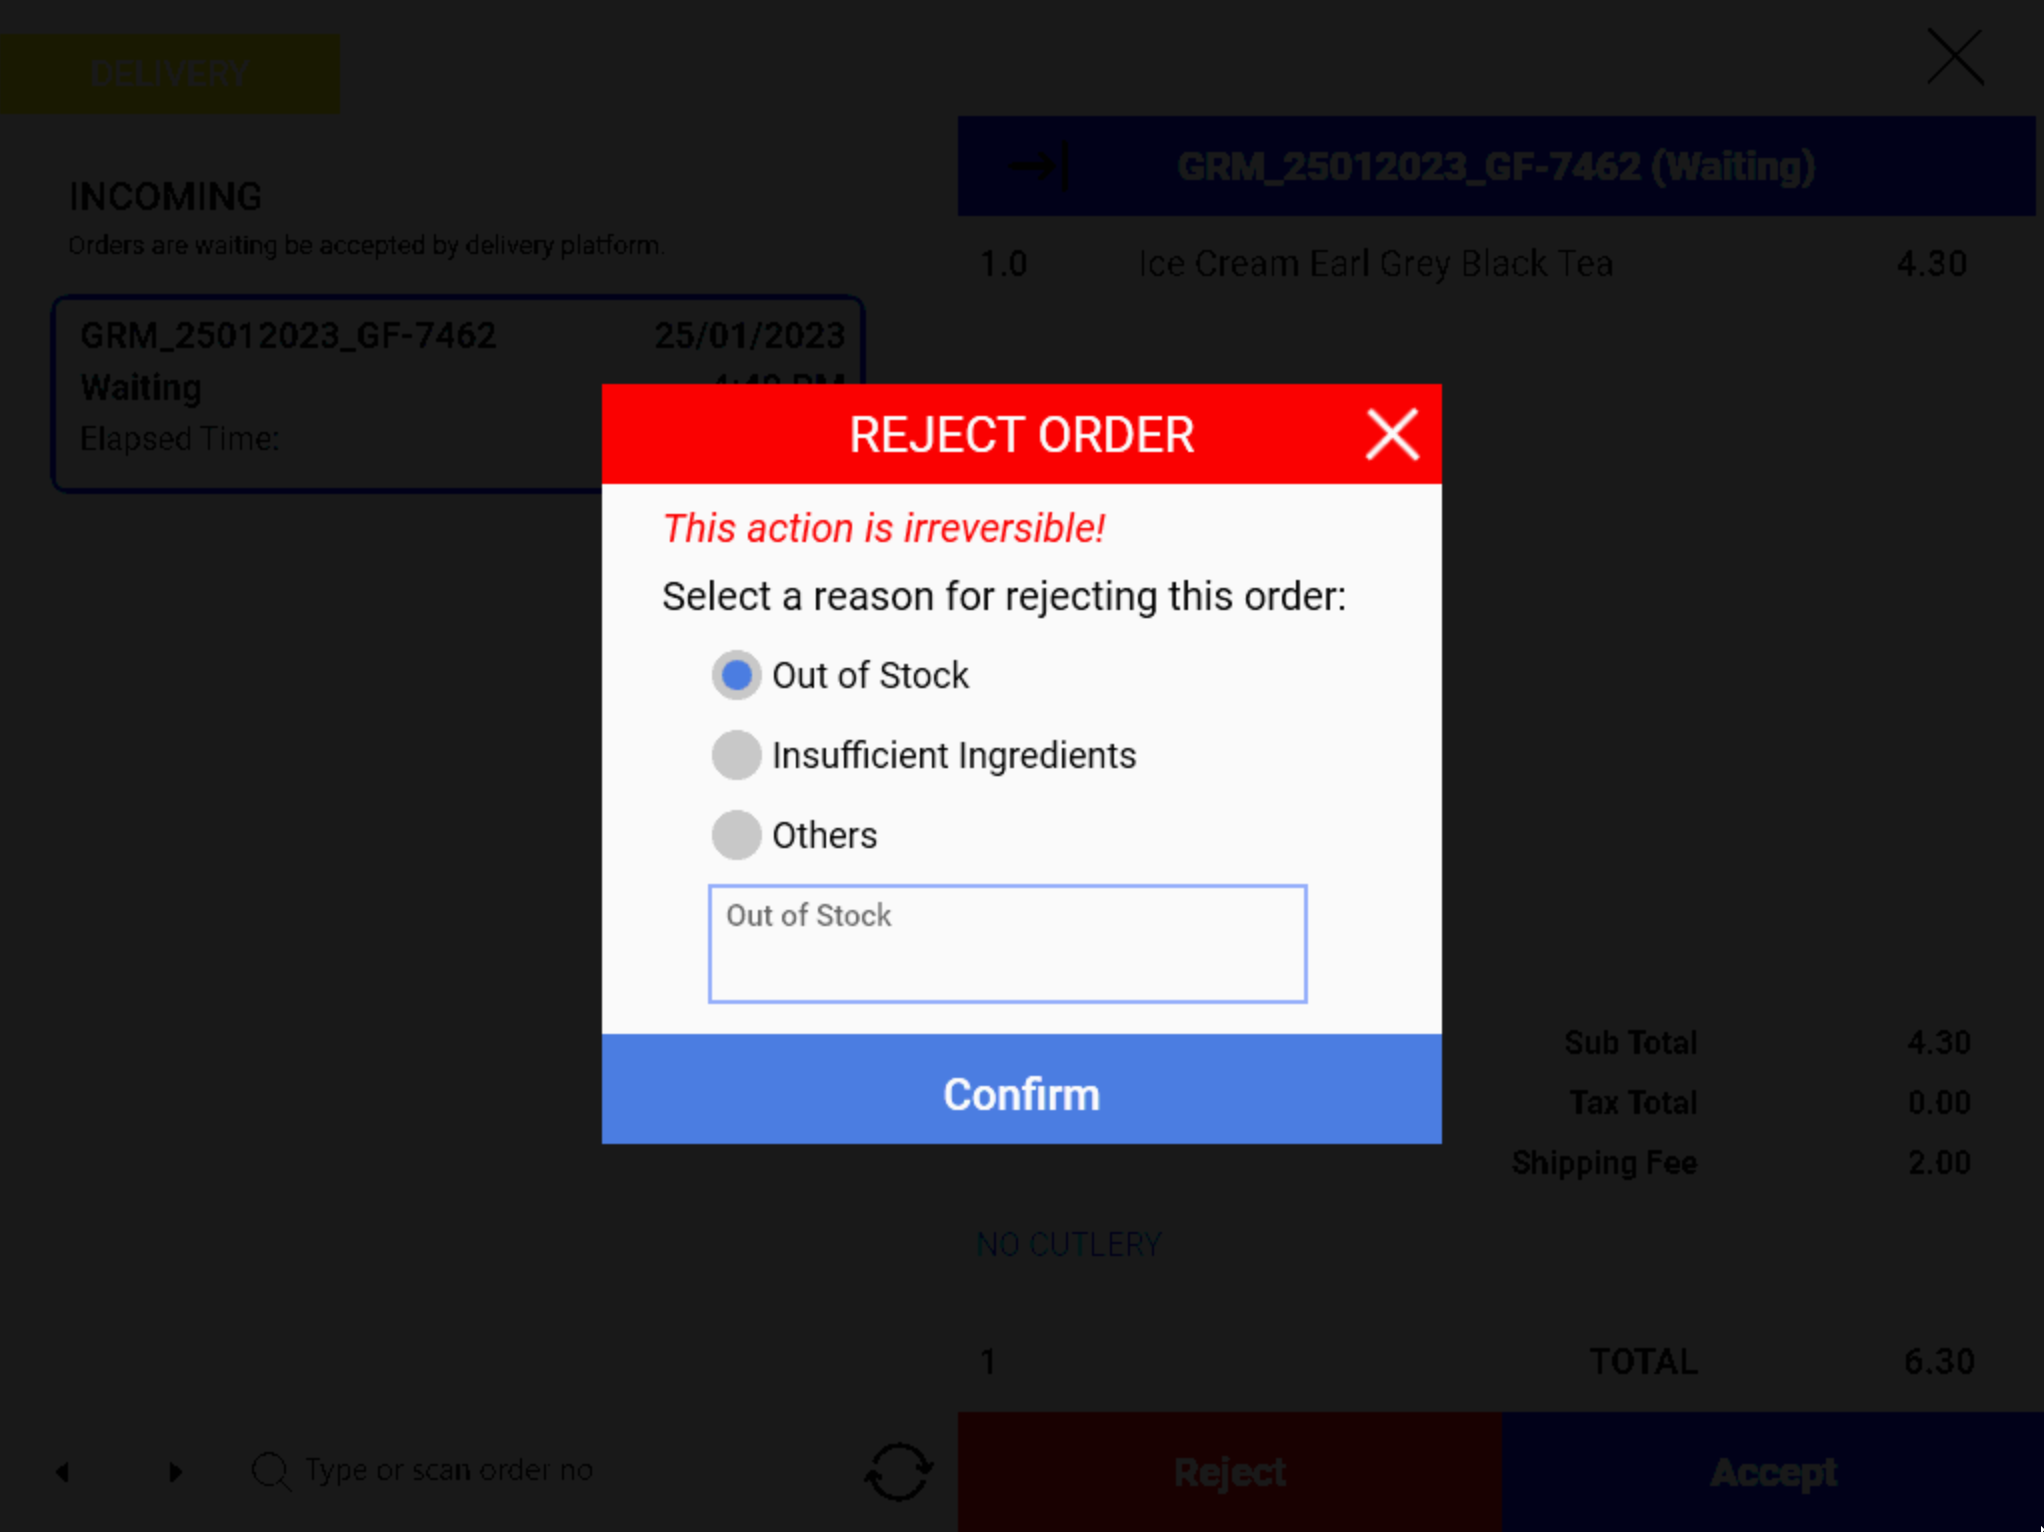
A pop up window will appear. User will need to select a reason for rejecting this order.
User can either select one of the default options, or he can select “Others” and manually key in the rejection reason.
Once done, click on the “Confirm” button, and this order will be rejected by the Delivery Platform.
Customer will be notified of the order cancellation.
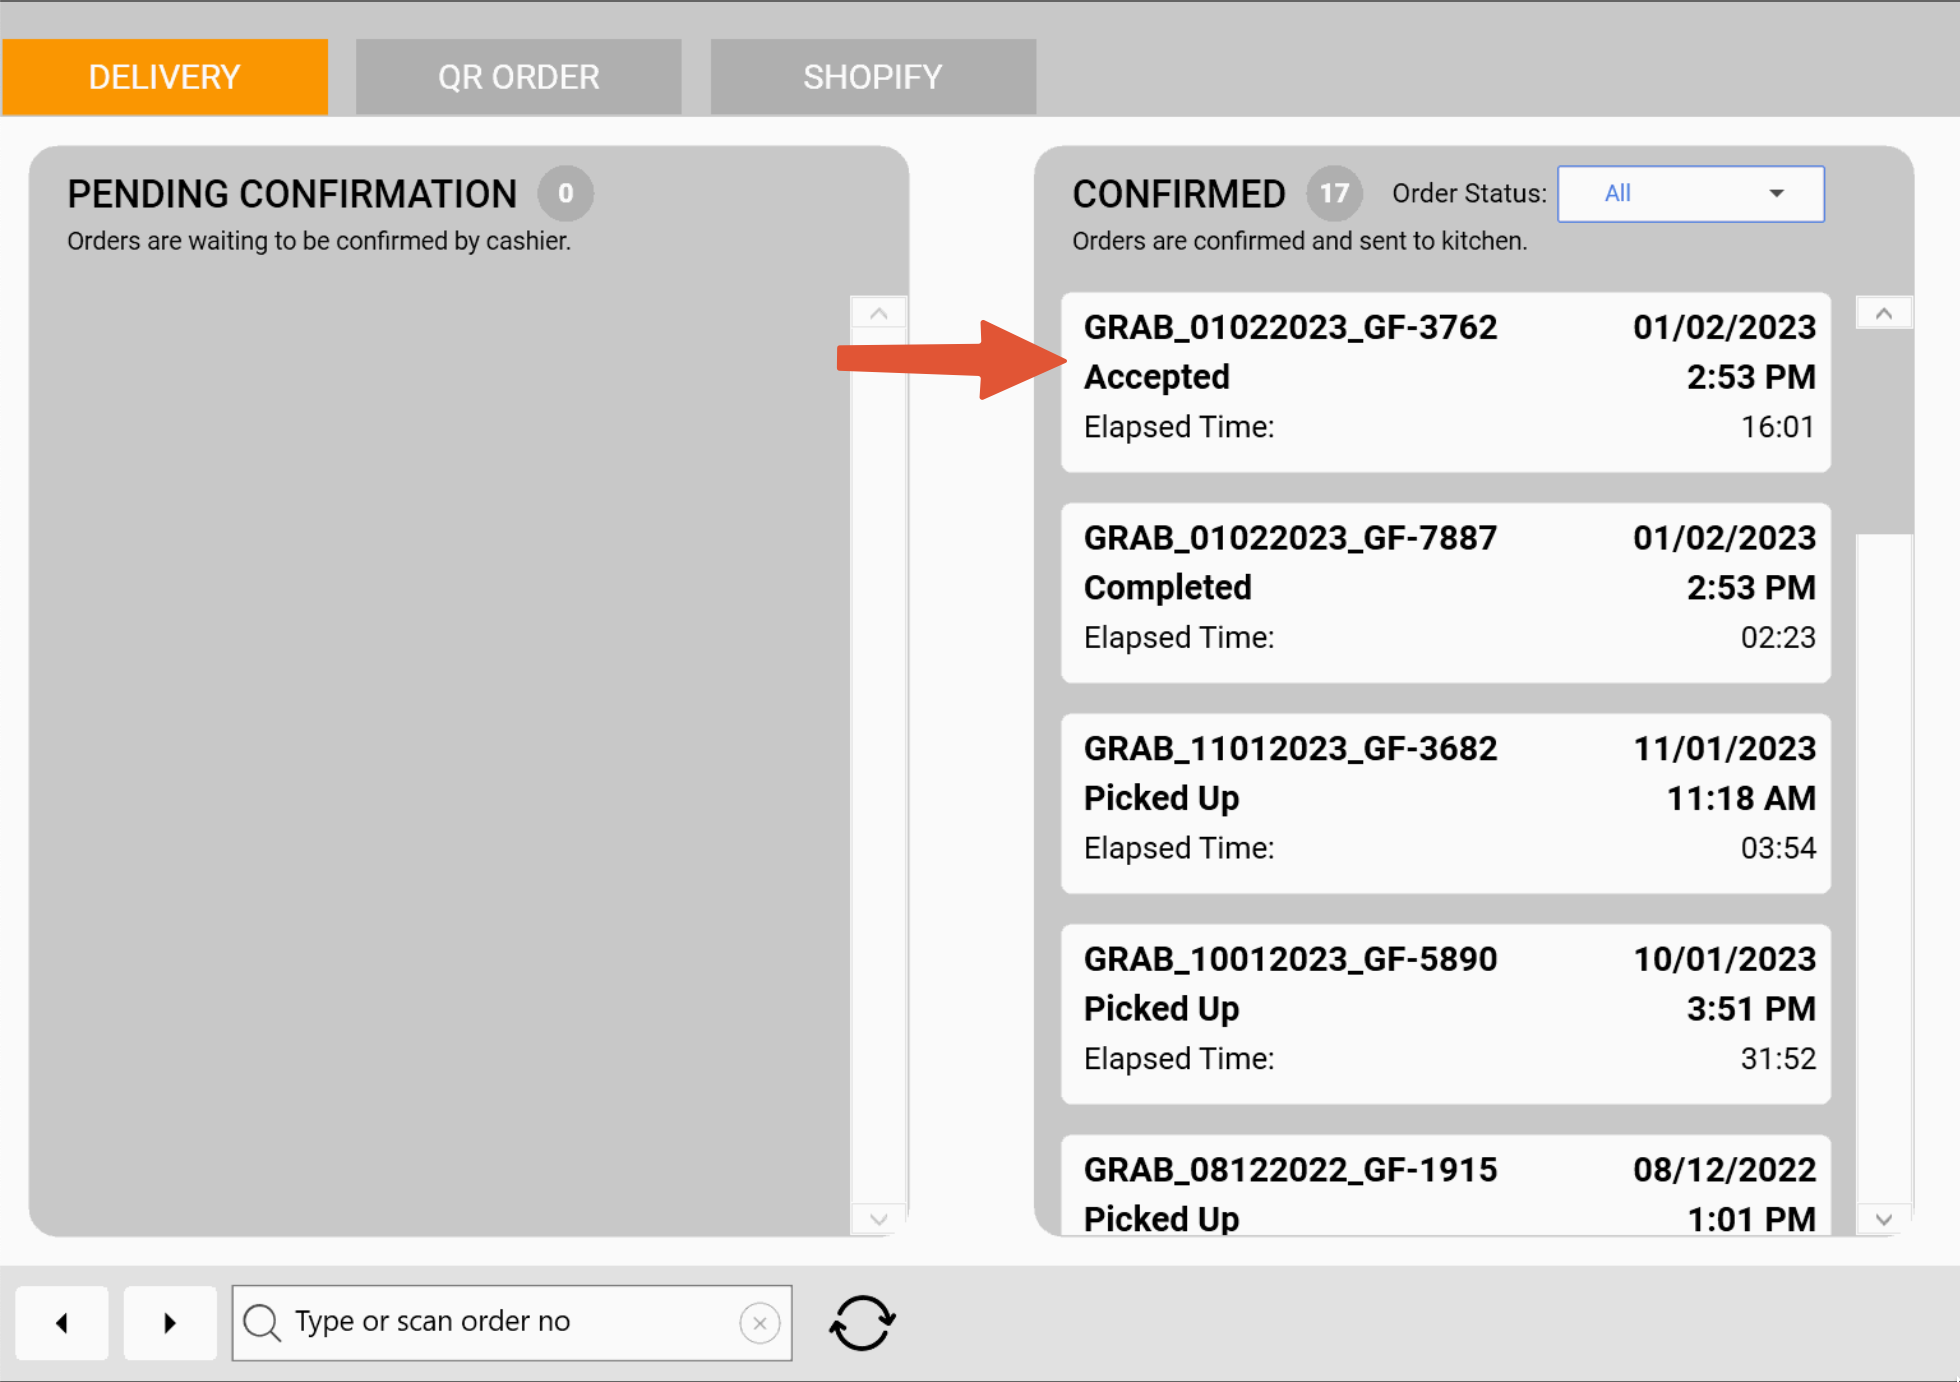
5. After the order is accepted/rejected by user, it will flow into the respective columns.
a) If the order has been accepted by user, it will flow into the “PENDING CONFIRMATION” column.
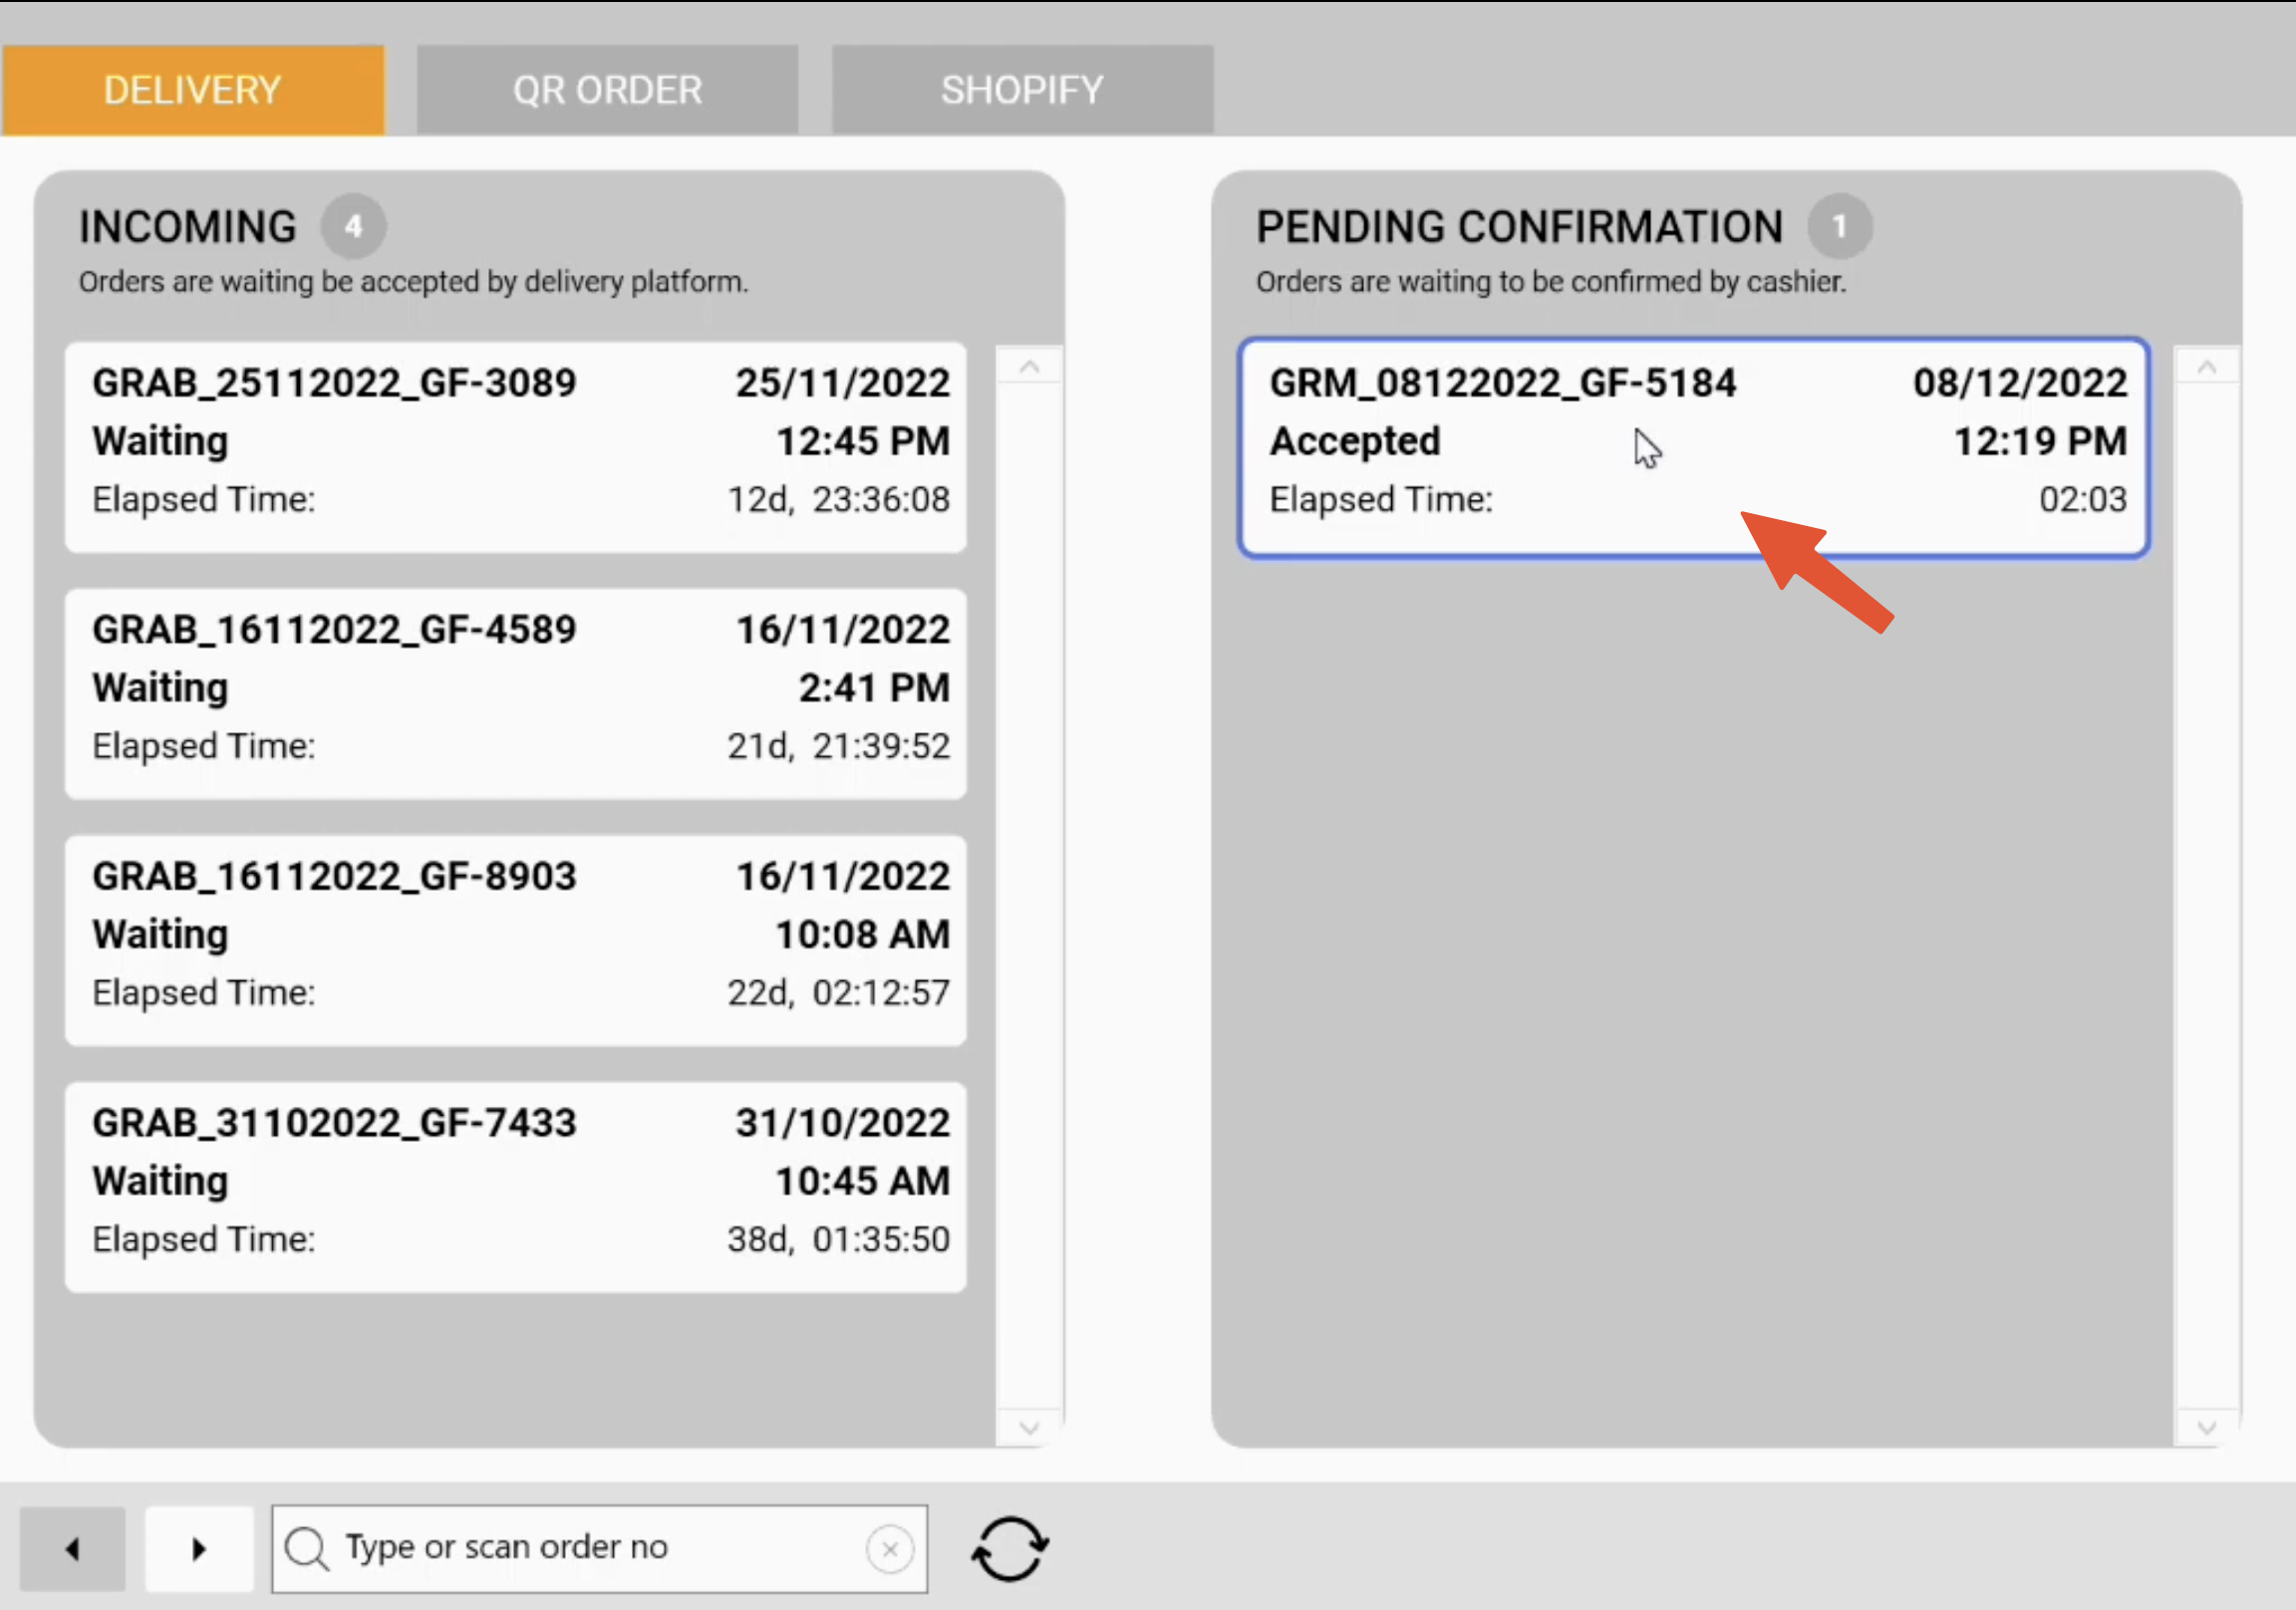
b) If the order has been rejected by user, it will flow into the “CANCELLED/REJECTED” column

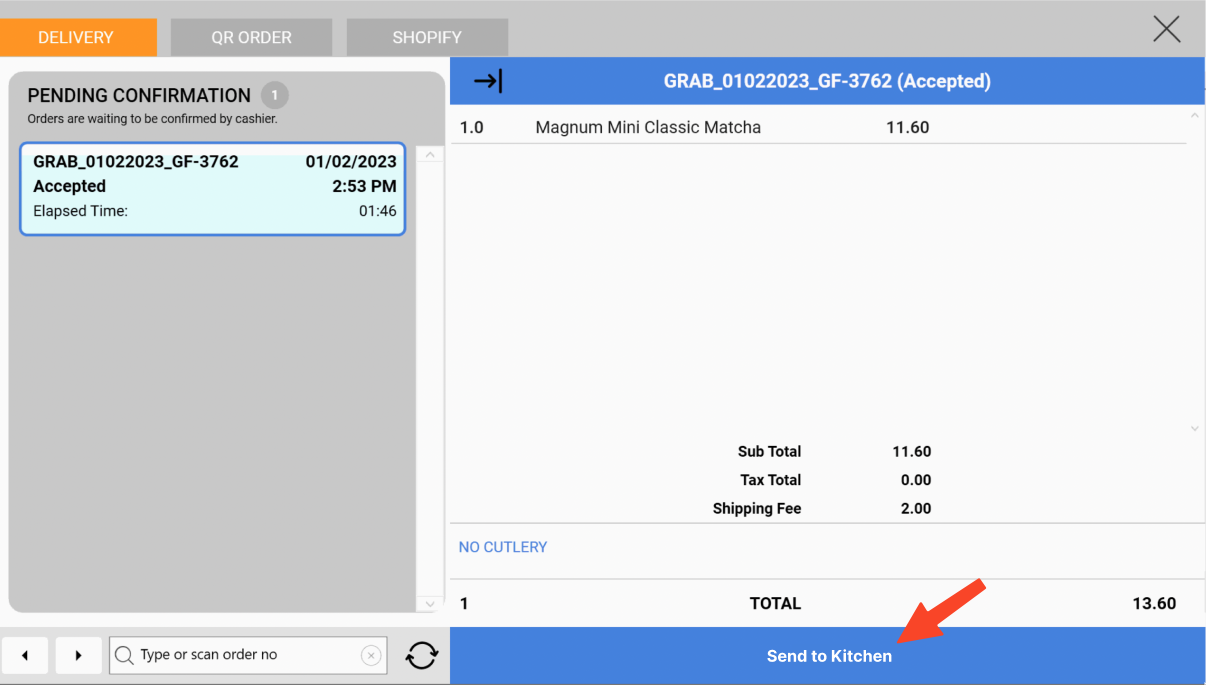
6. If the “Auto Send to Kitchen” config has been turned on at the backend, user will need to click on the “Send to Kitchen” button at the POS to acknowledge this order.
If user wants to skip this step, he can do so by enabling the Auto Send to Kitchen Config on the backend. This means that user does not need to manually acknowledge the order. Once this config is enabled, the order receipt and kitchen receipt will be automatically printed out once an order has been accepted by the Delivery Platform. For more information on how to enable this config, refer to Configure Auto Send to Kitchen for Delivery Orders.
7. Once the order has been confirmed, it will flow into the “CONFIRMED” column.
8. If the user wishes to reprint the receipt, simply click on the “Print Receipt” button.
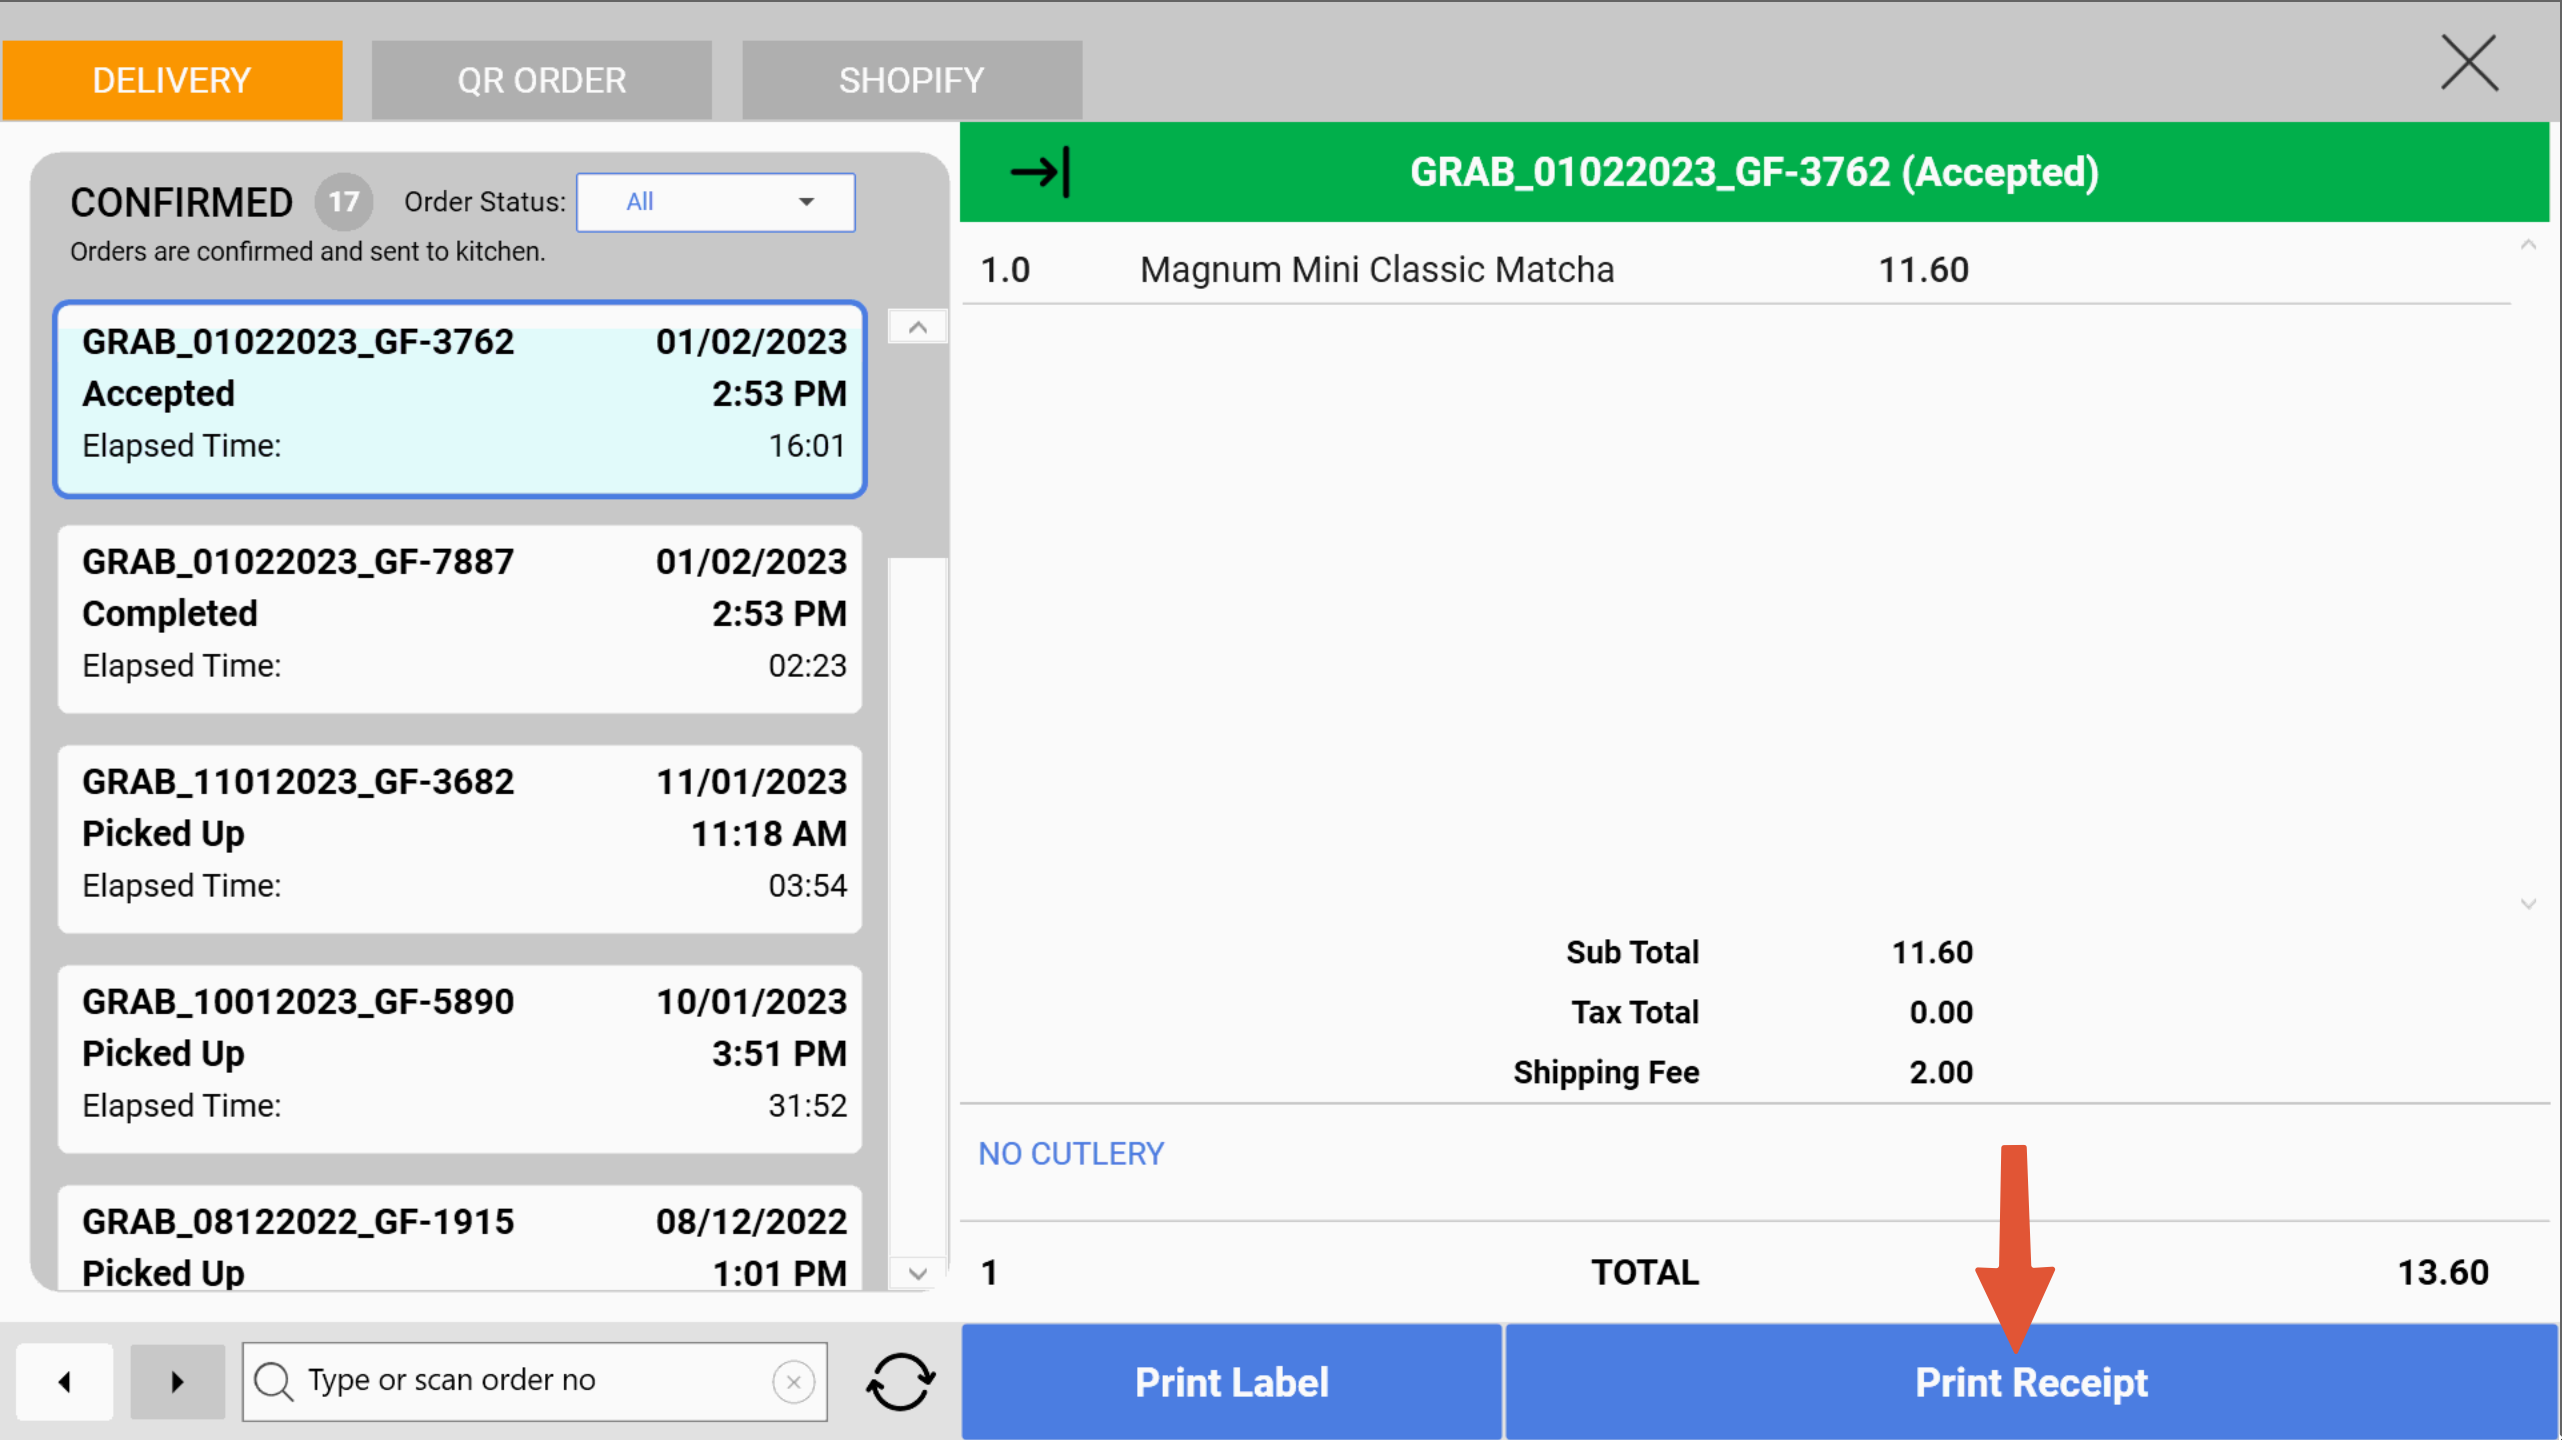
Note: The “Print Label” button is only applicable to users with a barcode printer, and wish to print out add-on products
Was this article helpful?
YesNo