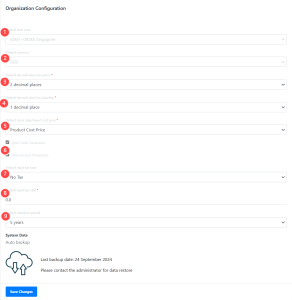
This section describes the General configuration for users’ Backend Portal.
Info Tab

1. Backend Creation
Shows the date when users’ Backend Portal was created.
2. Name
Shows the name of the user’s organisation.
Config Tab
1. Default time zone
Set the timezone of the Backend Portal.
2. Default currency
Set the currency to be used in Backend Portal.
3. Default decimal places for prices
Set the decimal places for base price and cost price.
4. Default decimal places for quantity
Set the decimal places for product quantity.
5. Default stock adjustment cost price
Allow users to configure the cost price to be assigned for inventory adjustments.
● $0
● Default Cost Price – this is set when product is created
6. Allow Credit Transaction & Account Transaction
If Credit Transaction and Account Transaction are enabled, these settings will be automatically applied when creating a new customer in the database, whether through the frontend POS system or the ERP Sales module.
7. Default input tax type
Set the default tax type that is assigned to the product during product creation.
8. Default input tax rate
Set the default tax rate that is assigned to the product during product creation.
9. Default retention period
In accordance with IMDA’s requirement of having regular and automated backup of information to cloud for all digital solutions, this section allows users to view the latest backup date and provides instructions to contact the administrator for data restoration.
Email Template Tab
User can create multiple email templates.
How it works:
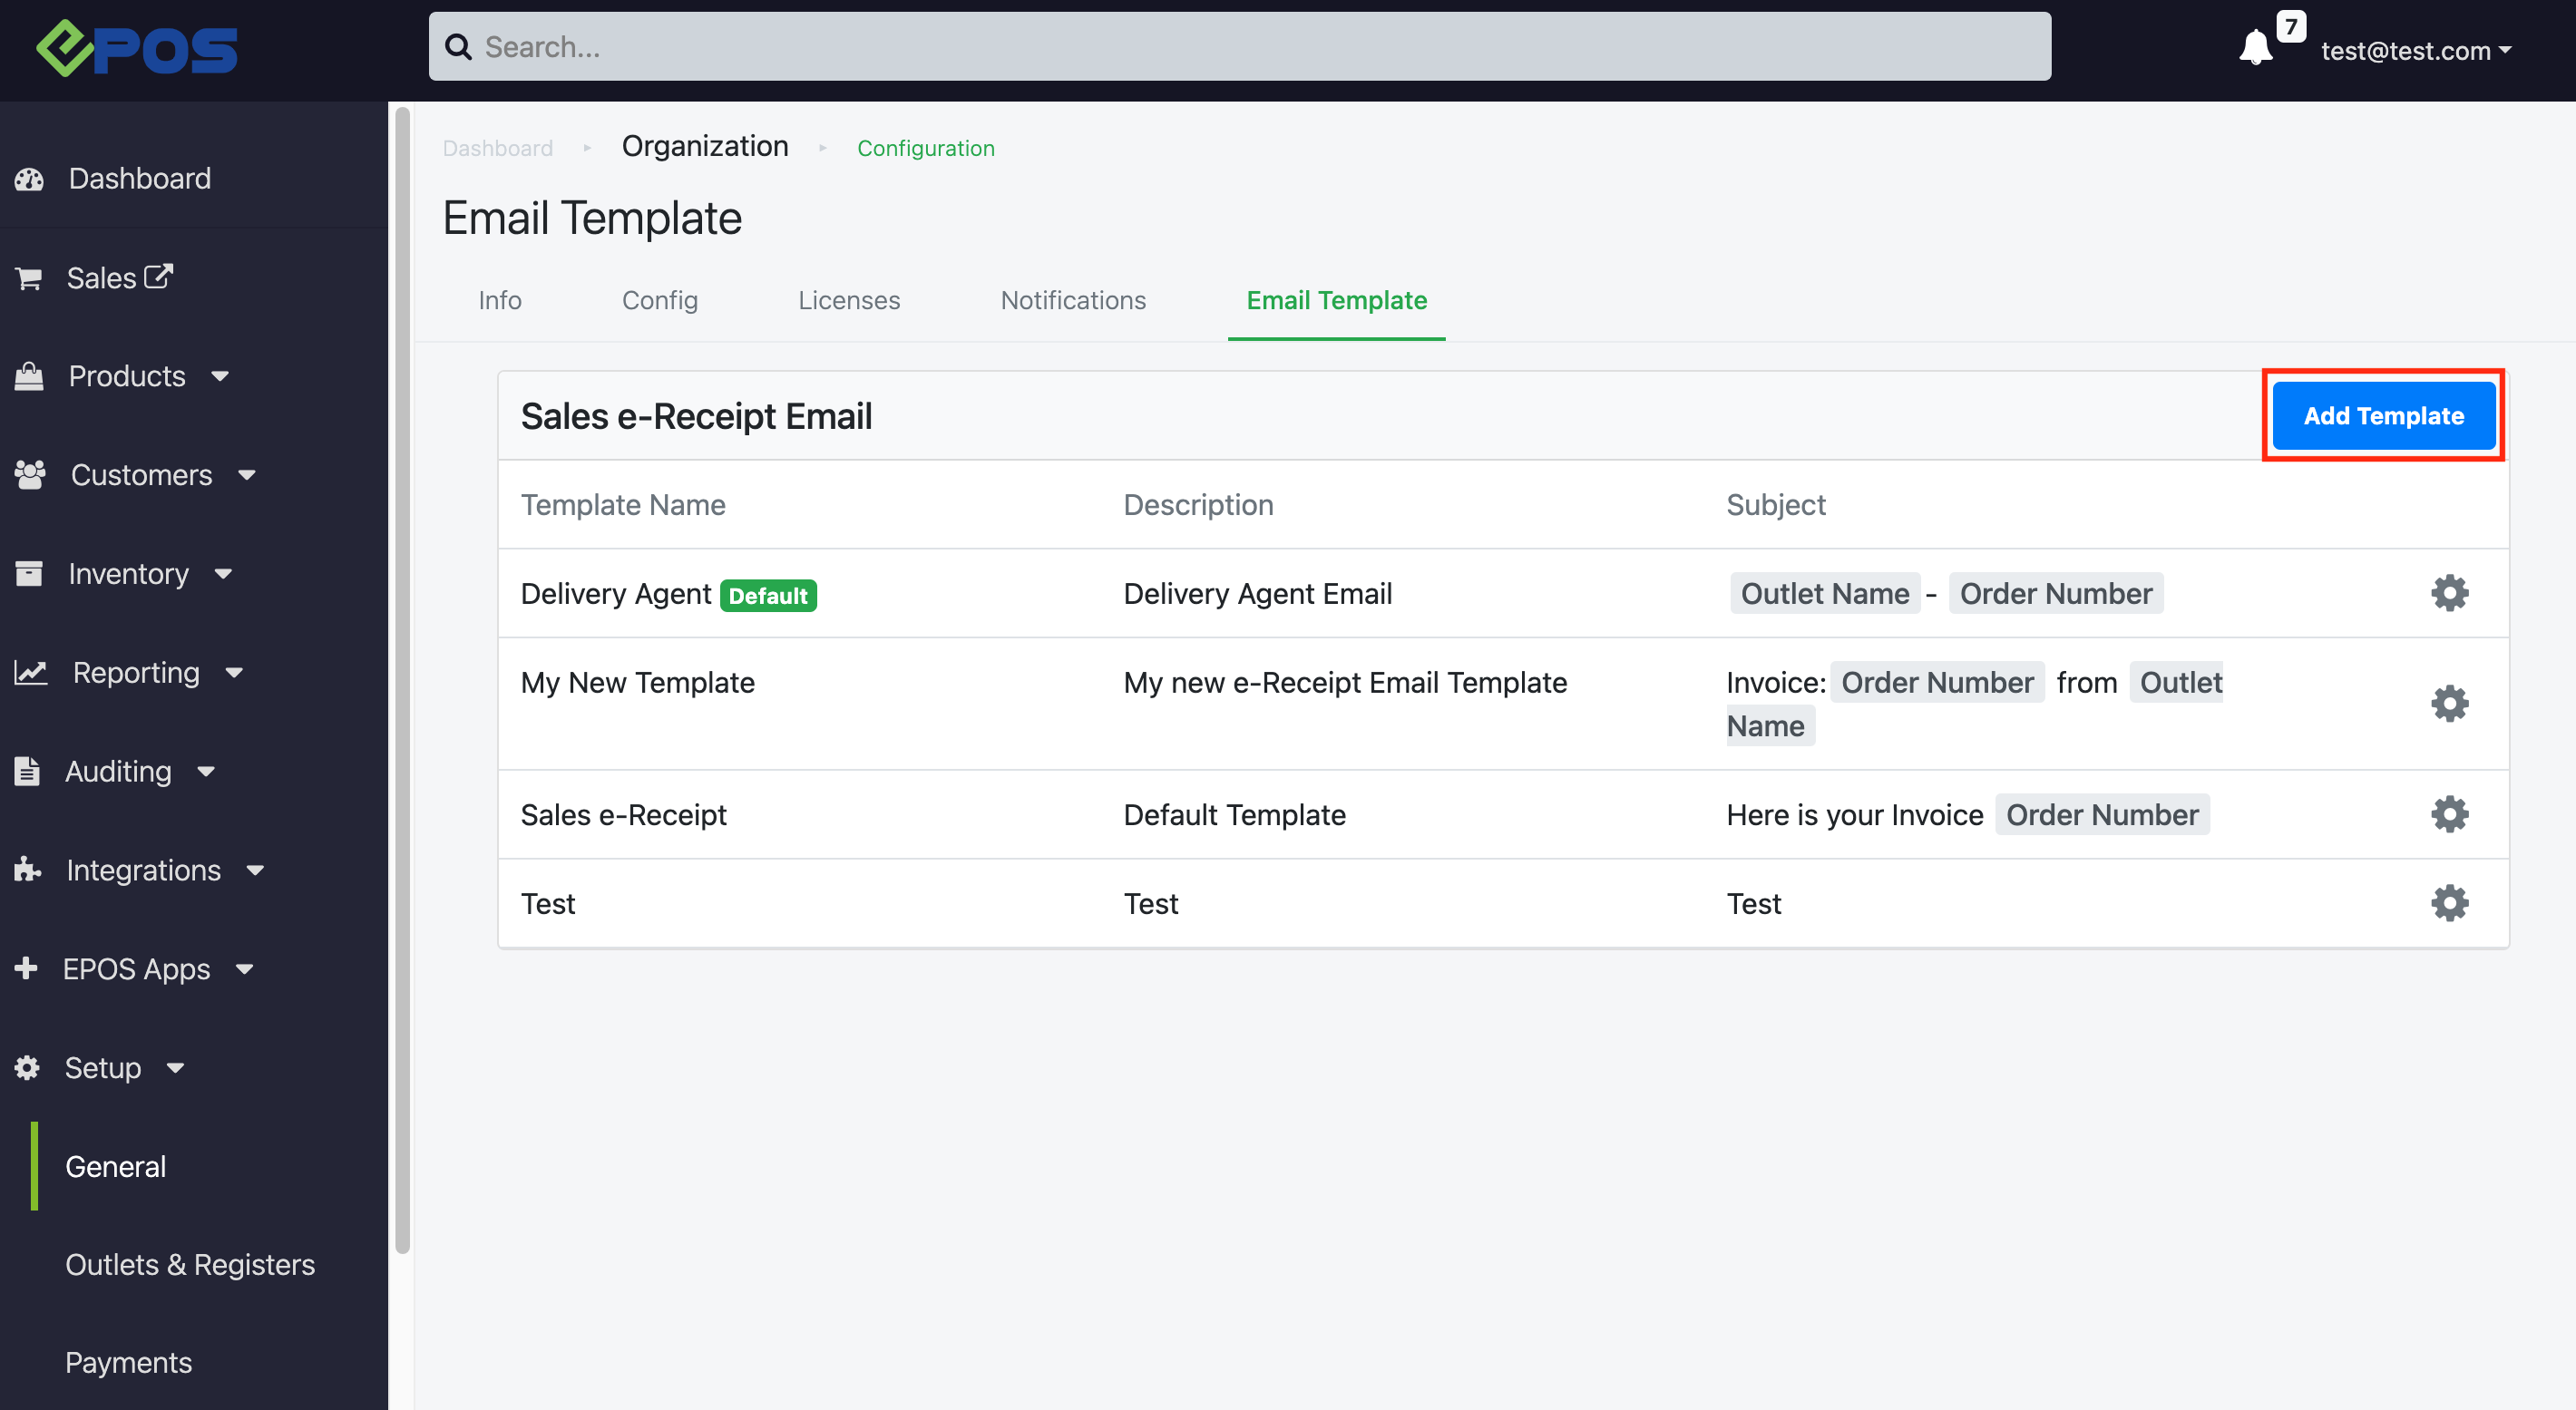
1. Go to Backend > Setup > General > Email Template
2. Click on “Add Template”
3. The compulsory fields are marked with * (Template Name, Description, Email Type, Subject, Body)
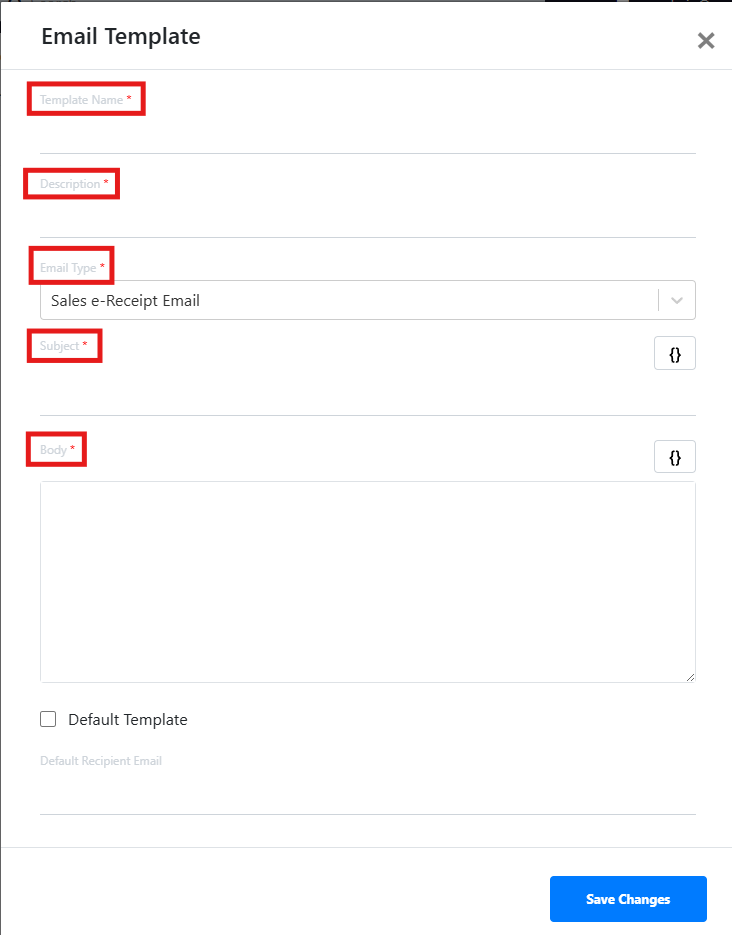
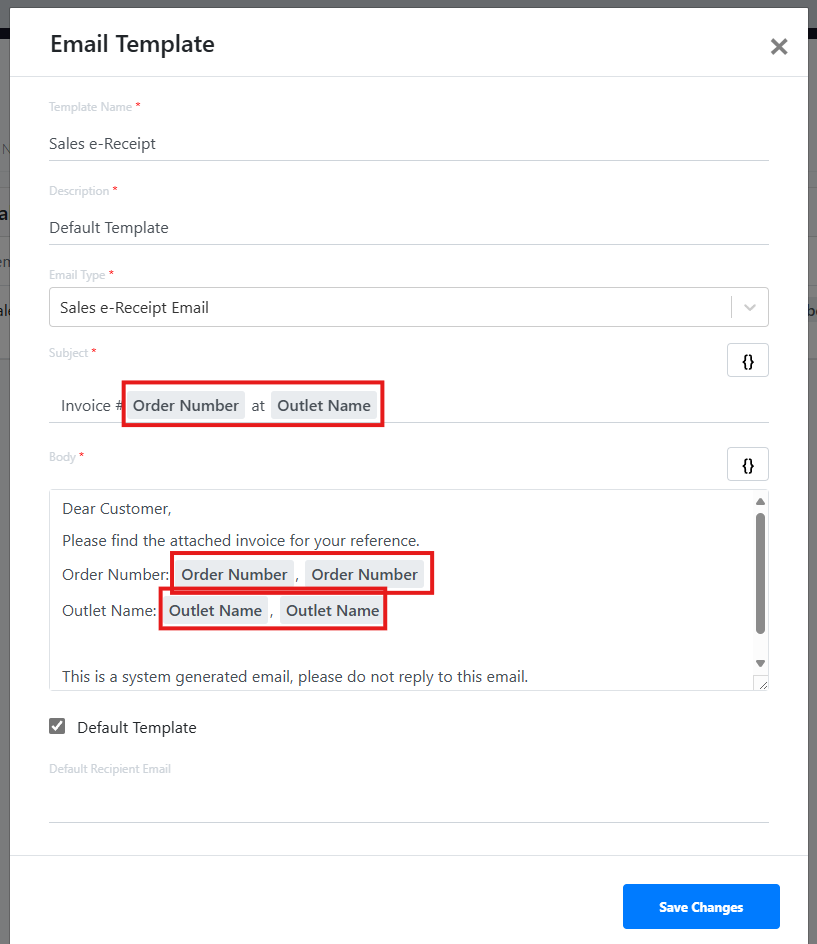
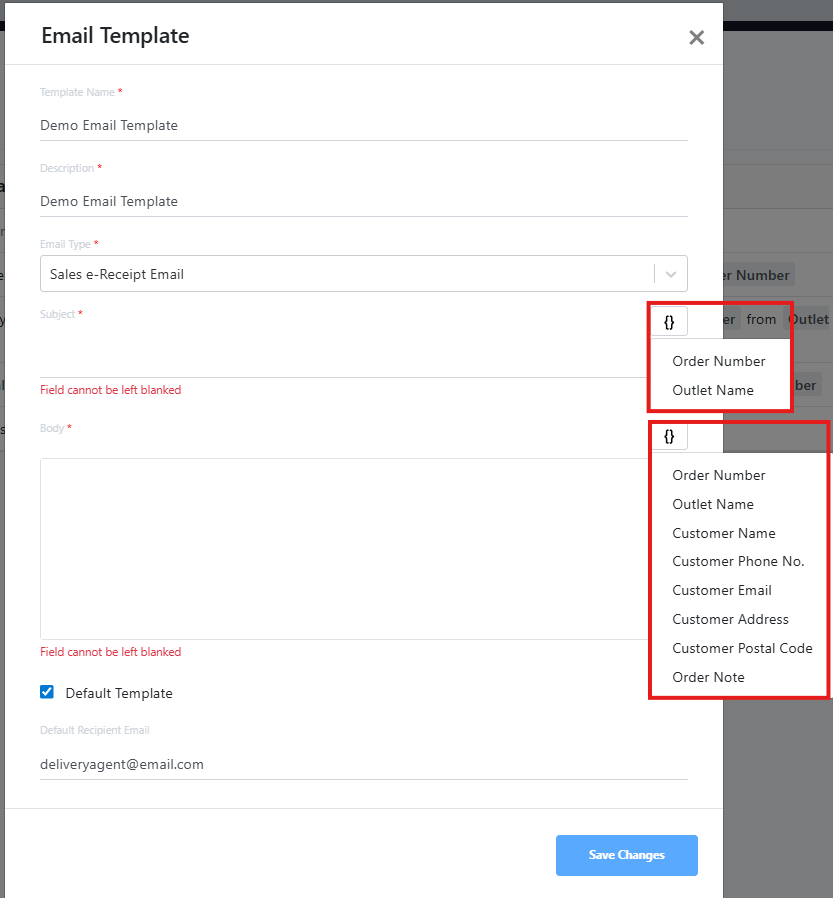
4. You can add the following variables to the Subject and Body fields:
- Subject
- Order Number
- Outlet Name
- Body
- Order Number
- Outlet Name
- Customer Name
- Customer Phone No.
- Customer Email
- Customer Address
- Customer Postal Code
- Order Note
5. Click on the “{}” button to add them accordingly.
6. After filling in the Email Template details, click on “Save Changes”

7. The newly created Email Template will appear

8. Below shows an example of the sent email content based on the template, as well as the receipt attached:
| Email Template | Email Content |
|
|
 |
How to set a default template:
1. Select the “Gear” icon on the template to be set as default and click on “Edit”
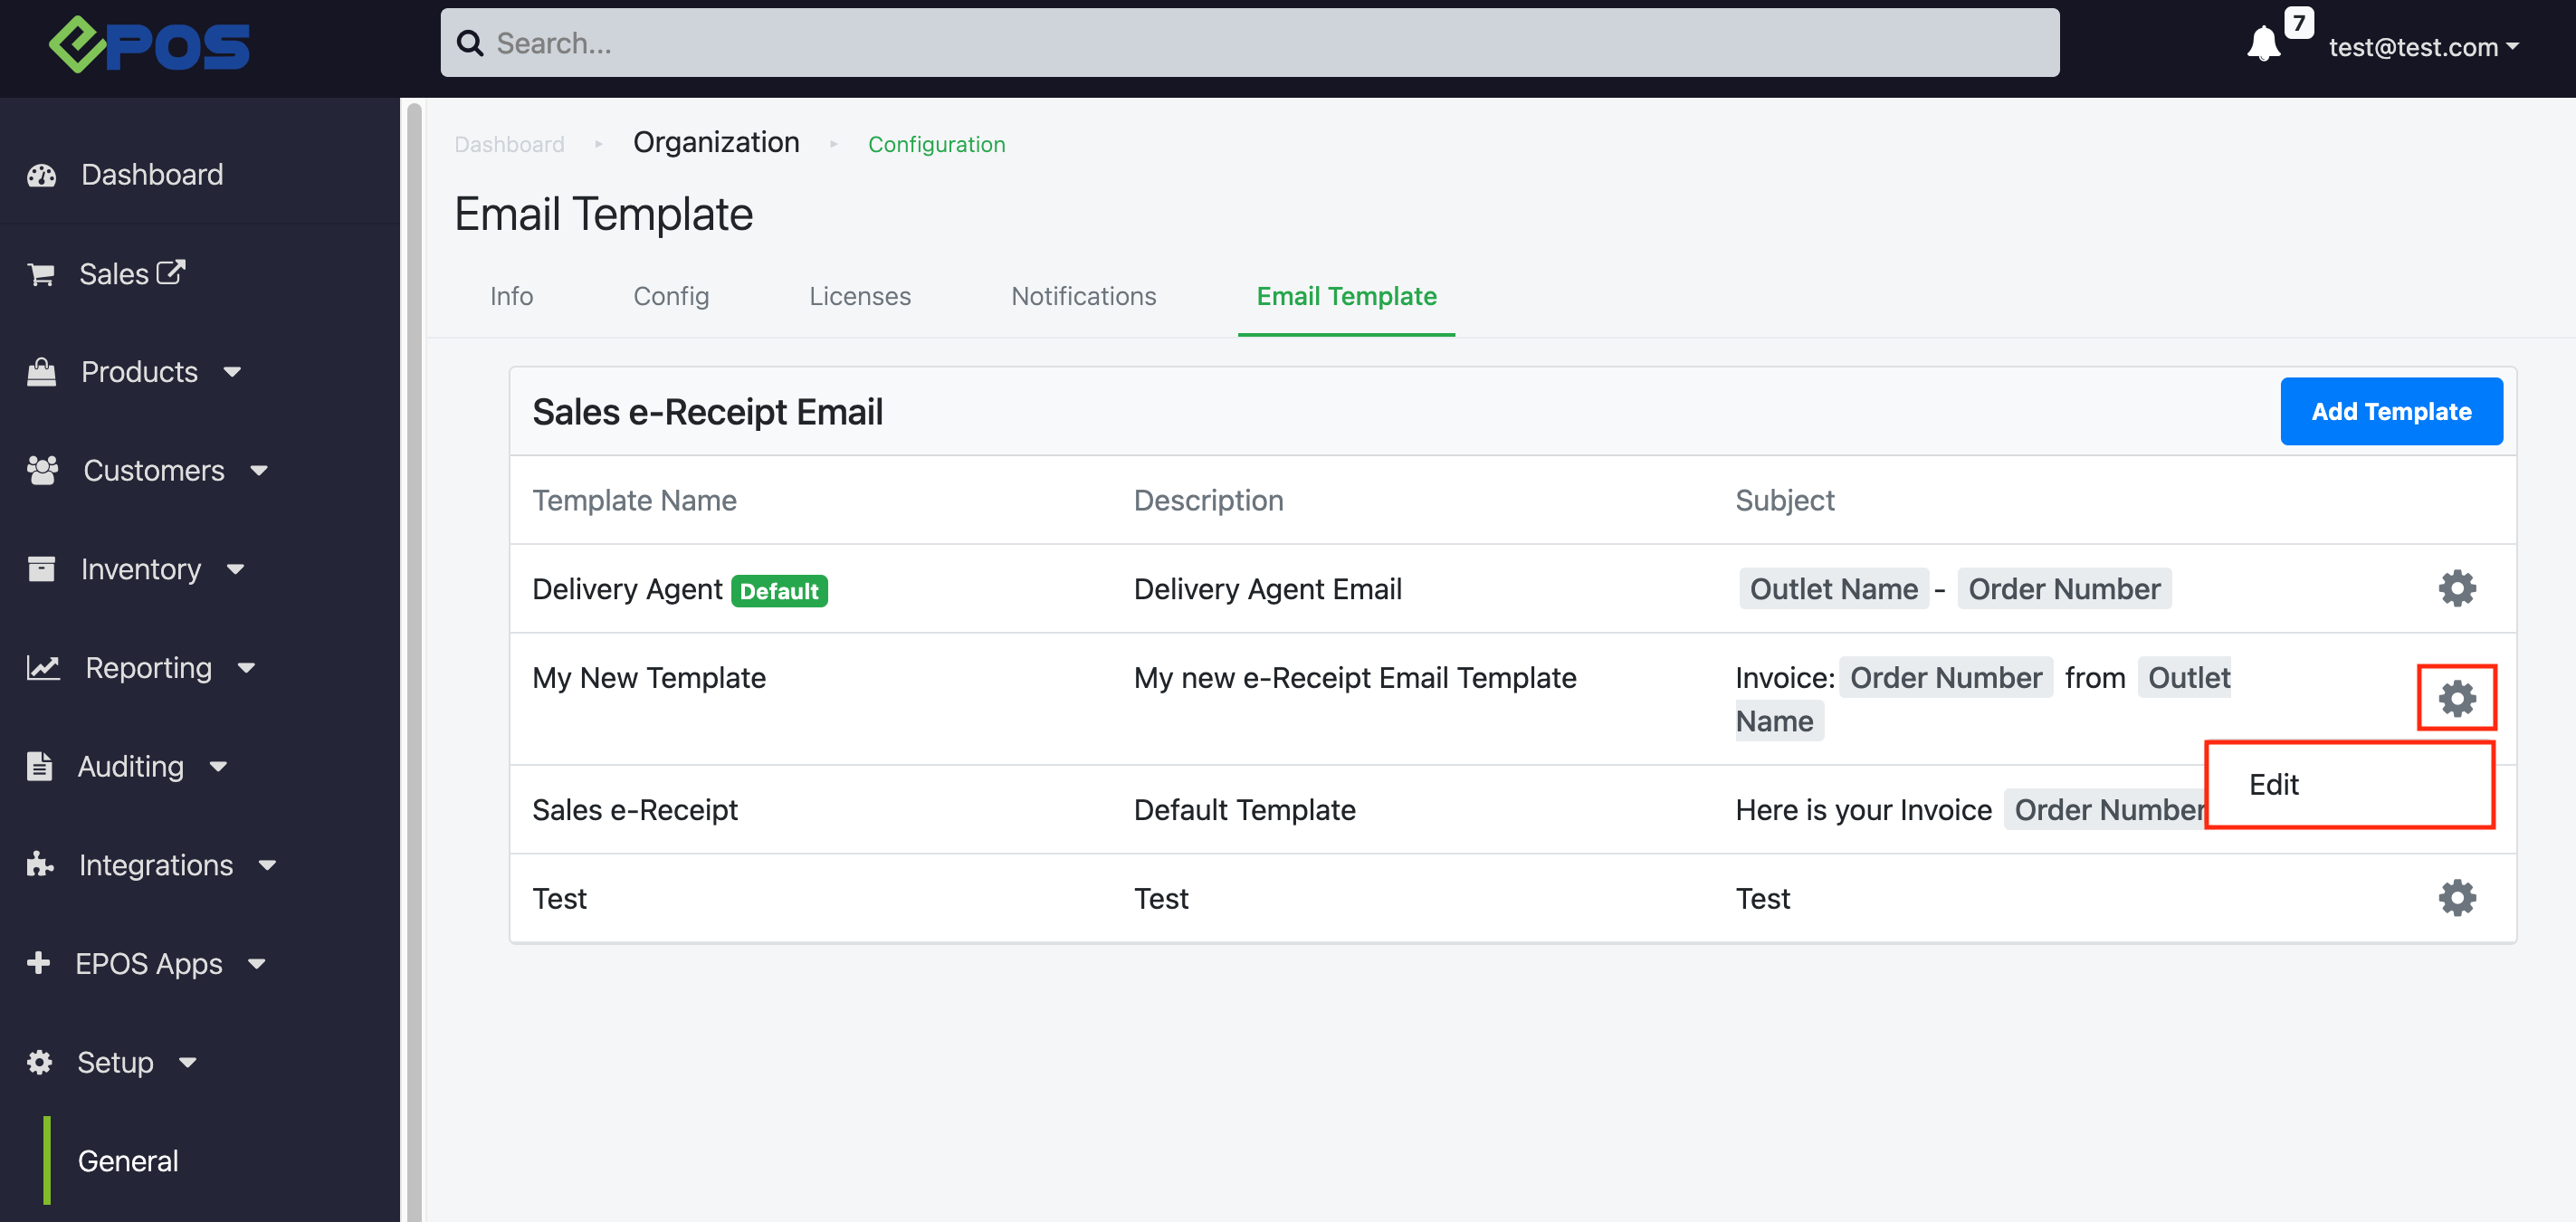
2. “Tick” the default template checkbox and click on “Save Changes”

3. The desired Email Template will be set as the default

4. Once the template has been set as default, the email sent from backend would also follow the default sales e-receipt template.

How to set a default email address for Email Template:
1. Select the “Gear” icon on the template to be set as default and click on “Edit”

2. Input email address to be set to default and click “Save Changes”. Note: Optional field


