This section describes in detail the features of Modifiers. Users will be guided on creating modifier groups, and assigning modifier products to linked products, configuring linkages etc.
This feature is best used when users would like to offer customers the freedom of choice whether to top-up for additional “tag-along” items or “optional” during a purchase.
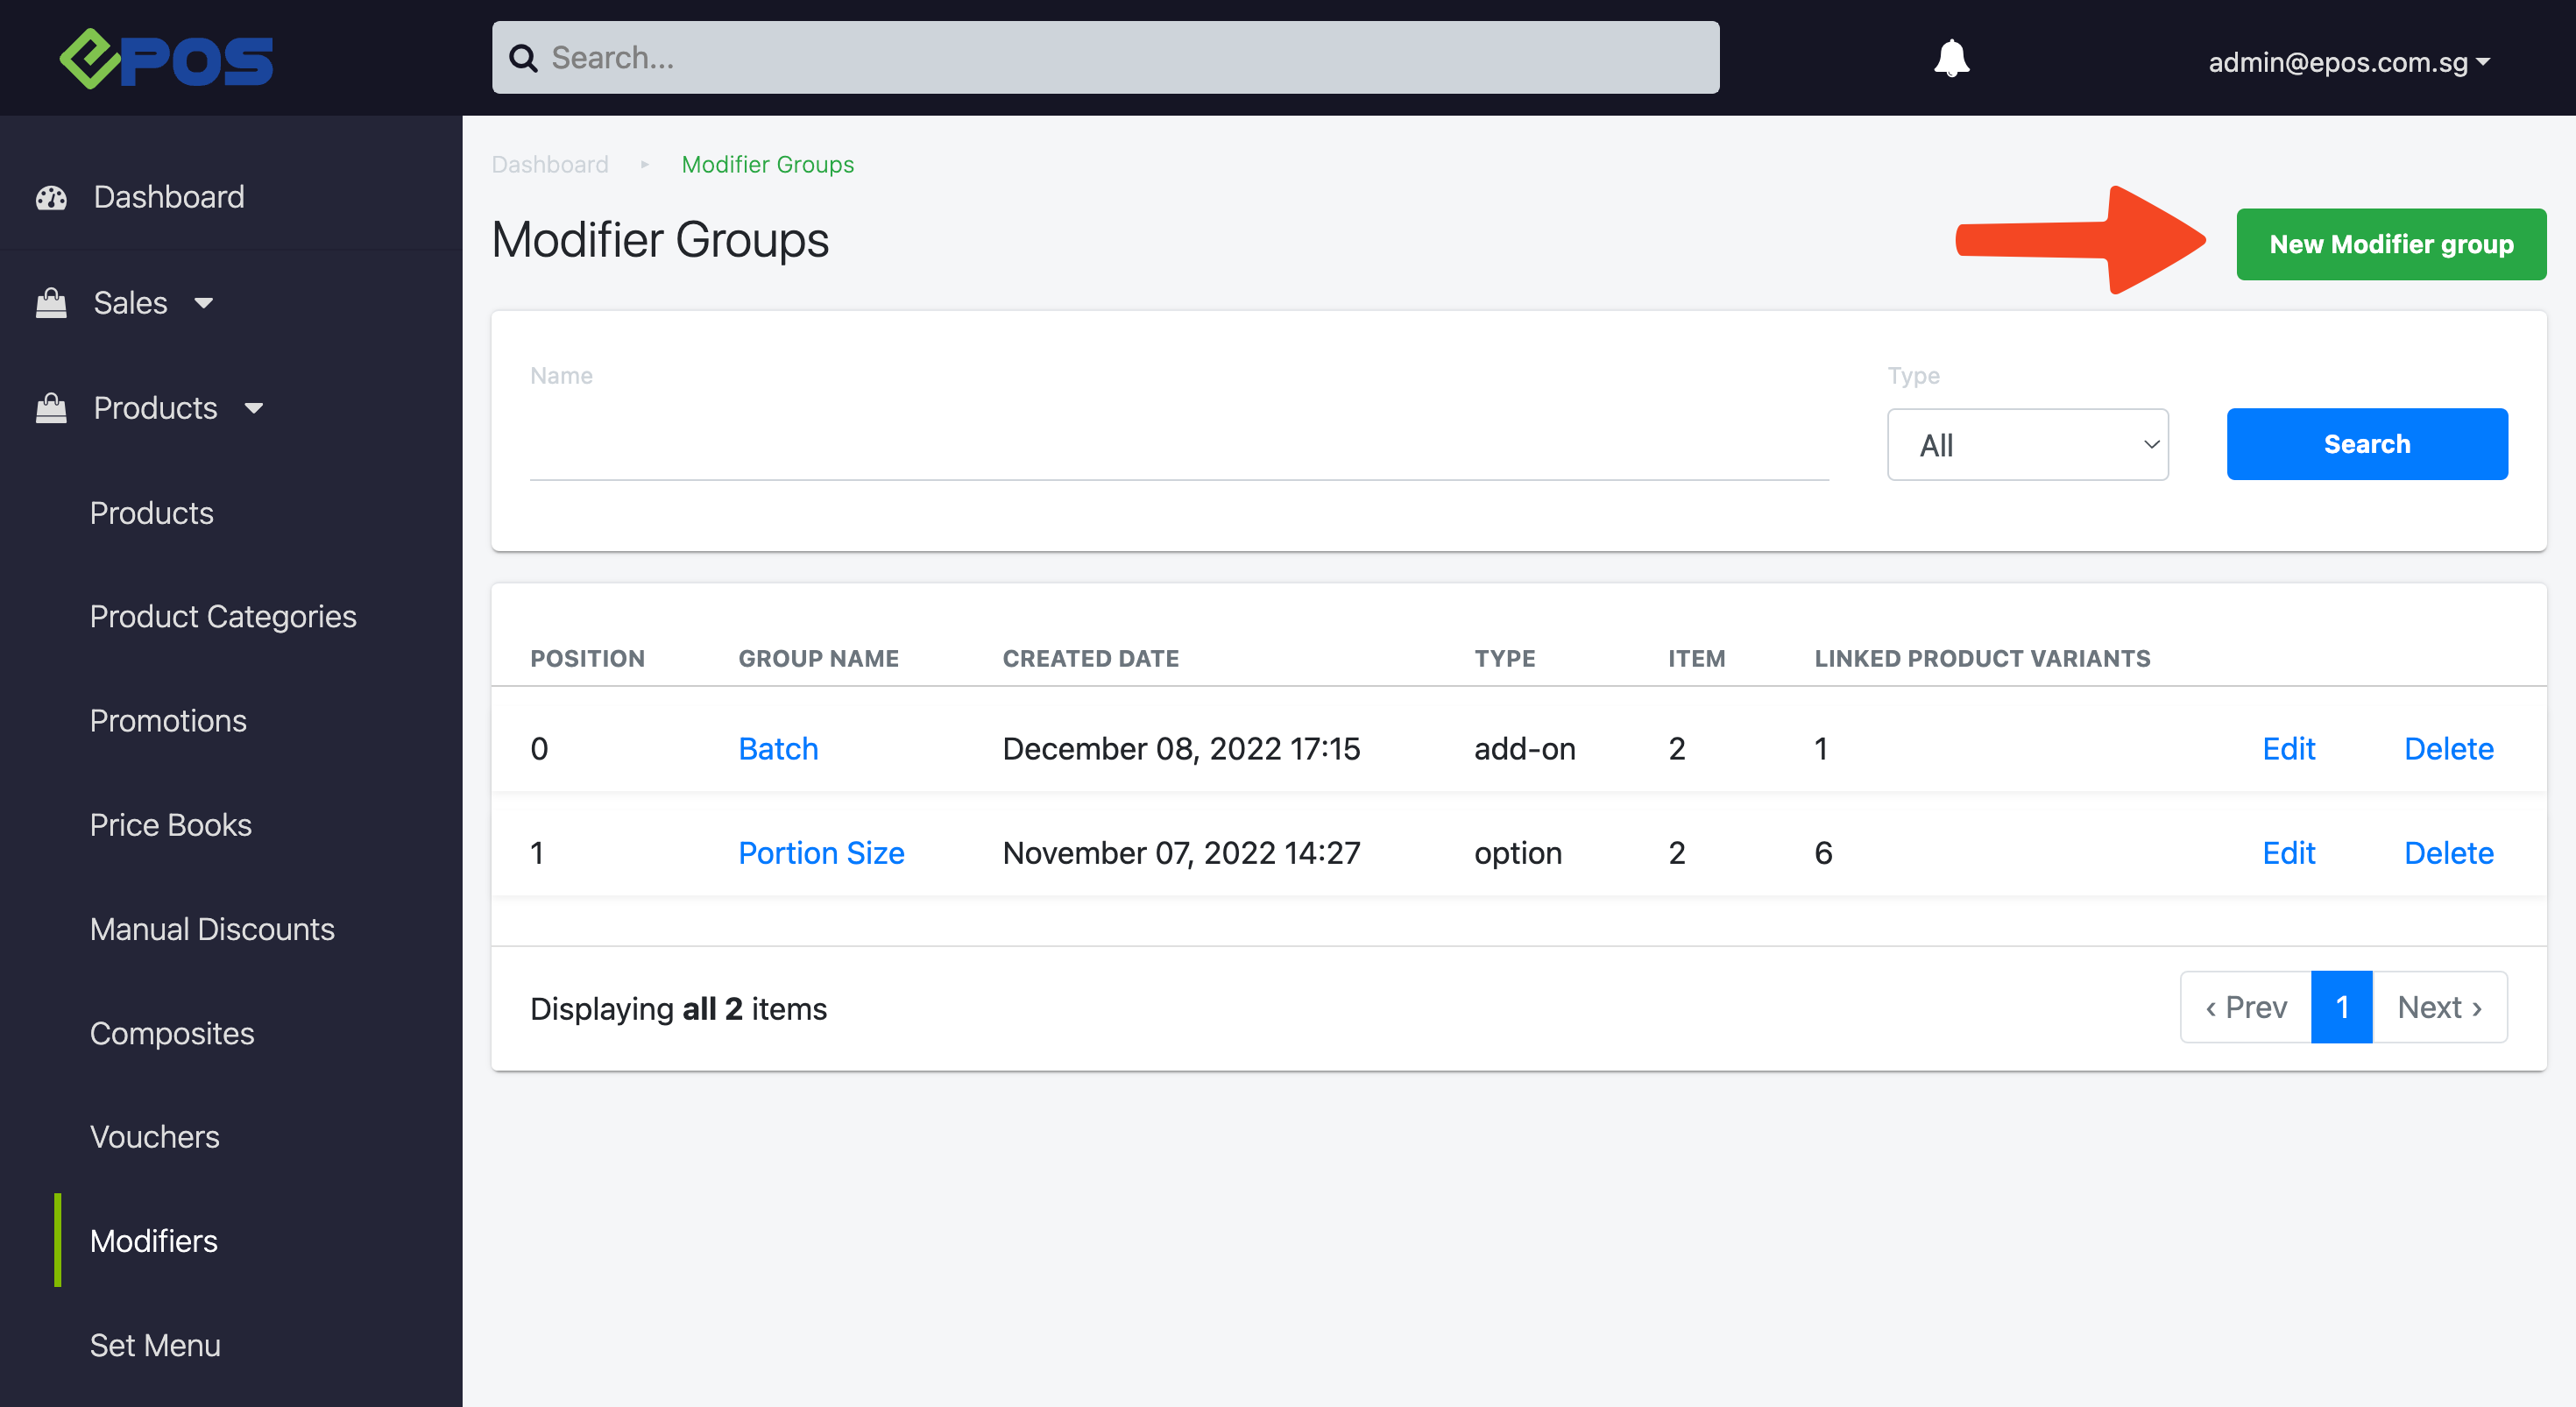
As a continuation from Product Classes, once modifier products and main product are created, at the Features Panel, Click on Modifiers to access Modifiers main page.
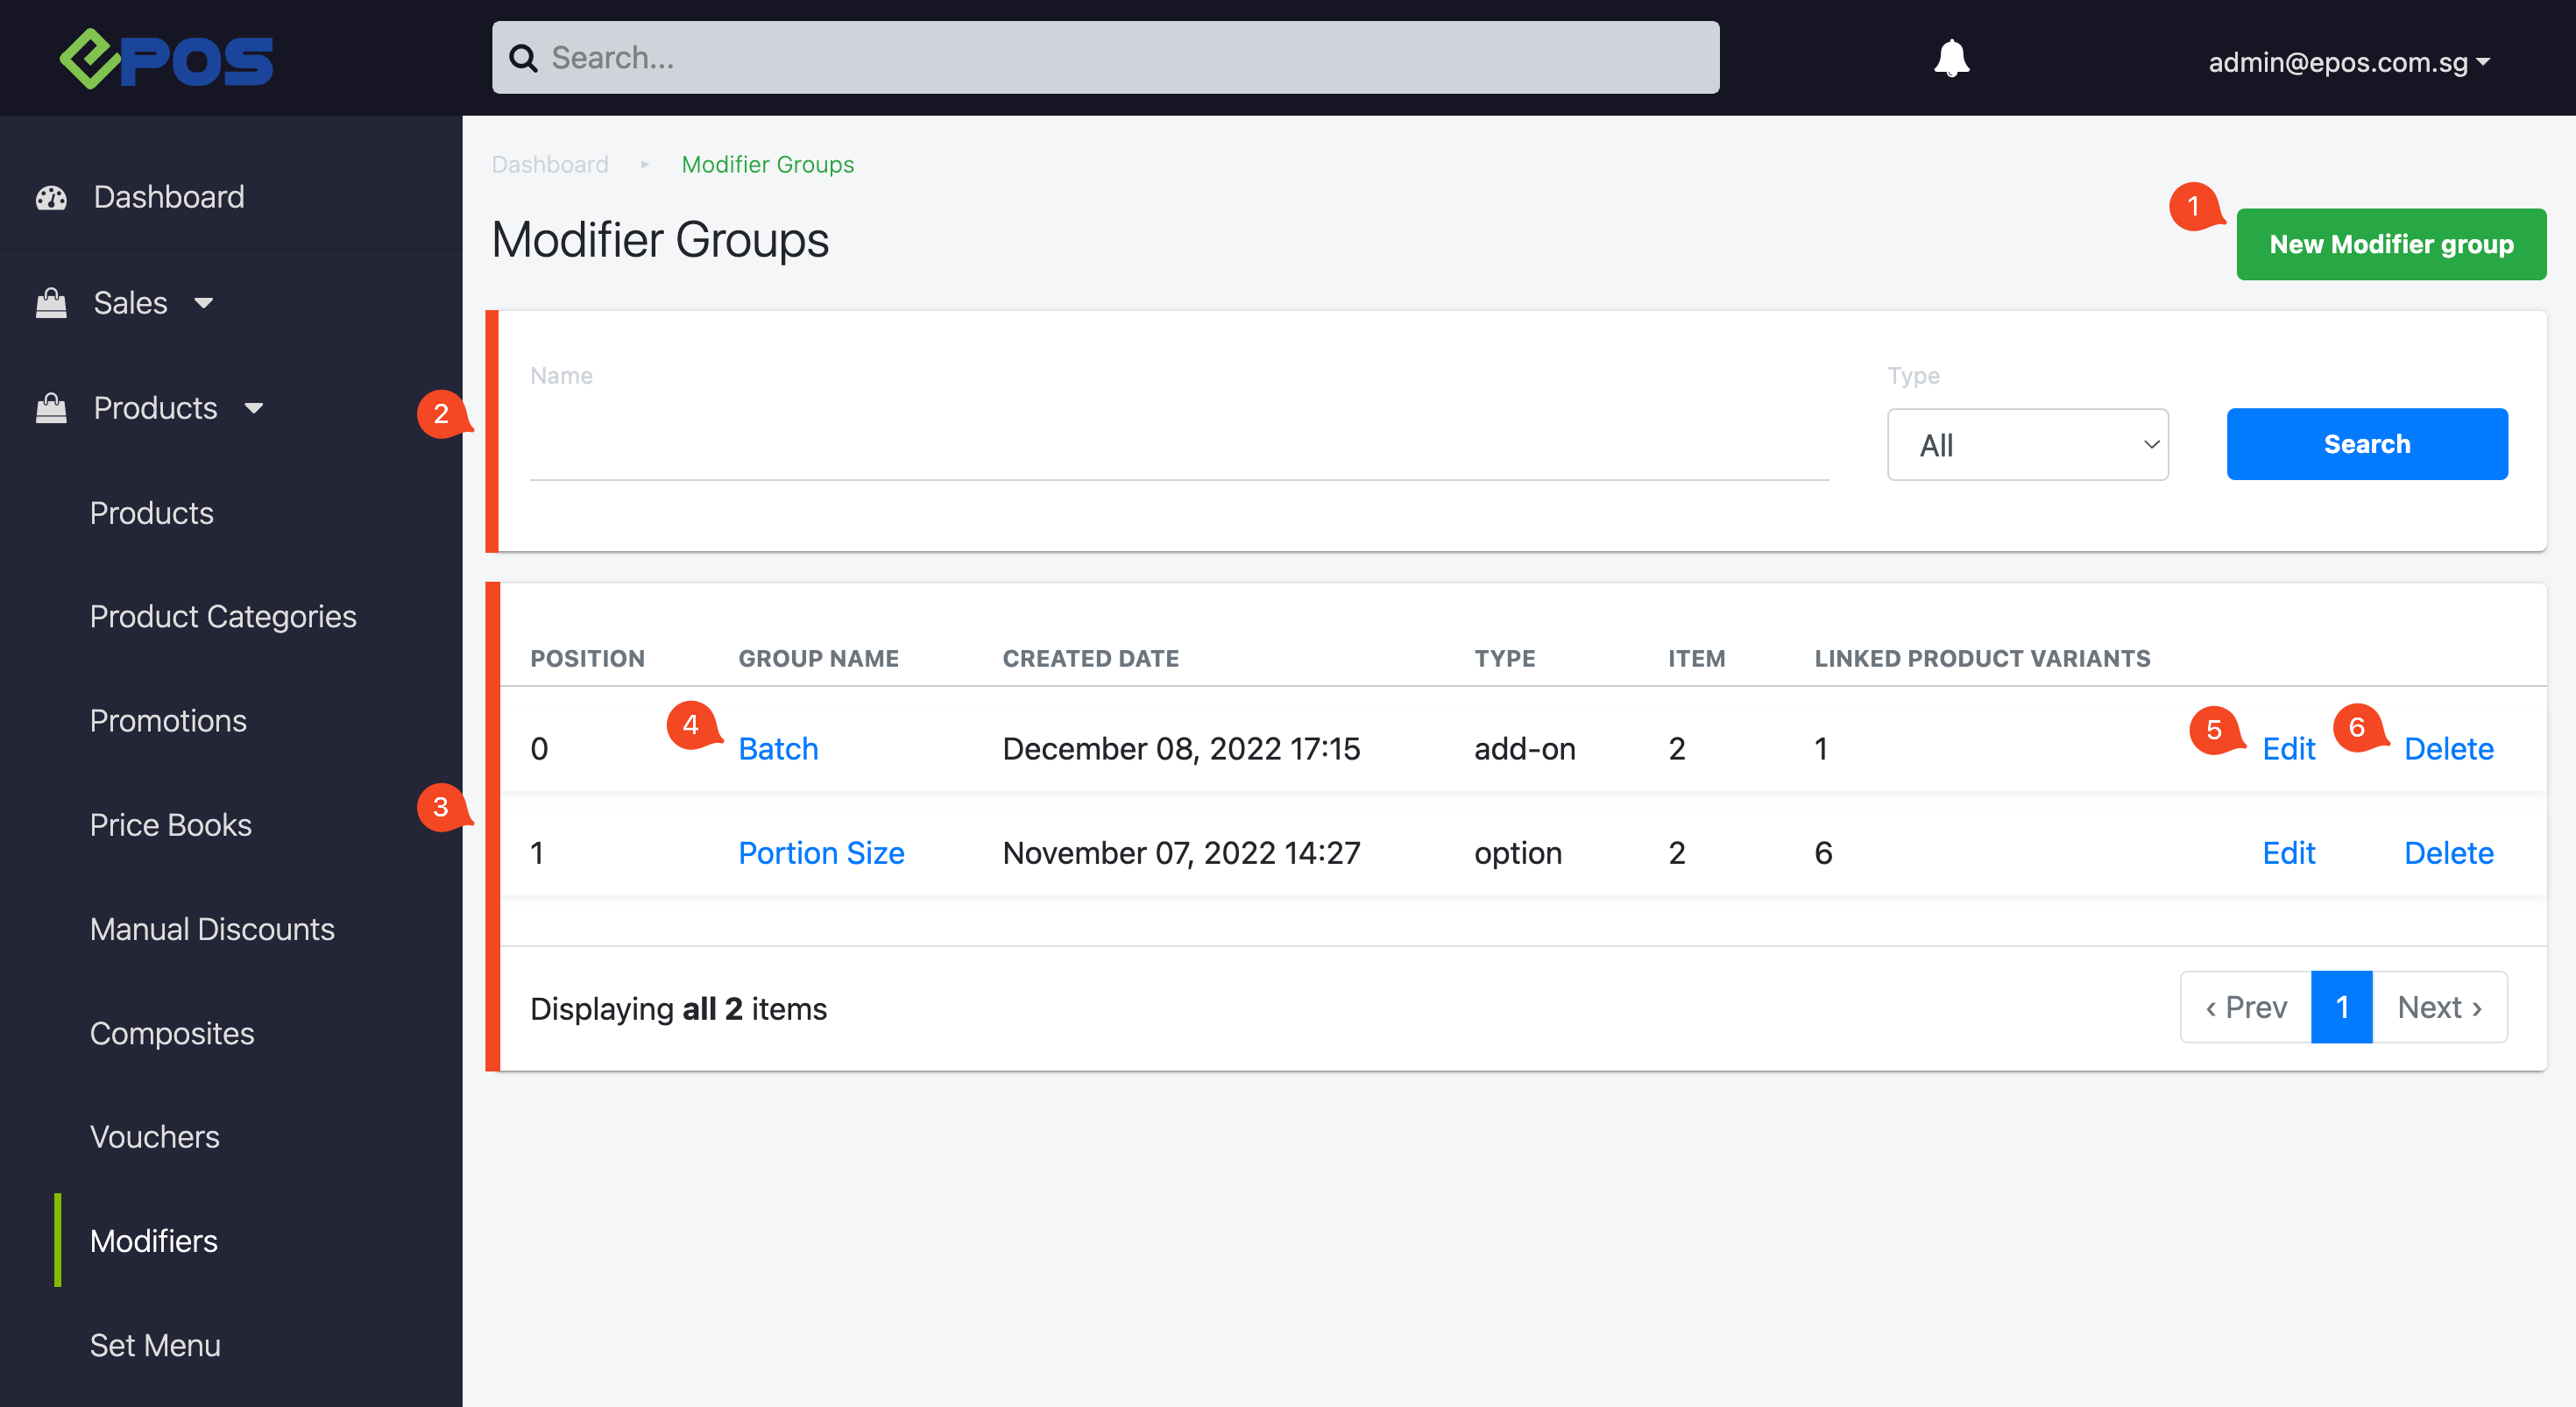
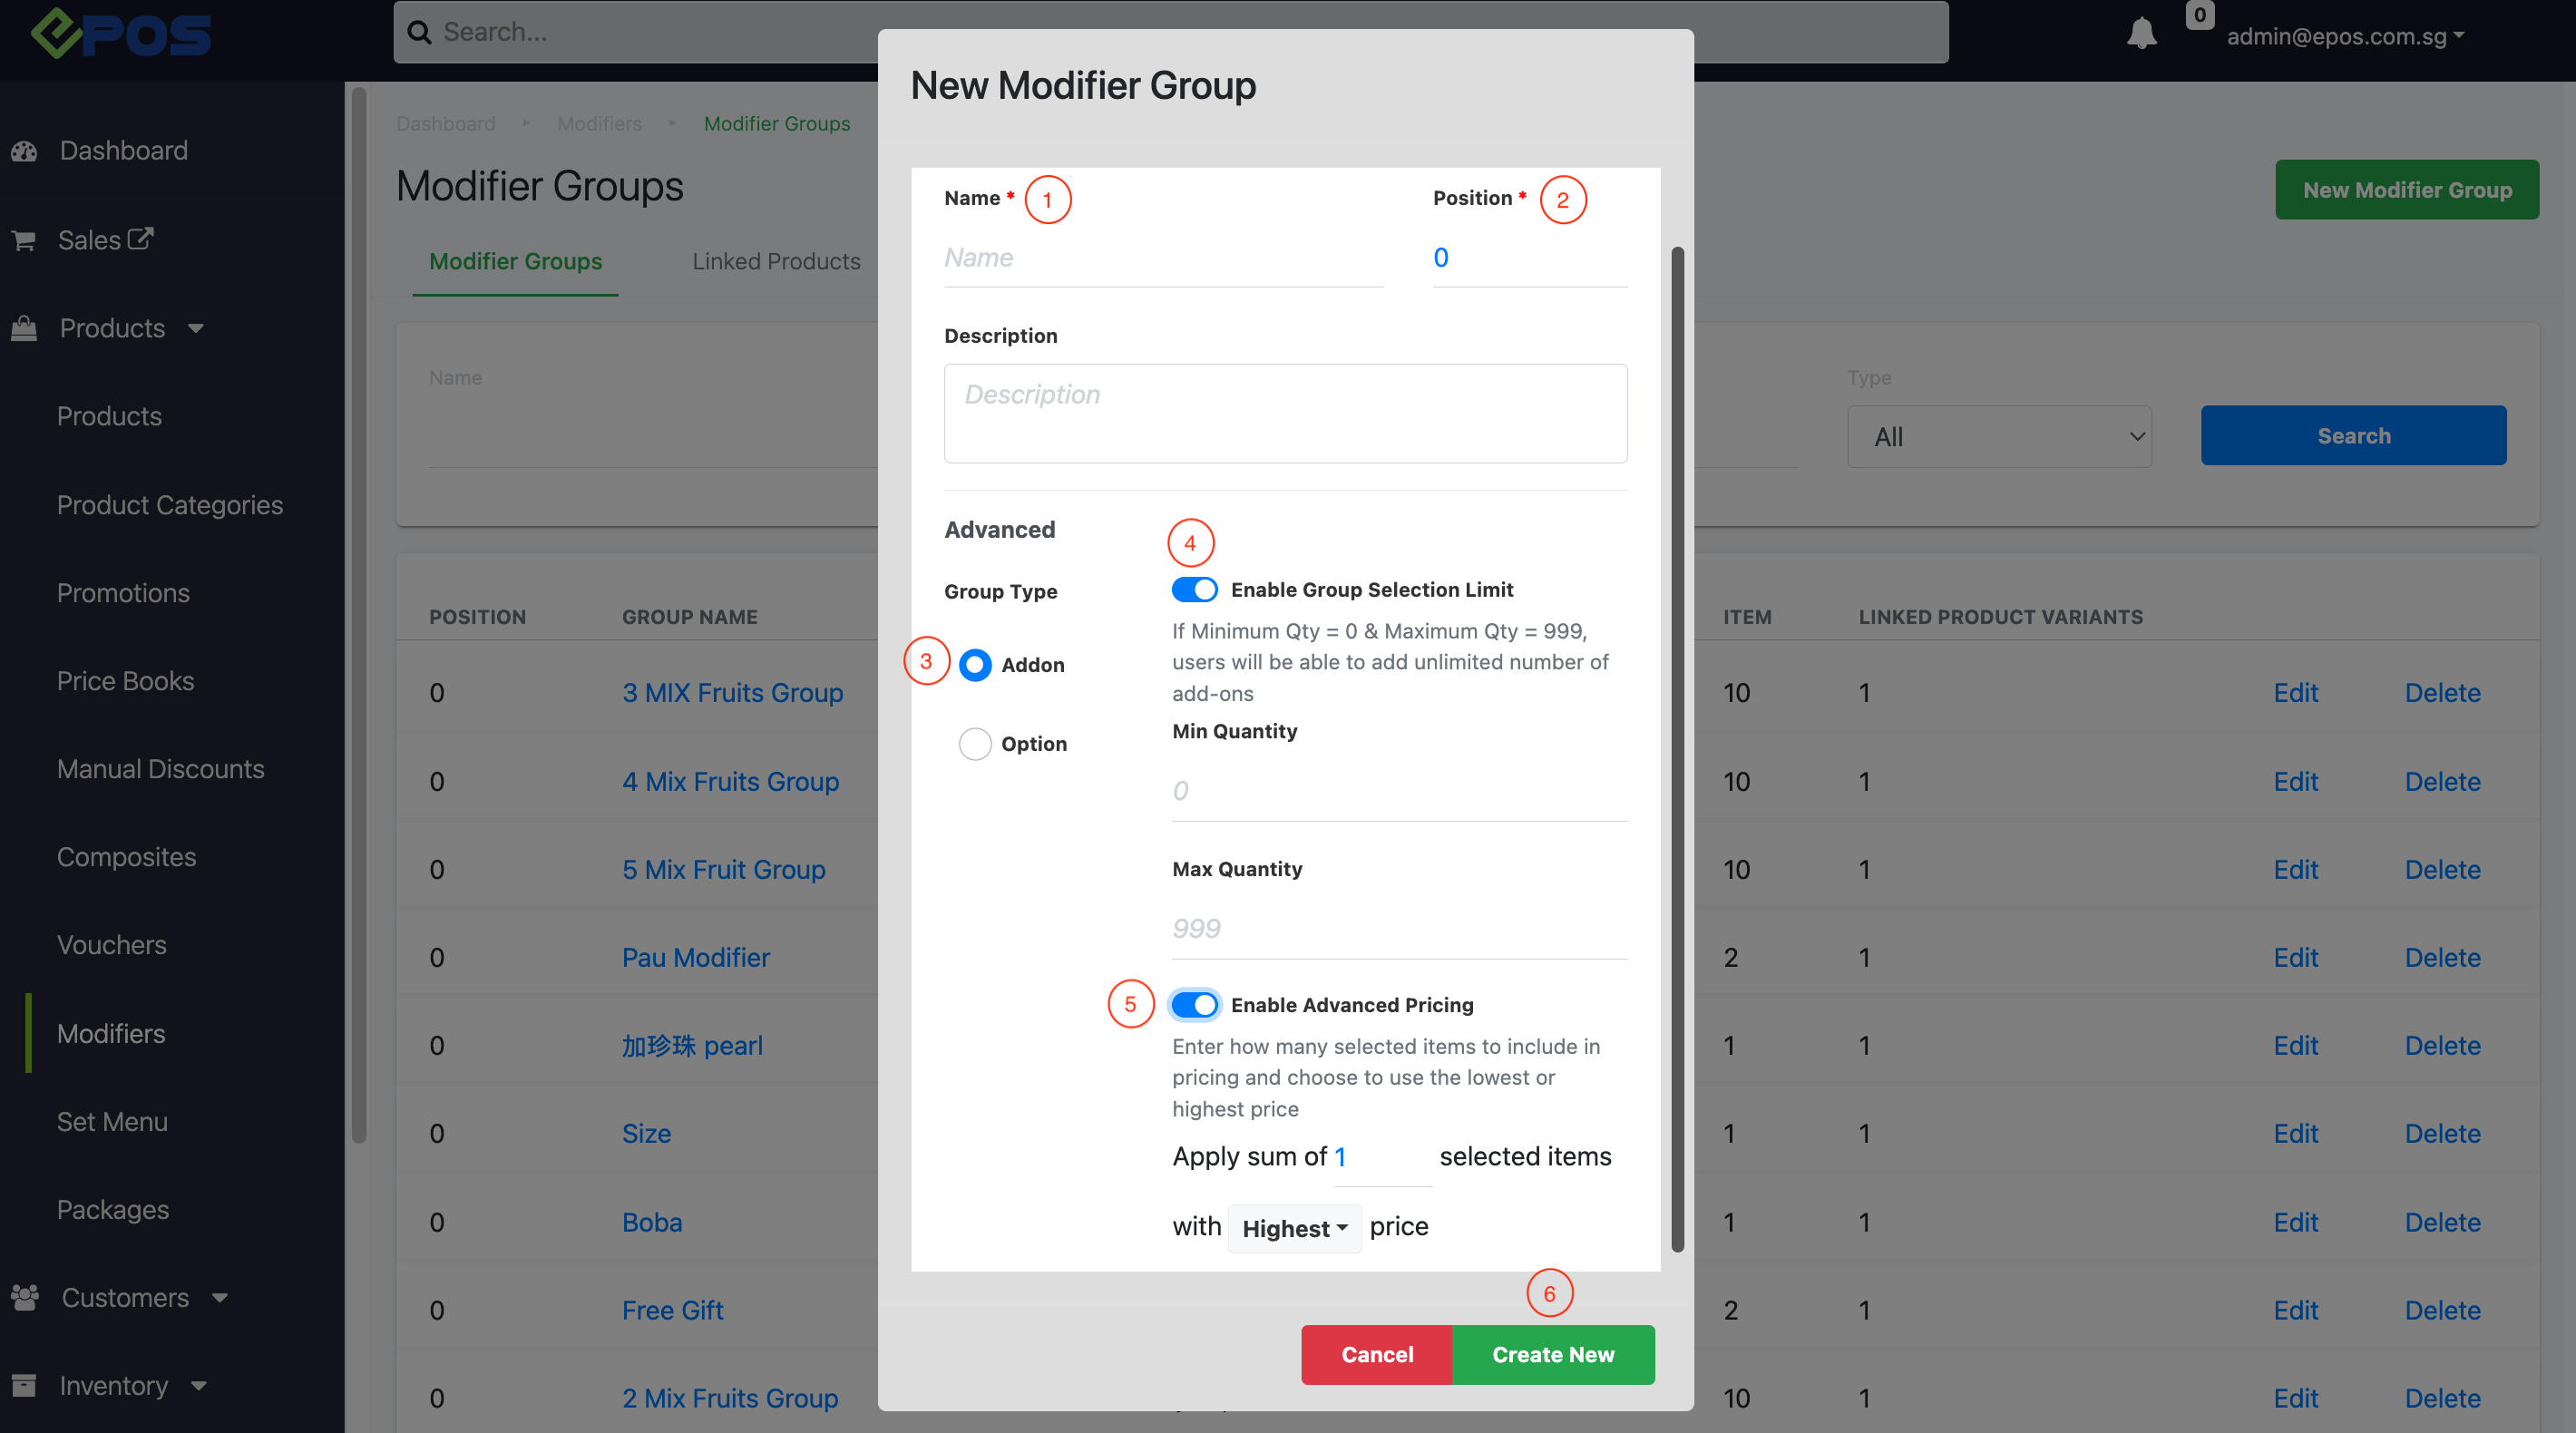
1. New Modifier Group
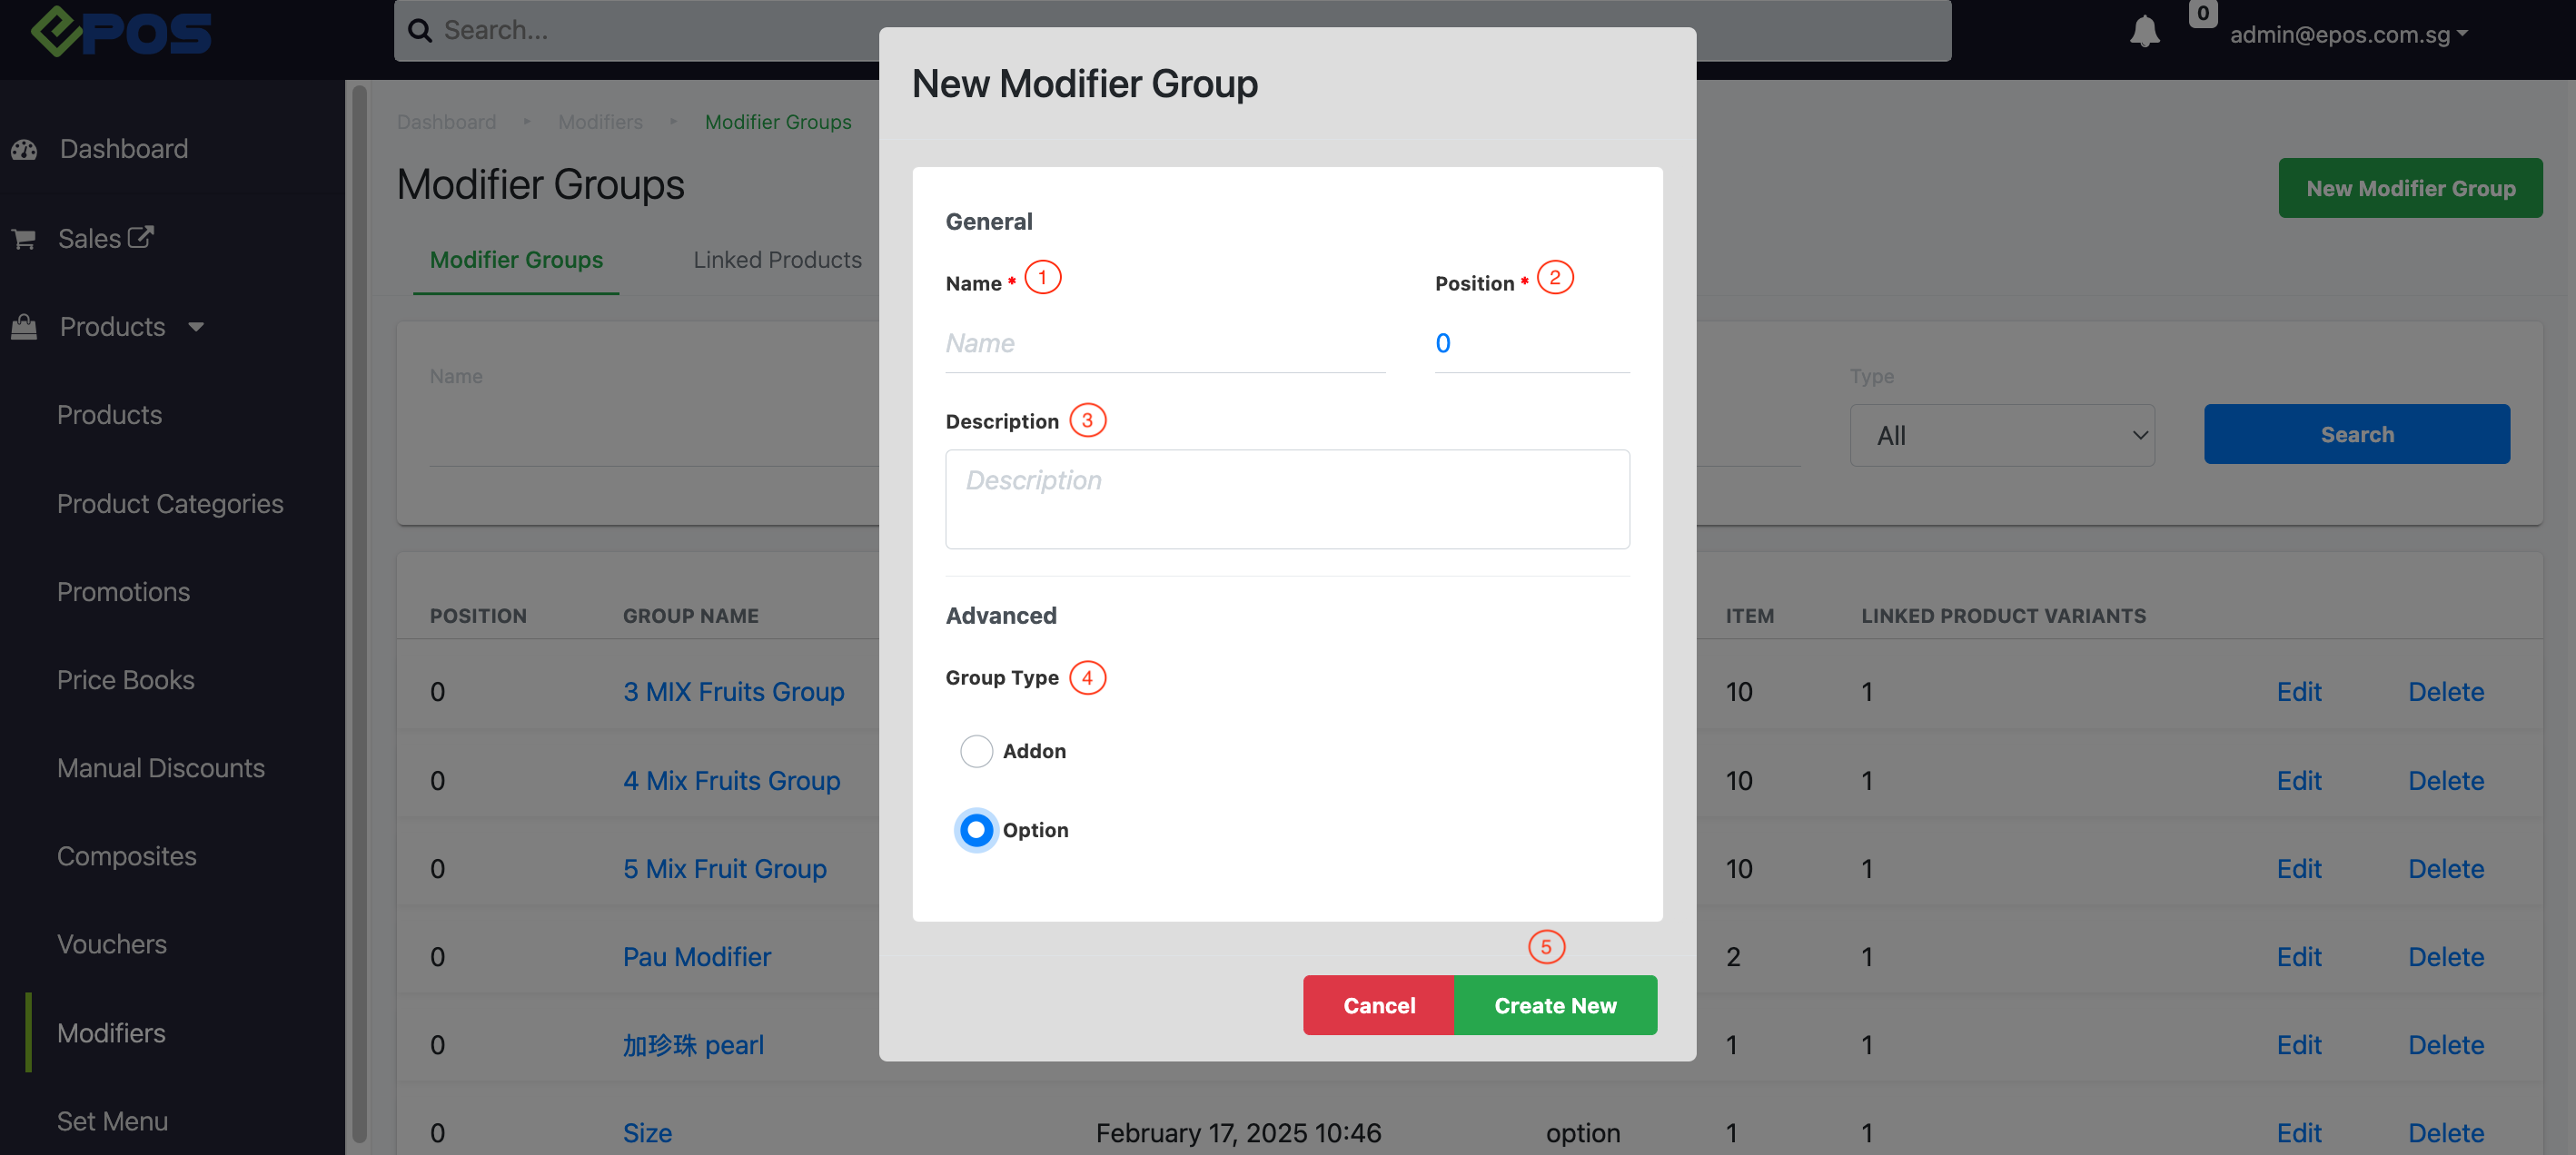
Enable users to create a new modifier group, select Modifier Group.

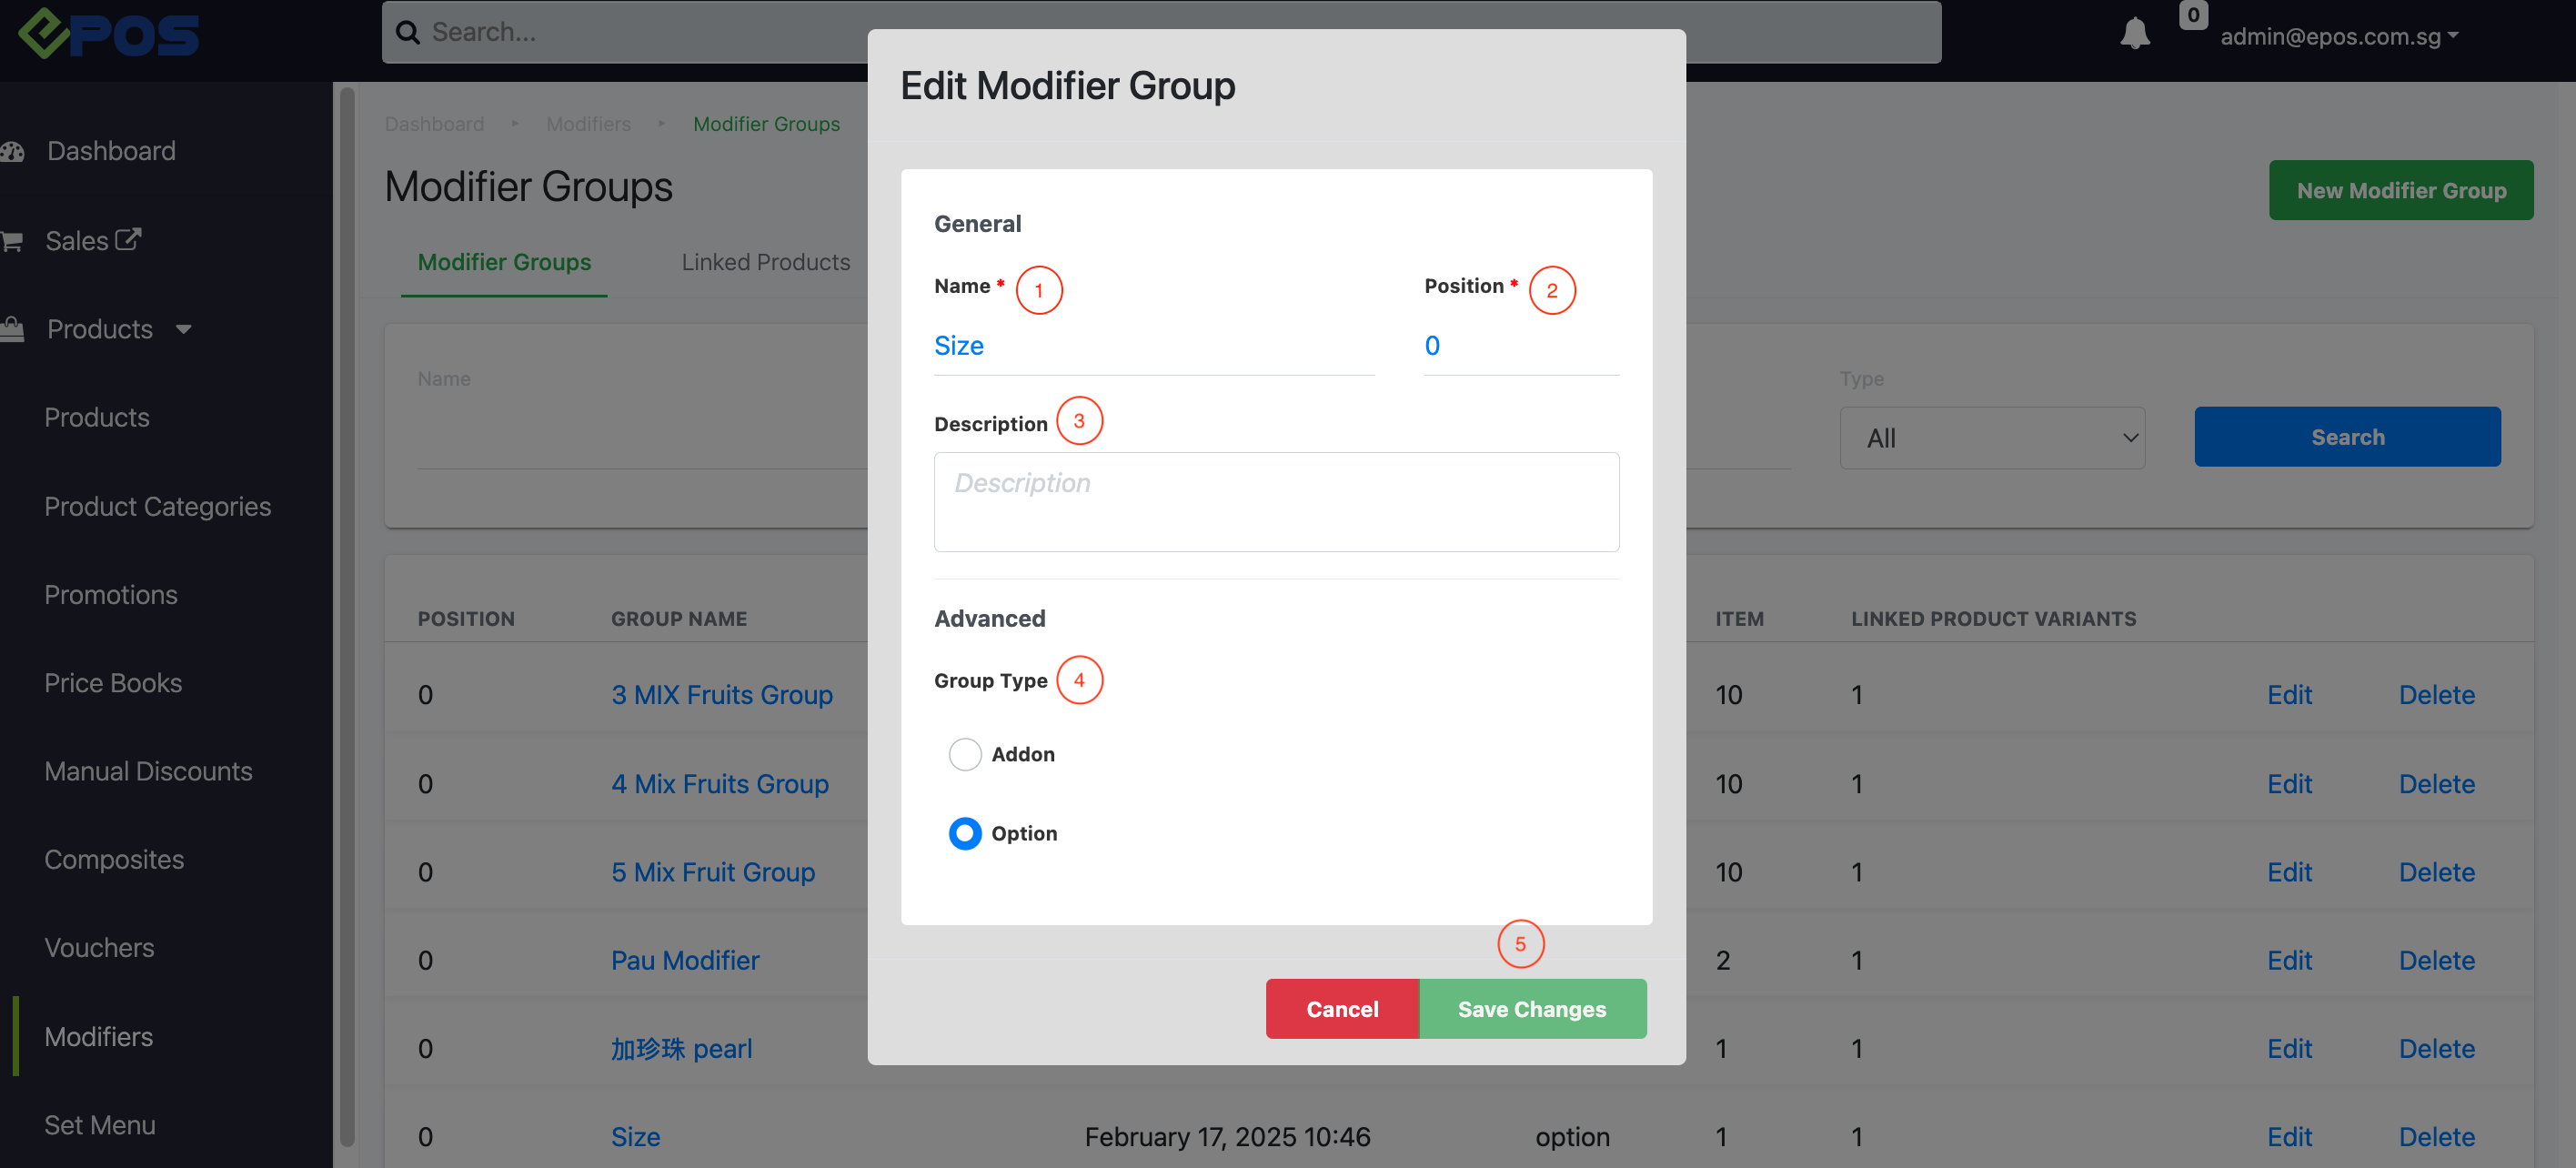
a. Enter the name of modifier group.
b. Assign sequence of modifier group. (0 being on top of the list)
c. Enter description of modifier group. (optional)
d. Select modifier type.
-
-
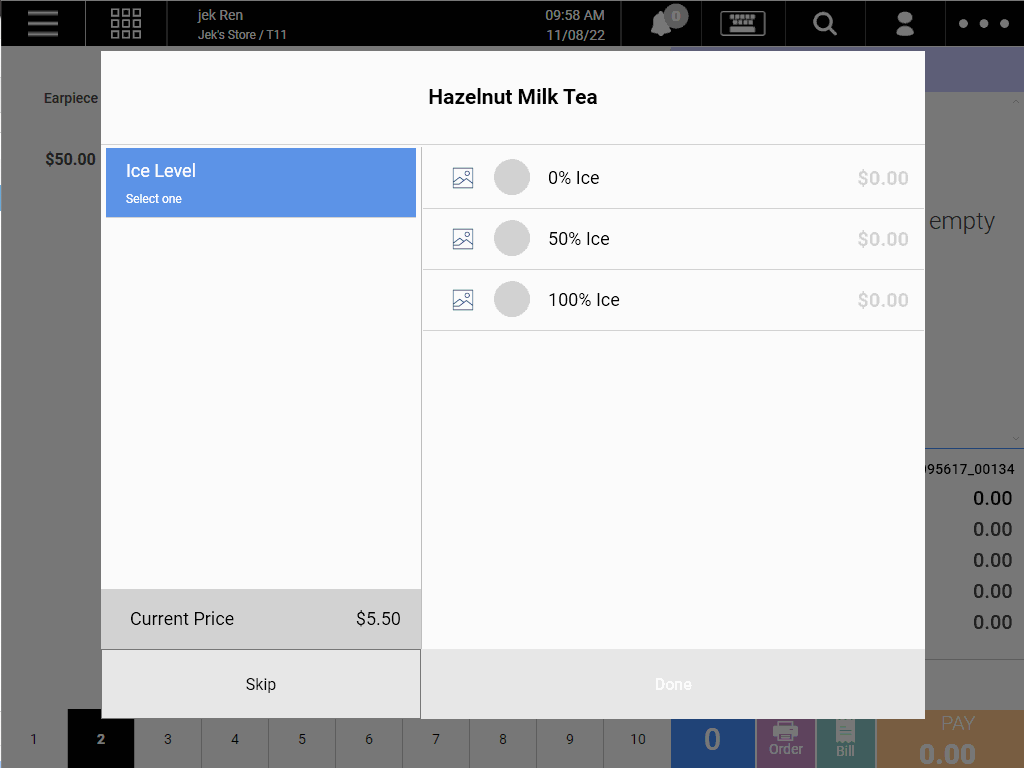
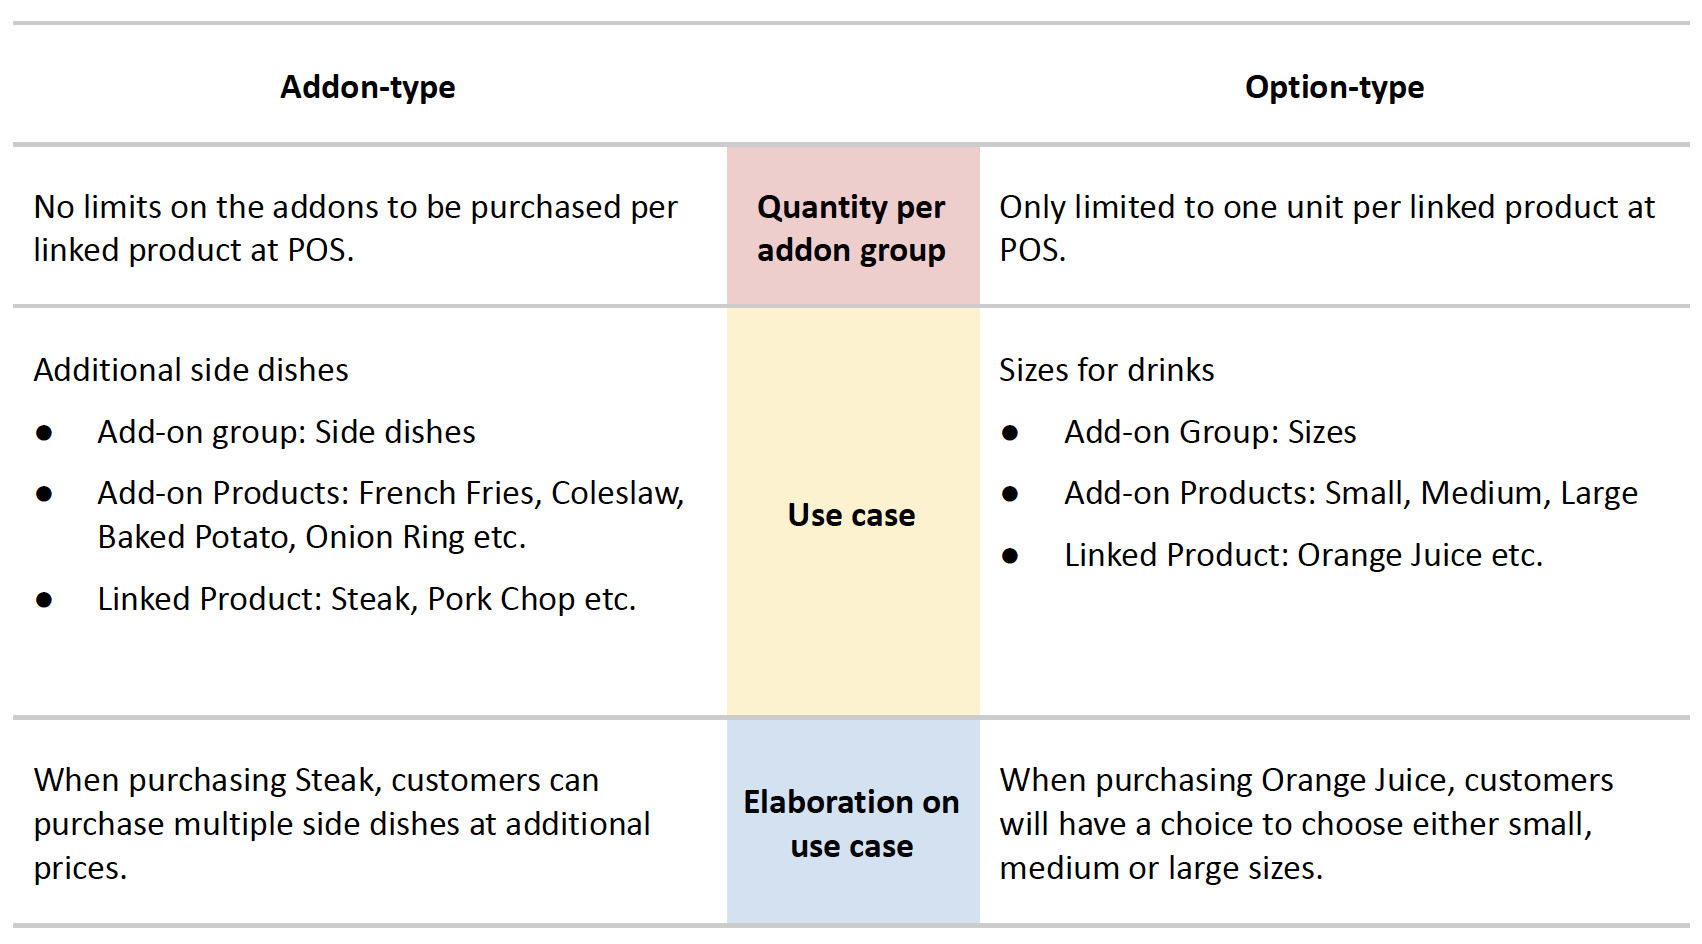
- Add-on: Does not limit customers to quantity and choices from a range of add-on products at the POS System.
- Option: To limit customers to choose only a single option from a range of add-on products at the POS System.
-
e. Click on Create New once done.
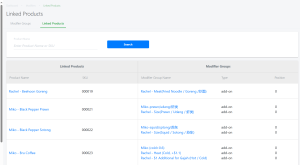
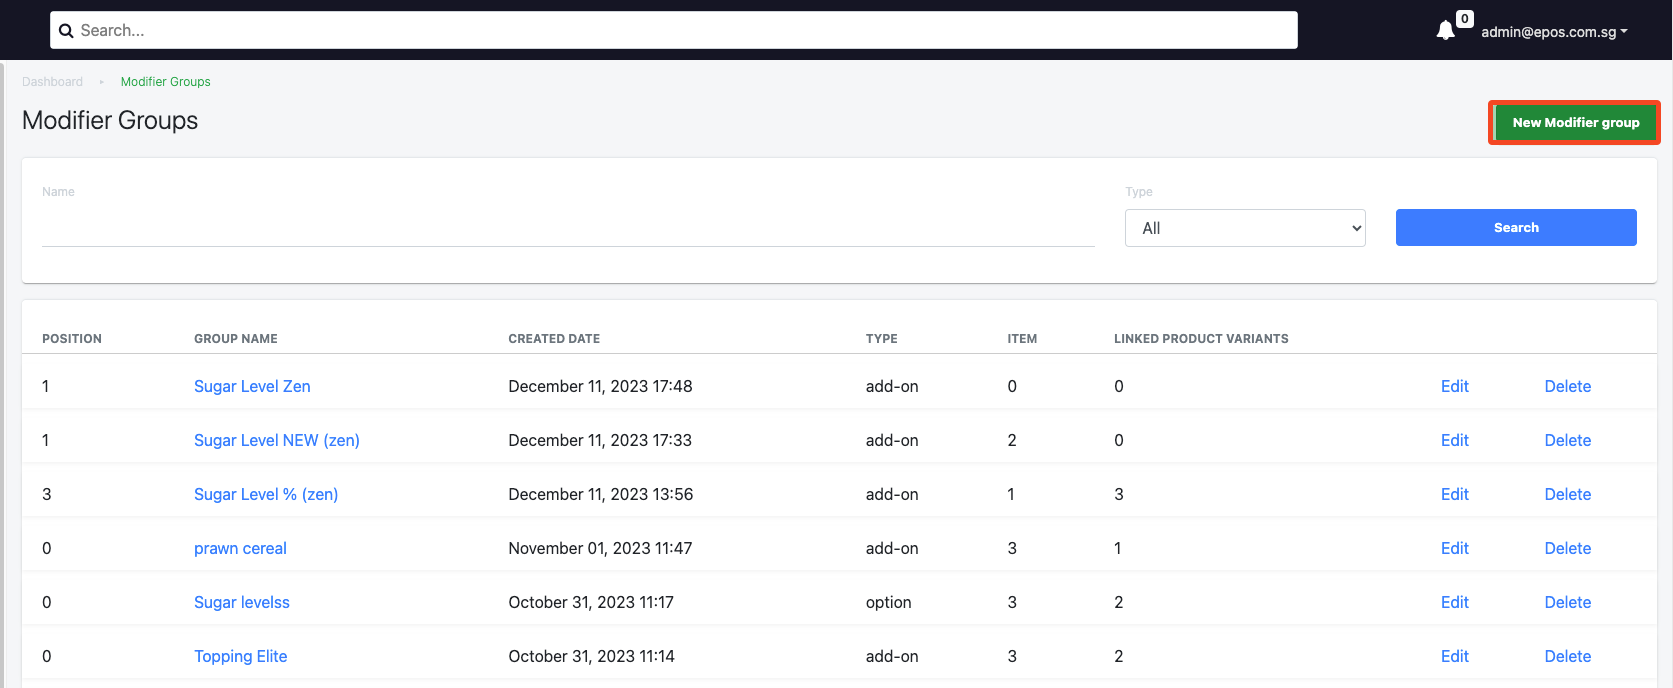
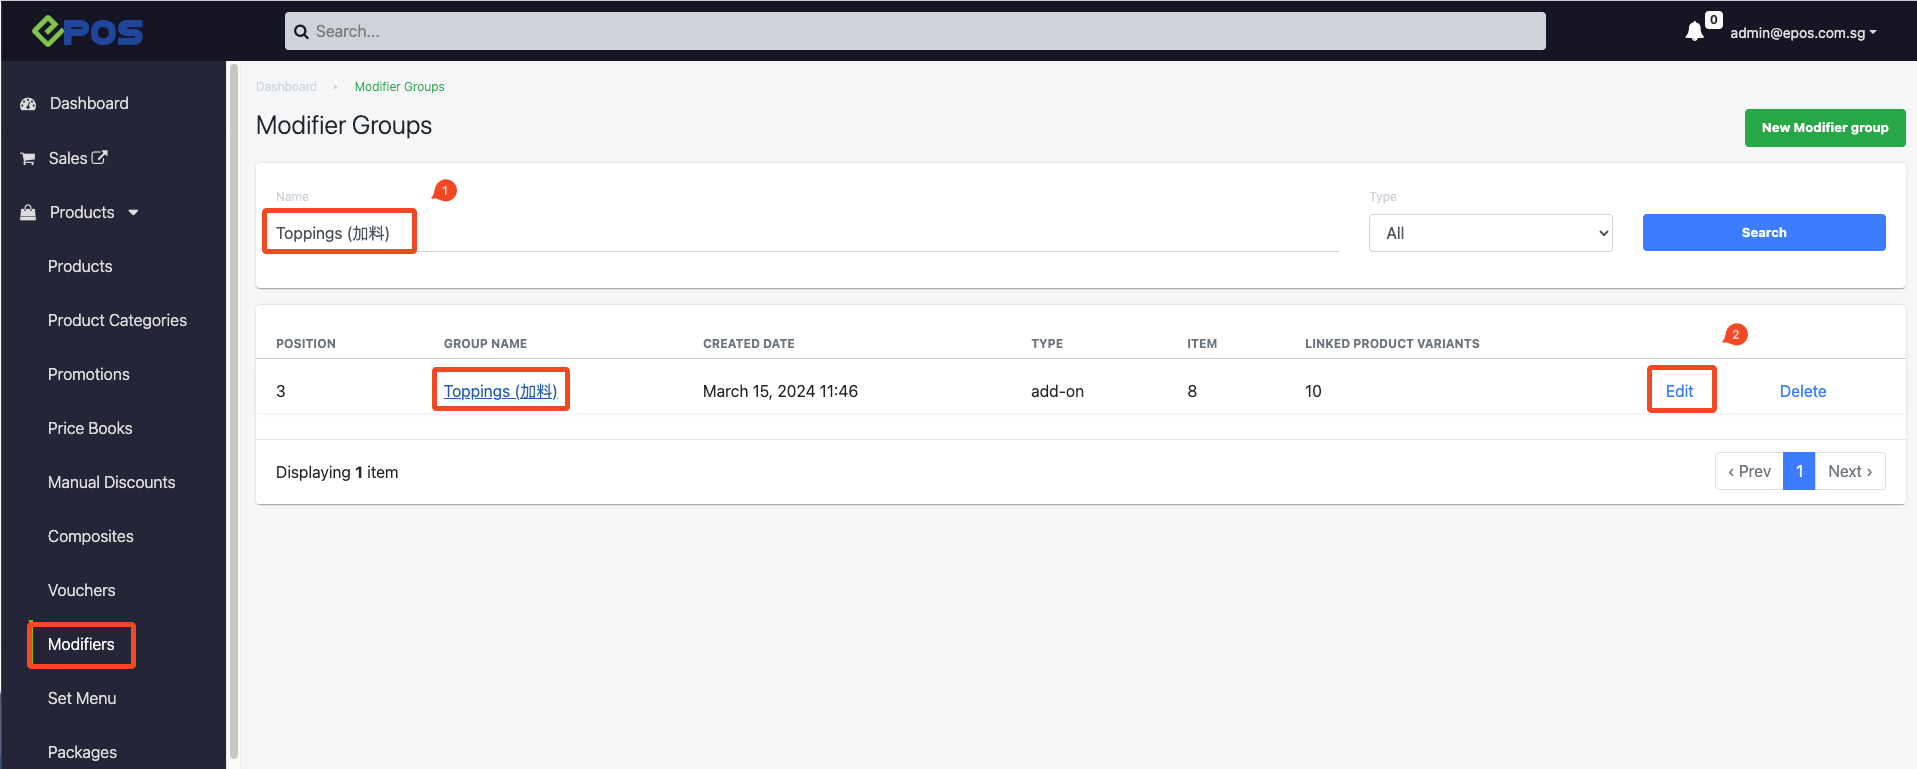
2. Search & Filter
Allows user to search created Modifier Group based on Group Name and Type of Groups filtered.
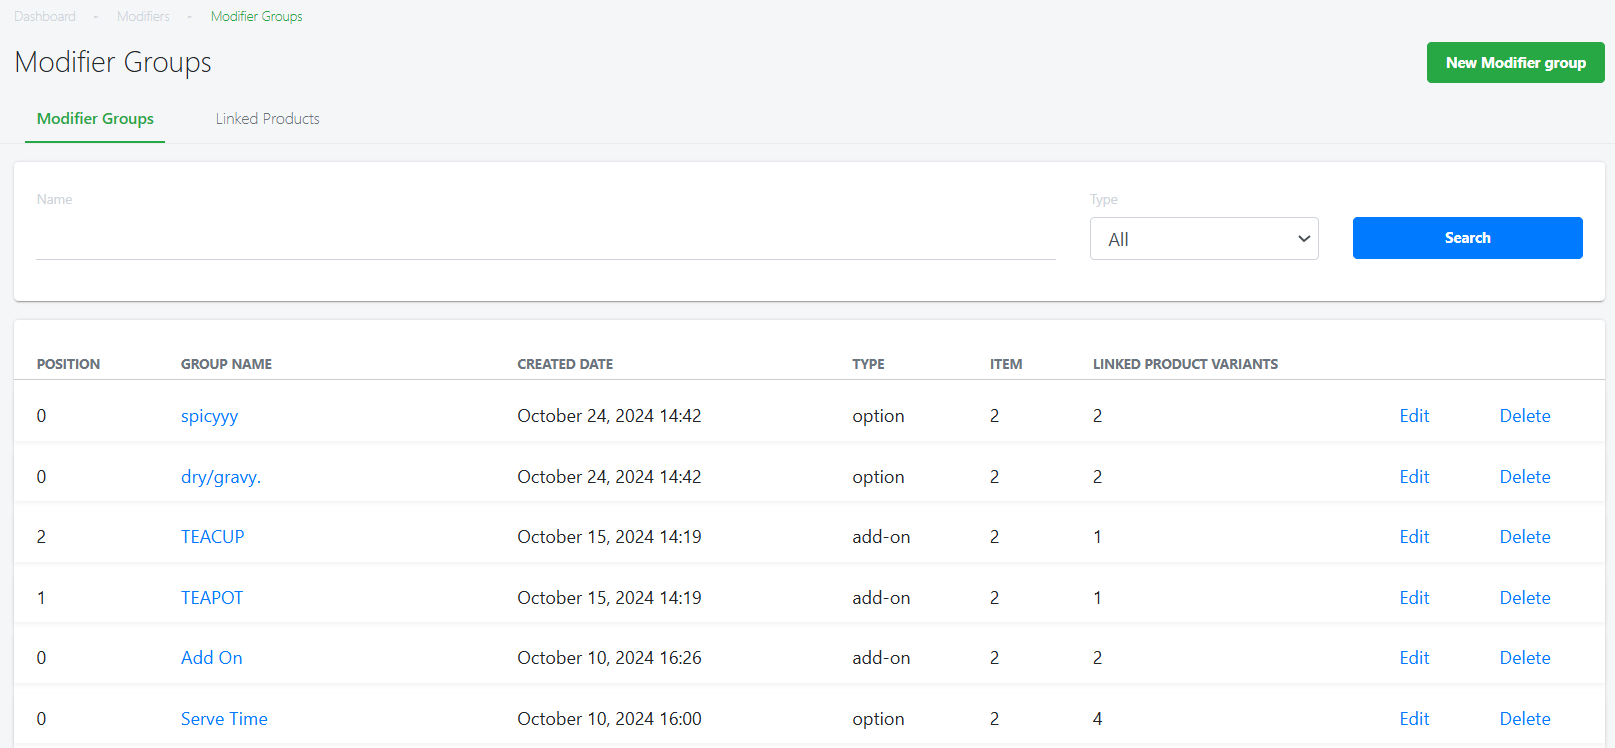
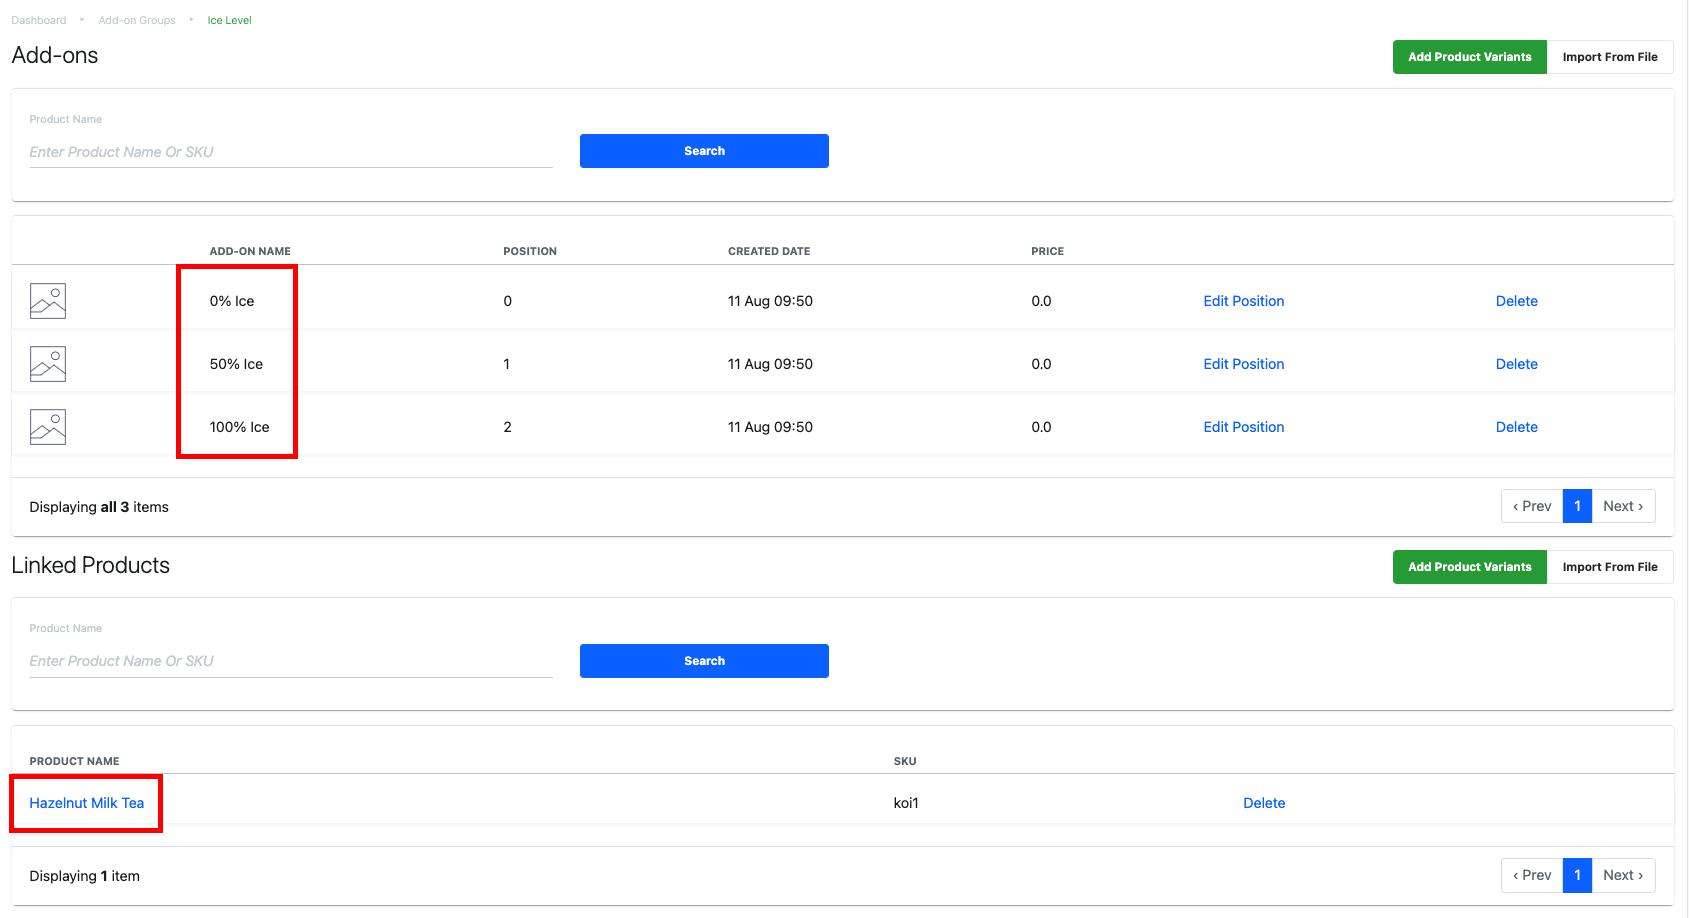
3. Modifier Groups Details
Shows user information relating to a particular voucher series.
-
- Position: Sequence of Modifier Groups
- Group Name: Name of Modifier Groups
- Created Date: Date of Modifier Groups created
- Type: Add-on / Option
- Item: Modifier products linked to a particular Modifier Groups
- Linked Product Variants: Main Products which the Modifier Group is linked to.
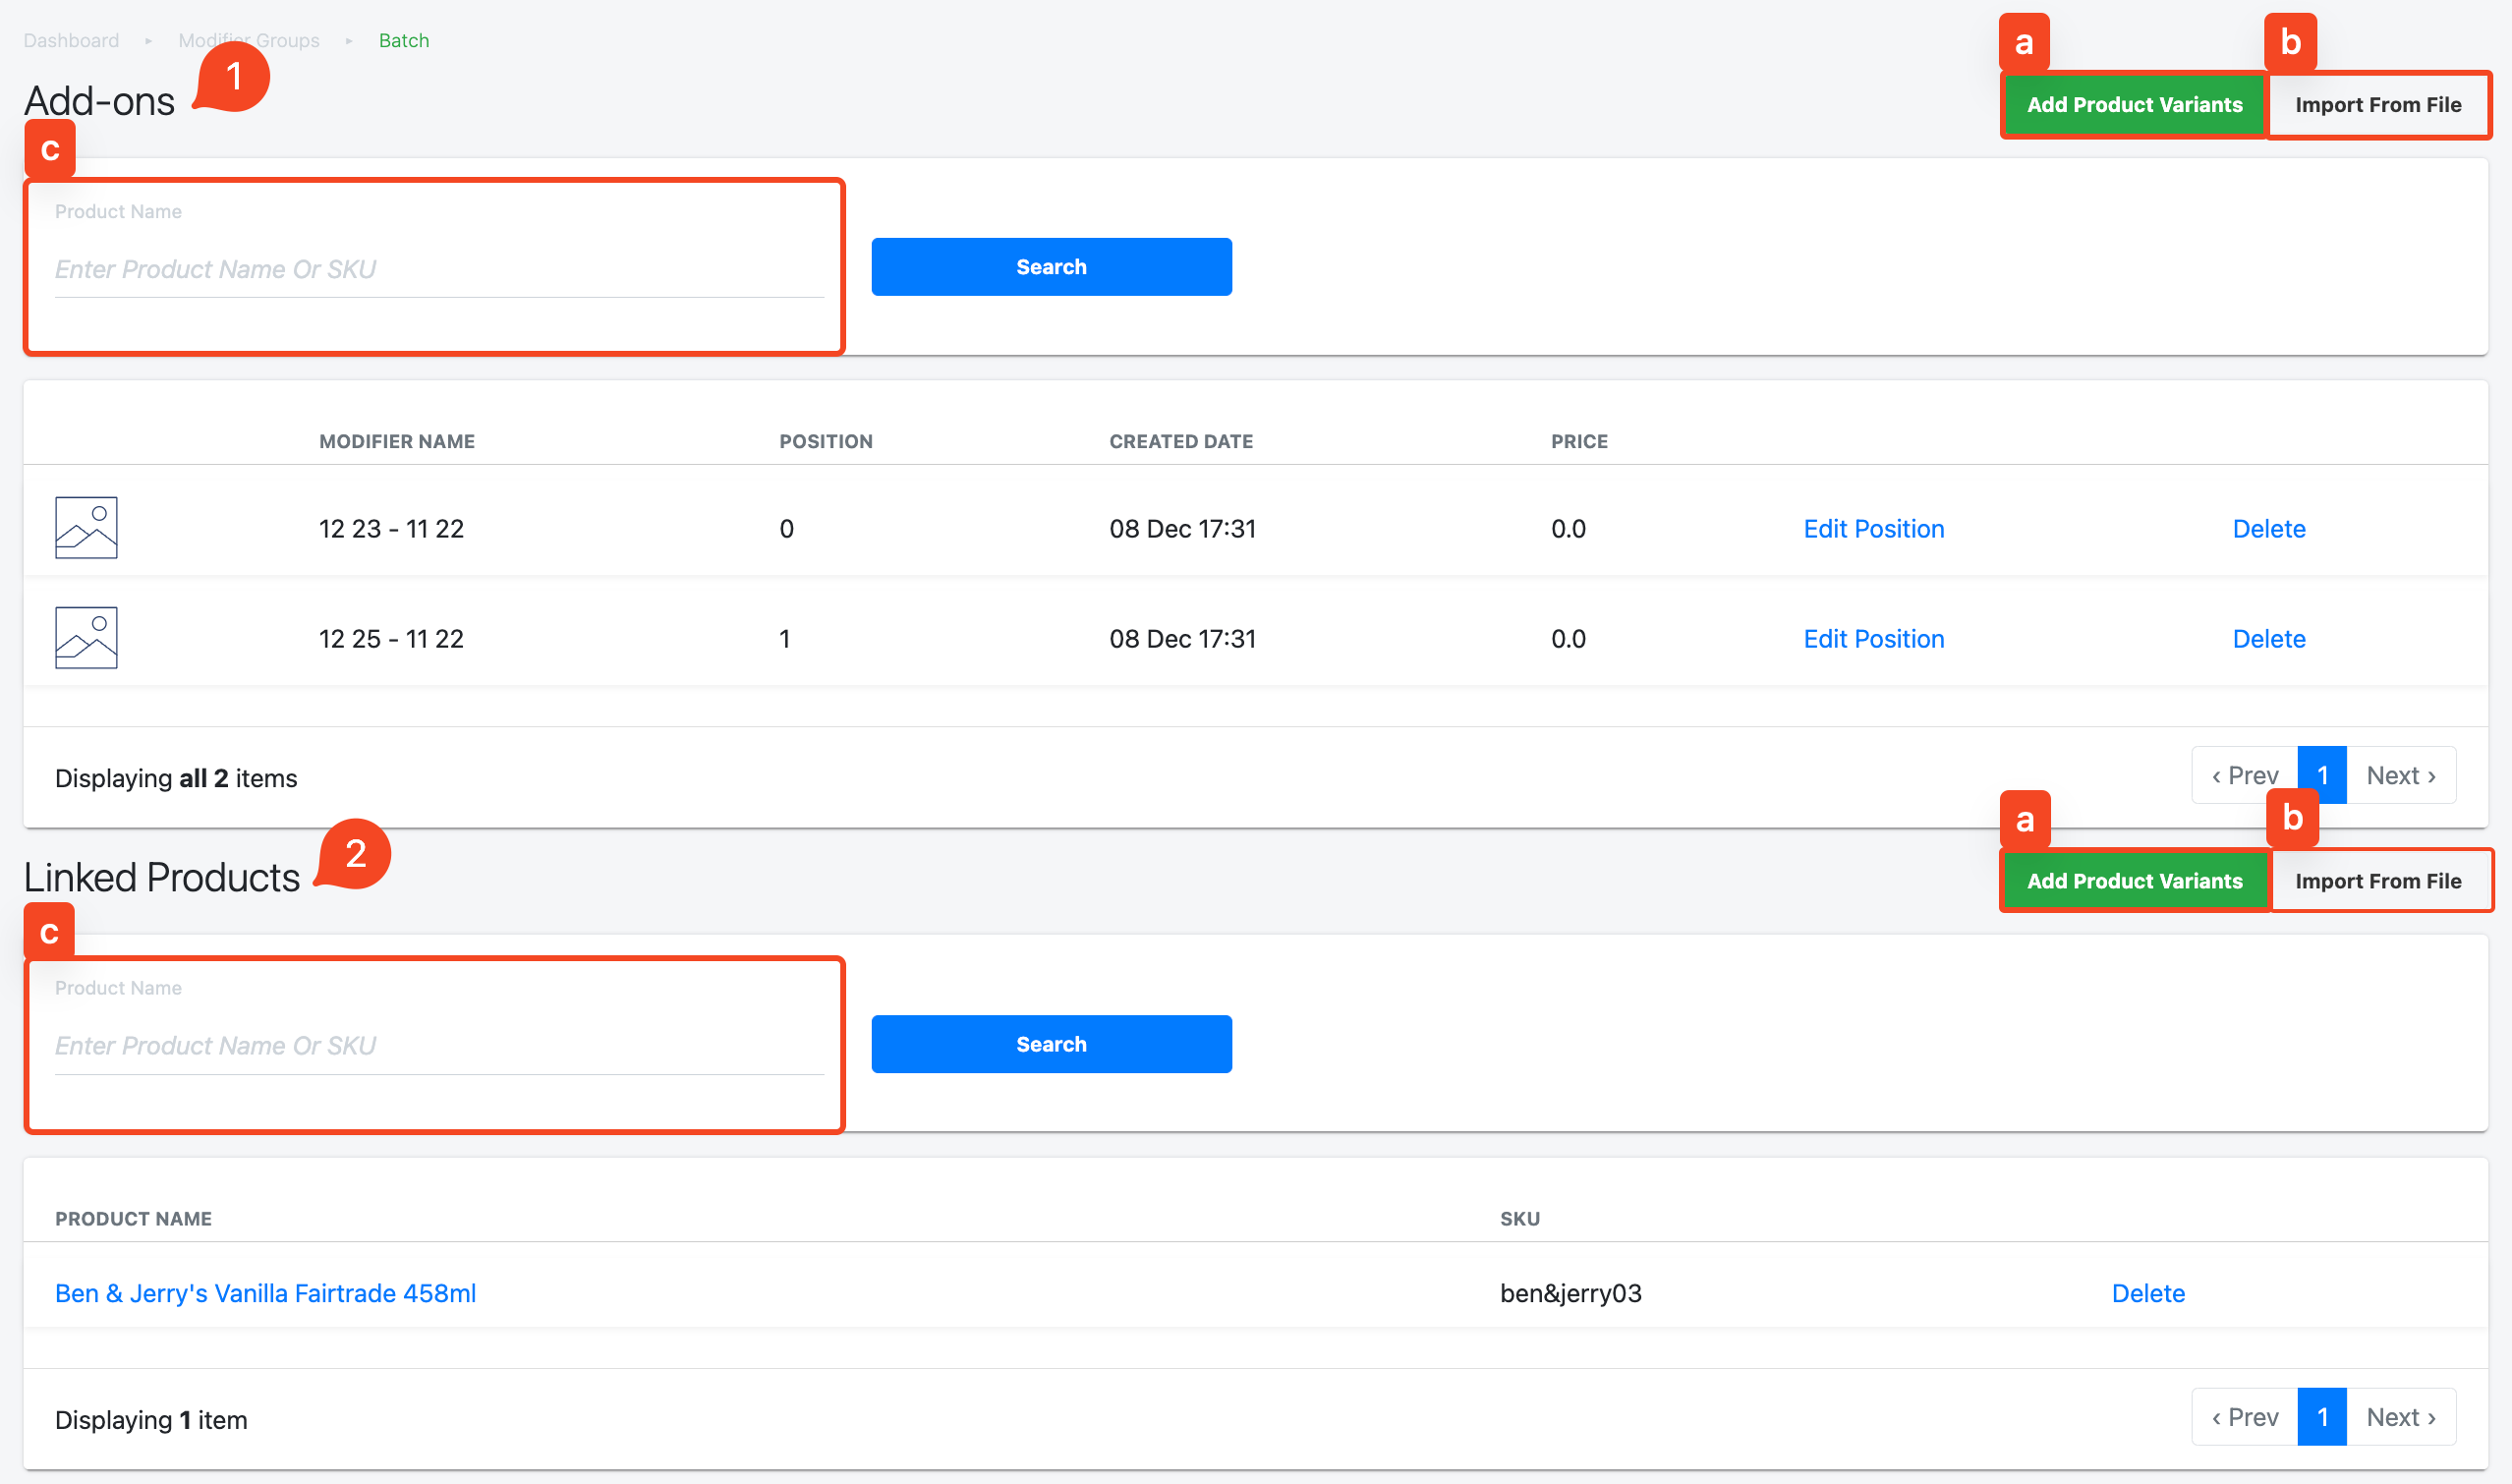
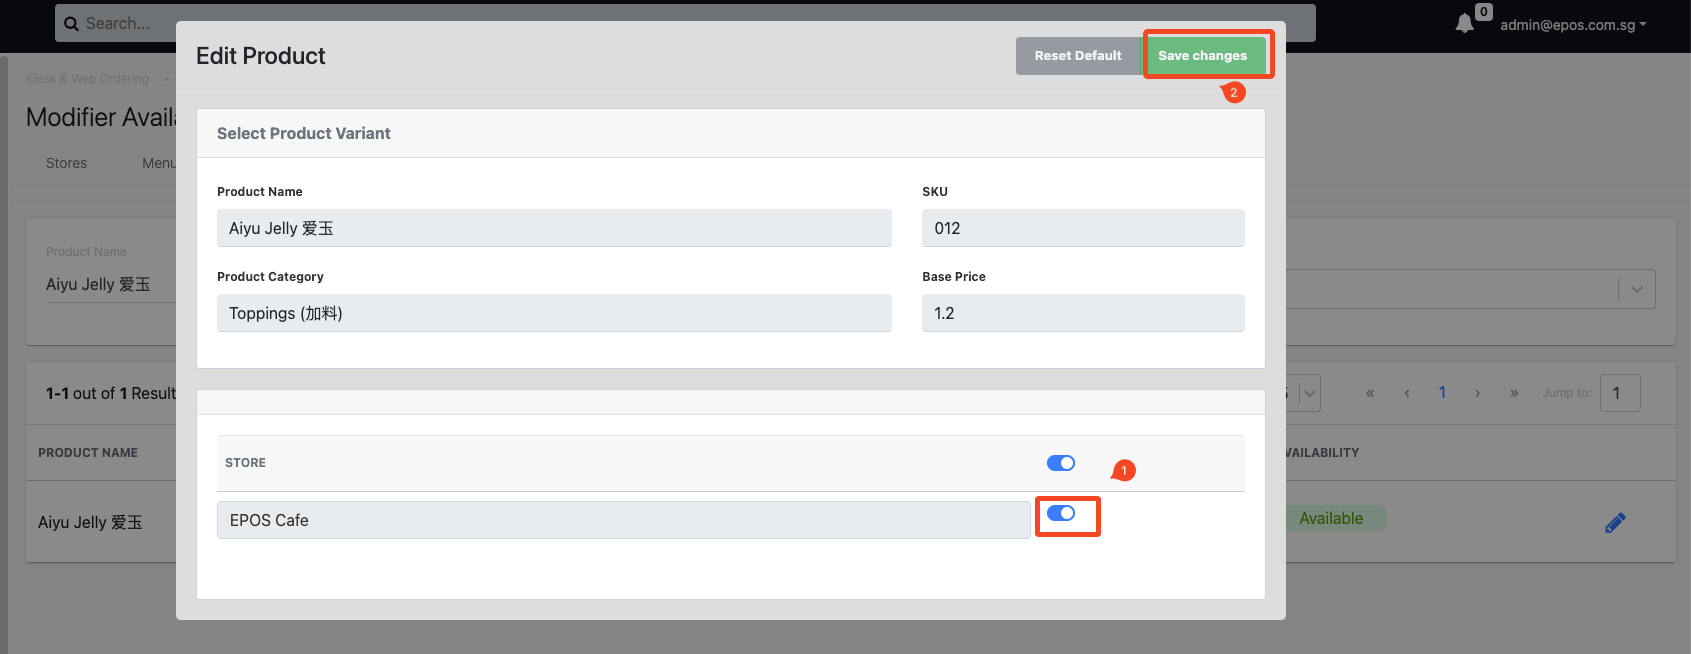
4. Modifier Group Configuration
Click on the name of the Modifier Group to be directed to the Configuration page of a Group.
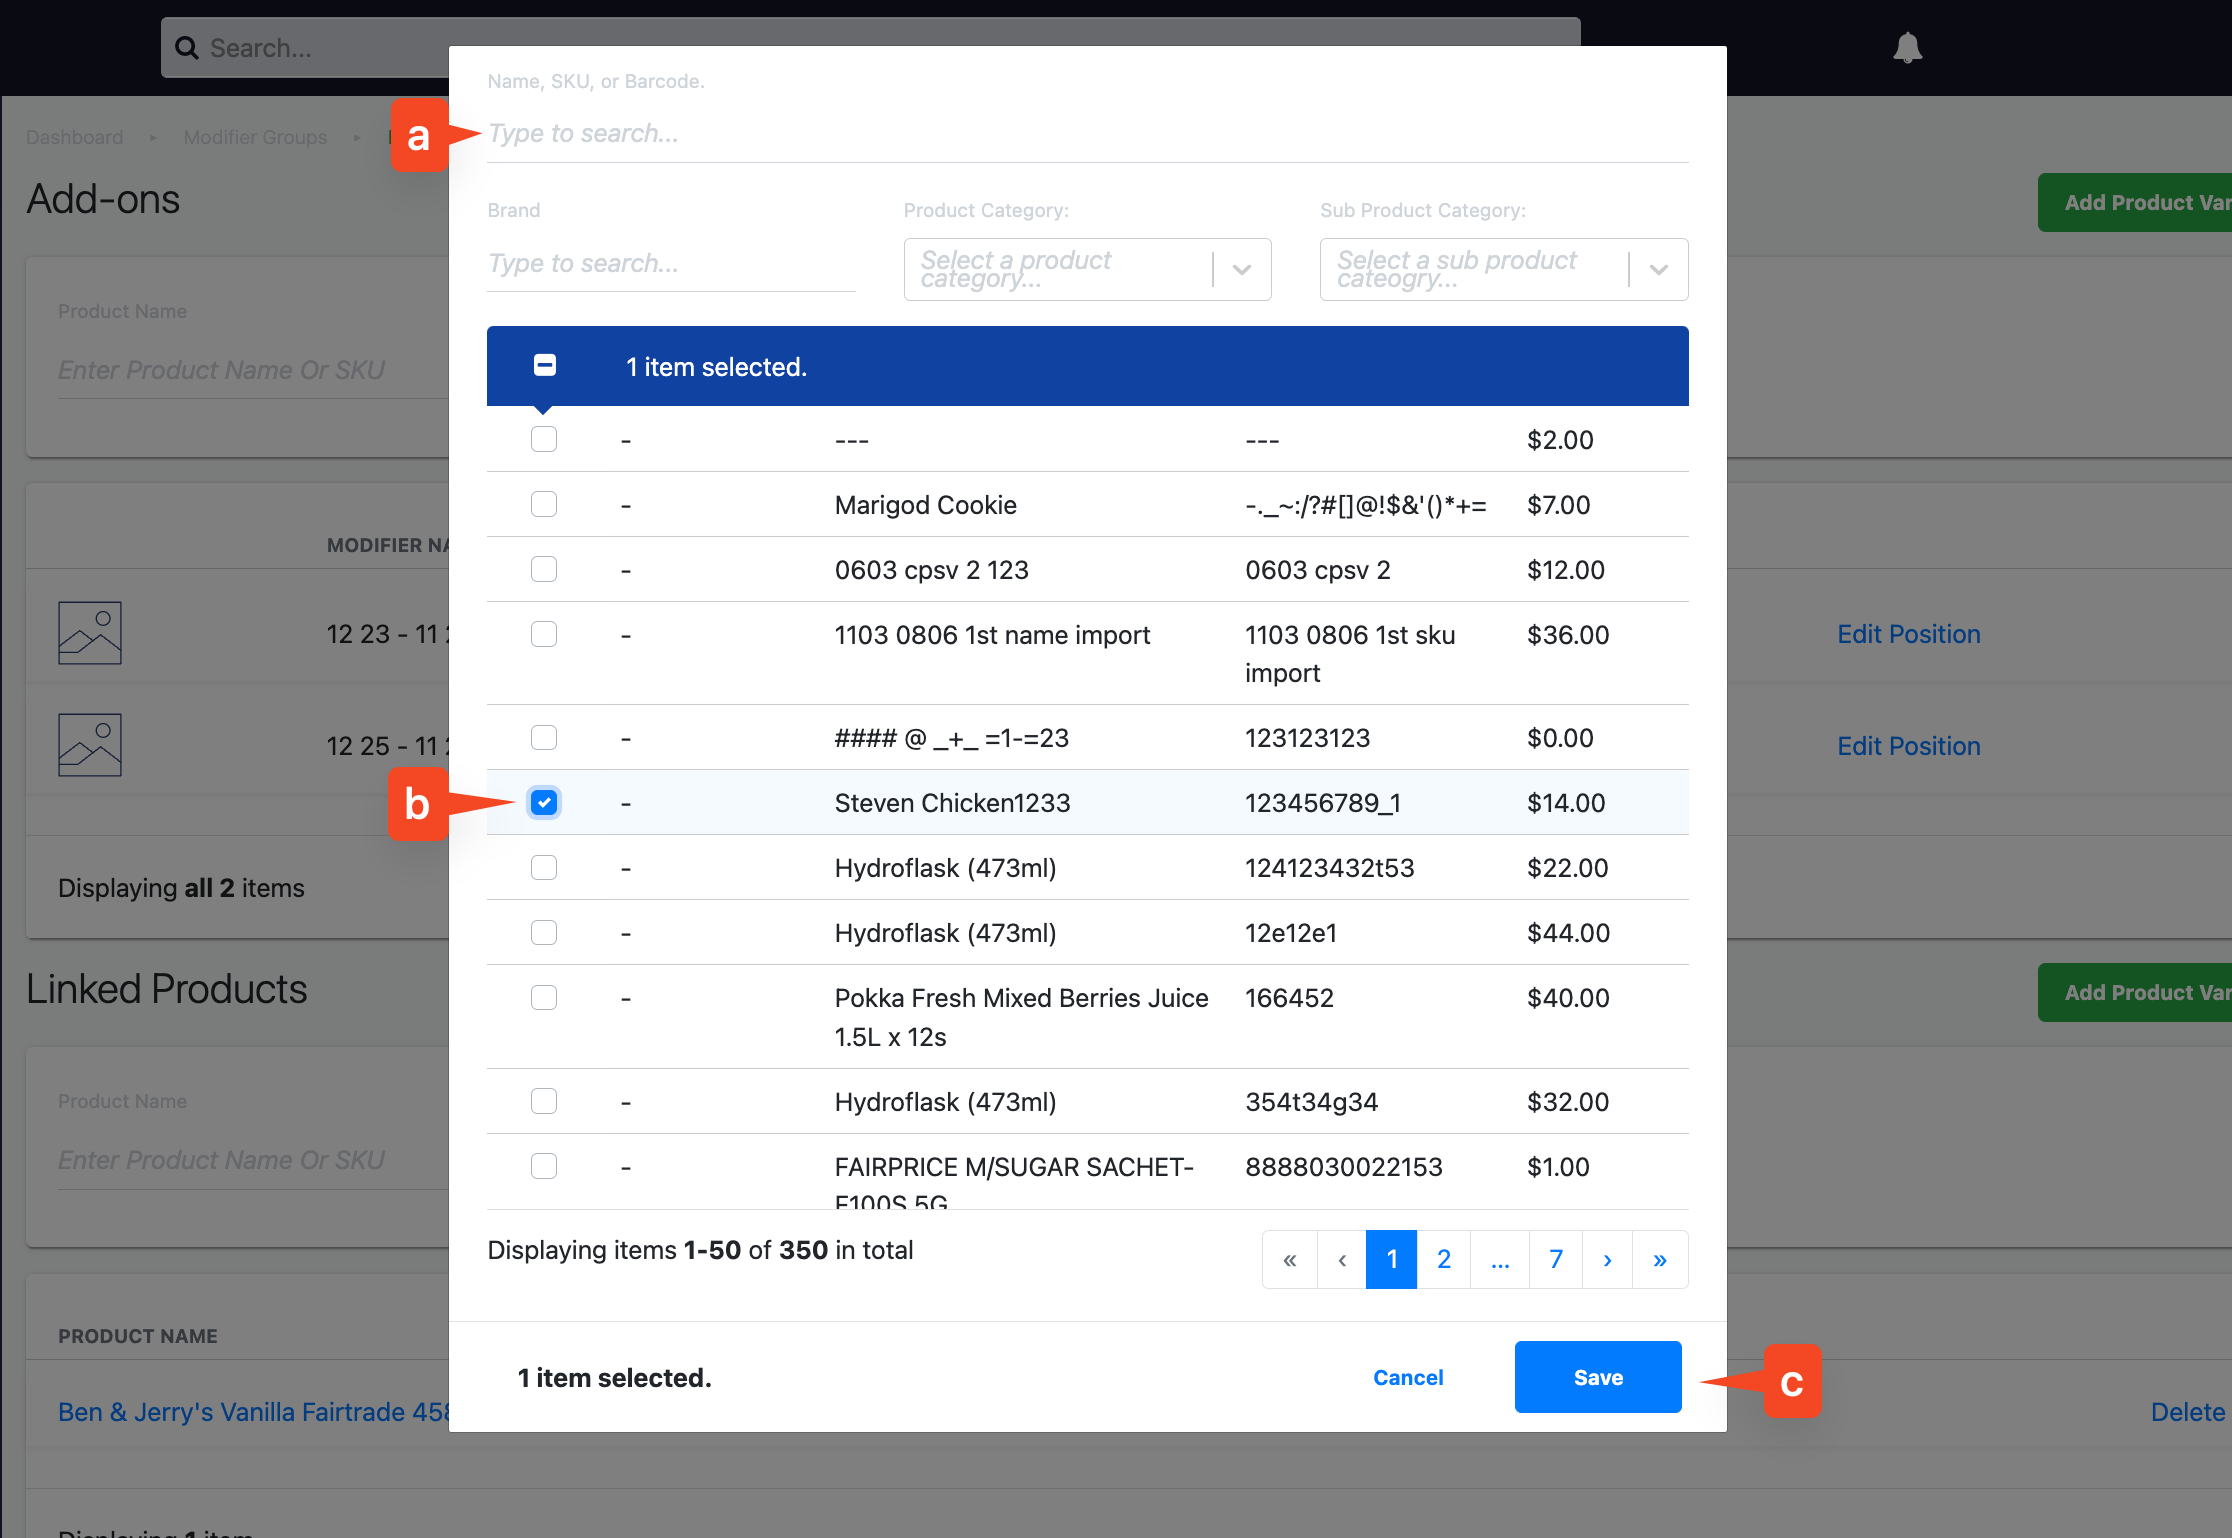
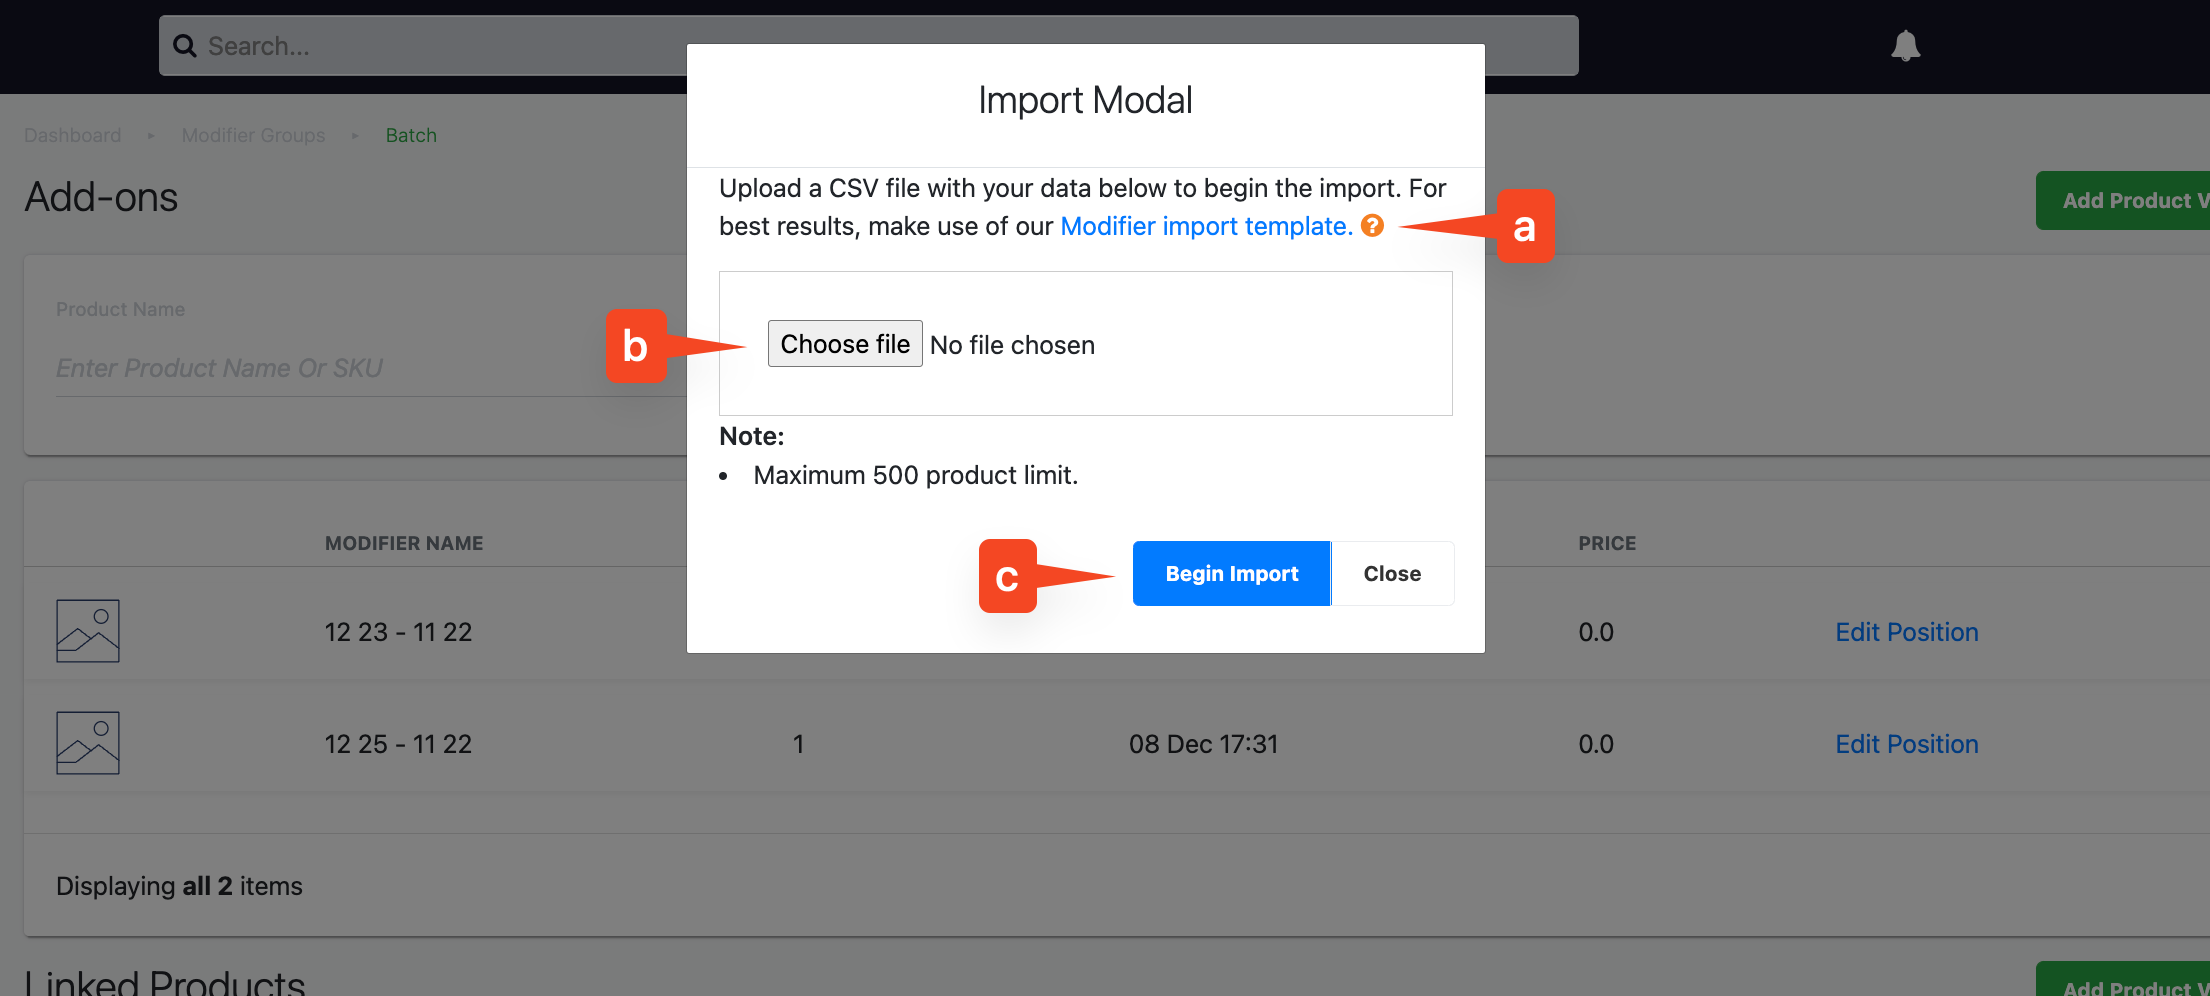
Users also need to access the configuration page to create linkages for modifier group, linking the modifier products and main products.
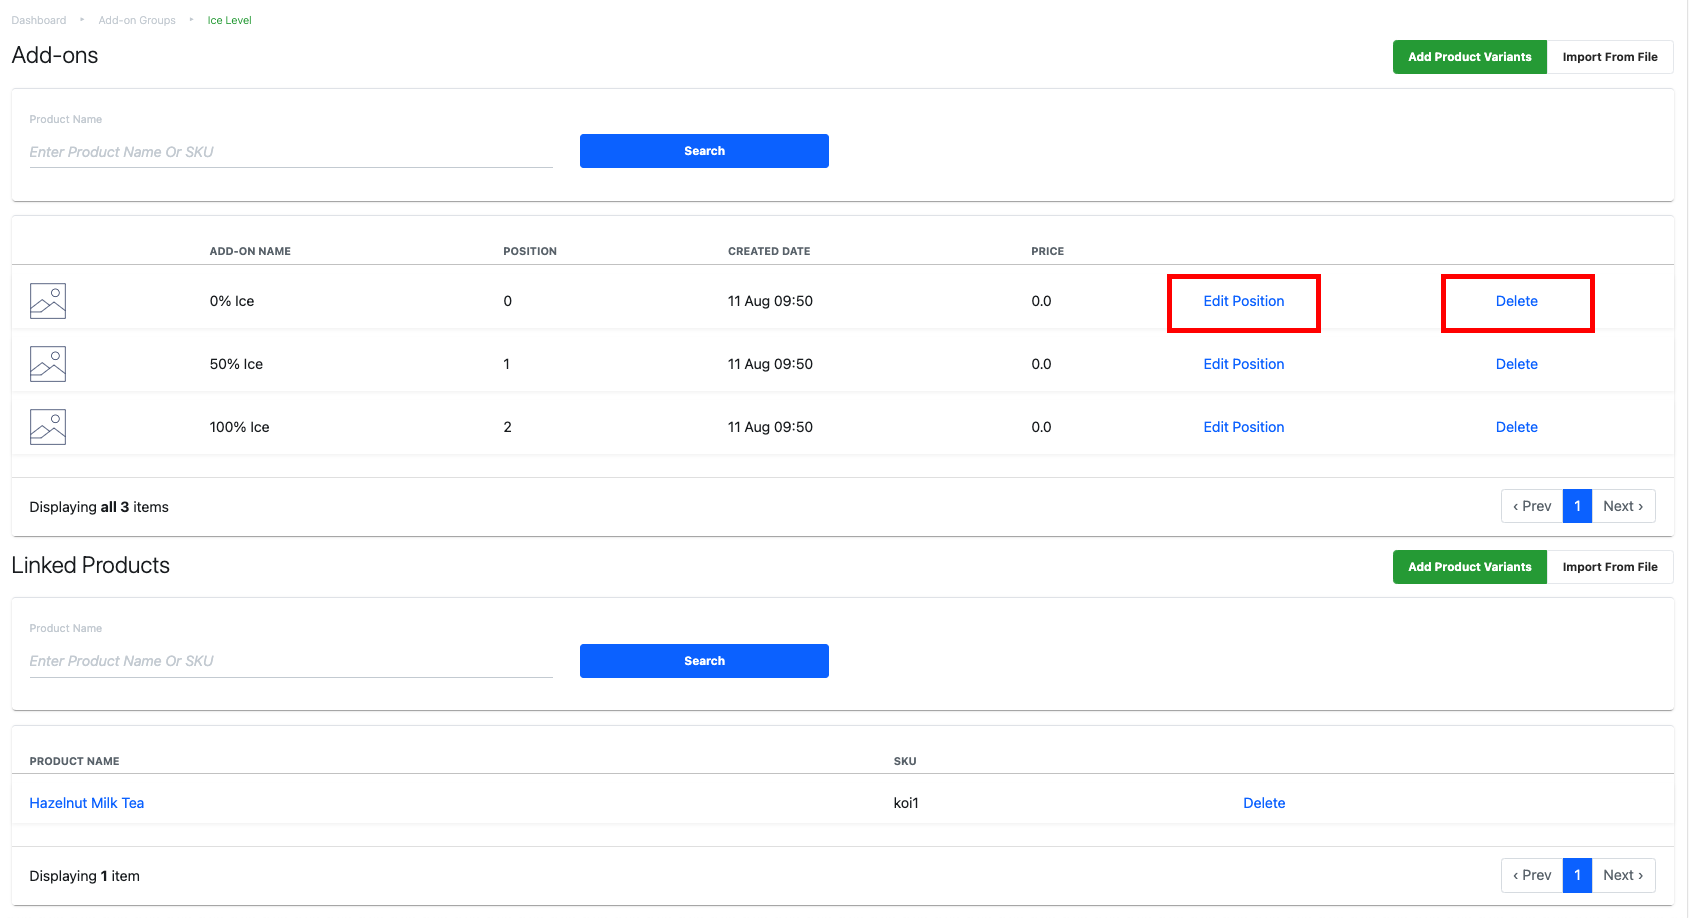
5. Edit Button
To enable users to make changes to an existing modifier group.

6. Delete Button
To remove modifier group from the database.