
Prior to creating a kitchen printer in Backend Portal, users must ensure that the printer driver had been installed into the frontend POS Terminal.
💡 To check whether printer driver is installed, click on windows start button and search for Devices and Printers.
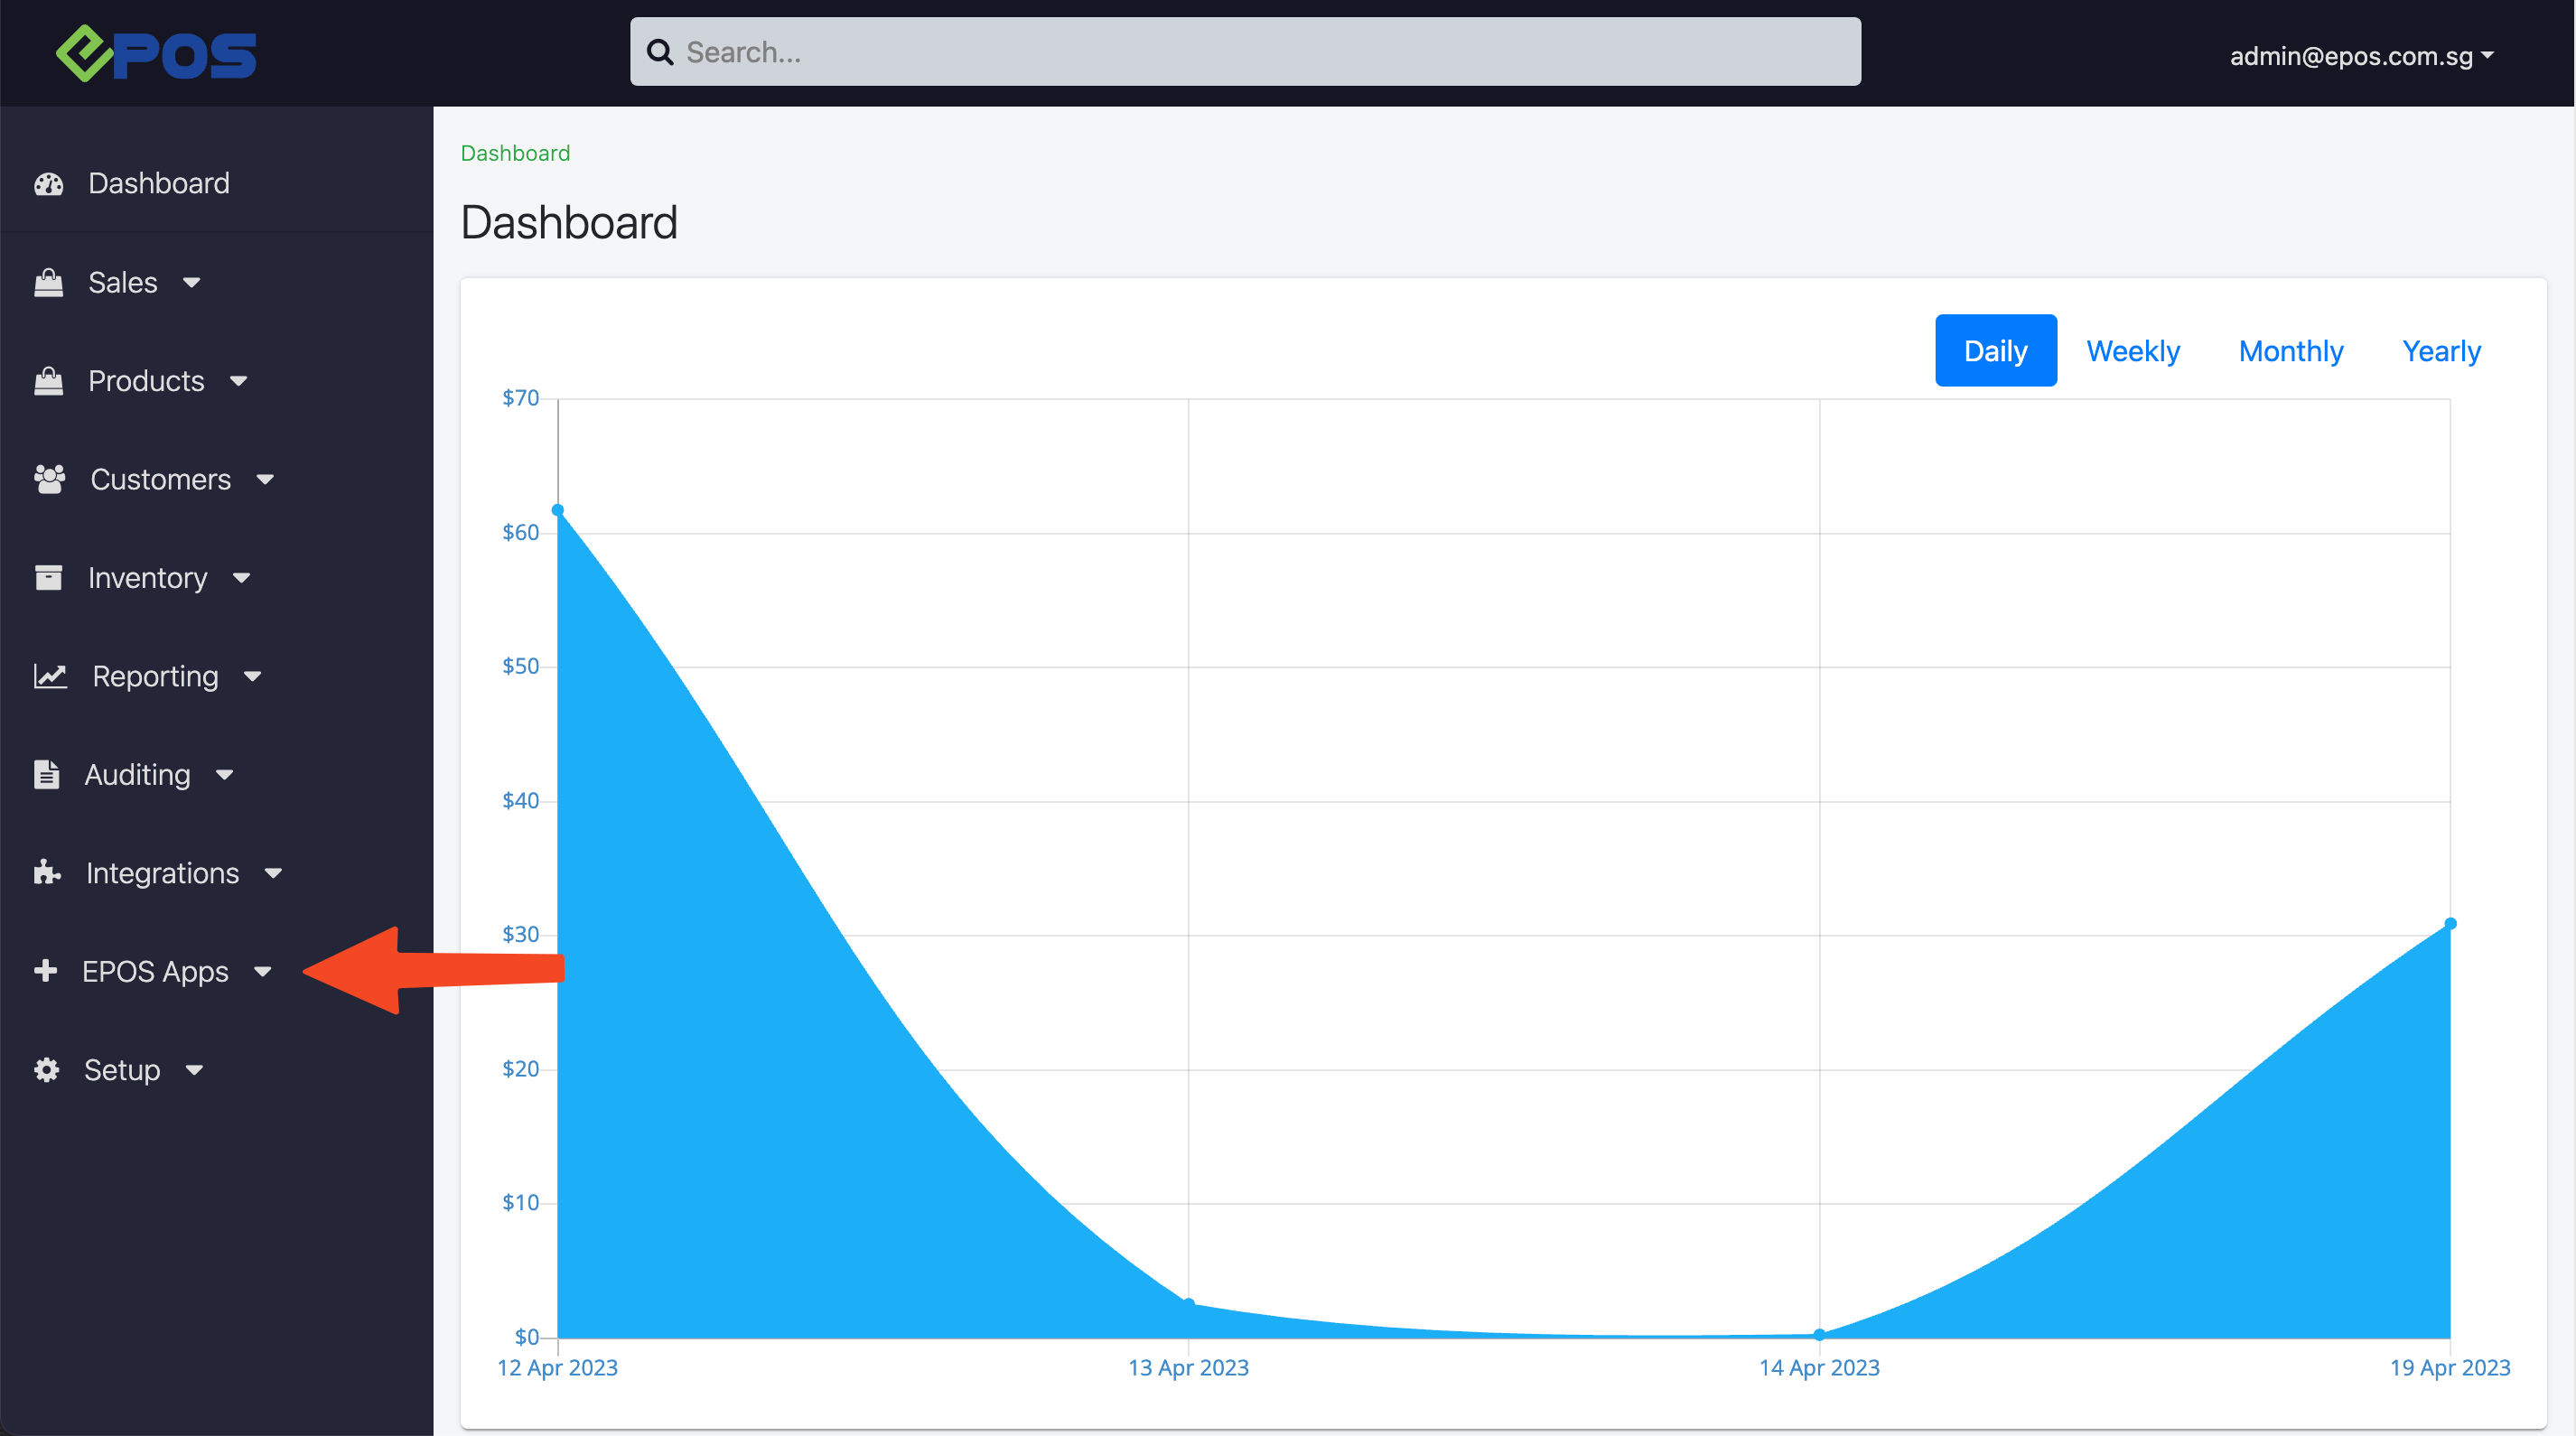
User will go to EPOS Apps
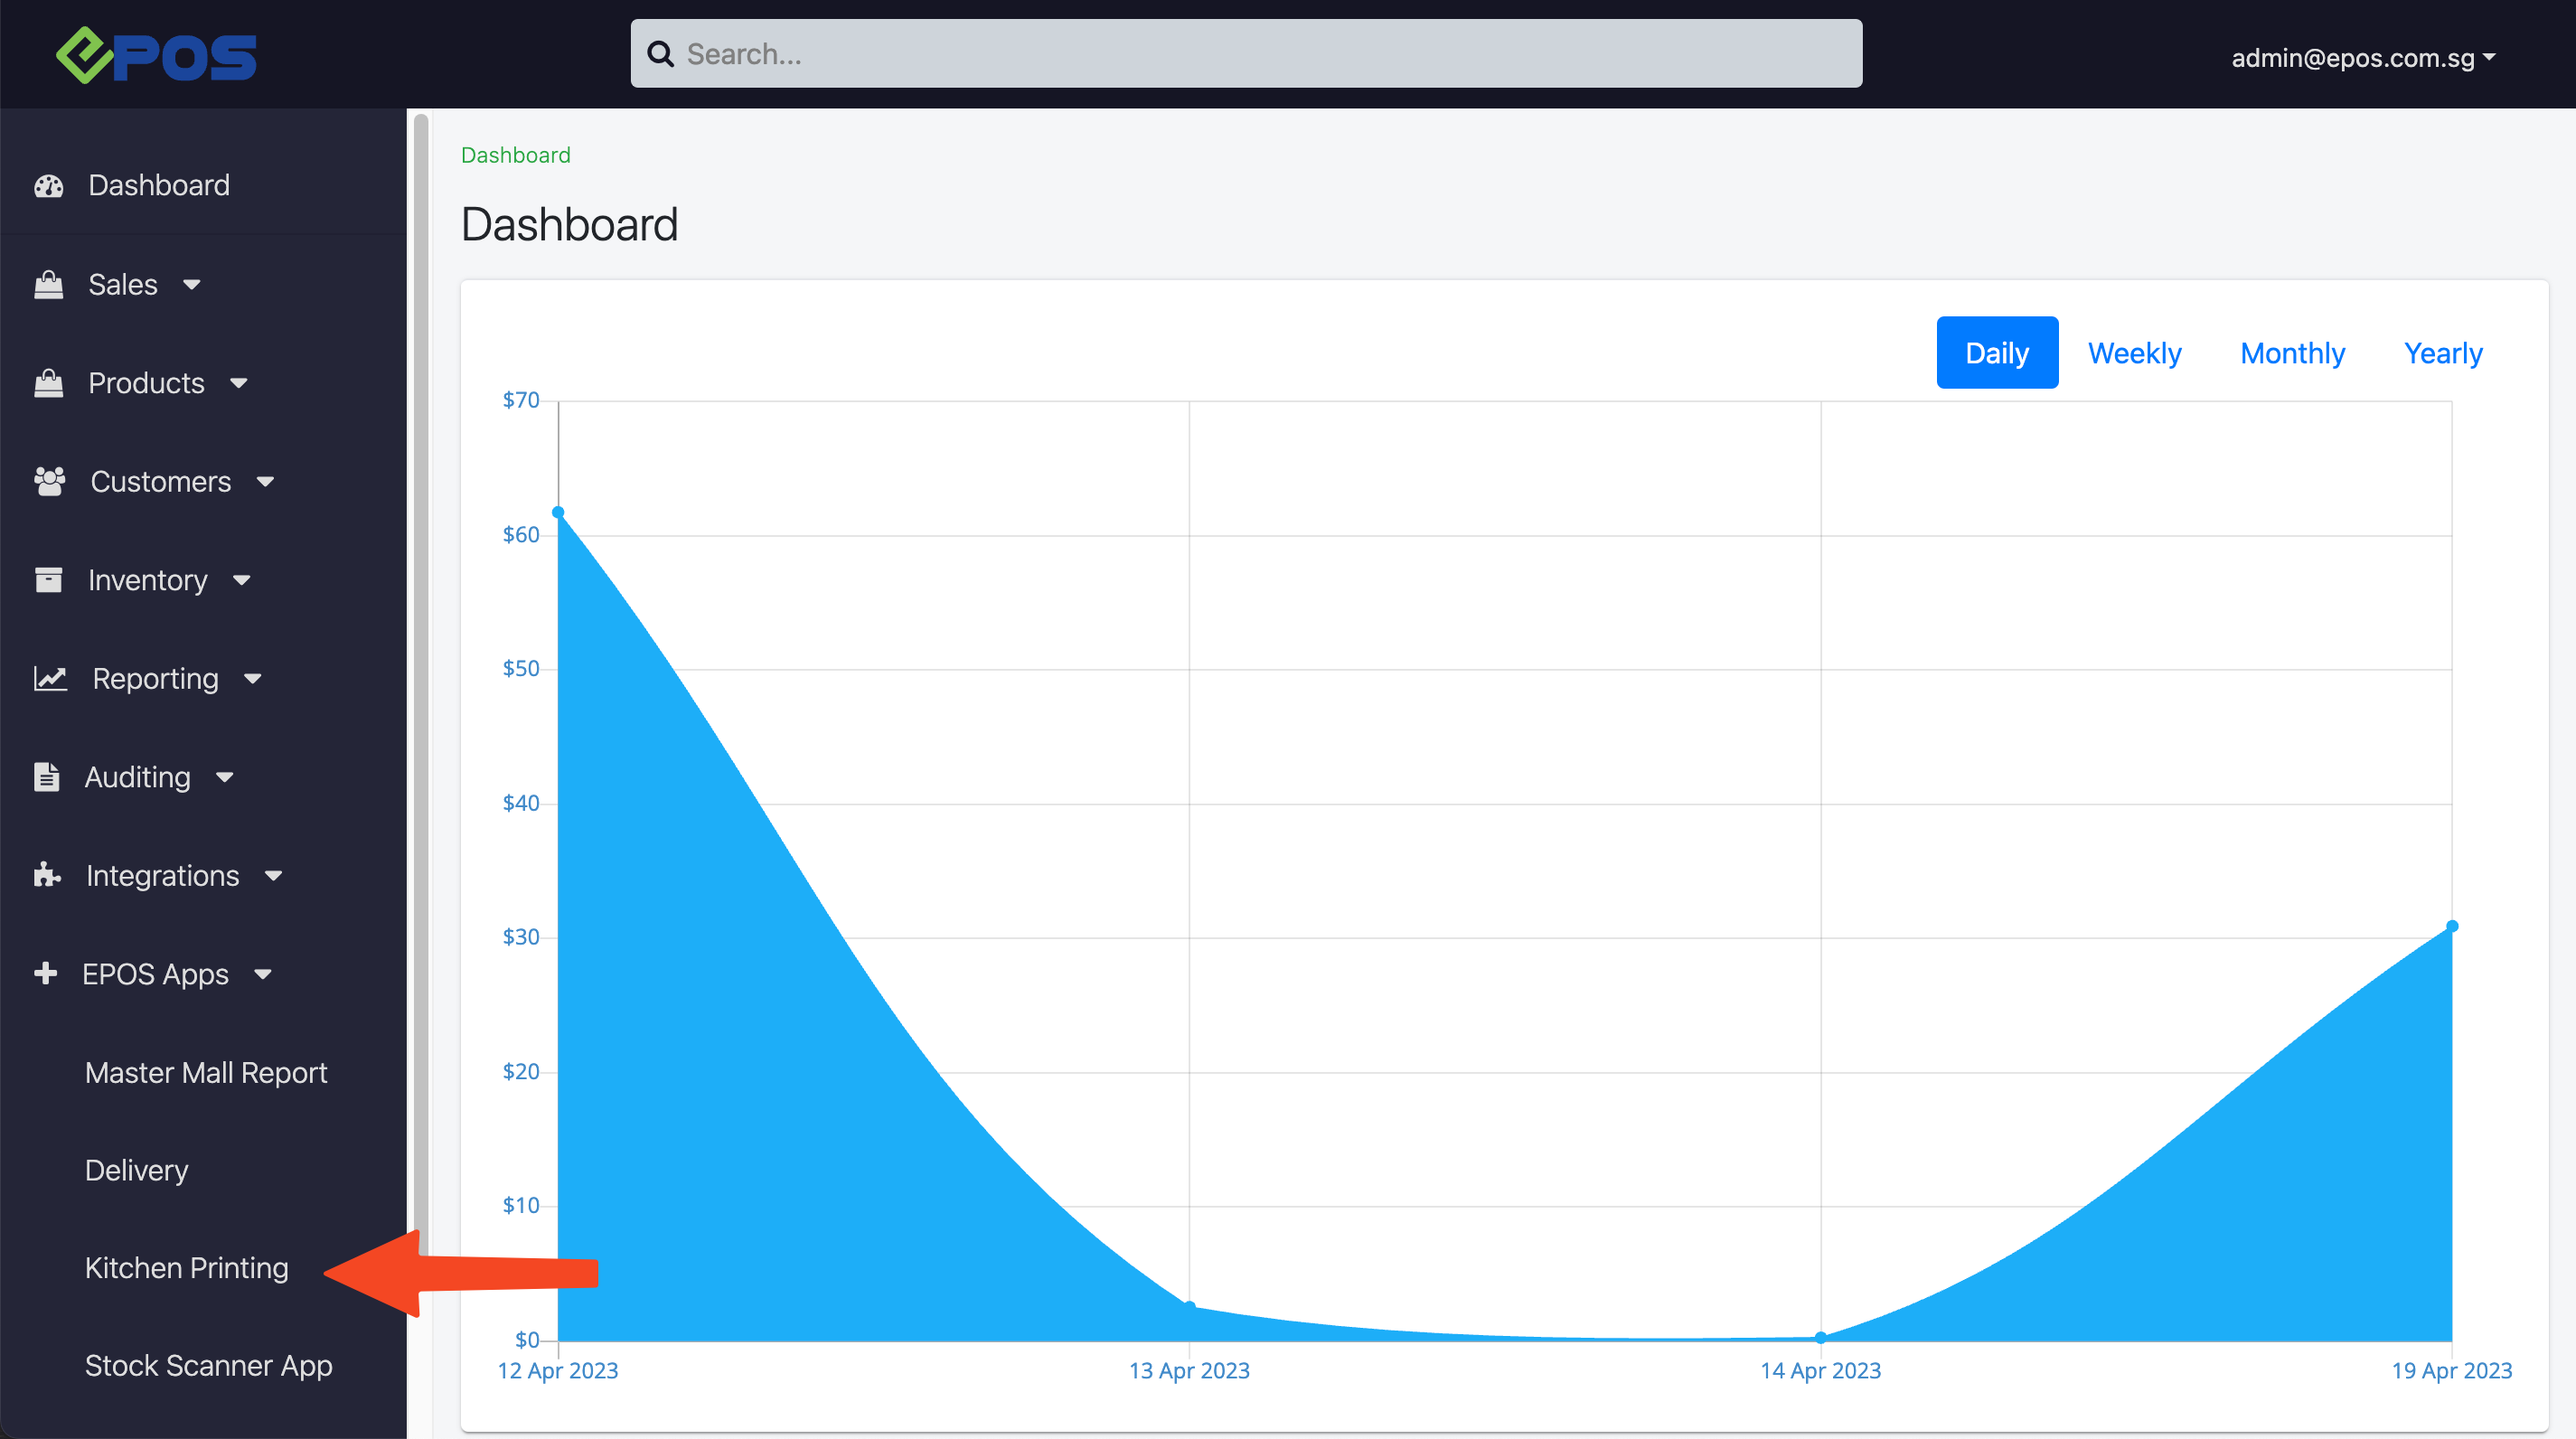
Select Kitchen Printing
New Printer
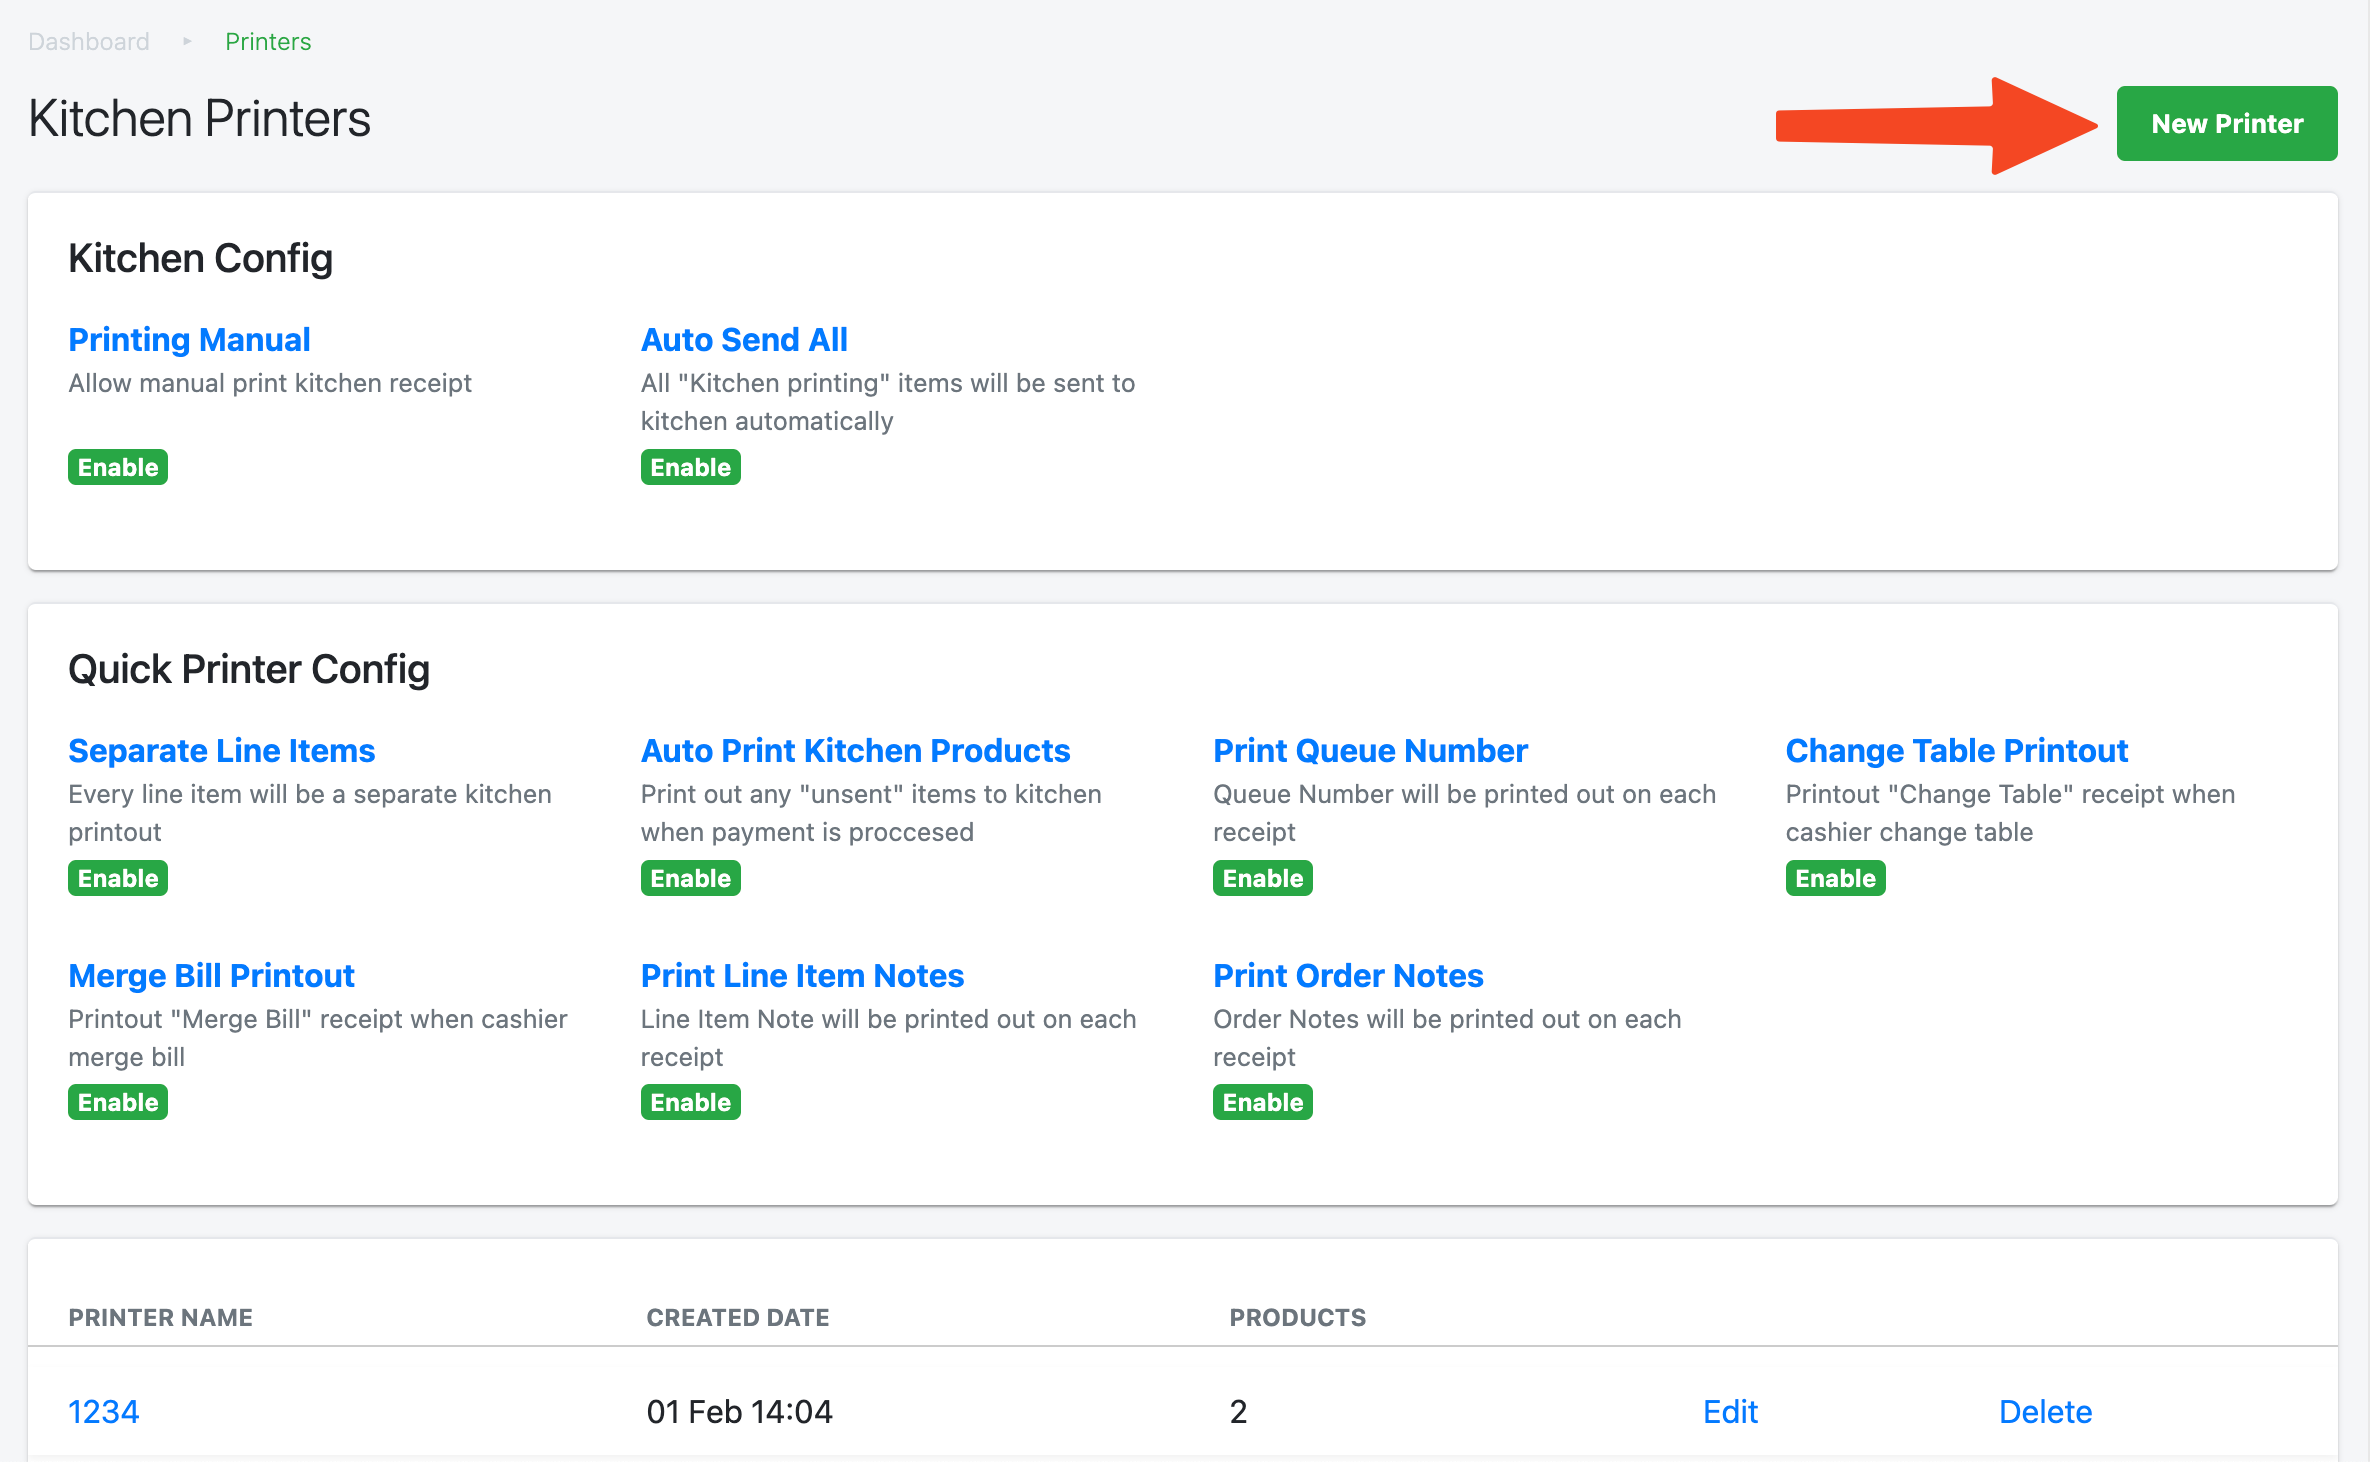
Pop up window will be shown
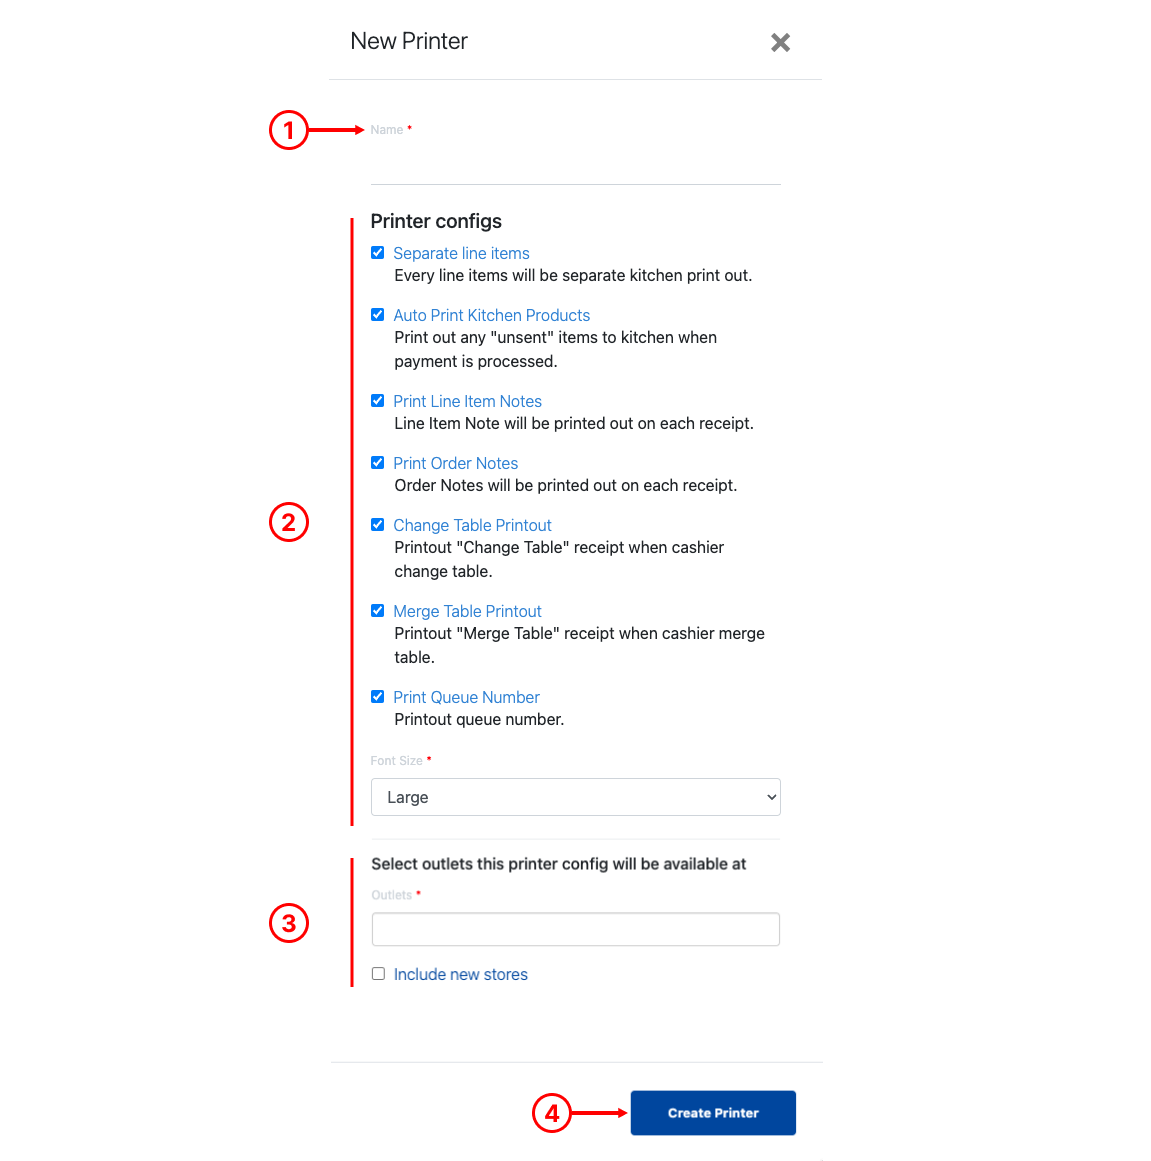
1. Printer Name
Enter the Printer Name.
💡Printer name must be identical to the printer driver installed in Devices and Printers.
2. Printer Configurations
Allow users to configure the kitchen printer with different settings :
● ☑️ Separate line items
↳ Printer printouts will be 1 item per kitchen chits.
● ☑️ Auto Print Kitchen Products
↳ Allow users to send any unsent products when payment is collected.
● ☑️ Print Line Item Notes
↳ Item notes will be printed on each kitchen chit.
● ☑️ Print Order Notes
↳ Order notes will be printed on each kitchen chit.
● ☑️ Change Table Printout
↳ Kitchen chit will be printed when users changed table at POS.
● ☑️ Merge Table Printout
↳ Kitchen chit will be printed when users merged table at POS.
● ☑️ Print Queue Number
↳ Allow queue number to be printed on kitchen chits.
🔲 Print Queue Number
↳ Hides the queue number from kitchen chits.
● Font Size: Large / Small
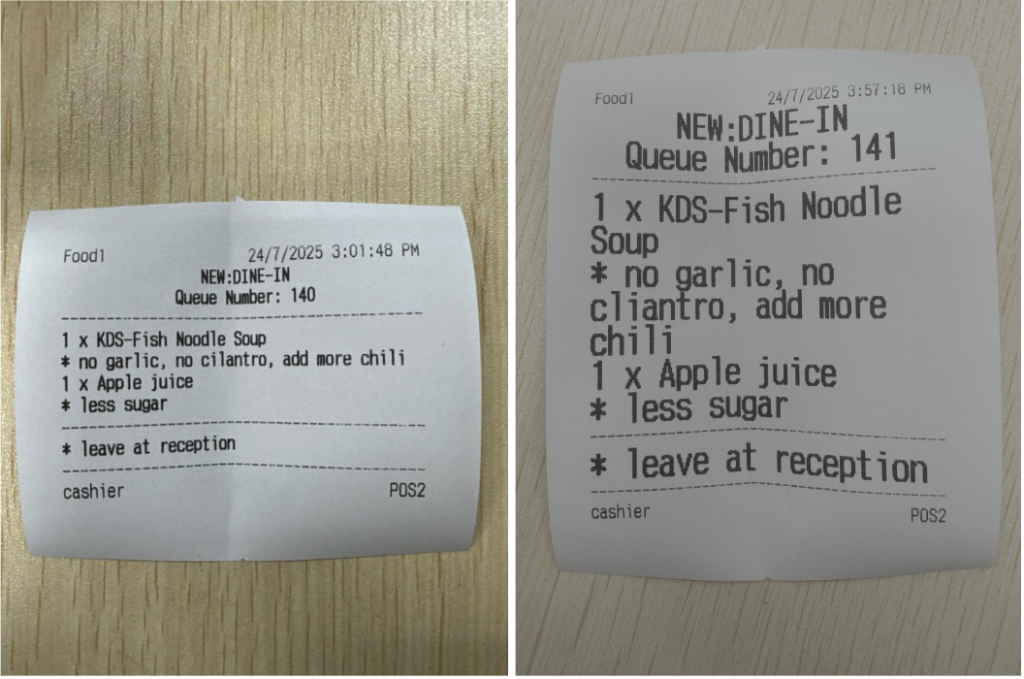
Note: Asterisk and space (* ) are added at the start of line note and order note for both font sizes.
3. Select Outlets
Allows users to assign this kitchen to a particular outlet
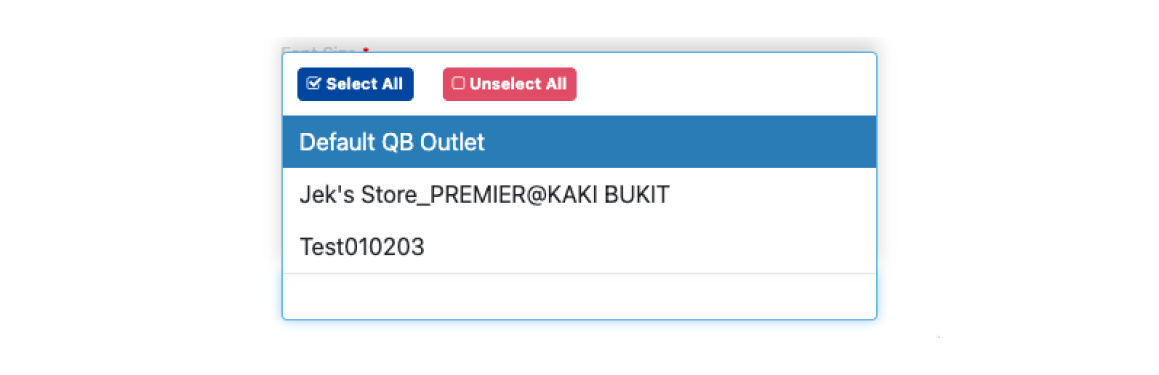
a. Click on the text box to display all the active outlets created in the backend, like below.
b. Users then select single / multiple outlets to be added to the settings.
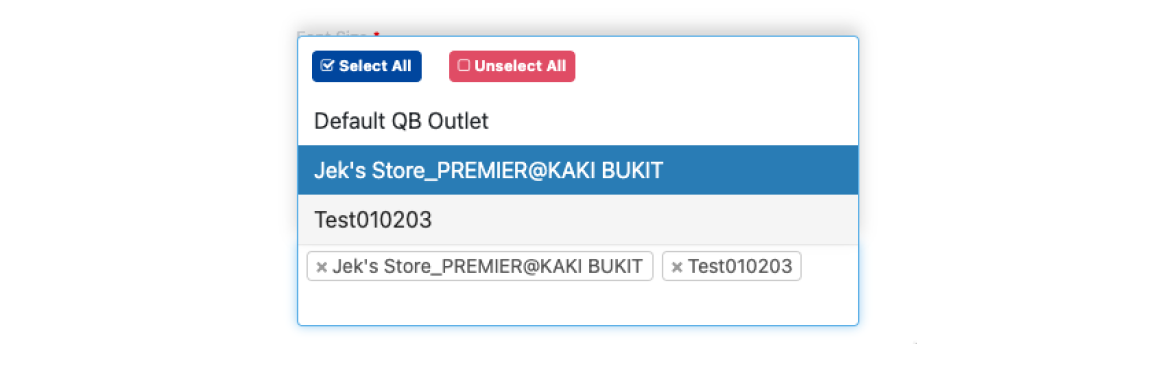
c. Once done click on anywhere to dismiss the dropdown.
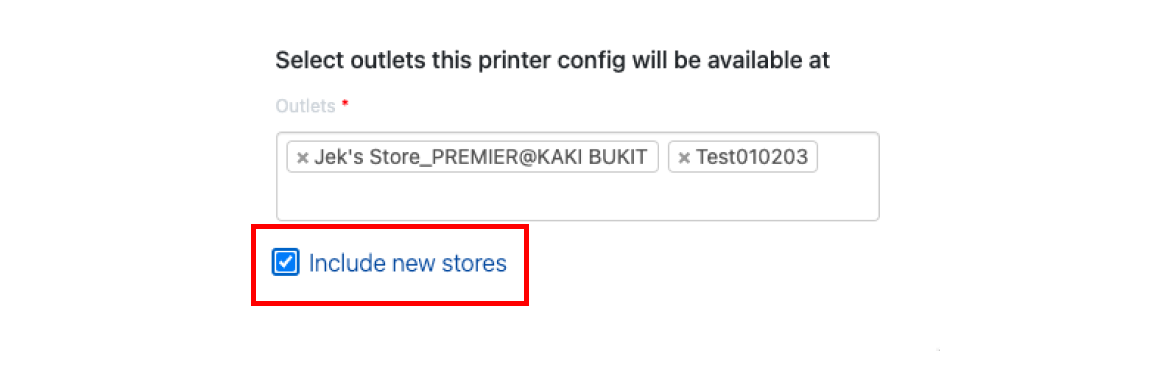
Users can check ☑️ Include new stores (this setting will automatically assign this printer whenever there is a new store created in the backend)
Create Printer
Once done configuring all the settings and outlets, click on Create Printer to confirm creation.
💡 For more information on configuring kitchen printing products, see Assigning Kitchen Printing Product to Kitchen Printers.