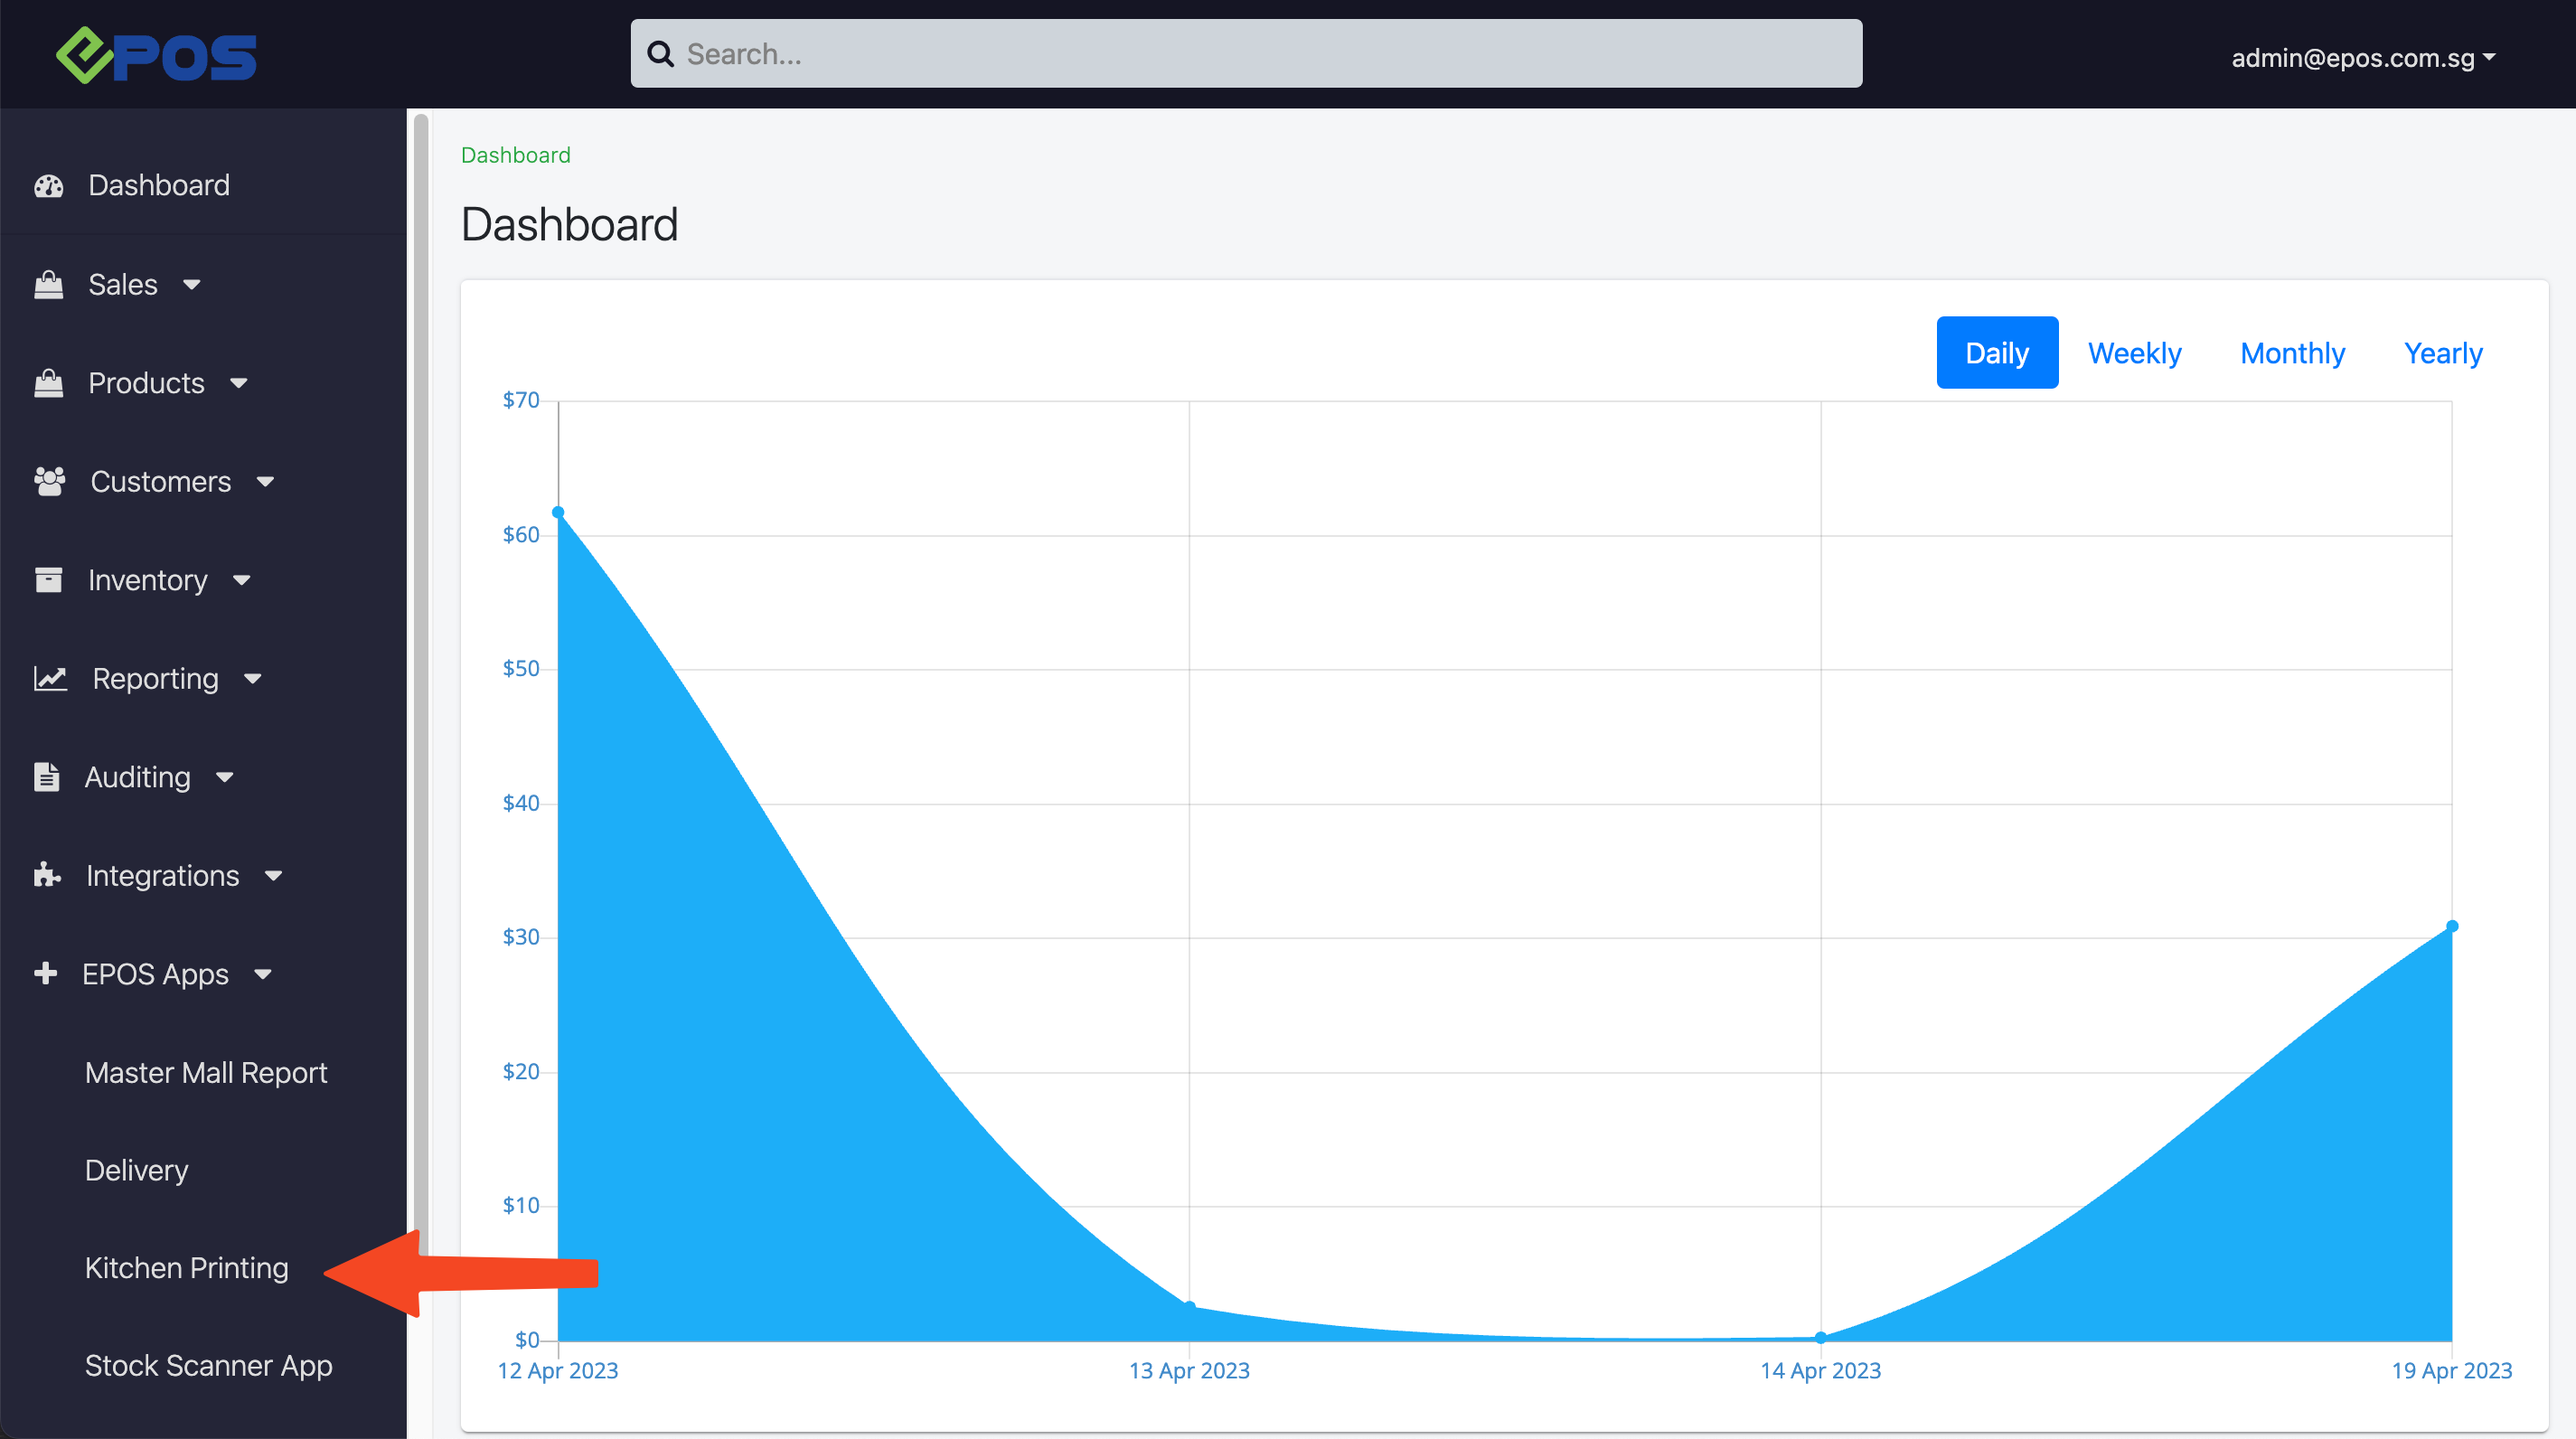
This kitchen setup is essential to ensure coherent transition of user’s business operations from ordering at the frontend POS to printing kitchen chit in the kitchen and serving food to customers’ tables.
To access the Kitchen Printing Configurations page, follow the following steps:
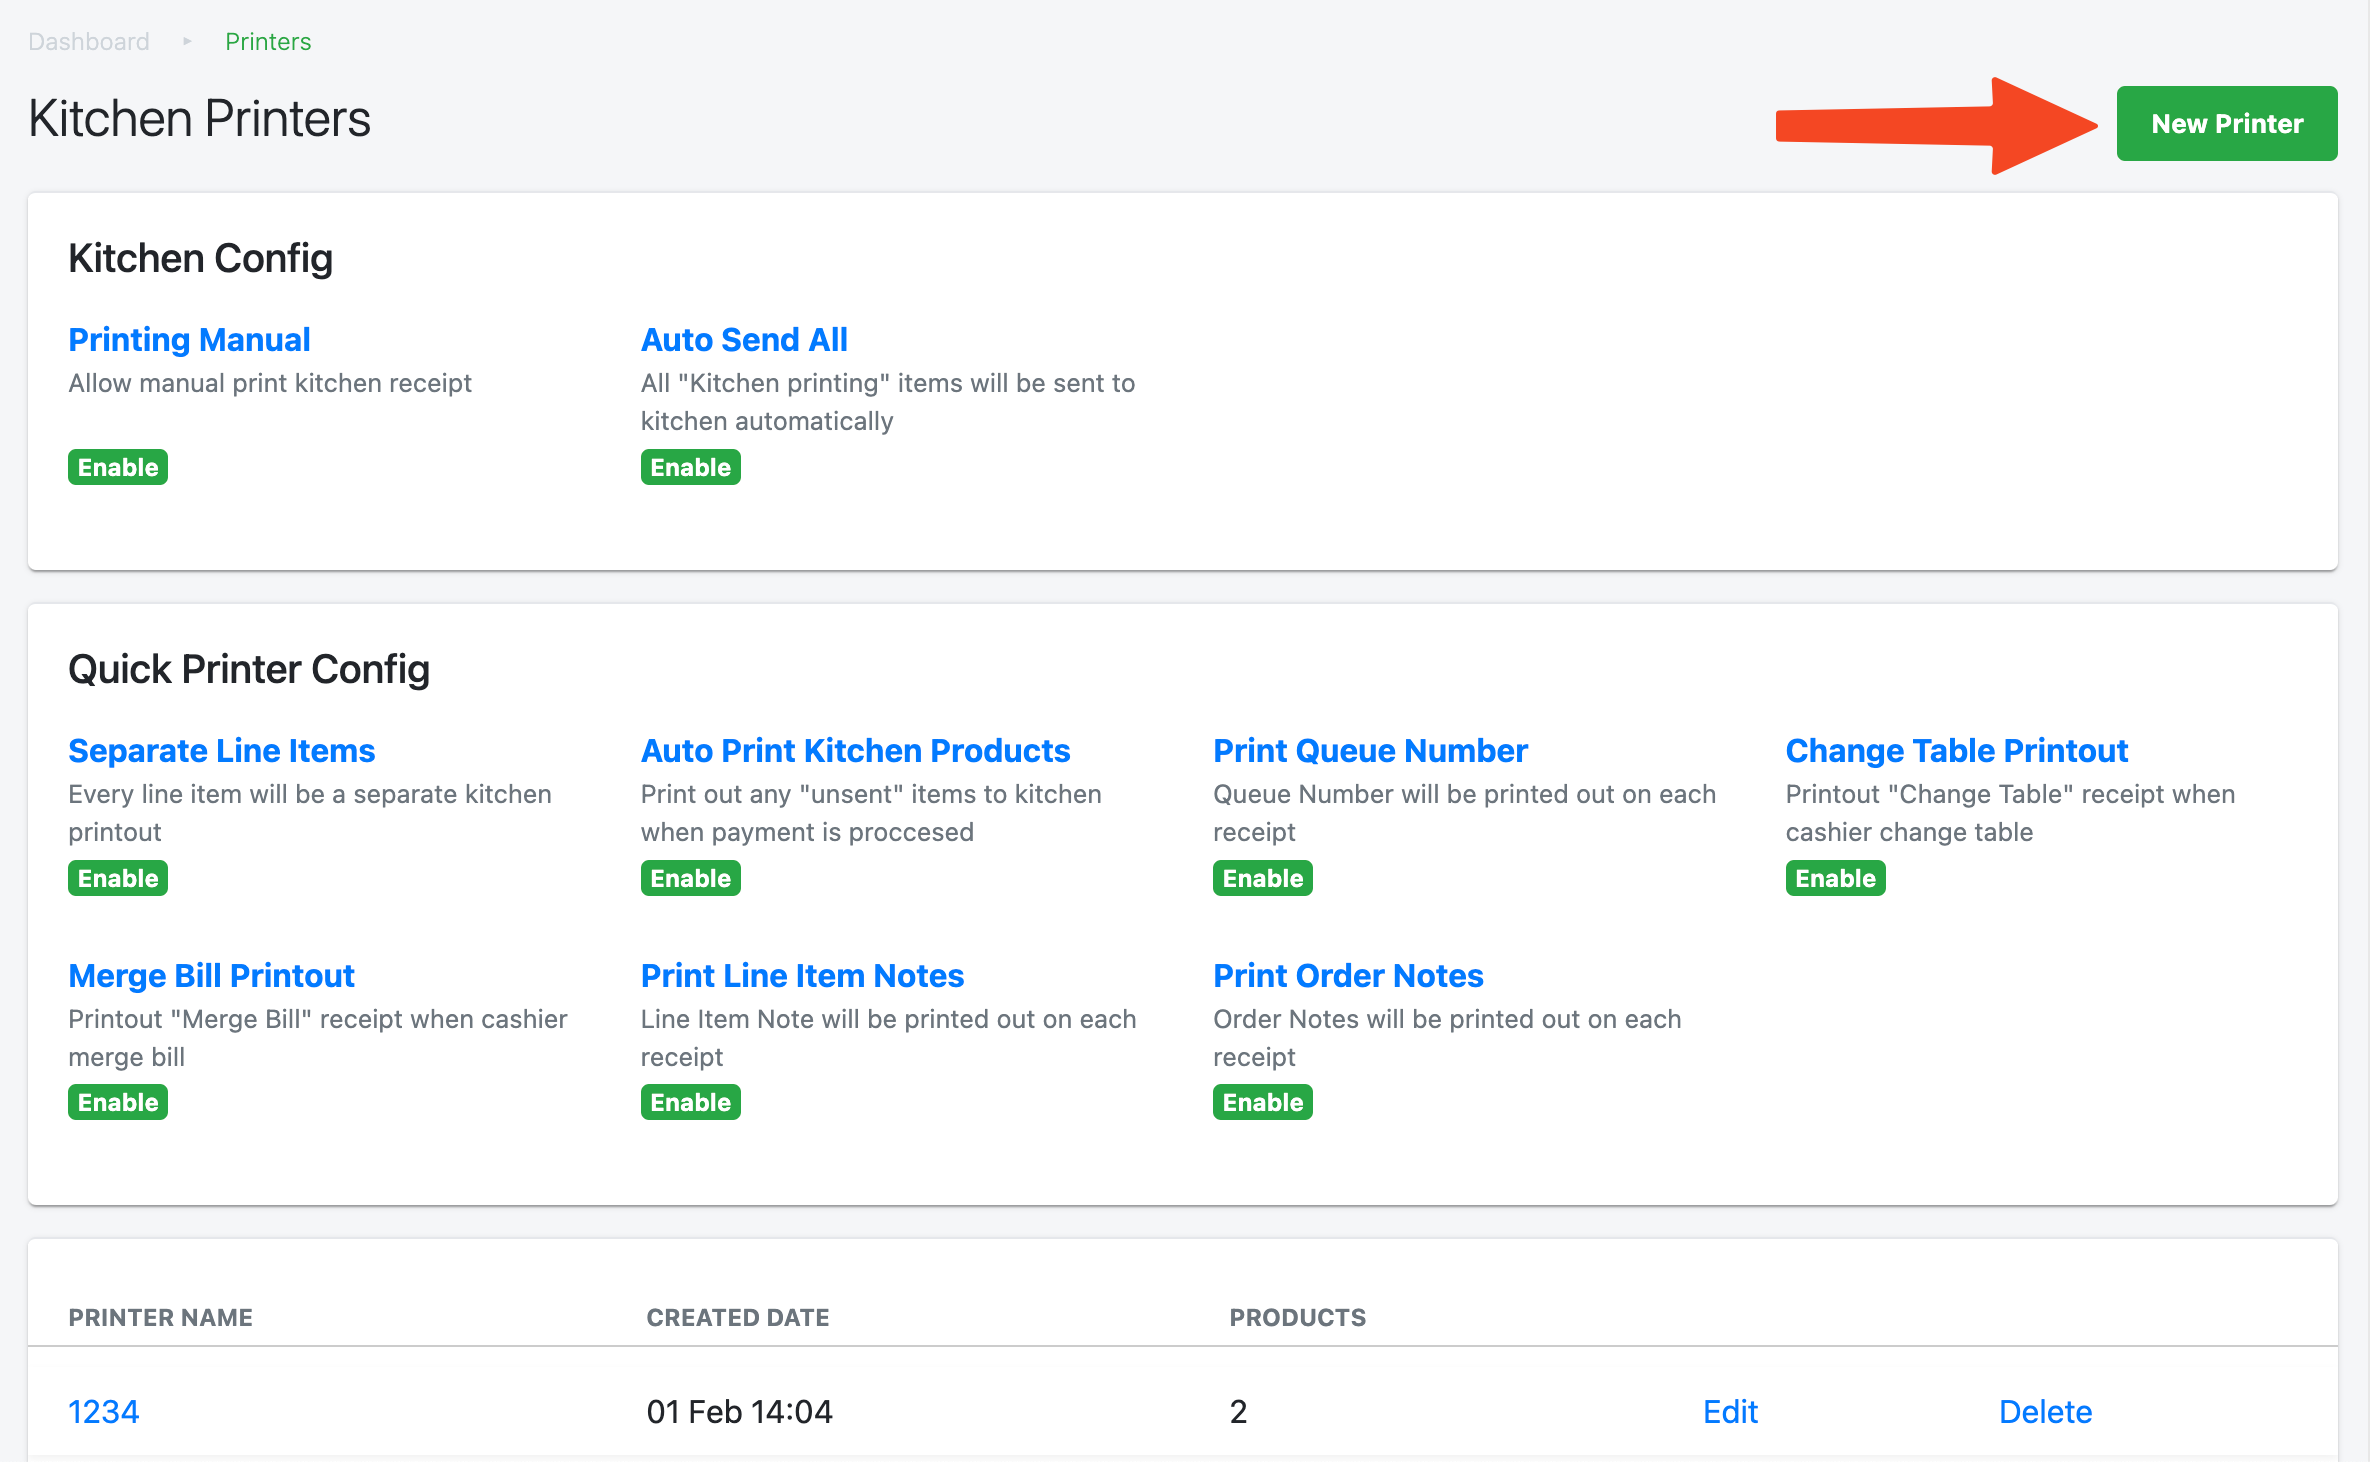
Users will be directed to this page.
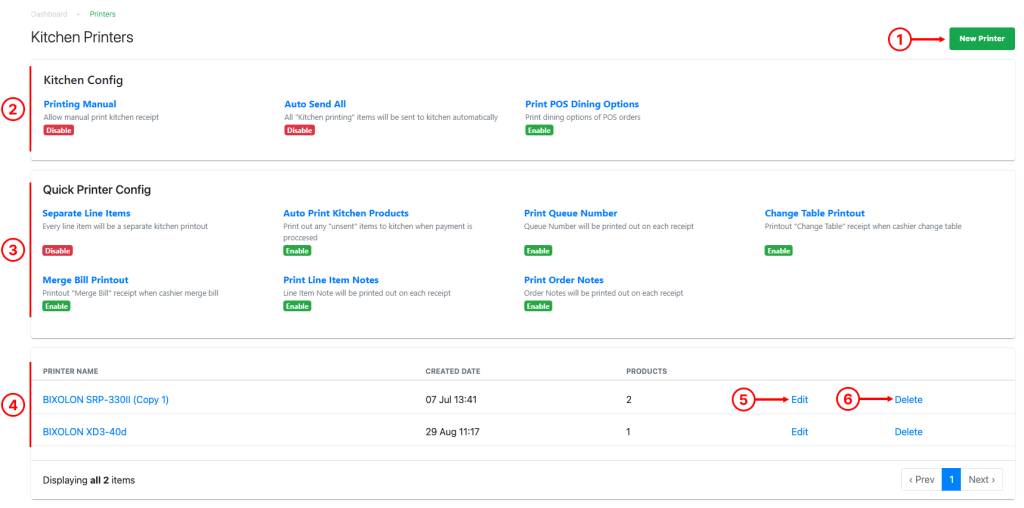
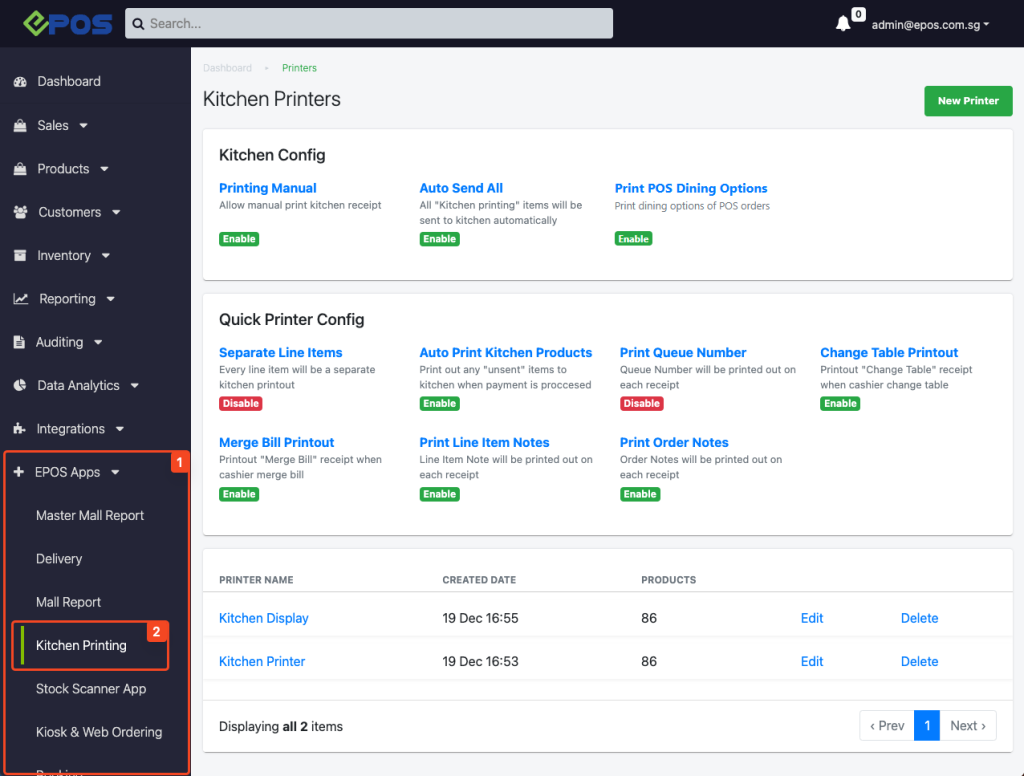
1. New Printer
Allow users to create a new printer in the Backend Portal.
For more details, see Creating a New Kitchen Printer.
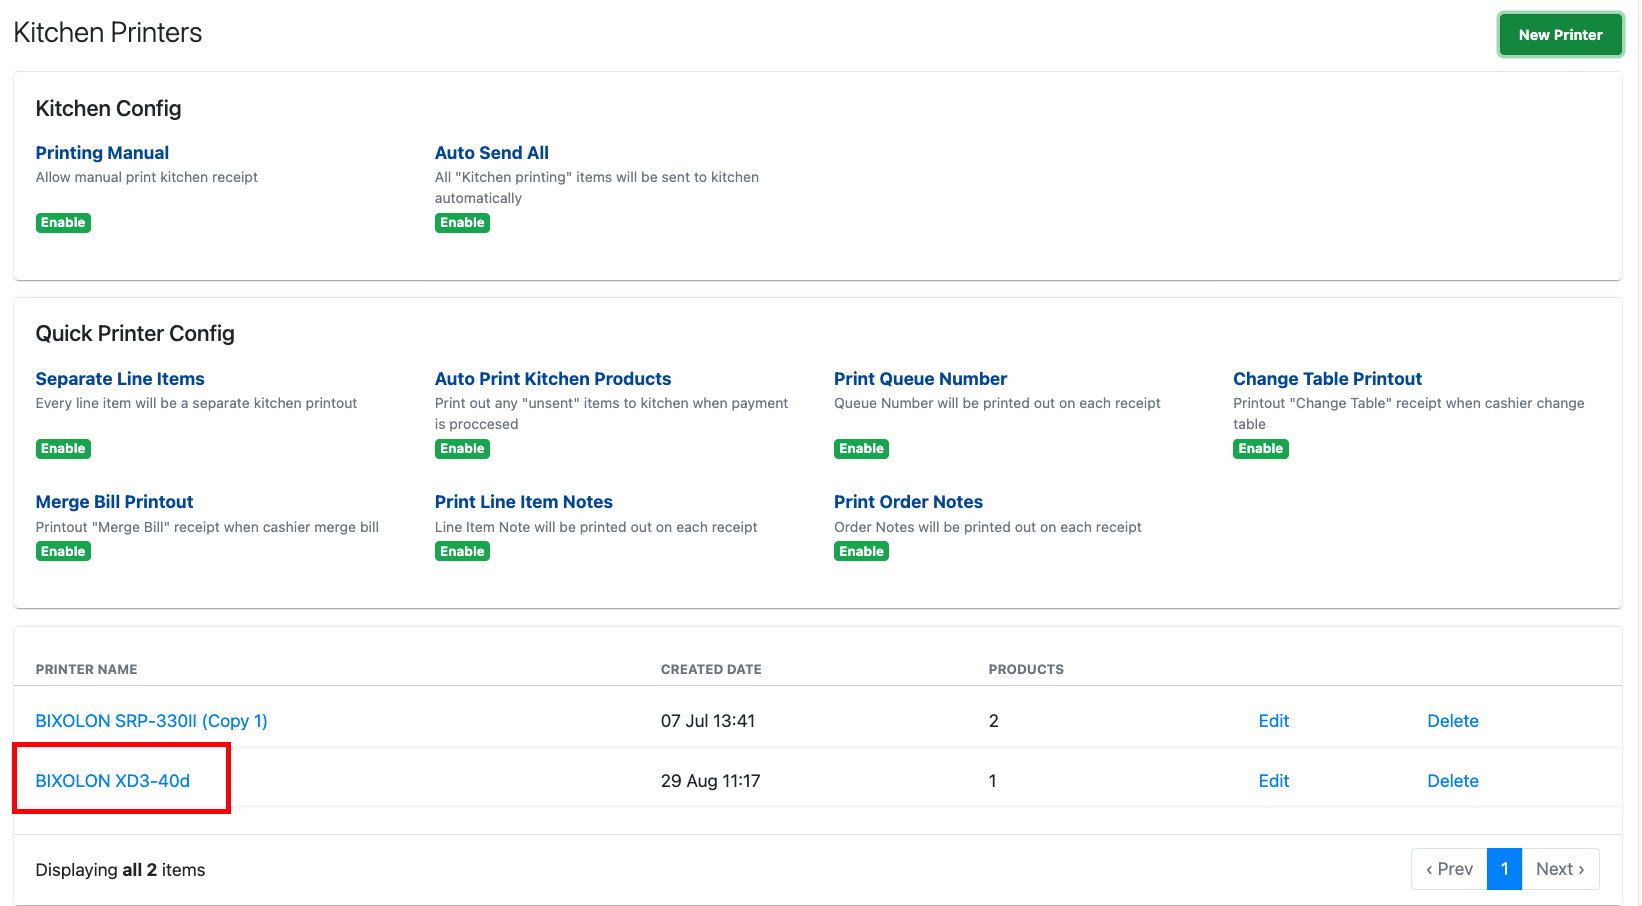
2. Kitchen Config
Allows user to configure settings for kitchen printing that are standardised across all terminals and kitchen printers.
Users can click on each configuration to toggle on/off.
-Printing Manual
↳ When enabled, it allows users to manually send ordered items to kitchen printer.
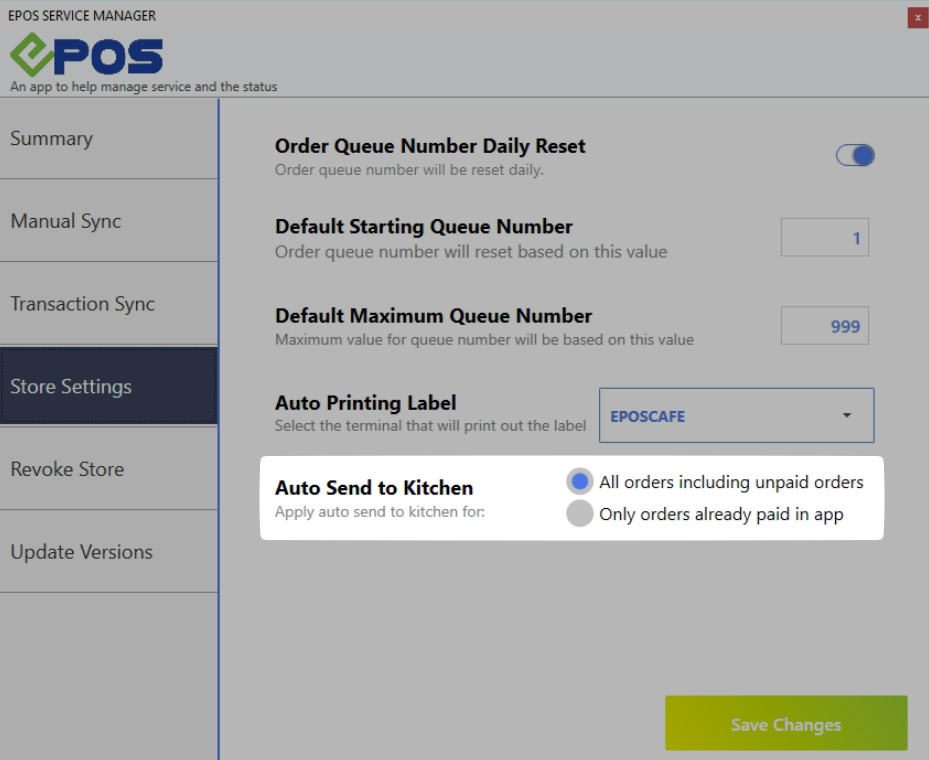
-Auto Send All
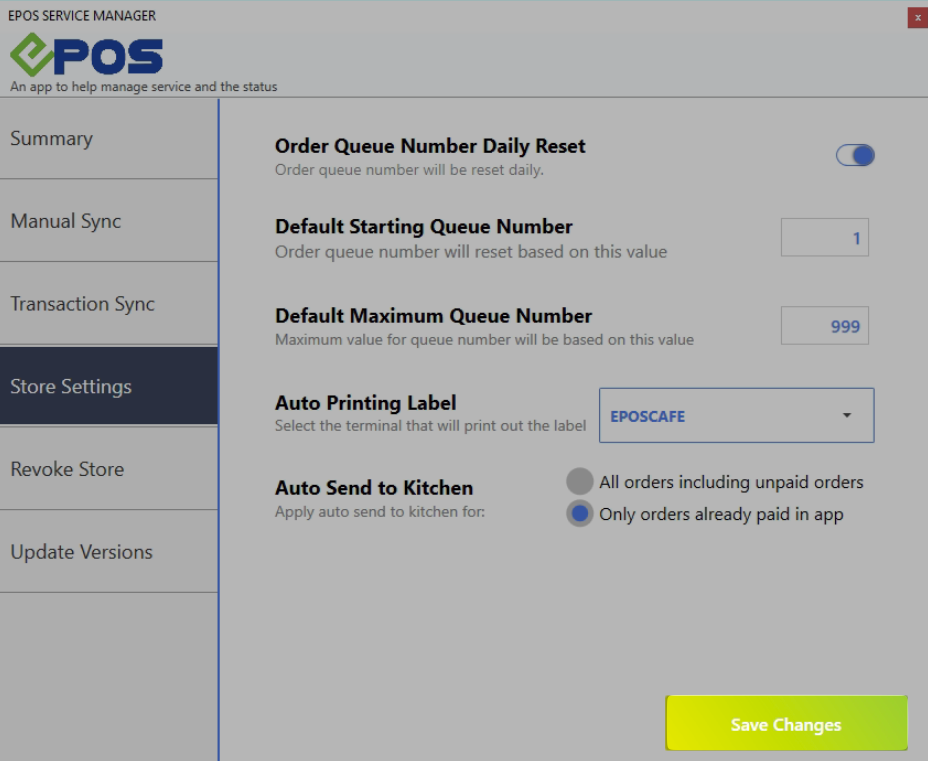
↳ When enabled, it allows users to print all kitchen printing product all at once. To ensure that only paid orders are auto-sent to kitchen, select “Only orders already paid in app” in EPOS Service Manager.
↳ When disabled, users can selectively send kitchen printing products to kitchen.
-Print POS Dining Options
↳ When enabled, it allows users to select “Dine-In” or “Takeaway” for each order directly on the POS.
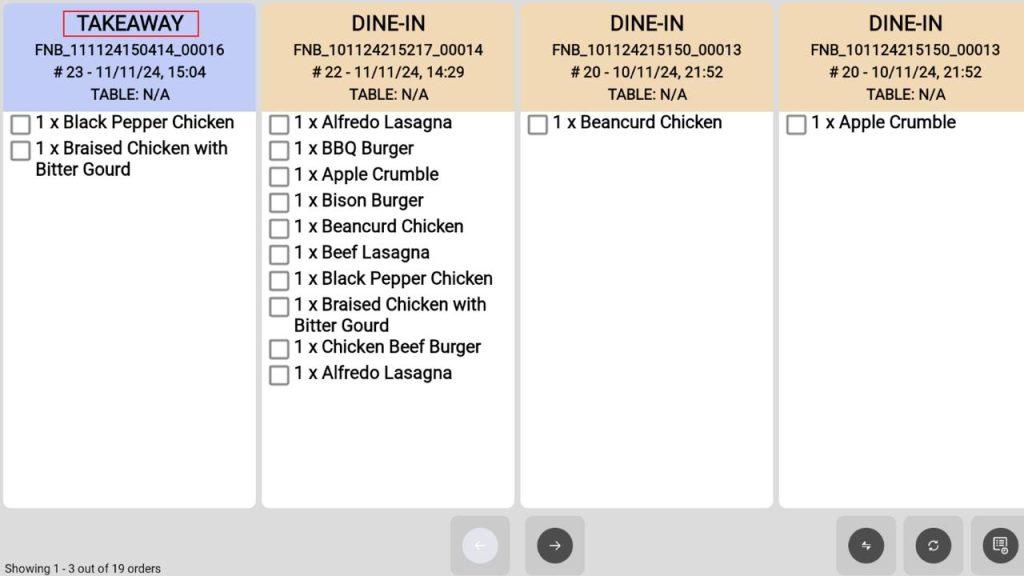
Once activated, the selected dining option will display on both the kitchen slip and KDS.
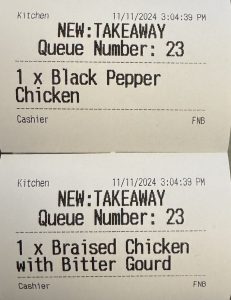
Example of kitchen slip.
Example of KDS
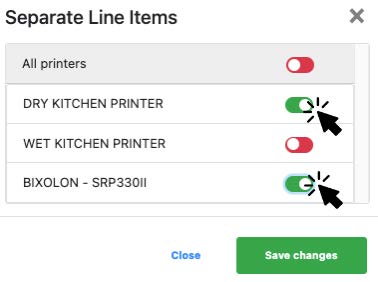
3. Quick Printer Config
Allows users to configure settings for individual kitchen printers. Users can click on each configuration to toggle on/off for each kitchen printer created.
Eg: Separate Line Item Settings
a. Click on All printers to toggle on/off for all printers at once.
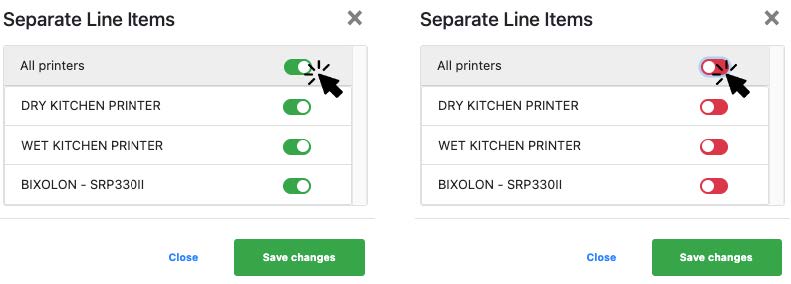
b. Click on the individual printer to toggle on/off for that particular printer.
4. List of Printers
Shows the list of printers created, and number of products that are added to the printer.
5. Edit
Allow users to edit the name and configurations of the particular kitchen printer.
6. Delete
Delete the particular printer from Backend Portal.
Prior to creating a kitchen printer in Backend Portal, users must ensure that the printer driver had been installed into the frontend POS Terminal.
💡 To check whether printer driver is installed, click on windows start button and search for Devices and Printers.
User will go to EPOS Apps
Select Kitchen Printing
Select New Printer
Pop up window will be shown
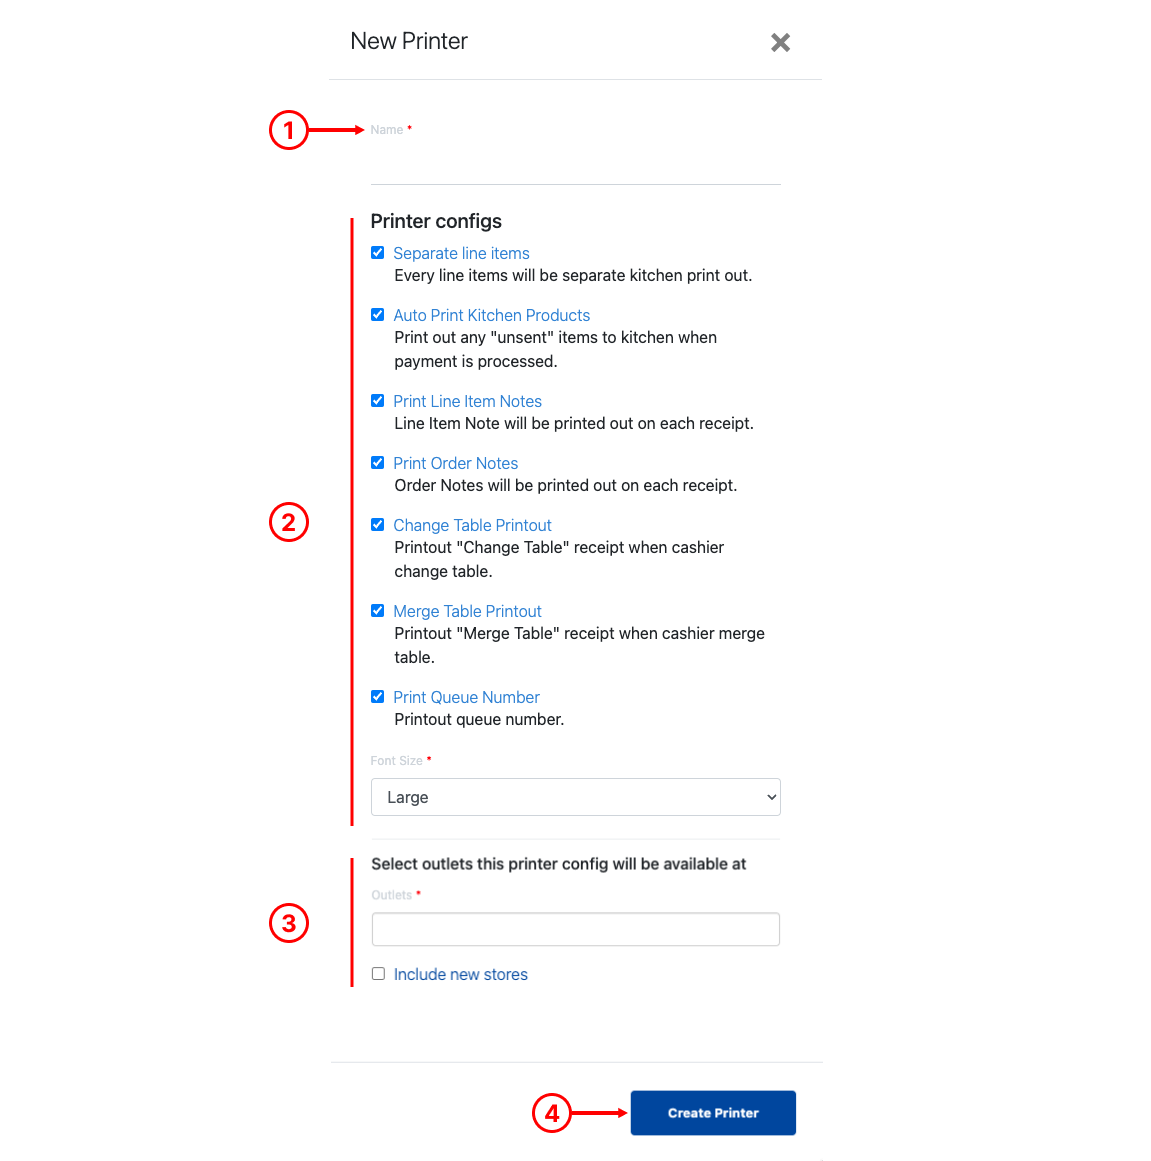
1. Printer Name
Enter the Printer Name.
💡 Printer name must be identical to the printer driver installed in Devices and Printers.
2. Printer Configurations
Allow users to configure the kitchen printer with different settings :
-
- ☑️ Separate line items
↳ Printer printouts will be 1 item per kitchen chits.
- ☑️ Auto Print Kitchen Products
↳ Allow users to send any unsent products when payment is collected.
- ☑️ Print Line Item Notes
↳ Item notes will be printed on each kitchen chit.
- ☑️ Print Order Notes
↳ Order notes will be printed on each kitchen chit.
- ☑️ Change Table Printout
↳ Kitchen chit will be printed when users changed table at POS.
- ☑️ Merge Table Printout
↳ Kitchen chit will be printed when users merged table at POS.
- ☑️ Print Queue Number
↳ Allow queue number to be printed on kitchen chits.
- 🔲 Print Queue Number
↳ Hides the queue number from kitchen chits.
- Font Size: Large / Small
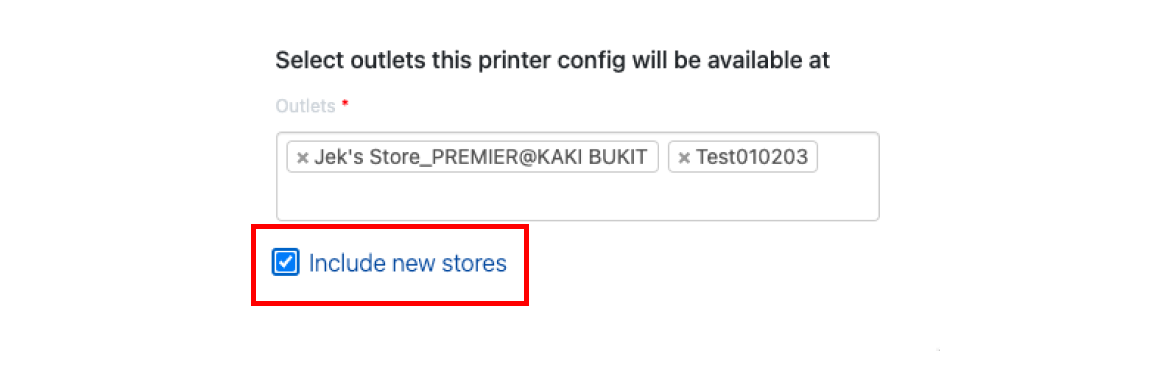
3. Select Outlets
Allows users to assign this kitchen to a particular outlet
a. Click on the text box to display all the active outlets created in the backend, like below.
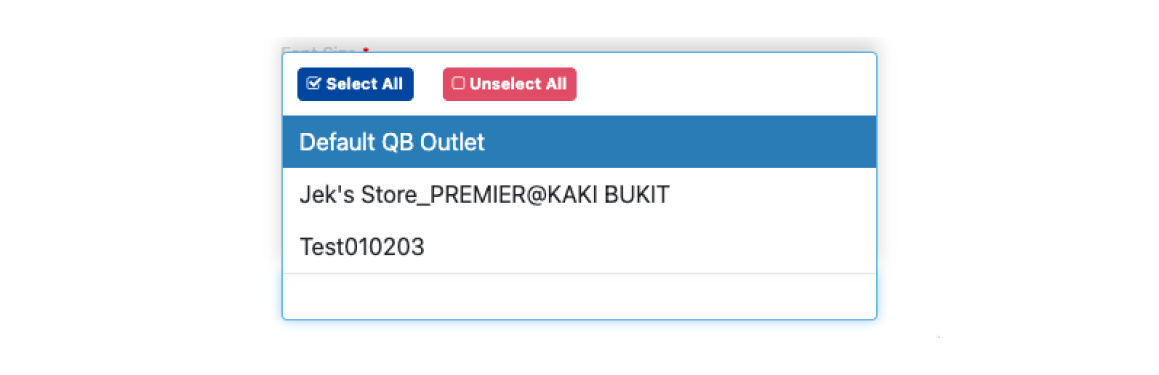
b. Users then select single / multiple outlets to be added to the settings.
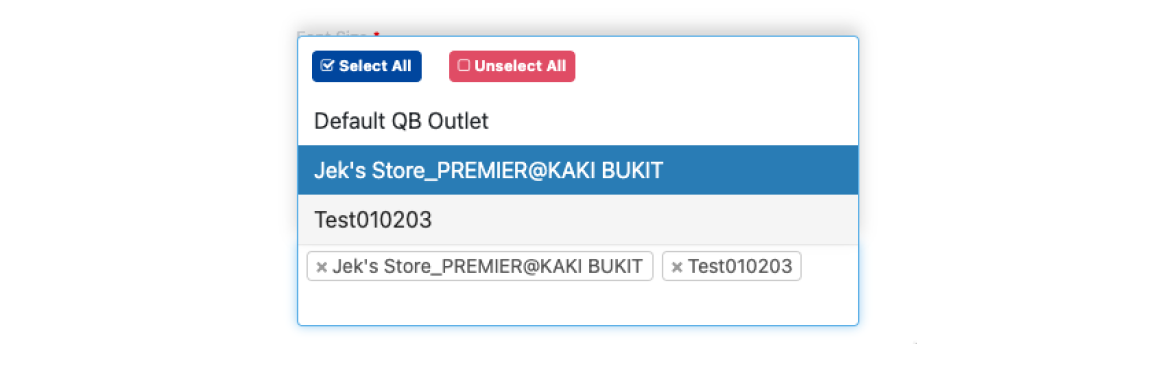
c. Once done click on anywhere to dismiss the dropdown.
Users can check ☑️ Include new stores (this setting will automatically assign this printer whenever there is a new store created in the backend)
Create Printer
Once done configuring all the settings and outlets, click on Create Printer to confirm creation.
💡 For more information on configuring kitchen printing products, see Assigning Kitchen Printing Product to Kitchen Printers.
Kitchen Printing Products are products which are required to be sent to the kitchen / bar for preparations.
Before assigning kitchen printing products to a particular kitchen printer, users are required to set up the products (see Adding a New Product) and set up the kitchen printers (see Creating a New Kitchen Printer).
1. User will go to EPOS Apps
2. Select Kitchen Printing
3. Click on the particular kitchen printer that users would like to configure further.
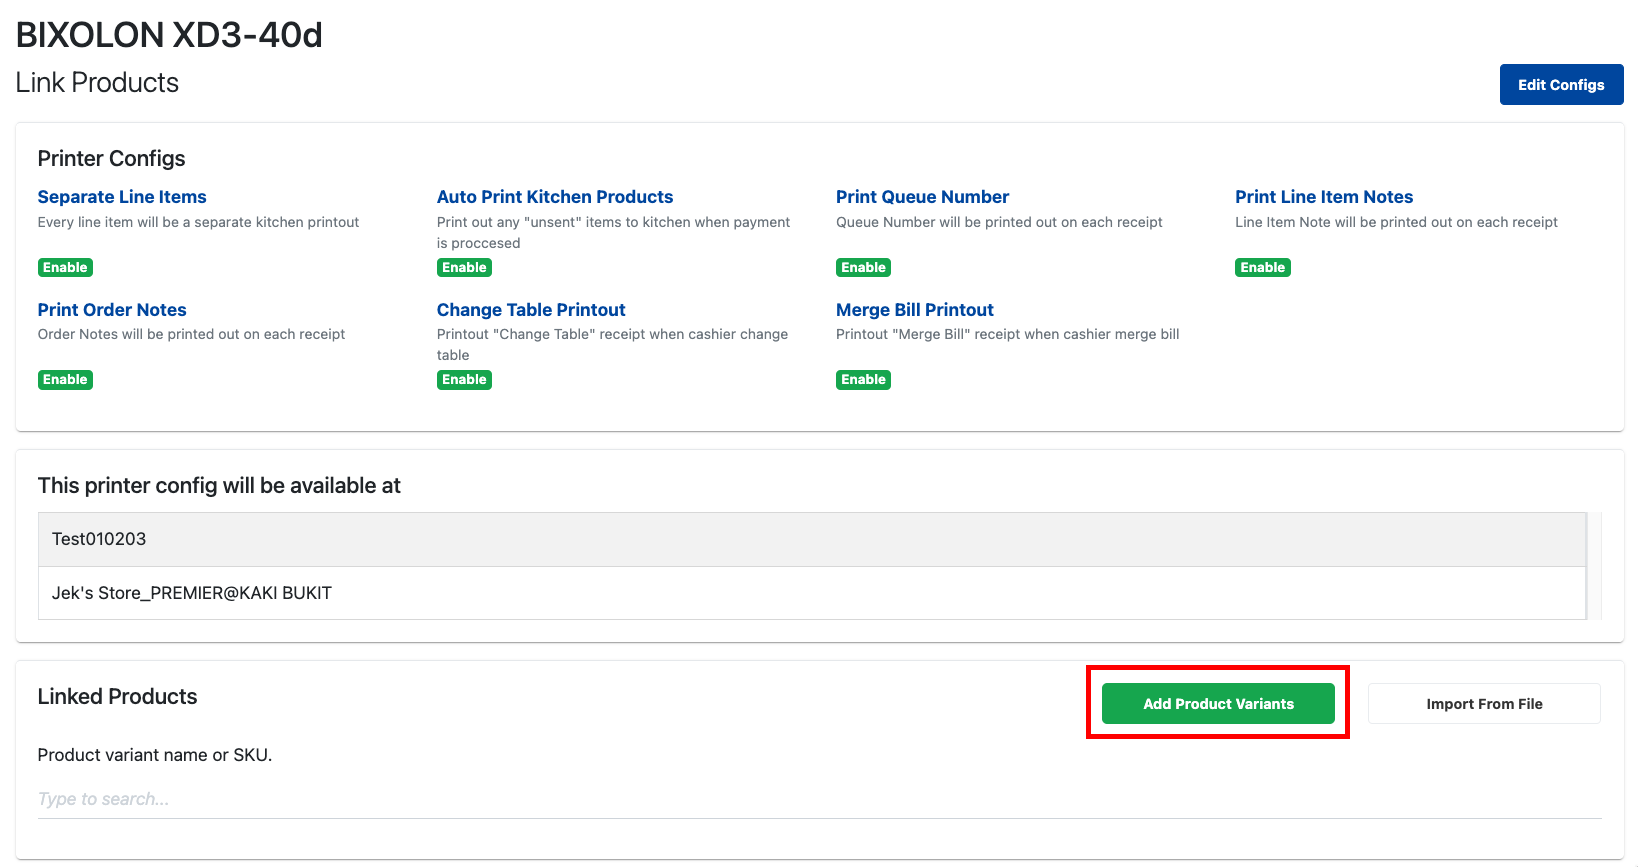
4. Users will then be directed to the Link Products Page. To configure the kitchen printer settings, users can click on Edit Configs.
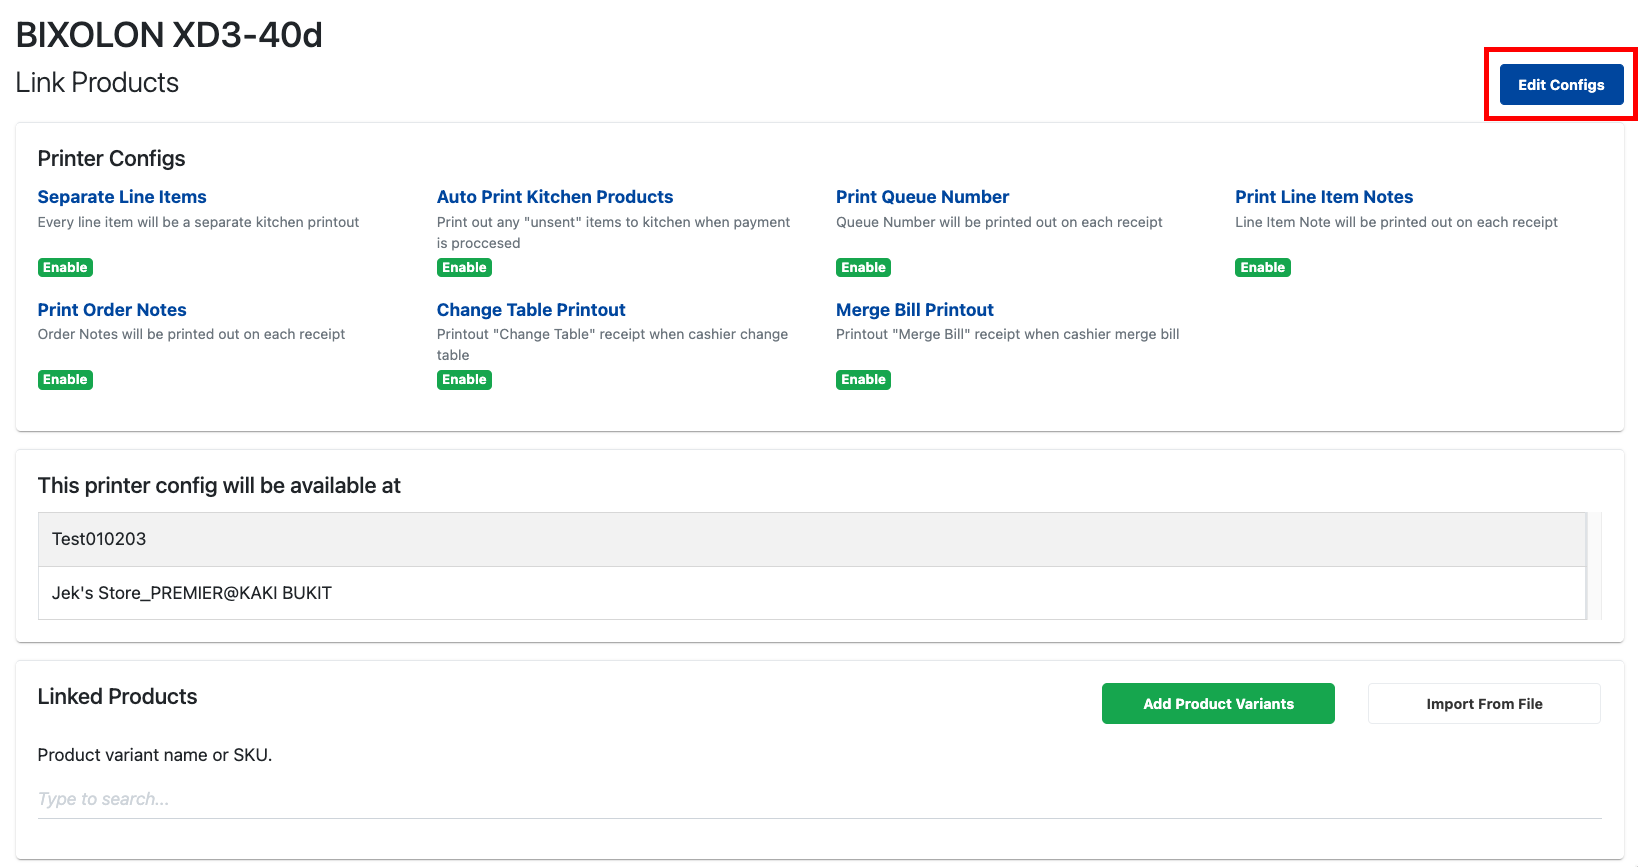
A similar pop out as shown in Creating a New Kitchen Printer will be shown. Users can then re-configure the settings for this particular kitchen printer.
4 (a) To add products users can add by selecting the product using the Add Product Variant.
💡Add-on(s) are not required to be assigned to kitchen printers as they will be tagged along with the main product automatically and sent to the assigned kitchen printer together.
4 (b) The following window will be shown.
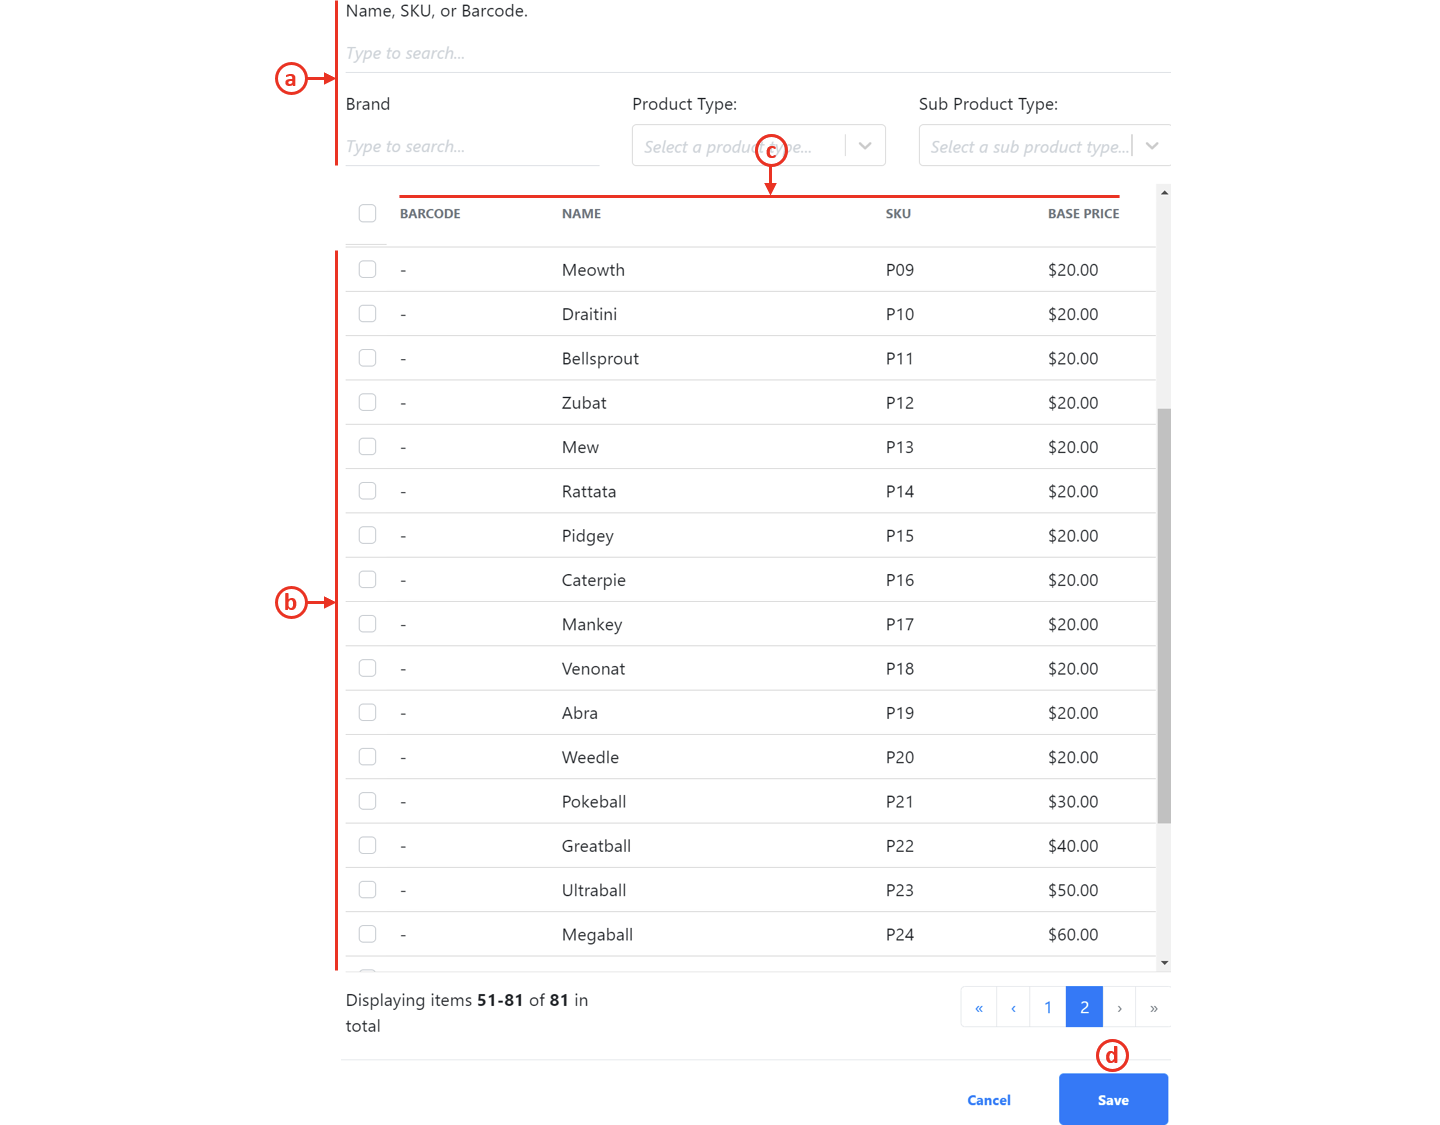
a. Search Panel: Search with product name, SKU, brand and product categories.
b. Selection Boxes: ☑️ the selection boxes for applicable products.
c. Product information: Barcode, name, sku and base price.
d. Click on Save once done
5 (a) Alternatively, users can click on Import From File to bulk import kitchen printing products.

5 (b) The following window will be shown.
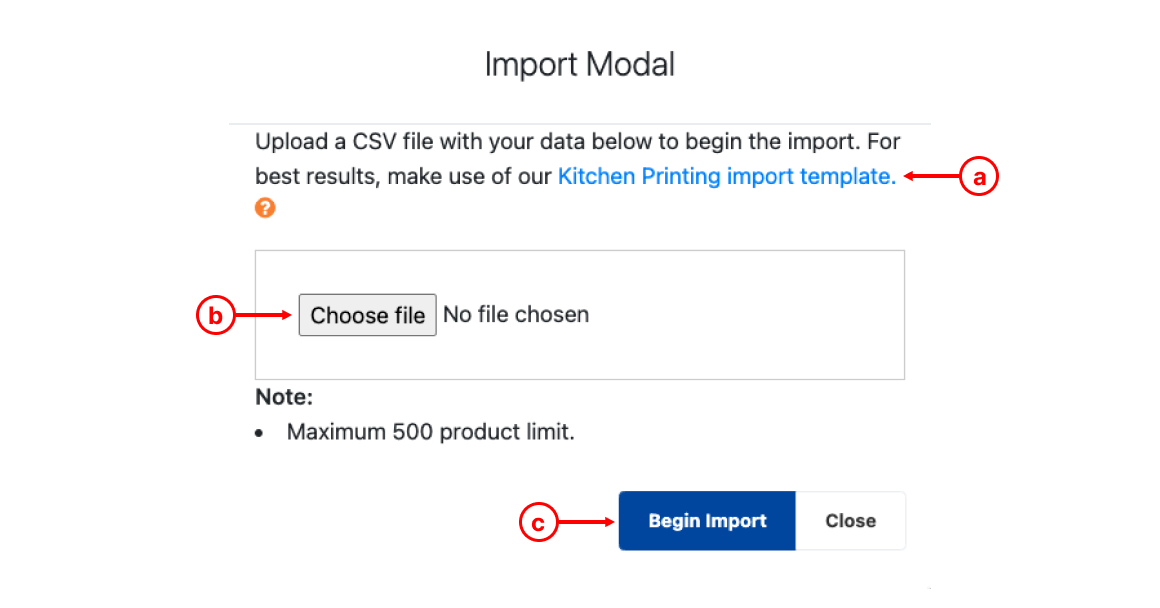
a. Download Kitchen Printing Import template, open the template and enter sku in column A.
💡 Click on “?” to see required information for bulk import.
b. Once done editing the csv template, upload the file by clicking on Choose file.
c. Click on Begin Import once done, the entire list of SKU will be assigned to the kitchen printer.
💡 Importing is limited to only 500 line items.
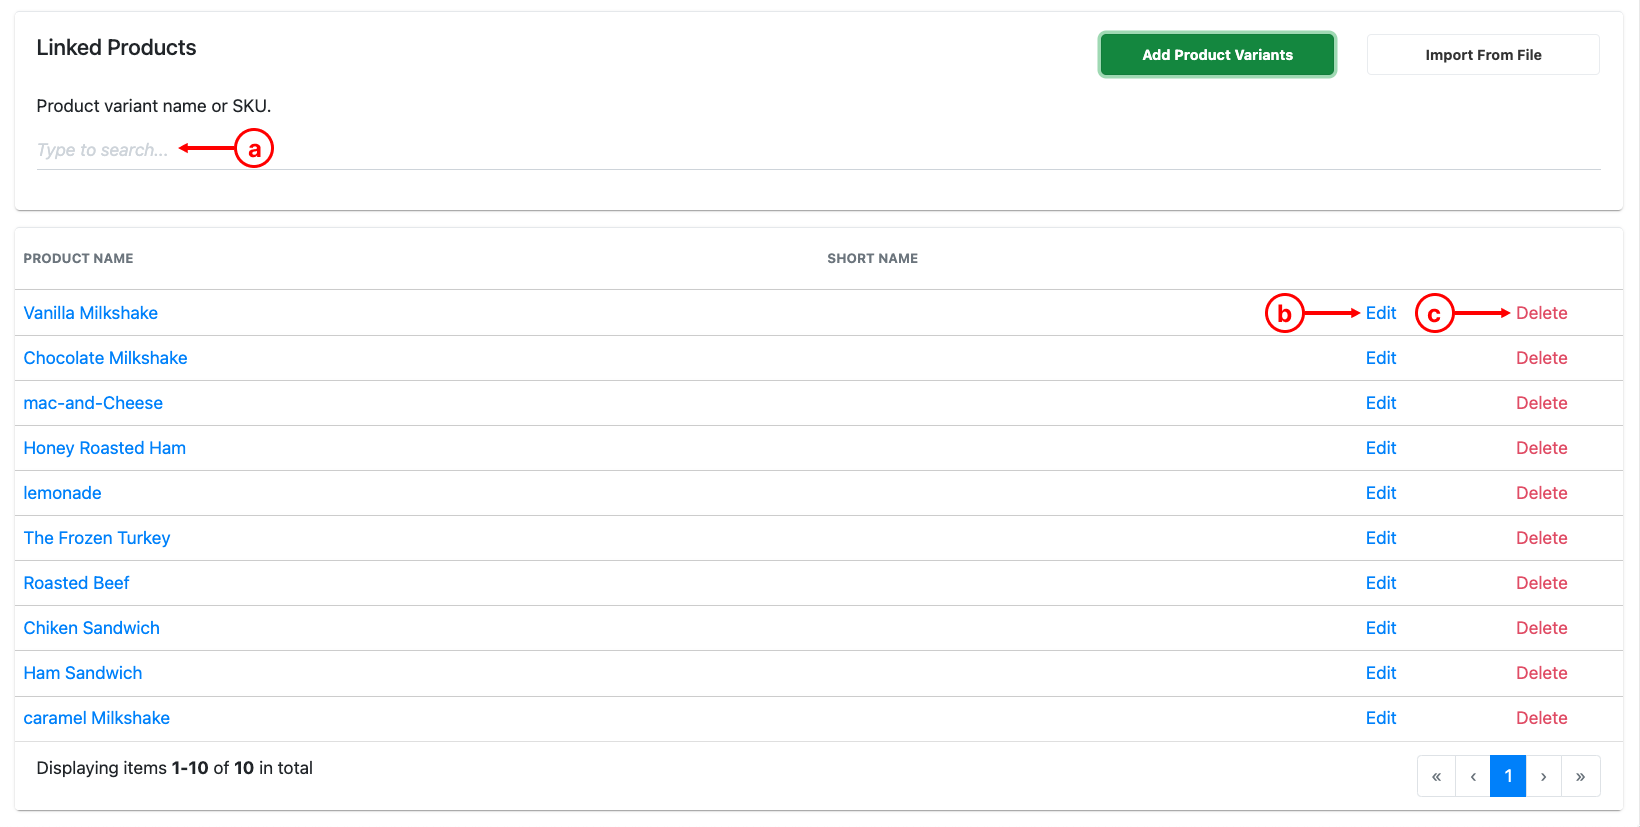
6. Once products are added, they will be shown in the list below. Users can then utilise the following:
a. Search – to search through the list to check if a particular product is added.
b. Edit – to assign a short name for the product.
c. Delete – to remove a particular product from the kitchen printer.