This section describes in detail the features of Customers Membership. Users will be guided through on creating new memberships, configuring the memberships and assigning customers to the relevant membership. This feature is best used for users who would like to reward customers with membership points as part of the effort in customer relationship management.
Users must take note that the point redemption setting will be constant across all membership tiers. However, to differentiate between membership tiers, users can decide the points earning rate (points earned per dollar spent) for each tier, e.g. the more prestigious tier will be rewarded more points per dollar spent.
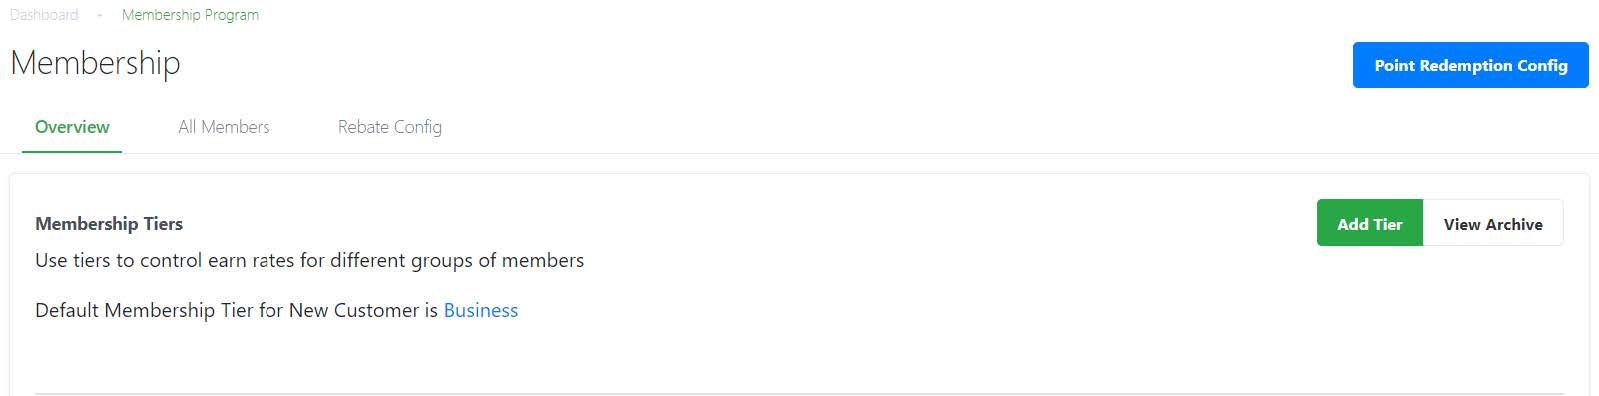
To access the Membership Main Page, at the Features Panel, click on Membership, by default, users will be directed to Membership Overview page.
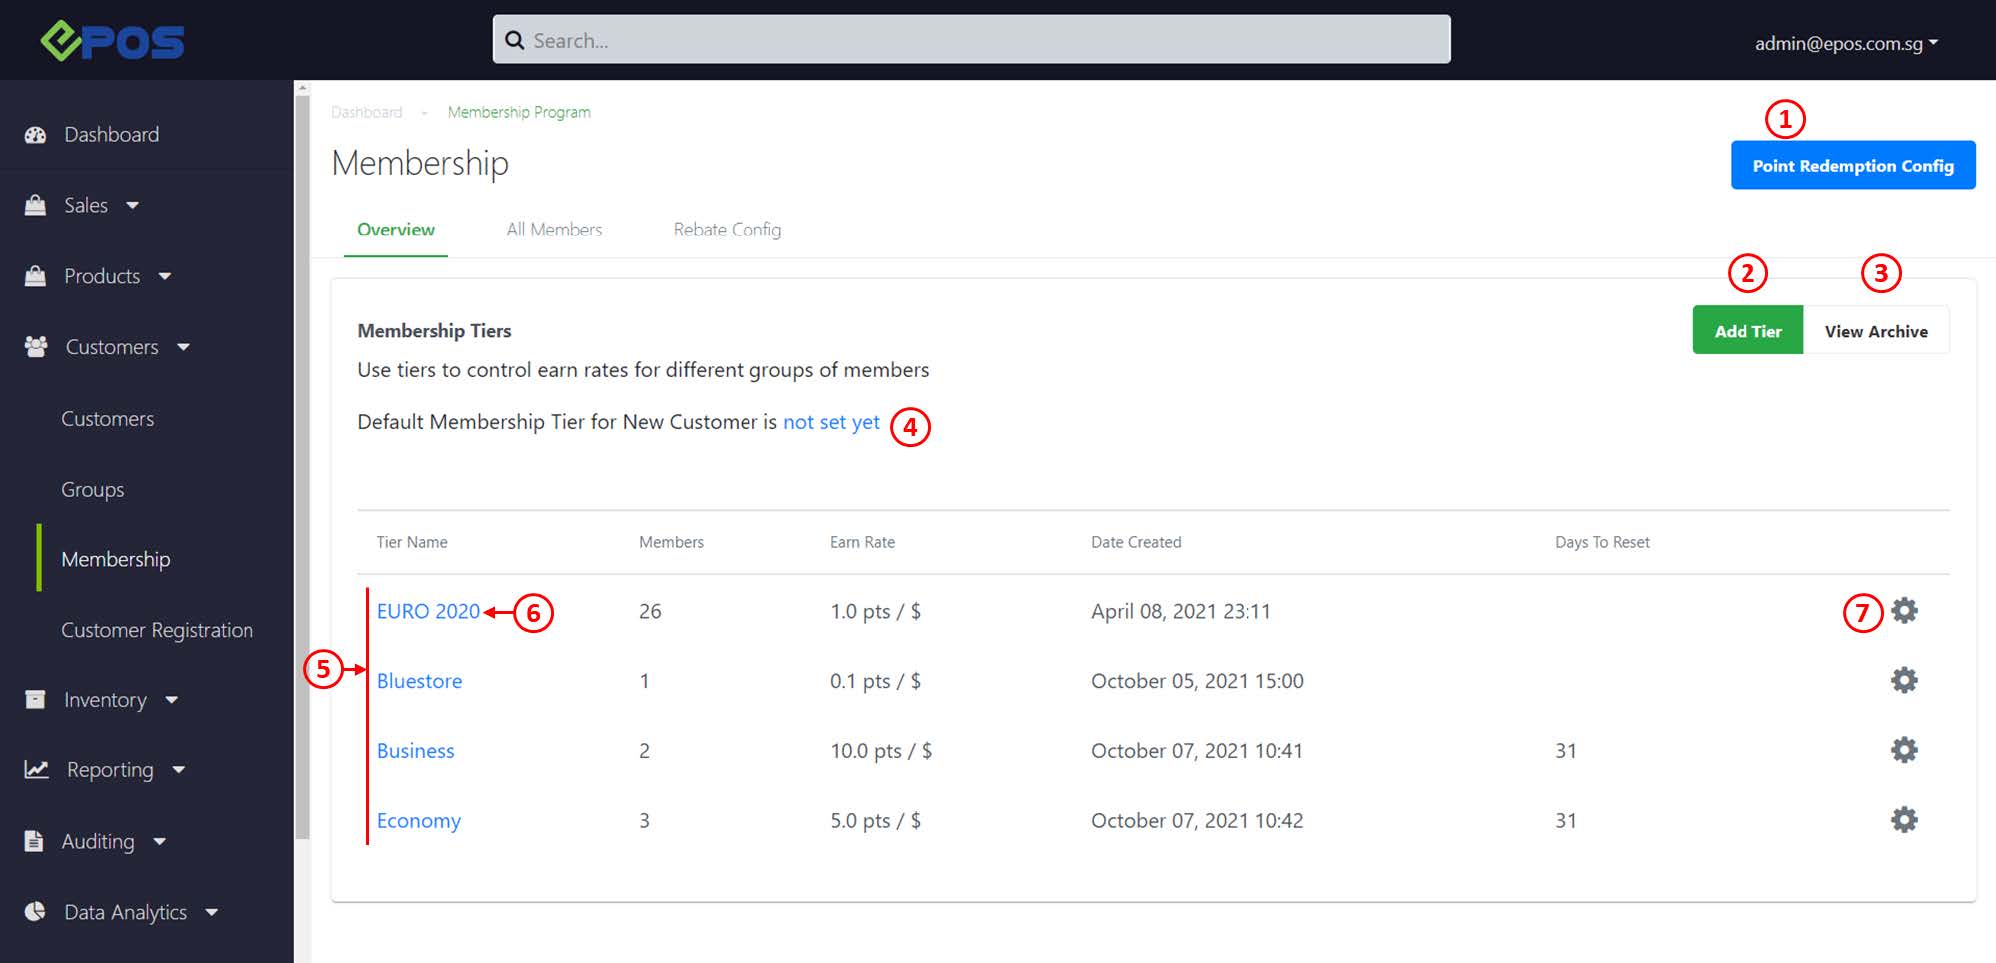
1. Point Redemption Config
Allows users to adjust the point redemption in terms of $/point for customers who wish to redeem membership points
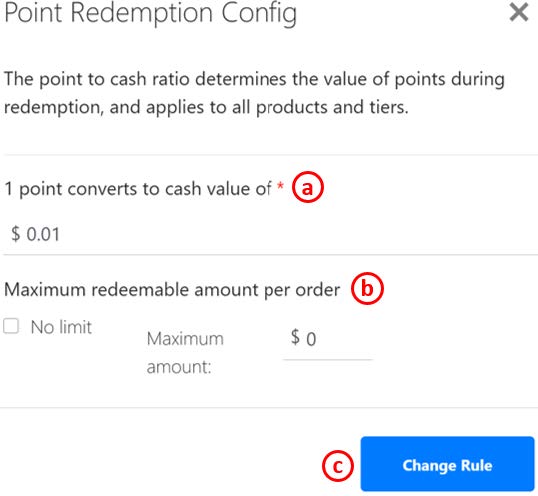
a. Enter points conversion rate.
b. Enter maximum redemption limit. If no limit, ☑️ No Limit.
c. Click on Change Rule once done.
2. Add Tier
Allows users to create a new membership tier.

a. Enter the name of the membership tier.
b. Enter no. of points earned per dollar spent.
c. Enter no. of days for unspent points to be forfeited.
💡Can be left blank if it is not applicable.
d. Click on Add Tier once done.
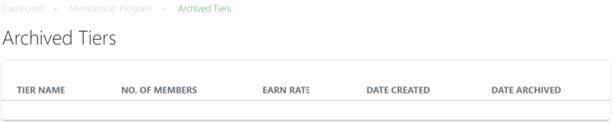
3. View Archive
Shows the membership tiers which are no longer active.
-
- Membership Tier Name
- No. of members
- Earn Rate: No. of points earned per dollar spent
- Date of membership tier created
- Date of membership tier archived
4. Default Membership Tier
Allows new customers to be automatically assigned to a particular membership tier.
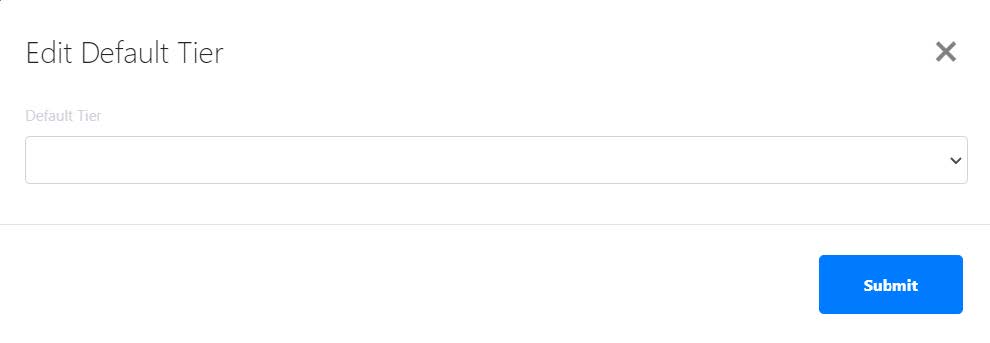 Click on the membership tier name to select the default tier from the list of dropdown selections. Click on Submit to confirm and save change.
💡No default tier will be selected if left blank.
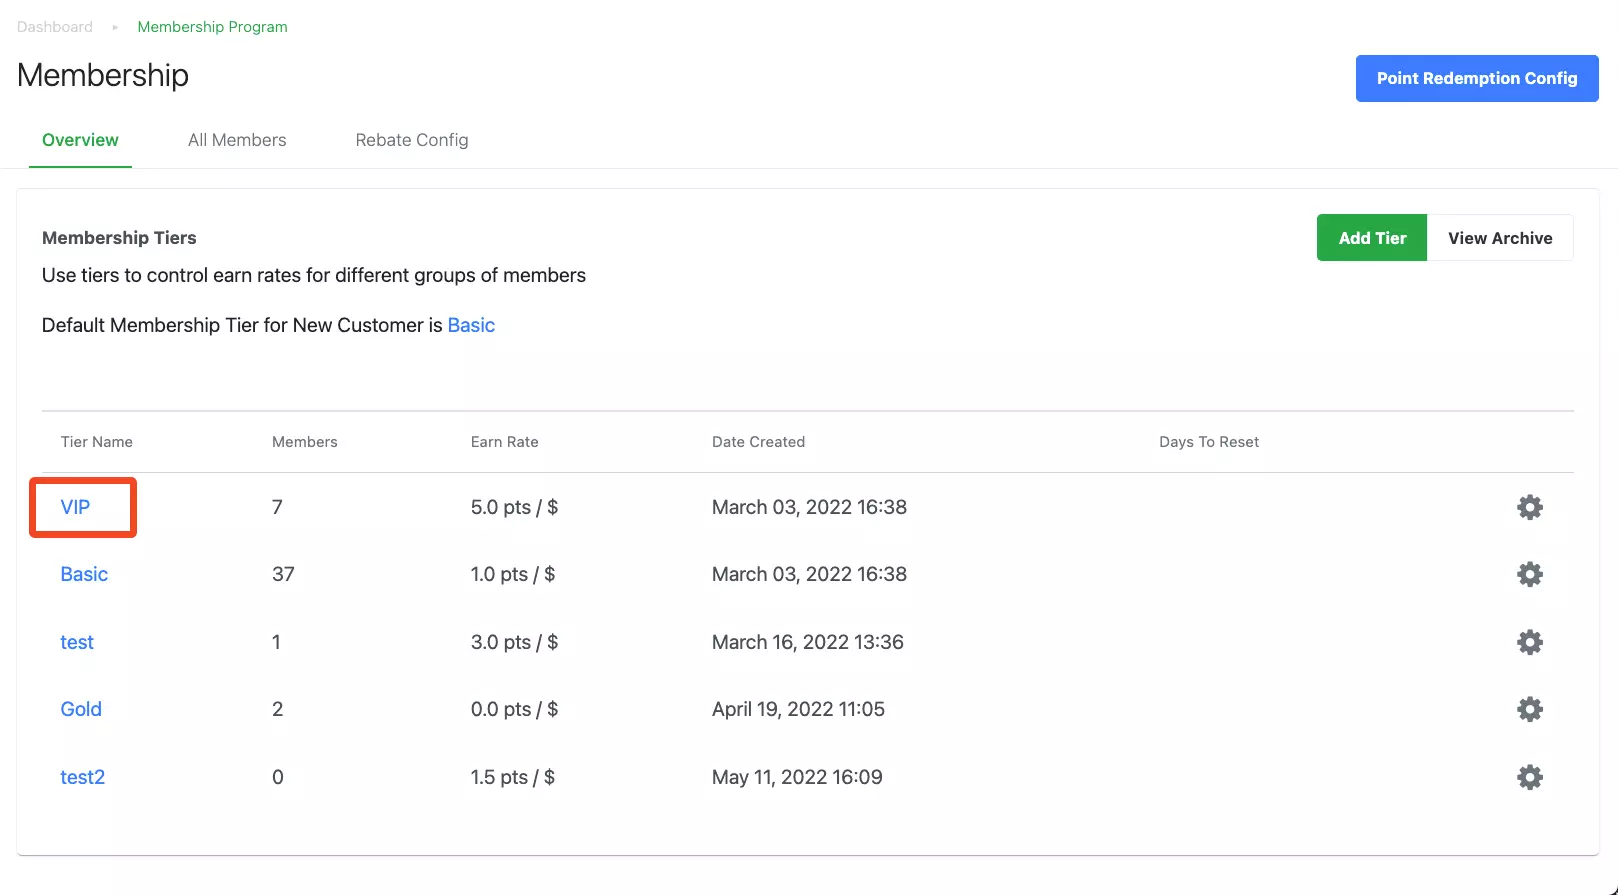
Once set, the default membership tier will be shown.
5. Membership Tier Details
Shows the user the list of membership tiers created and their related details
-
- Membership Tier Name
- No. of members
- Earn Rate – Points earned per dollar spent
- Date of membership tier created
- No. of days till membership points are forfeited
6. Membership Configurations
Direct users to the membership configuration page.
For more information, see Membership Configurations (Overview).
7. Quick Settings
Click on the gear button for membership settings.
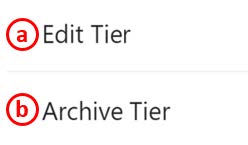
a. Edit Tier: similar to Point.2
b. Archive Tier: Deactivates membership tier.
This section guides users on assigning customers to membership tiers.
💡 Users need to ensure that a membership tier has been created before proceeding to assign customers.
For more information, refer to How to create membership tier.
To assign customers to membership:
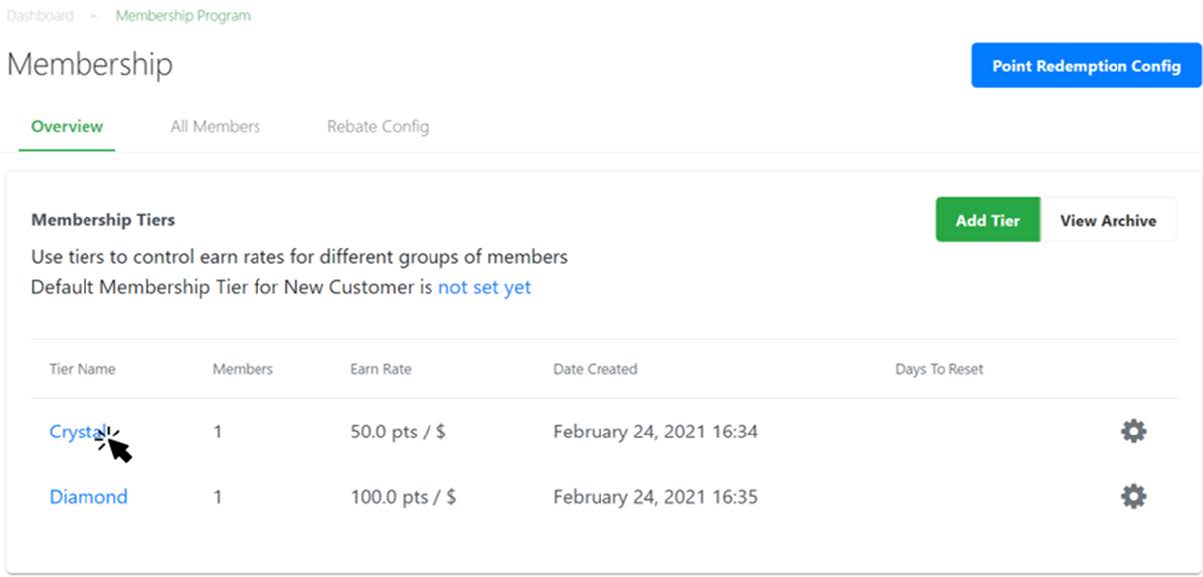
1. On the Membership Main Page, search for the particular membership tier, click on the name of the membership.
Users will then be directed to the Membership Configuration page.
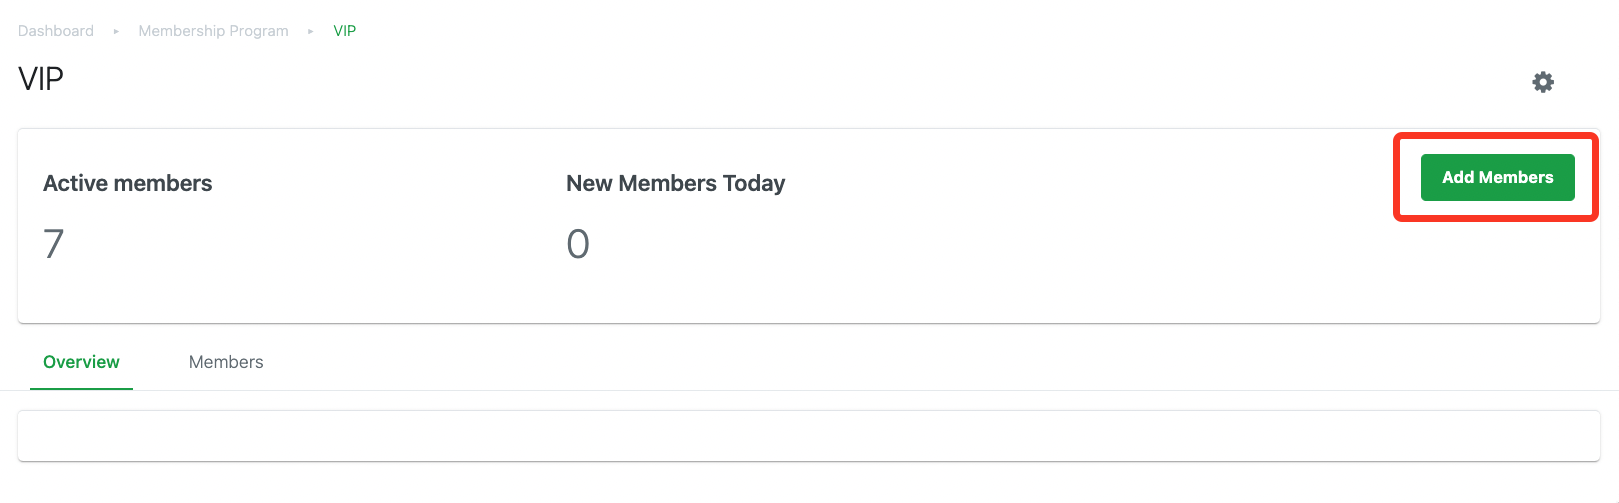
2. On the Membership Configuration page, click on Add Members, select customers field will be shown in the next step.
3. On the Select Customers field, see below.
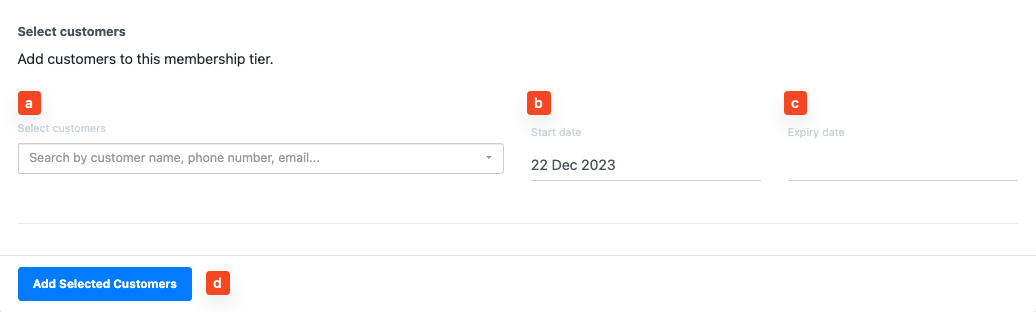
a. Enter customer’s details to retrieve customers, select relevant details.
💡 Users should ensure that customers were created beforehand.
💡 Customers who already exist in other membership tiers will not be shown.
b. Start date of membership.
c. Expiry date, leave blank if not applicable.
d. Click on Add Selected Customers after relevant customers are selected and fields are filled accordingly.
4. Users will be able to see the updates on the Membership Configuration page, under the Members tab, the list of customers added will be shown.
For more information, see Membership Configurations (Members).
💡 Users can also directly assign a new customer to a membership tier when Creating New Customers.
After assigning customers, users will then be guided on configuring the membership tiers.
Release Log:
Dec 2023: Implemented A Membership Tier Expiry Configuration That Enables For Automation
To access Membership Configuration page, click on the name of the membership tier.
Users will then be directed to the Membership Configuration page, under the Overview tab.
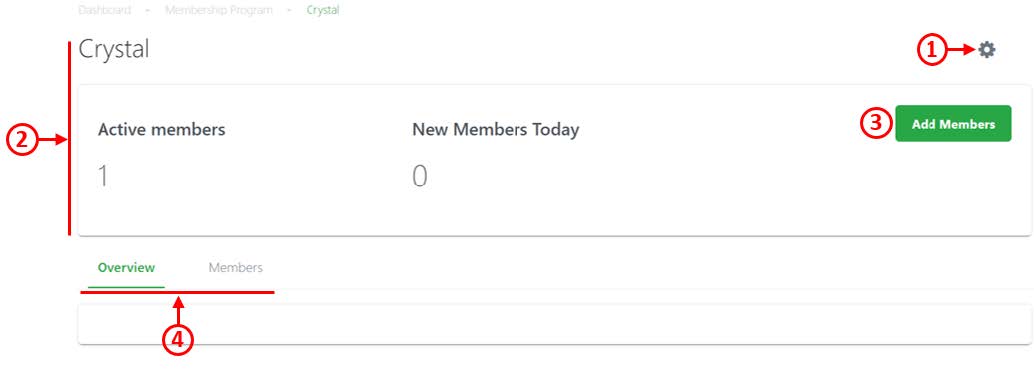
1. Membership Settings
a. Edit Tier: Displays Edit Tier window.
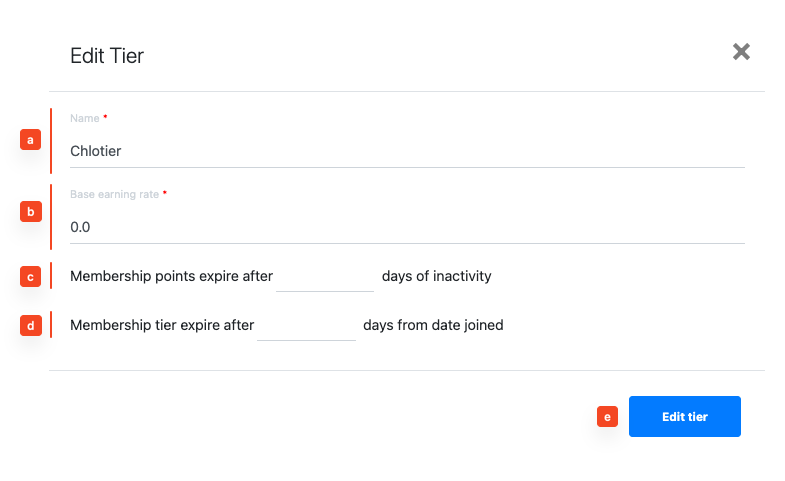
a. Edit membership tier name.
b. Edit membership tier points earning rate.
c. Edit number of days of inactivity for membership points to expire.
d. Edit number of days from date joined for membership tier to expire.
💡 The number of days for the membership tier to expire will auto-apply for all new members of the membership tier.
💡 Users are encouraged to input the number of days to expiry for membership points and tiers to automate the membership point and tier expiration process.
e. Click to save changes to membership tier configurations.
b. Archive Tier: Deactivates membership tier.
2. Membership Tier Overview
Shows the number of active members and new members added today.
3. Add Members
Allows users to assign customers to a particular membership tier. For more information, see Assigning Customers to Membership Tiers.
4. Tab Toggler
Allow users to switch tabs in the Membership Configuration page.
As a continuation, users will see members details in
As a continuation, users will see members details in Membership Configurations under the Members tab.
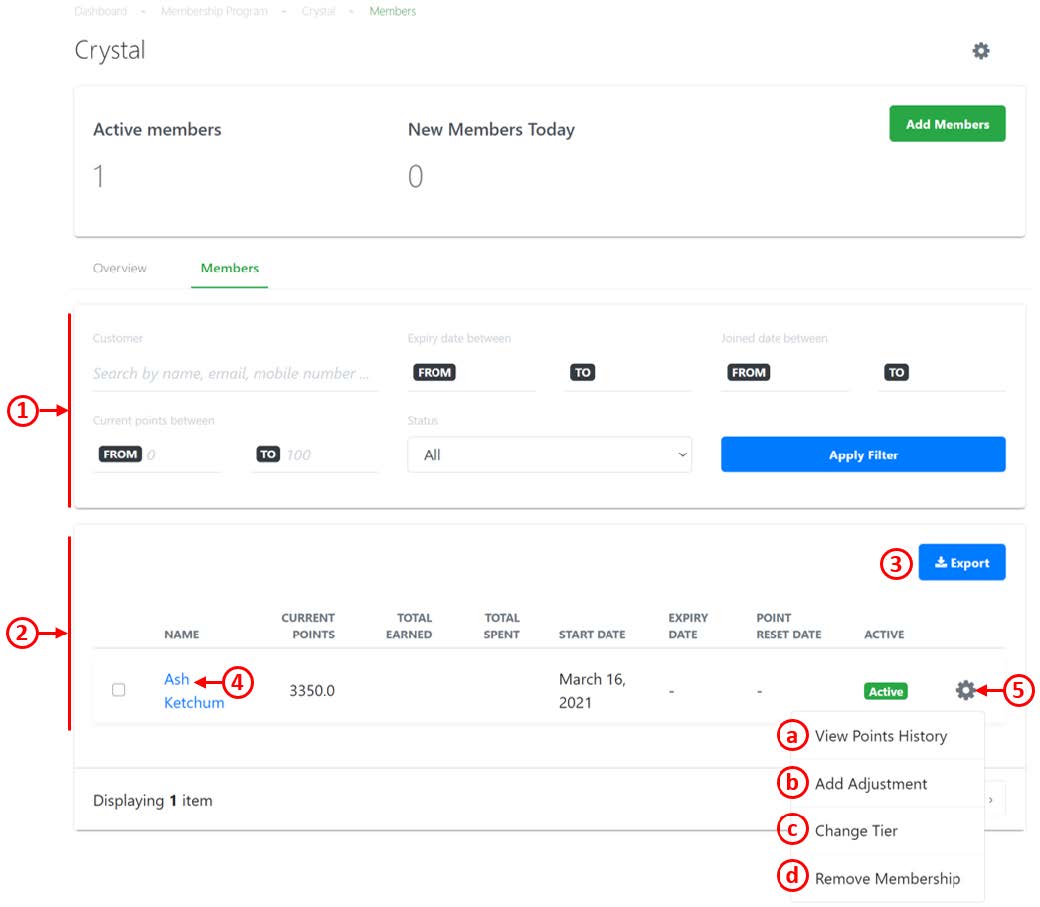
1. Filter and Search
Allows users to filter and search for customers in the membership.
2. Members List
Shows user the list of customers added to the membership tier and related details:
-
- Name of customer
- Current Points
- Total Points Earned
- Total Points Spent
- Start Date of membership
- Expiry Date of membership
- Point Reset Date
- Active Status
3. Export Members List
Download the list of selected members and relevant information in CSV format.
4. Customer Configuration
Directs users to the Customer Configuration page of a particular customer.
5. Quick Settings
a. View Points History: Directs user to Customer’s Point History.
b. Add Adjustment: Displays Add Adjustment window
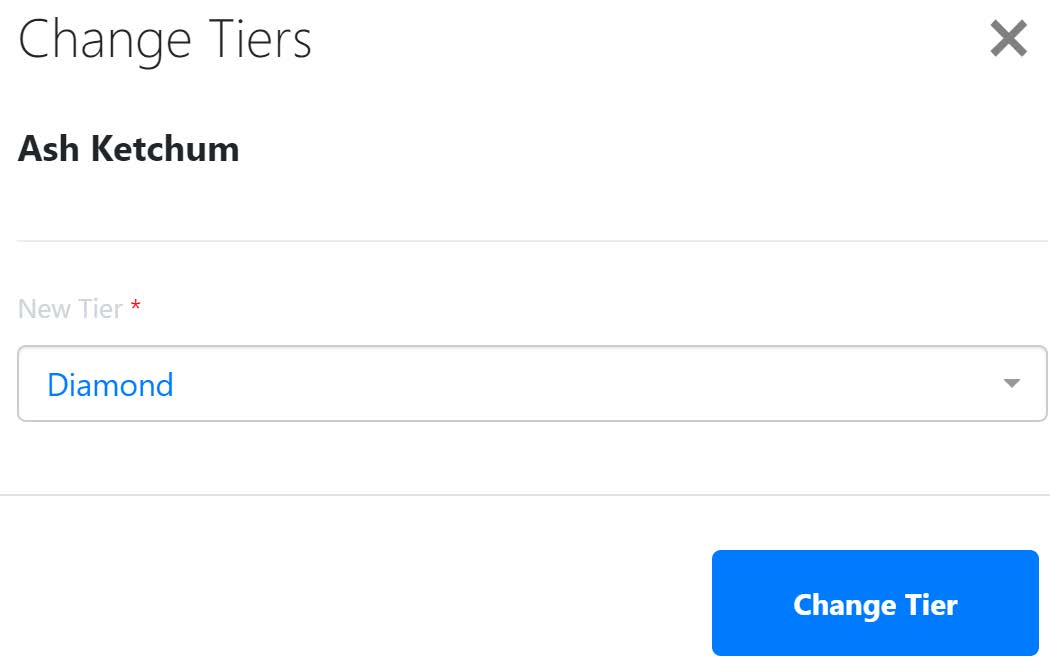
c. Change Tier: Allows users to change customer’s membership tier. Select a new membership tier then Click on Change Tier once done.

d. Remove Membership: Removes customer as a member.
Under the Members tab:
1. Filter and Search
Allows users to filter and search for customers in the membership.
2. Members List
Shows user the list of customers added to the membership tier and related details:
-
- Name of customer
- Current Points
- Total Points Earned
- Total Points Spent
- Start Date of membership
- Expiry Date of membership
- Point Reset Date
- Active Status
3. Export Members List
Download the list of selected members and relevant information in CSV format.
4. Customer Configuration
Directs users to the Customer Configuration page of a particular customer.
5. Quick Settings
a. View Points History: Directs user to Customer’s Point History.
b. Add Adjustment: Displays Add Adjustment window, see Customer’s Point History.
c. Change Tier: Allows users to change customer’s membership tier. Select a new membership tier then Click on Change Tier once done.
d. Remove Membership: Removes customer as a member.
Users can utilize this feature to access information of all customers who are assigned to a membership tier.
To access All Members List:
From Membership Main Page, Click on the All Members.
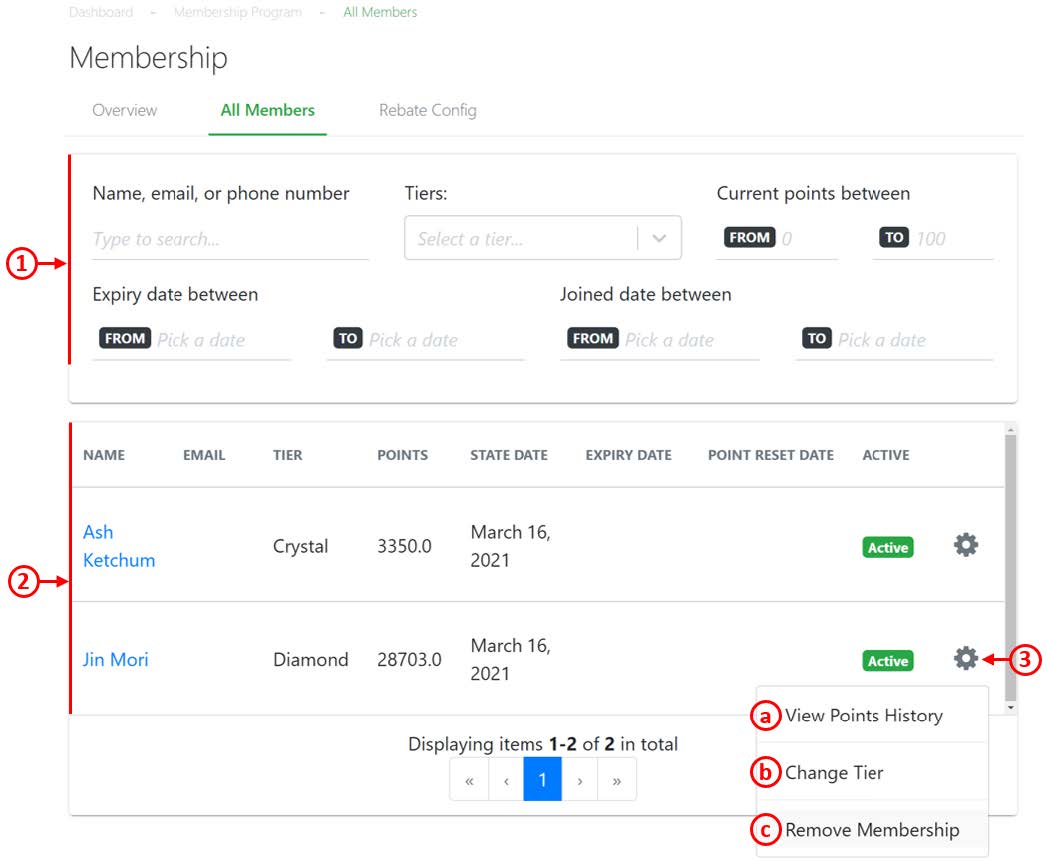
1. Filter and Search
Allows users to filter and search for all customers assigned to a membership.
2. Members List
Shows user the list of customers already assigned to a membership
-
- Name of customer
- Email (if information is available)
- Tier
- Current Points
- Start Date of membership
- Expiry Date of membership
- Point Reset Date
- Active Status
3. Quick Settings
a. View Points History: Directs user to Customer’s Point History.
b. Change Tier: Allows users to change customer’s membership tier. Select a new membership tier then Click on Change Tier once done.
c. Remove Membership: Removes customer as a member.
Users can utilize this feature to configure membership points redemption and add/delete products which contribute to membership points.
To access Membership Points Rebate Configurations:
From Membership Main Page, click on Rebate Config.
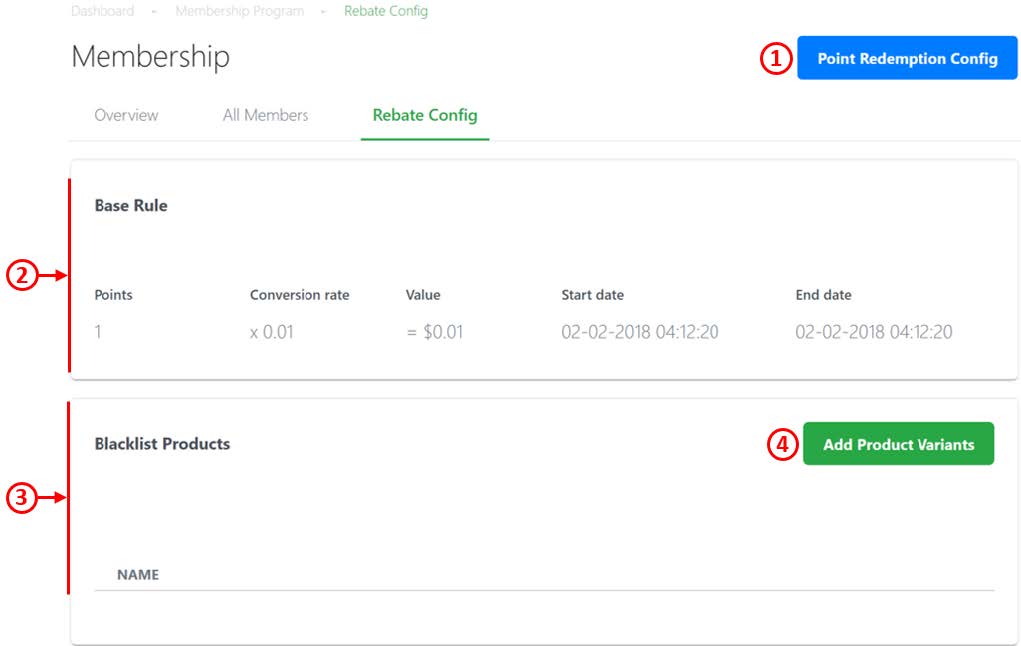
1. Point Redemption Config
Allows users to adjust the point redemption in terms of $/point for customers who wish to redeem membership points.
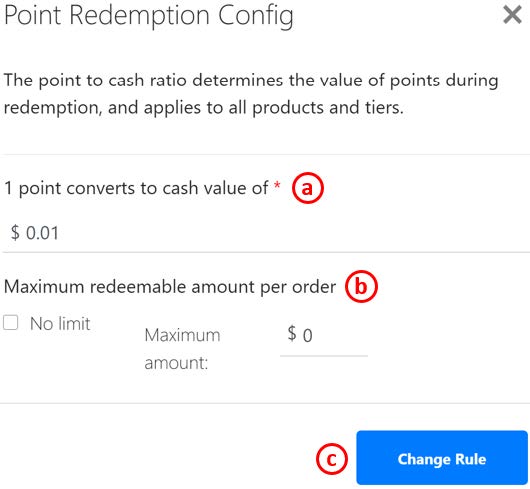
a. Enter points conversion rate
b. Enter maximum redemption limit. If no limit, ☑️ No Limit
c. Click on Change Rule once done.
2. Base Rule
Shows users the base earning rule and start & end date of the membership tier.
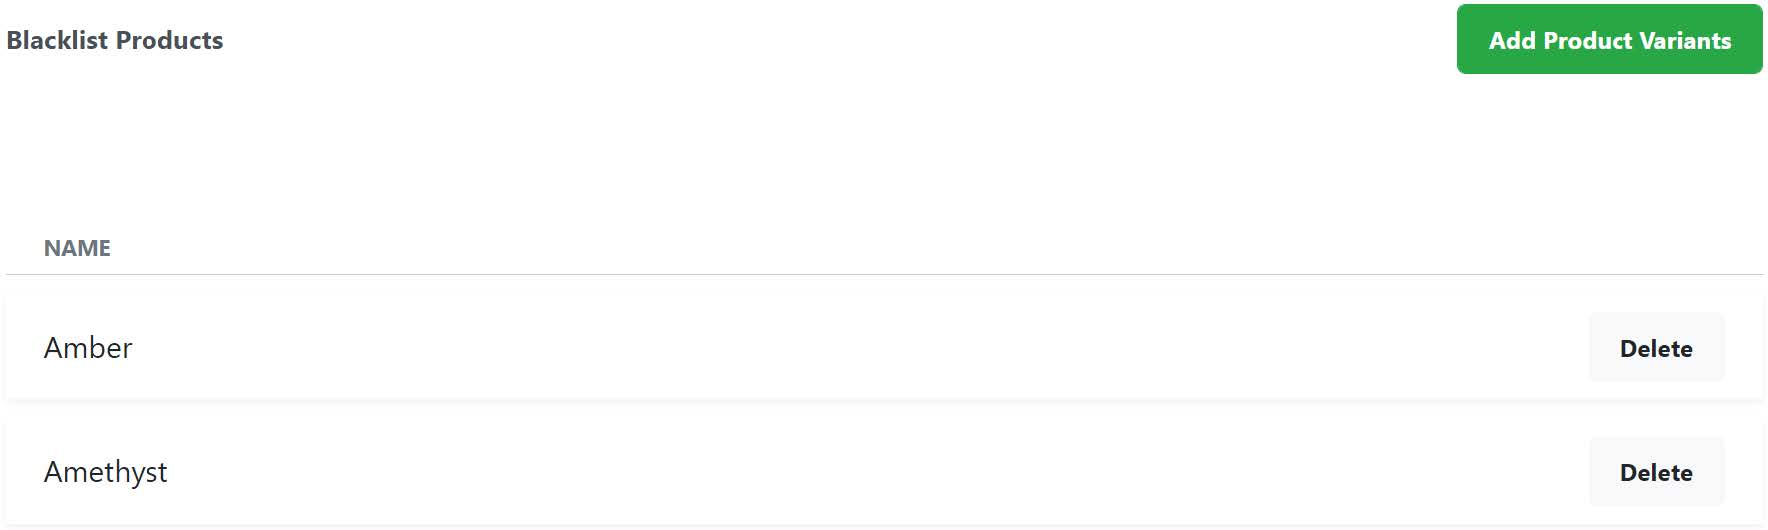
3. Blacklist Products
Shows users the list of products which do not contribute to customer’s membership points.
4. Add Product Variants
Displays an Add Product Variant window for users to select variants.
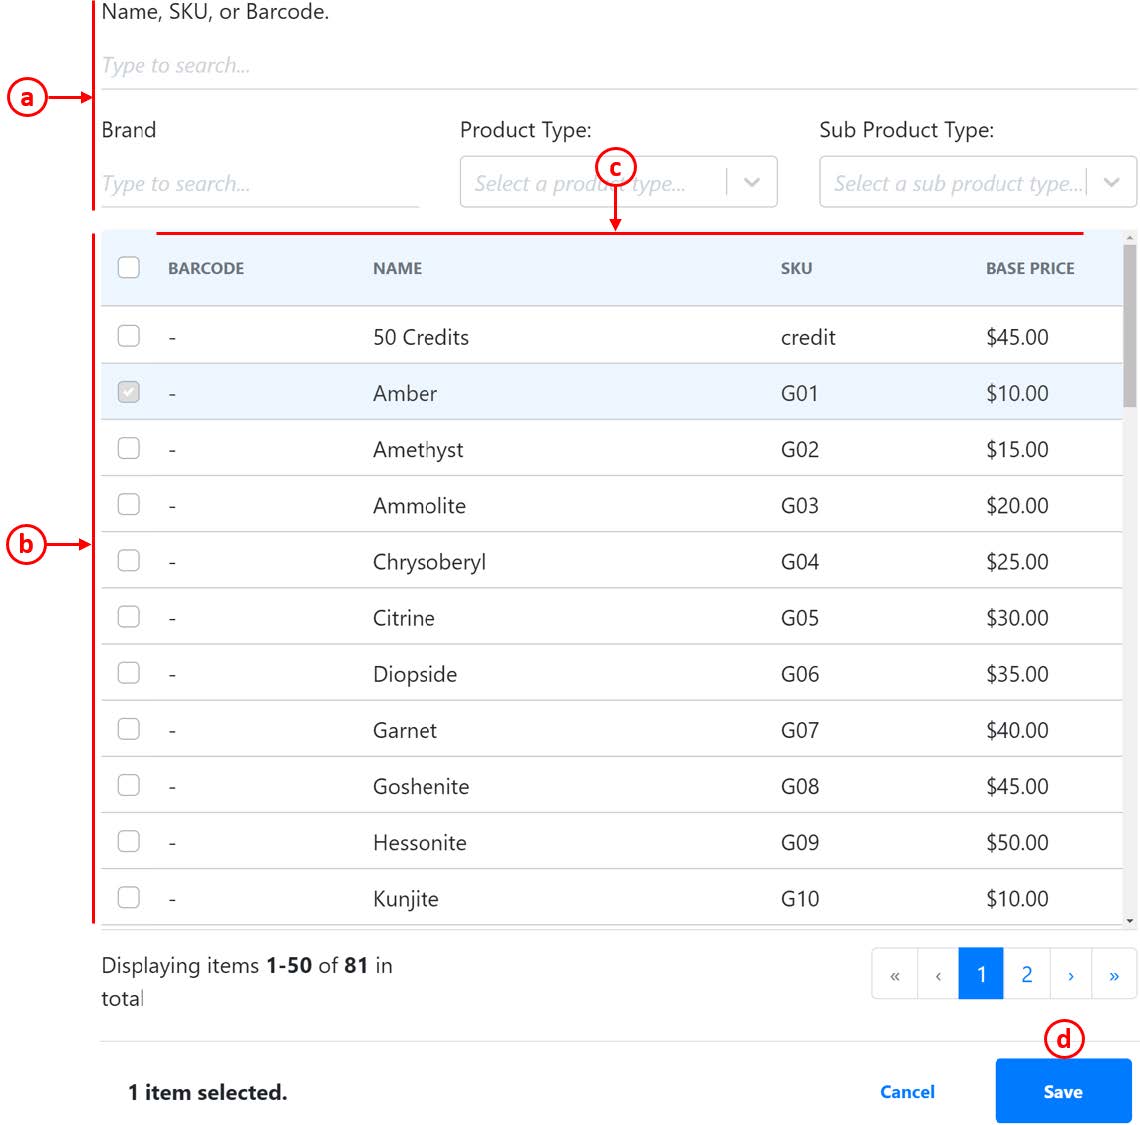
a. Search Panel: Search with name, SKU, brand, product categories.
b. Selection boxes: ☑️ the selection boxes for applicable products.
c. Product Information.
d. Click on Save once done.
Once blacklist products are added, membership points will not be credited to the customer’s account when the products are purchased.