This tab serves as a guide to how customers will be using the kiosk through each step:
-
- Dine-In/Take Away
- Making an order
- Making payment
Step-by-Step:
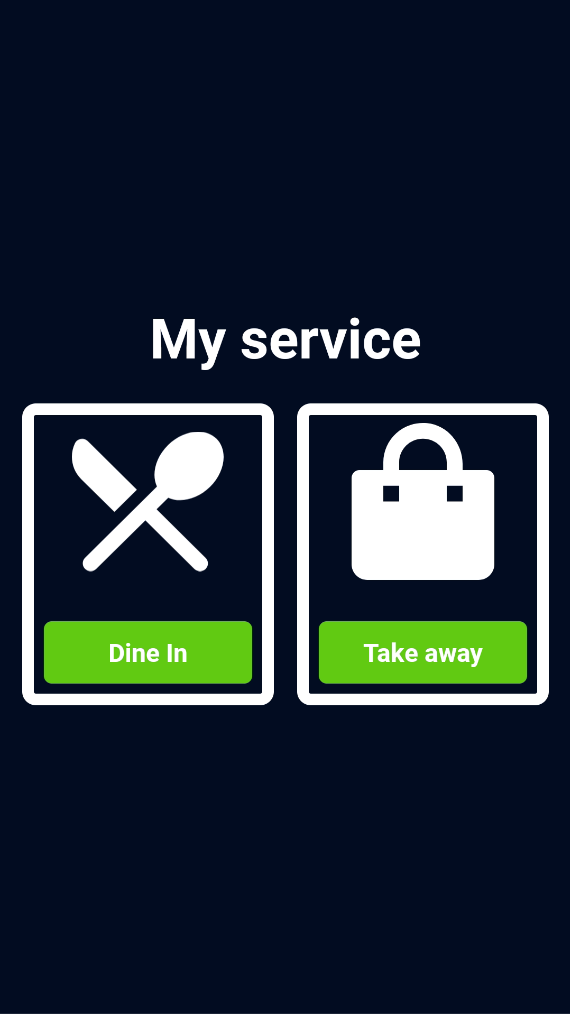
1. My service

Customers will select the mode of dining.
2. Sales Page

Customers will begin by selecting the products/services they would like to purchase from the quickpick selection.
Alternatively, they can opt to scan for the items using the barcode scanner located at the bottom right of the kiosk. If a BCRS barcode is scanned, a BCRS deposit will automatically be accounted for.
Note: Ensure that the BCRS item is already configured in the backend. For more information, visit Beverage Container Return Scheme (BCRS) setup.
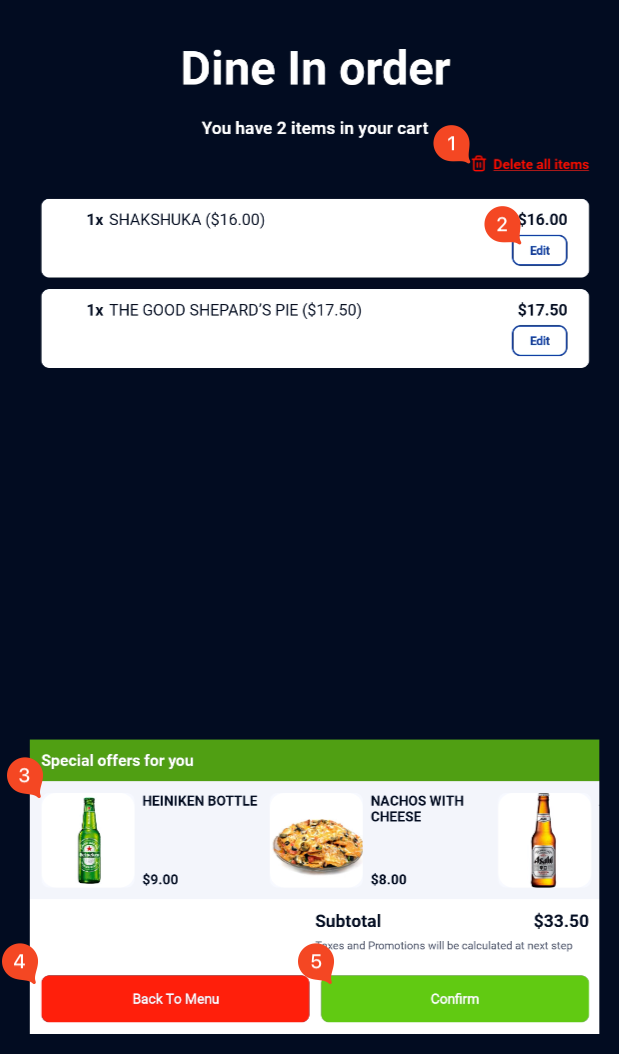
3. Order Confirmation Page

On this page, customers would be able to:
-
- Delete all items from cart
- Edit items added to cart
- Add recommended products to cart
- Go back and view menu
- Confirm order and proceed to make payment
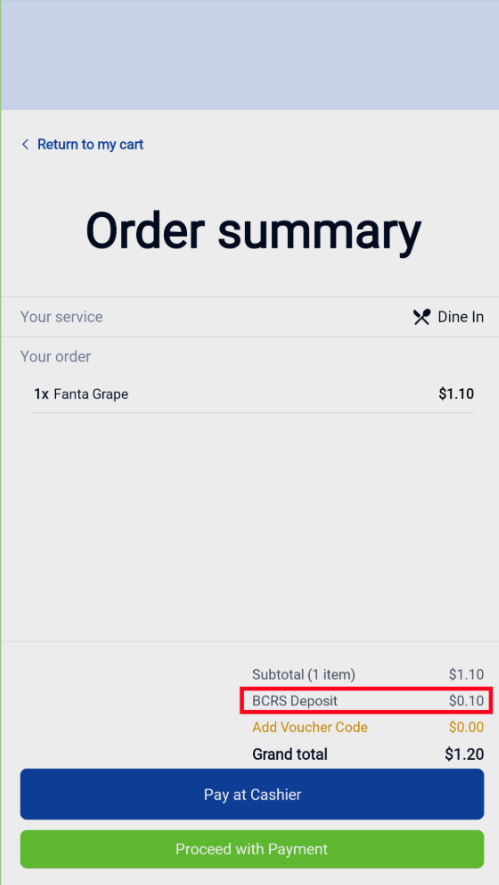
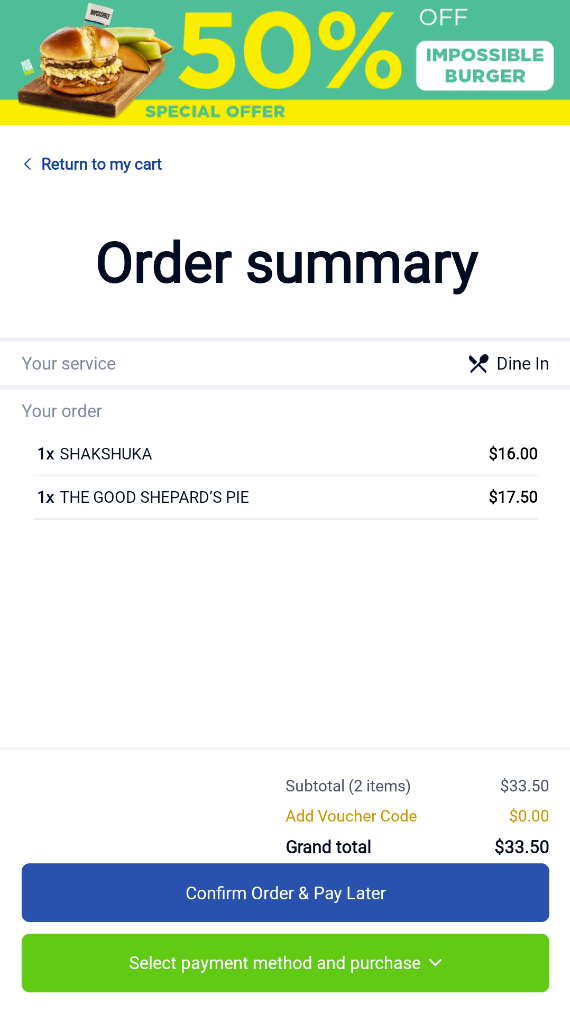
4. Order Summary Page

Customers will be able to select what type of payment mode they would like to use.
-
- Clicking the “Confirm Order & Pay Later” button prints a receipt for customers to bring to the cashier for payment.
- Clicking the “Select payment method and purchase” button brings customers to the Order Summary Page – Other Payment Methods.
Note: The order summary will display the total BCRS deposit when a BCRS eligible item is added to the cart.
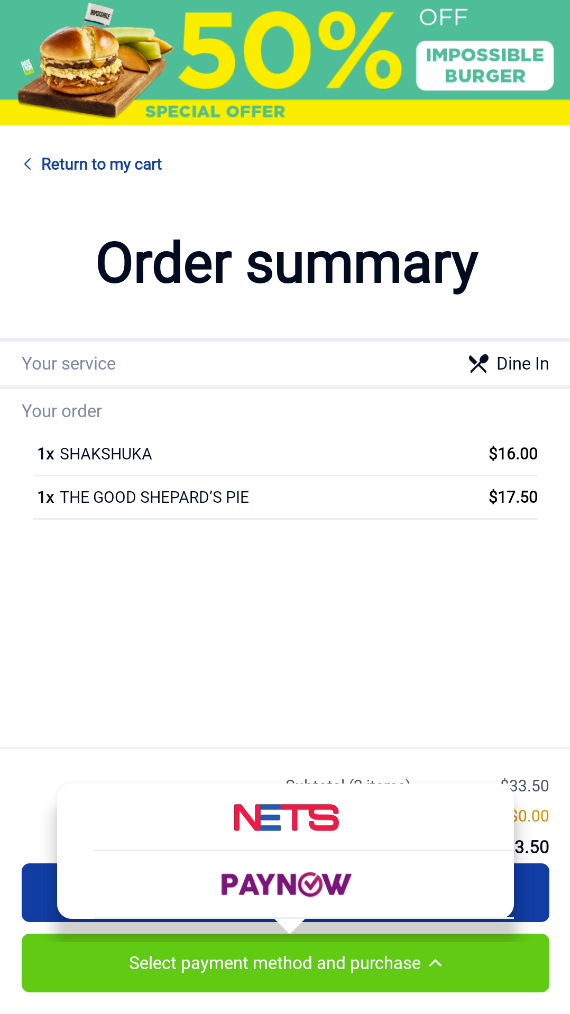
5. Order Summary Page – Other Payment Methods
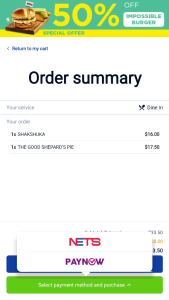
All other in-app payment methods would appear in a list.
💡 To set up payment methods for the kiosk, refer to the “Payment Method” tab.
6. Post-Payment
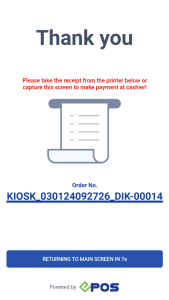
To return to the Sales Page, users can:
-
- Wait for the time-out countdown to return to the main screen, or
- Click “Returning to Main Screen” to proceed to the main screen immediately
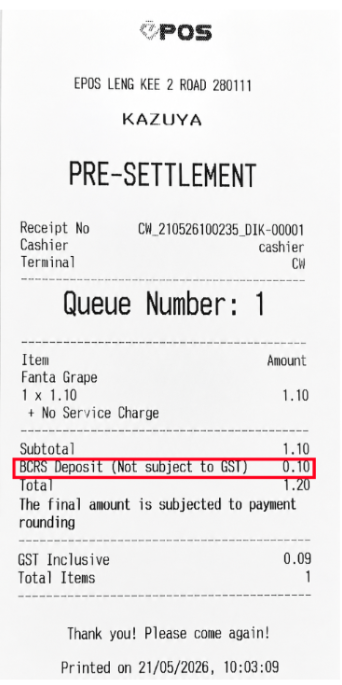
In the sales receipt/ pre-settlement receipt generated, the BCRS deposit will be reflected clearly.
- The footer of the receipt will include the line: “BCRS Deposit (Not subject to GST): [BCRS Deposit Amount]”
This tab serves as a guide to how customers will be using the kiosk through each step:
-
- Dine-In/Take Away
- Membership registration**
- Making an order
- Making payment
- Earn membership points as a member**
💡 To enable membership features, indicated by (**), contact our support team at [email protected] / 6871 8833.
💡 Refer to the CRM-related tabs for CRM set up on the kiosk.
Step-by-Step:
1. My service
Customers will select the mode of dining.
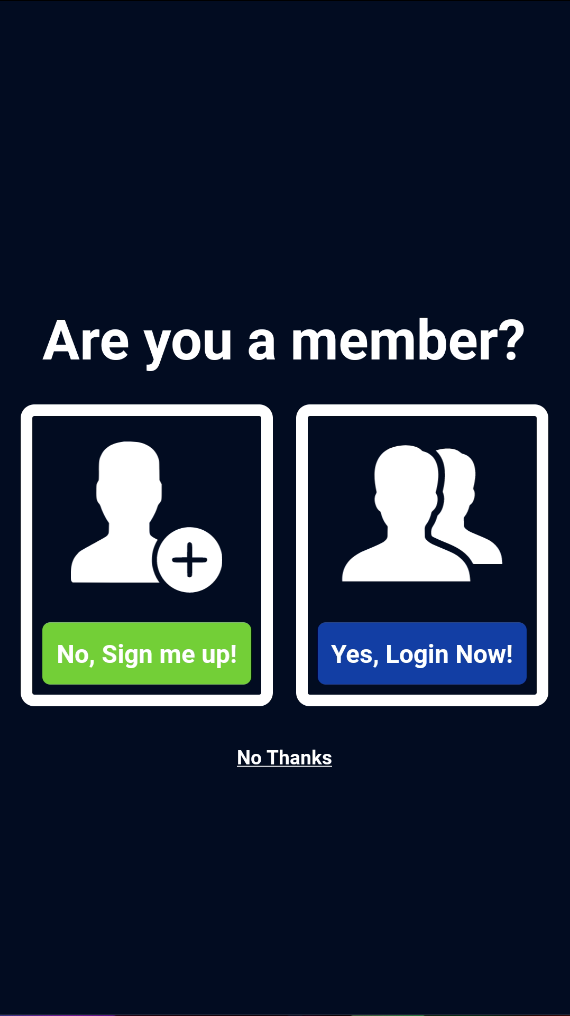
2. Are you a member?**
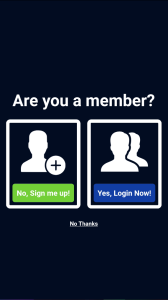
-
- “No, Sign me up!” → brings customers to the membership registration page
- “Yes, Login Now!” → brings customers to the member’s login page
- “No Thanks” → brings customers right to the sales page, without tagging them to the order
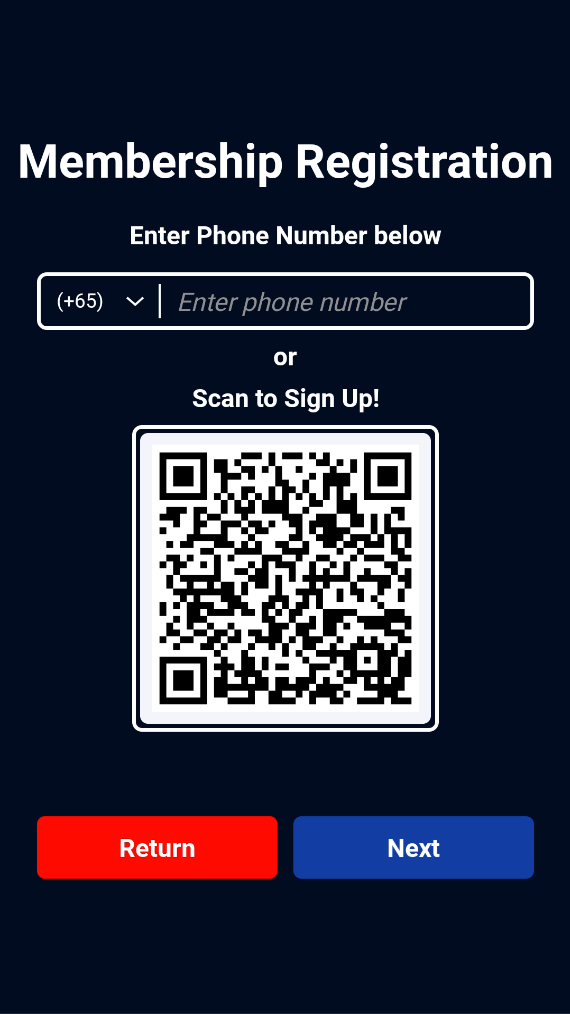
3. Membership Registration Page

Customers can register as a member through the following options:
-
- Enter their phone number on the kiosk screen
- Clicking on the “Next” brings customers to the Sales Page
- Scan the QR Code on the screen using their phones to sign up on the customer portal
- Clicking on the “Next” button brings customers to the login page
💡 Set up the compulsory/optional fields for sign-ups in the Customer Registration module
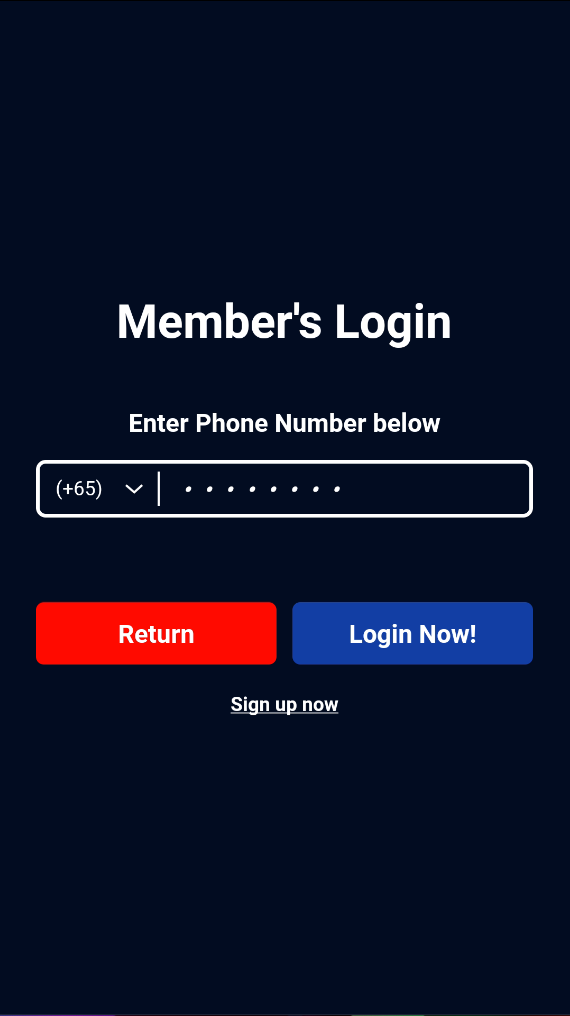
4. Member’s Login Page

Customers enter their phone number on the screen.
Clicking on the “Login Now!” button brings customers to the Sales Page, tagging customers to the order.
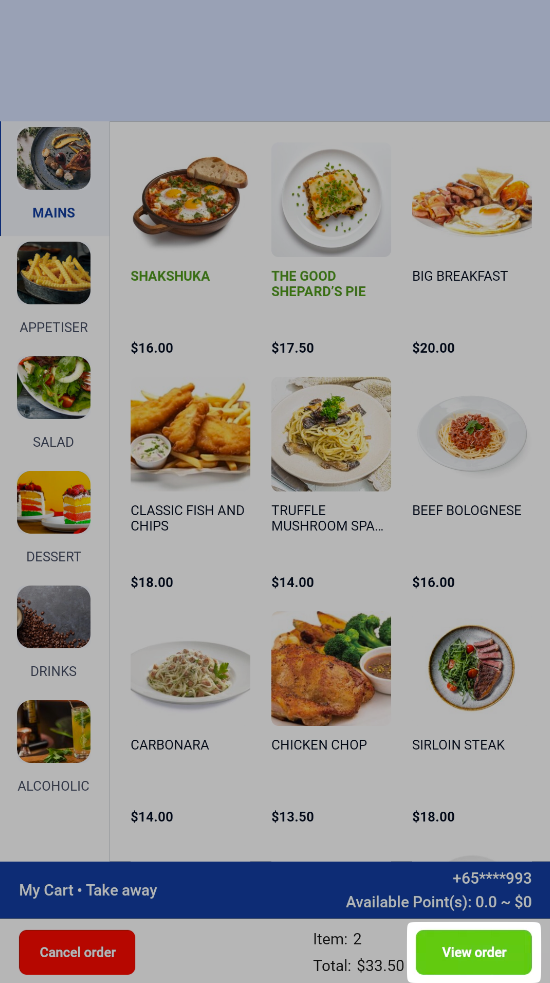
5. Sales Page
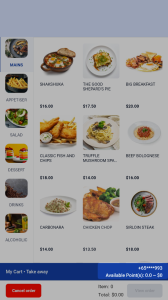
Customers will begin by selecting the products/services they would like to purchase from the quickpick selection.
Alternatively, they can opt to scan for the items using the barcode scanner located at the bottom right of the kiosk. If a BCRS barcode is scanned, a BCRS deposit will automatically be accounted for.
Note: Ensure that the BCRS item is already configured in the backend. For more information, visit Beverage Container Return Scheme (BCRS) setup.
Members would be able to view their membership points at the bottom right of the screen.
6. Sales Page – “View Order”

Upon selecting products, customers would be able to click on the “View Order” button
7. Order Confirmation Page
On this page, customers would be able to:
-
- Delete all items from cart
- Edit items added to cart
- Add recommended products to cart
- Go back and view menu
- Confirm order and proceed to make payment
8. Order Summary Page
Customers will be able to select what type of payment mode they would like to use.
-
- Clicking the “Confirm Order & Pay Later” button prints a receipt for customers to bring to the cashier for payment.
- Clicking the “Select payment method and purchase” button brings customers to the Order Summary Page – Other Payment Methods.
Note: The order summary will display the total BCRS deposit when a BCRS eligible item is added to the cart.

9. Order Summary Page – Other Payment Methods
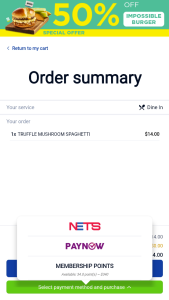
All other in-app payment methods would appear in a list.
💡 To set up payment methods for the kiosk, refer to the “Payment Method” tab.
💡To utilise membership points, customers must have sufficient points to pay for the whole Order
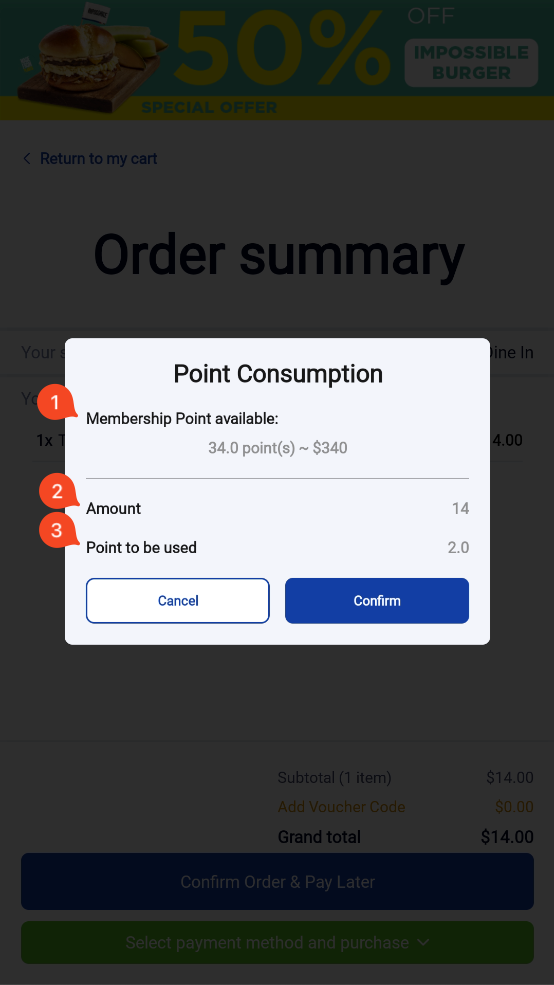
10. Points Consumption Page**

Members utilising membership points for their purchase would be prompted with the pop-up to confirm their payment method.
-
- Membership Point available: Shows the amount of membership points available in points and dollars
- Amount: Shows the dollar amount payable
- Point to be used: Shows the membership points payable
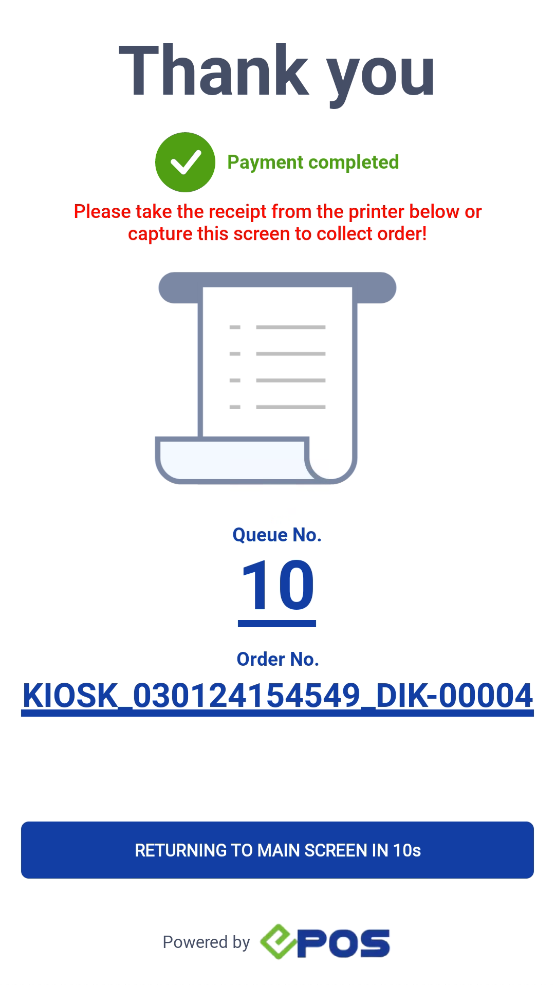
11. Post-Payment

To return to the Sales Page, users can:
-
- Wait for the time-out countdown to return to the main screen, or
- Click “Returning to Main Screen” to proceed to the main screen immediately
In the sales receipt/ pre-settlement receipt generated, the BCRS deposit will be reflected clearly.
- The footer of the receipt will include the line: “BCRS Deposit (Not subject to GST): [BCRS Deposit Amount]”
This page serves as a guide to setting up the kiosk for your business.
To start using the kiosk, ensure that the following have been set up:
-
- Users MUST have a POS
- Products and configurations in the Kiosk & Web Ordering Module have to be set up correctly
- Payment method have been enabled as a payment method at the appropriate outlets and assigned to the kiosk
- Check that both the POS and kiosk app are updated to the latest version
Once these areas are set up, further configurations can be adjusted on the kiosk itself.
This page serves as a guide to setting up your kiosk for EPOS CRM features, including:
-
- Customer Membership Registration/Login
- Earning Membership Points
- Utilising Membership Point As Payment
💡 To better understand how customers will be using the kiosk, see the “Ordering” tab
To enjoy the CRM features on your kiosk, ensure that you have set up the following:
-
- Membership
- Set up membership tiers
- Set up point redemption setting and points earning rate
- Enable/disable partial point usage according to your needs
- Payment Method
- Membership points must be enabled as a payment method at the appropriate outlets and assigned to the kiosk
💡 Having multiple kiosks in a single outlet: Payment configurations applied to a single outlet would apply to all kiosks in the same outlet.
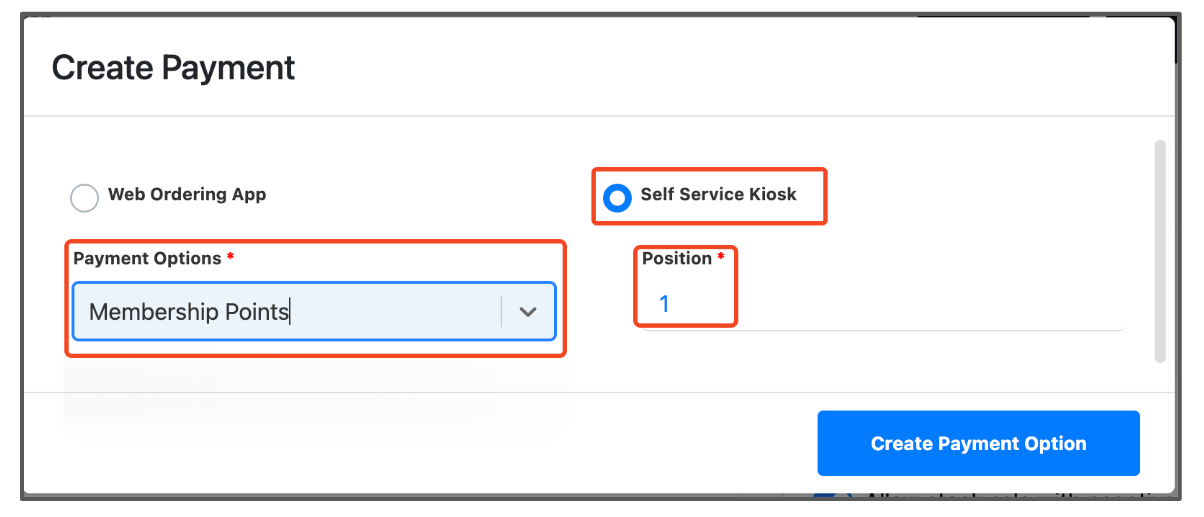
This page serves as a guide for users to set up all the relevant payment methods:
-
- Membership Points
- Integrated UOB PayNow
- NETS & NETS Credit Card
- EPOSPay Credit Card Terminal
💡 Each individual payment method has to be set up separately
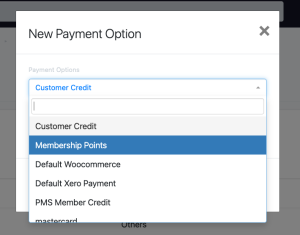
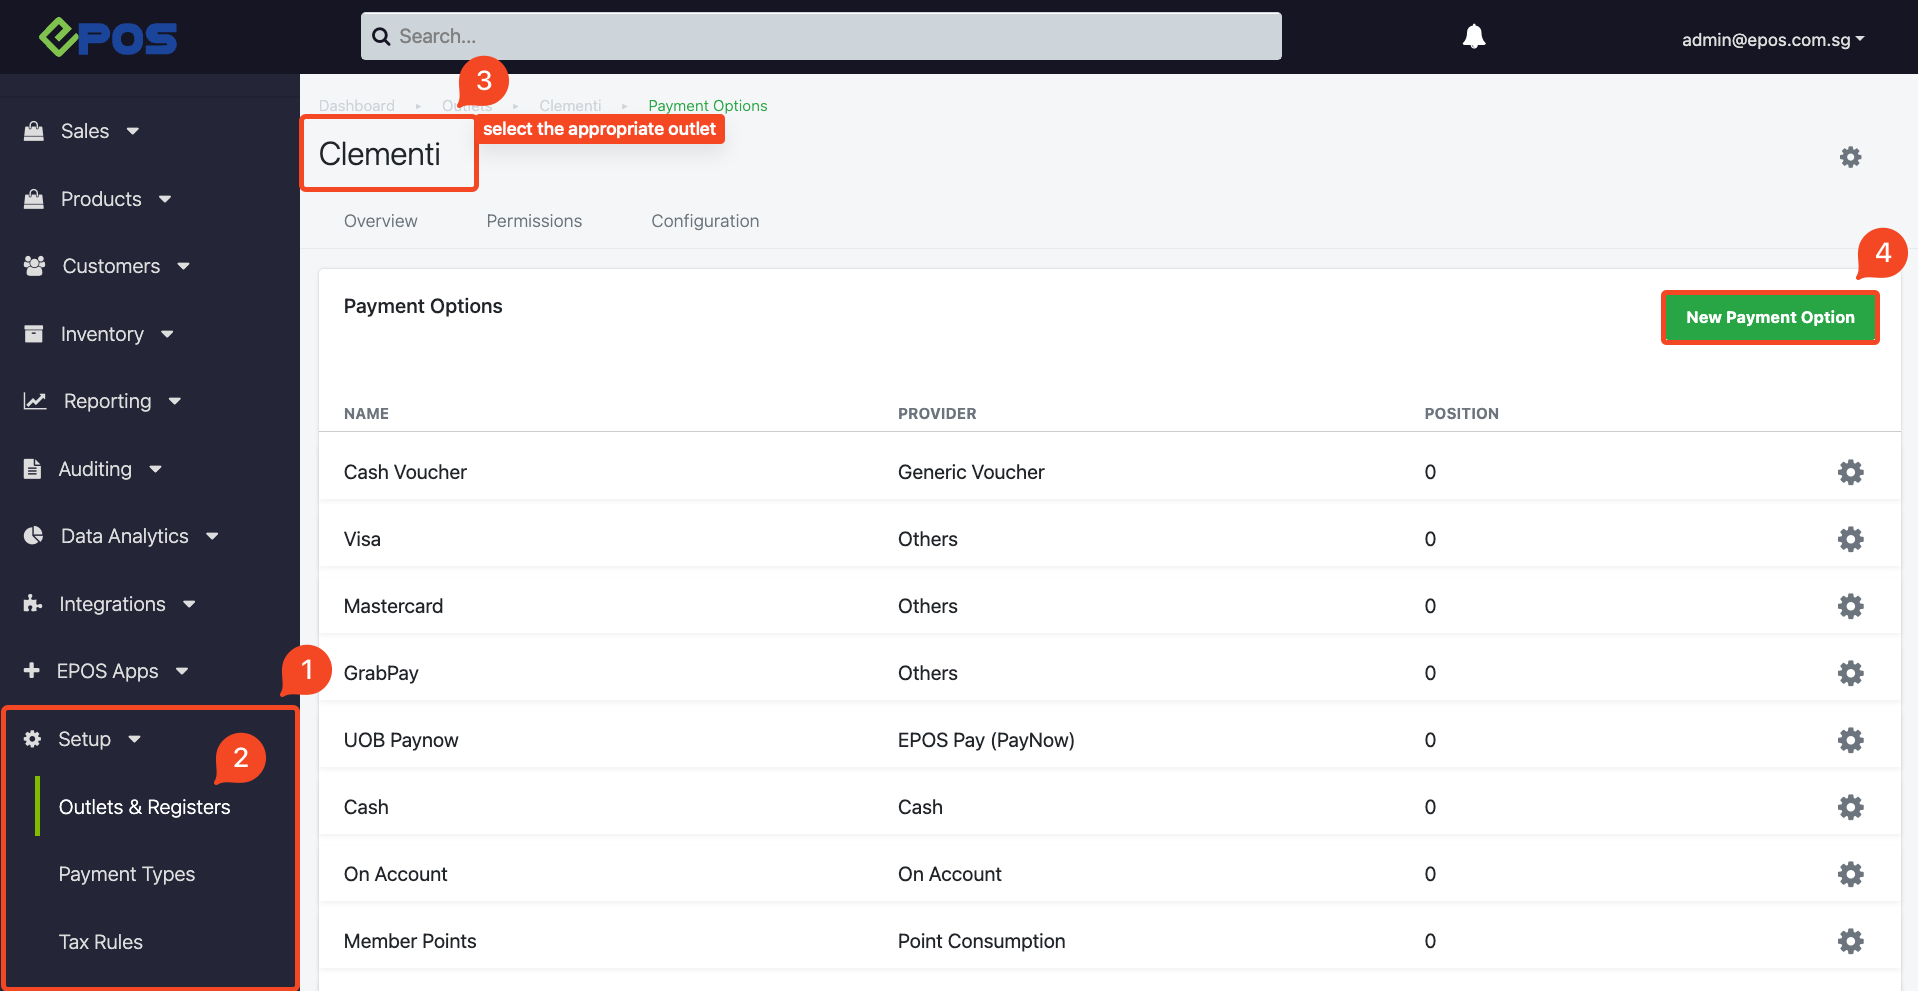
Select the following payment options respectively, or refer to payment option details for more information
-
- Membership Points → Points Consumption
- Integrated UOB PayNow → EPOS Pay (Contact EPOS for integration)
- NETS & NETS Credit Card → Nets (Plugged to Nets terminal)
- EPOSPay Credit Card Terminal → EPOS Pay (Contact EPOS for integration)
2. Add this payment method to the outlet that is deployed with the Self-Service Kiosk.
 .
. 
🖱️ Click to enlarge the images
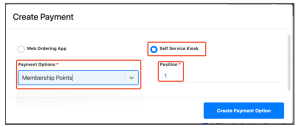
4. The payment method should now appear on the Self-Service Kiosk after a few minutes
This tab serves as a guide to how users can set the label printer to auto print each time an order is made.
In order to auto print labels, users can go to Setting on the user’s POS Terminal.

Users can click on the Receipt Settings Page and toggle to Turn on Auto Print Label.

Connect Label Printer with POS
In order to connect the Label Printer to POS, users can go to the Hardware Settings Page.
Drag down the menu to the Printer Configuration section, selecting the targeted Label Printer under Label.

Connect the POS Terminal
Users can go to the user’s desktop and select EPOS Store Manager. Go to the EPOS icon and hold for 3 seconds.

Click on View EPOS Dashboard in the pop up window.

After entering the EPOS SERVICE MANAGER Page, users can:
- Click on the Store Settings tab.
- Select targeted Label Printer from the menu under Auto Printing Label.
- Click on the Save Changes button to save all the adjustments upon completion.


 .
.