
This section describes Customers Groups. Users will be guided on:
- Creating Customer Groups
- Assigning Customers To Groups
- Assigning Multiple Customers into Customer Groups using Bulk Import
Steps:
1. In the EPOS Backend, go to Customers > Groups.

2. In the New List pop-up, type in the desired name of the new customer group in the Name field. Then, click on the “Create List” button.

Steps
Customers can be assigned to desired customer groups. This can be done via two methods.
Customer Group Configuration
Click on the Customer List tab. Users can assign customers to customer groups.
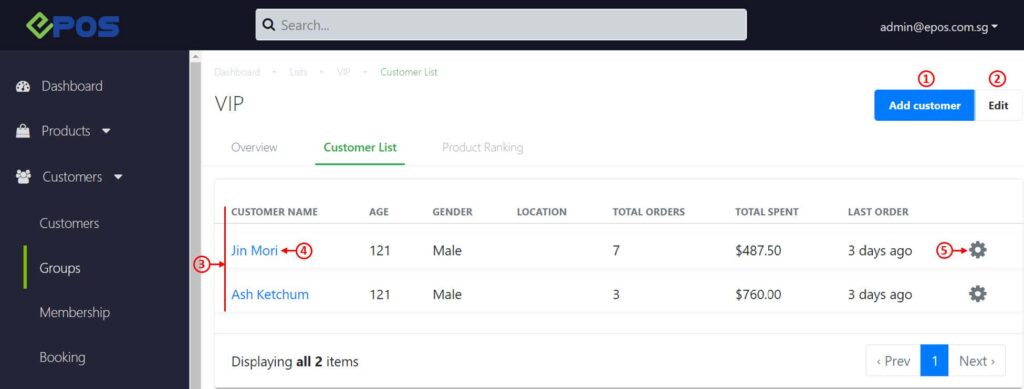
1. Add Customer
Click on Add Customer.
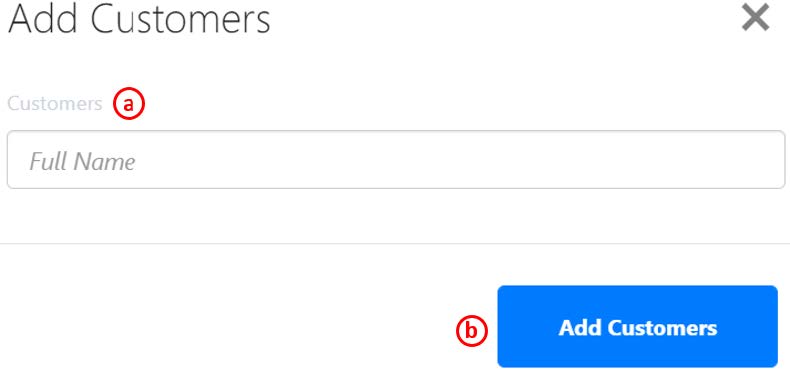
a. Search for customers.
b. Click on Add Customer once done. Customers will be added to the group.
2. Edit
Pops out the Edit Customer Group window.
3. Customer Details
Shows users the list of customers added to the group and related information.
-
- Age
- Gender
- Location
- Total orders (No of orders made)
- Total spent (Total amount spent)
- Last Order (No. of days)
4. Customer Configuration
Directs users to the customer configuration page.
5. Quick Settings
Click on the gear button for quick settings.
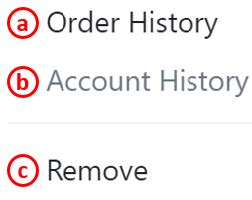
a. Order History – Directs user to customer’s order history page.
b. Account History – Directs user to customer’s account history.
c. Remove – Deletes customer from EPOS database.
Edit Customer through Customer Configuration
Alternatively, once a customer group is created, customers can be assigned to the group via Edit Customer.
1. At the Customer Main Page, search for the particular customer, click on the Customer Setting.
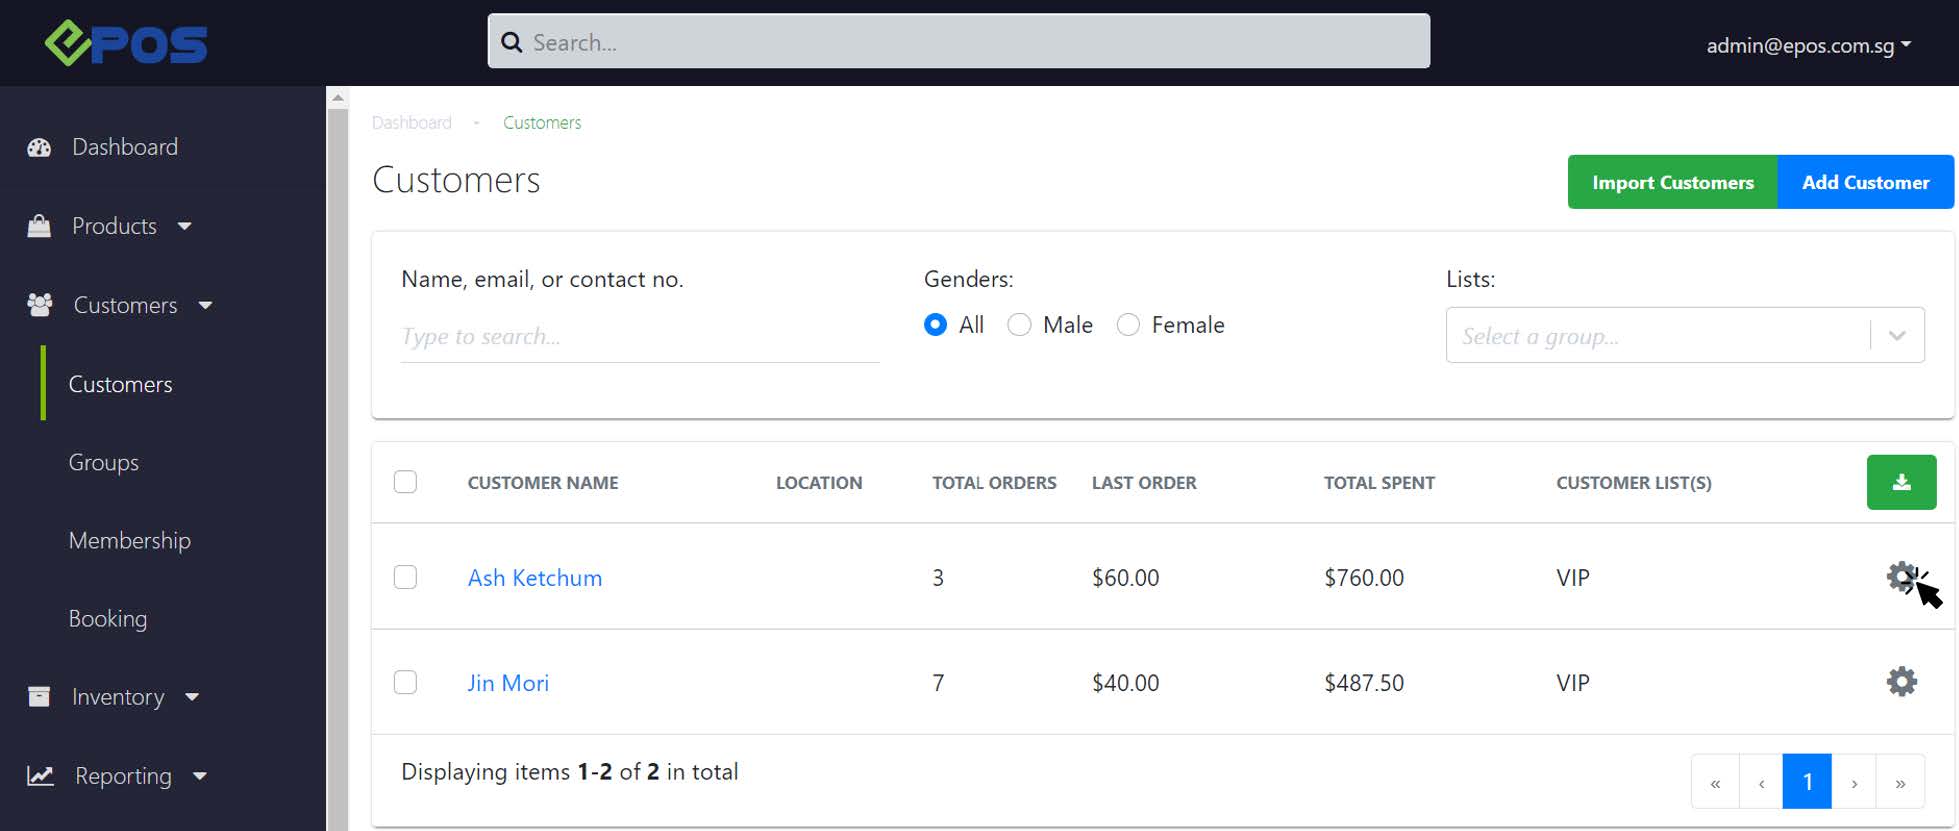
2. An edit customer window will be displayed.
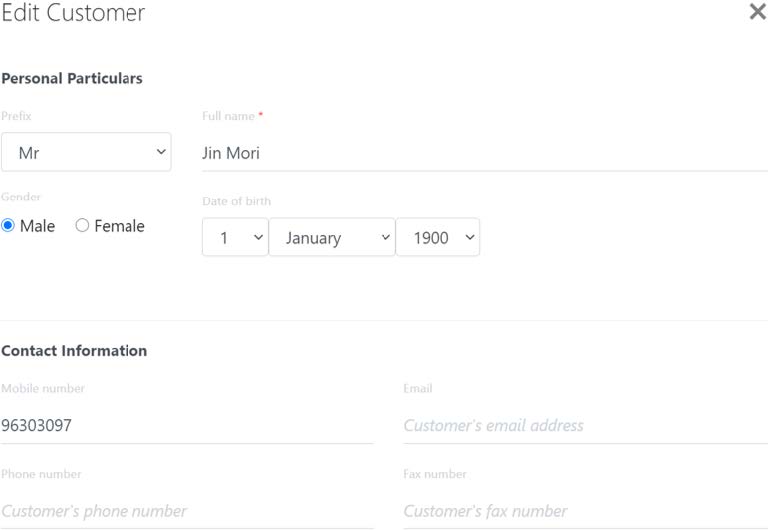
3 Scroll down to List.
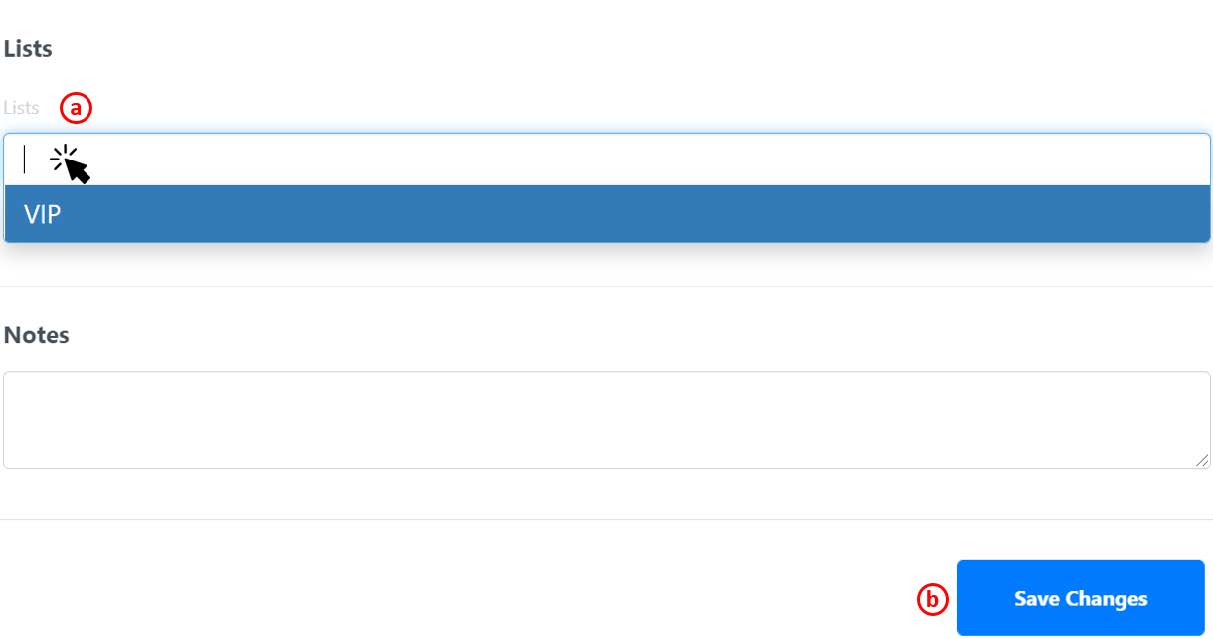
a. Type in the customer group created or click on the group in the drop-down box.
b. Click on Save Changes once done.
💡 Users are allowed to assign customers to multiple customer groups.
For the full guide on how to perform a bulk import, please refer to the Bulk Import Customer page
Steps:
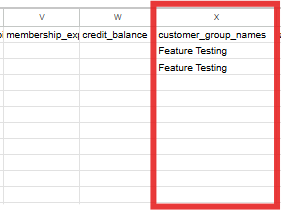
- To add a customer to a customer group during bulk import, enter the name of the customer group under the ‘customer_group_names’ column in the uploaded CSV
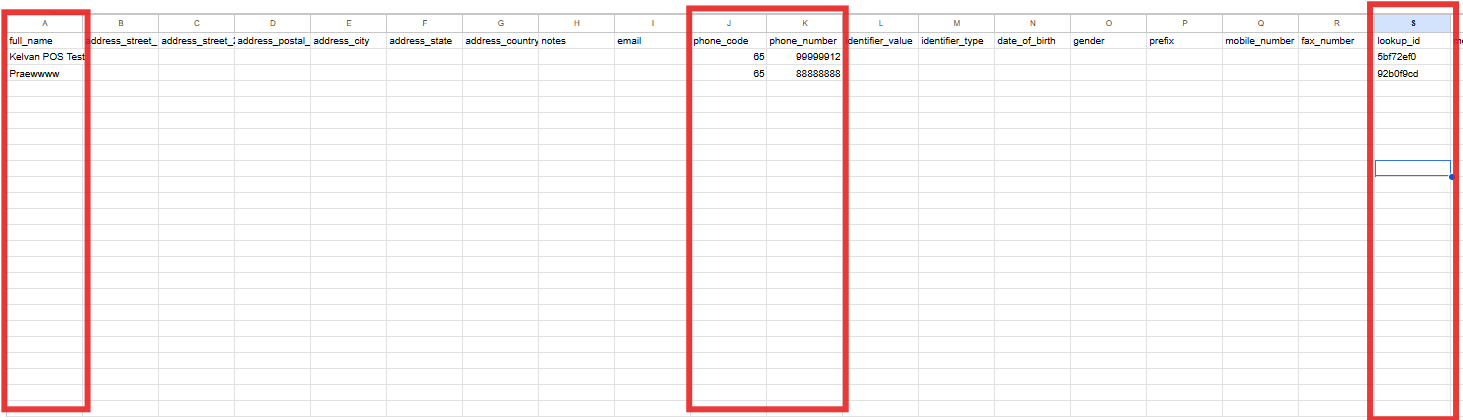
- For existing customers, please ensure that the ‘full_name’, ‘phone_number’, and ‘lookup_id’ columns match the existing data in the database
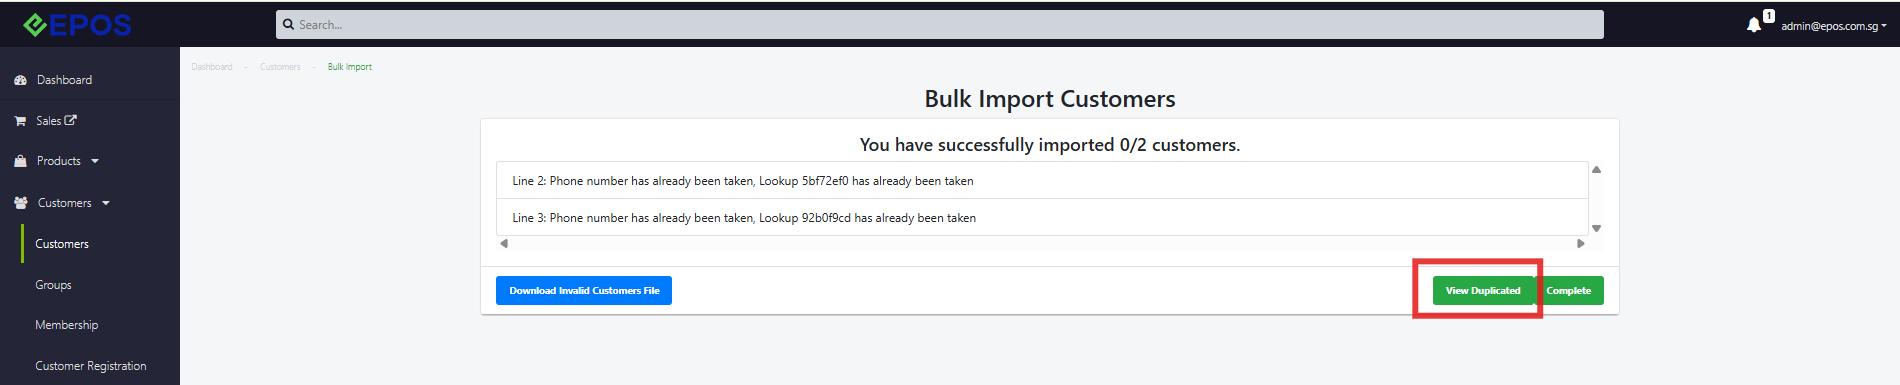
- A disclaimer pop-up will appear indicating that the Phone Number and Lookup ID already exist in the database. Click on ‘View Duplicated’ to review the conflicting records
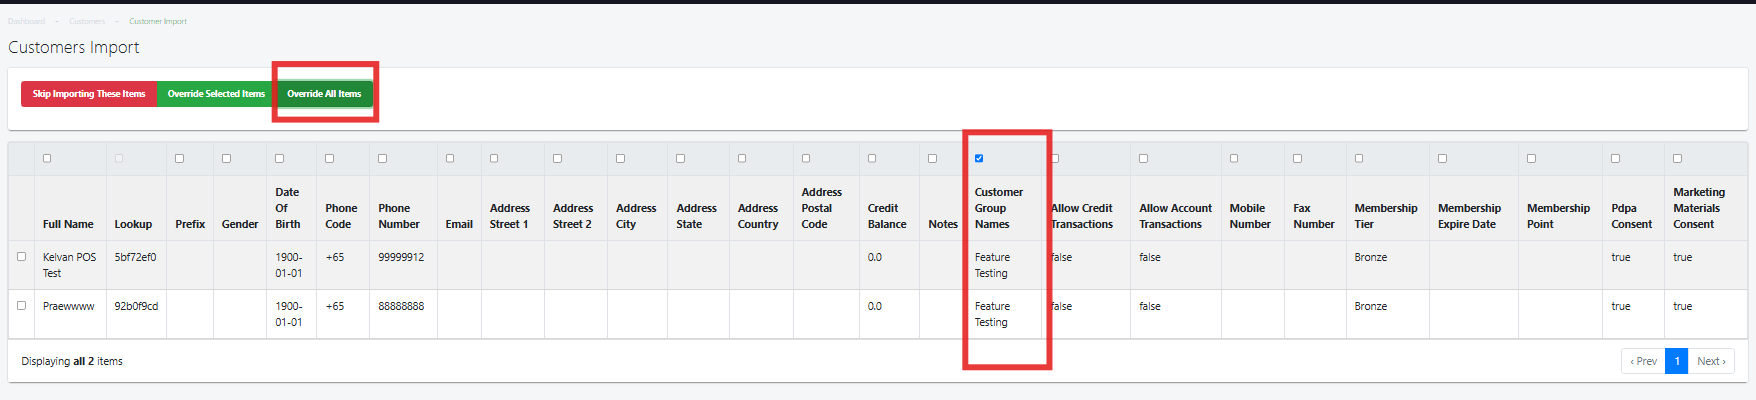
- Select the Customer Group column and click on ‘Override All Items’ to overwrite the existing customer groups that these customers are currently assigned to
For a guide on how to broadcast vouchers to a specific customer group, please refer to the Vouchers page